Smart washing machine
Introduction
Raise your family washing machine's IQ. 🤖 With the IoT box, you'll program a notification that tells your parents the laundry is done.
In this project, you will learn to set up the box to recognize when the washing machine has finished and send a notification to a phone. 📱 👈
You only need a box with a button and a Radio Dongle, so the basic HARDWARIO Start Set is all you need.
Download the new firmware
- Flash the new bcf-radio-washing-machine-monitor firmware to the Core Module (you'll find it among the other firmware in Playground). It makes the box more sensitive to the washing machine's vibrations. 🔃
Our tip: Don't know how to get the firmware or what it is? Find out here.
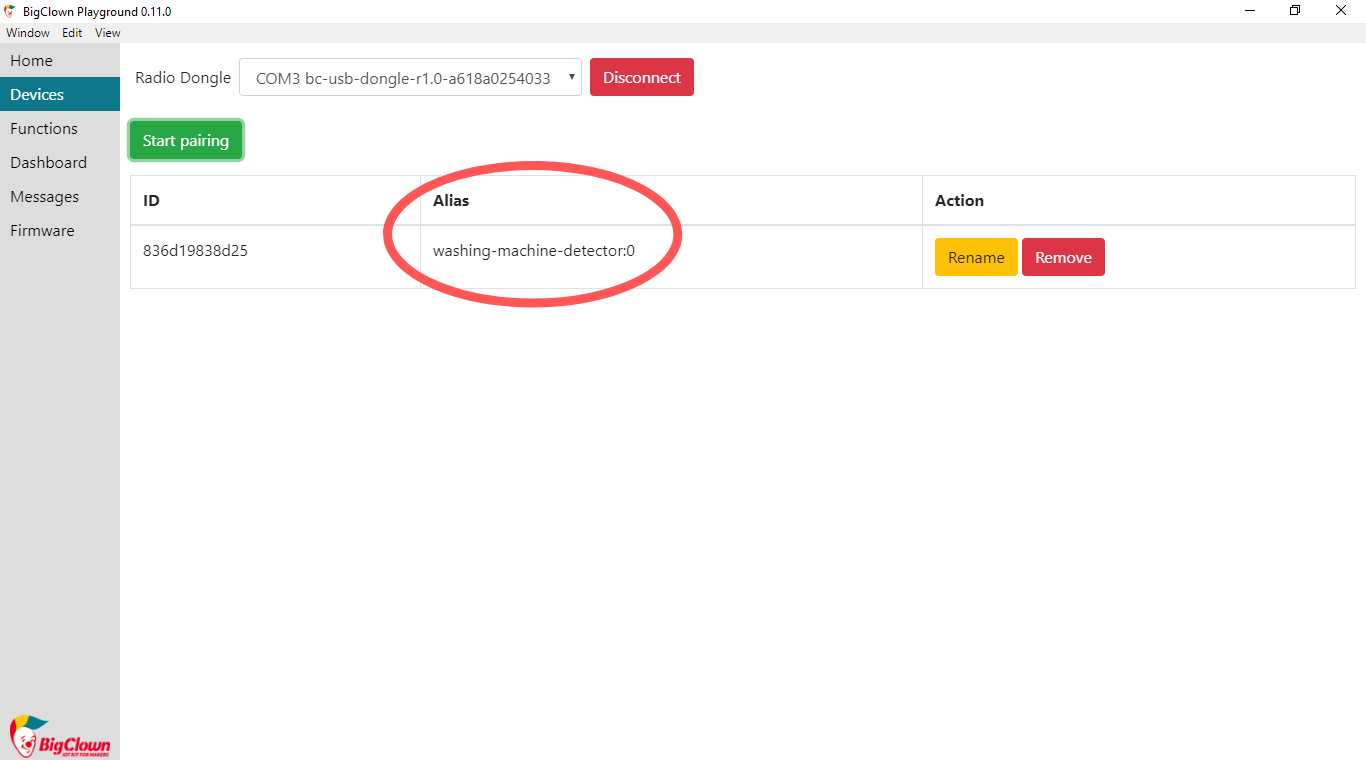
- Pair the Core Module with the Radio Dongle. Right after pairing, you'll see the Core Module's alias change to washing-machine-detector. 👌
Get it going in Node-RED
- In Playground, click the Functions tab, home of the Node-RED programming canvas. 🤖
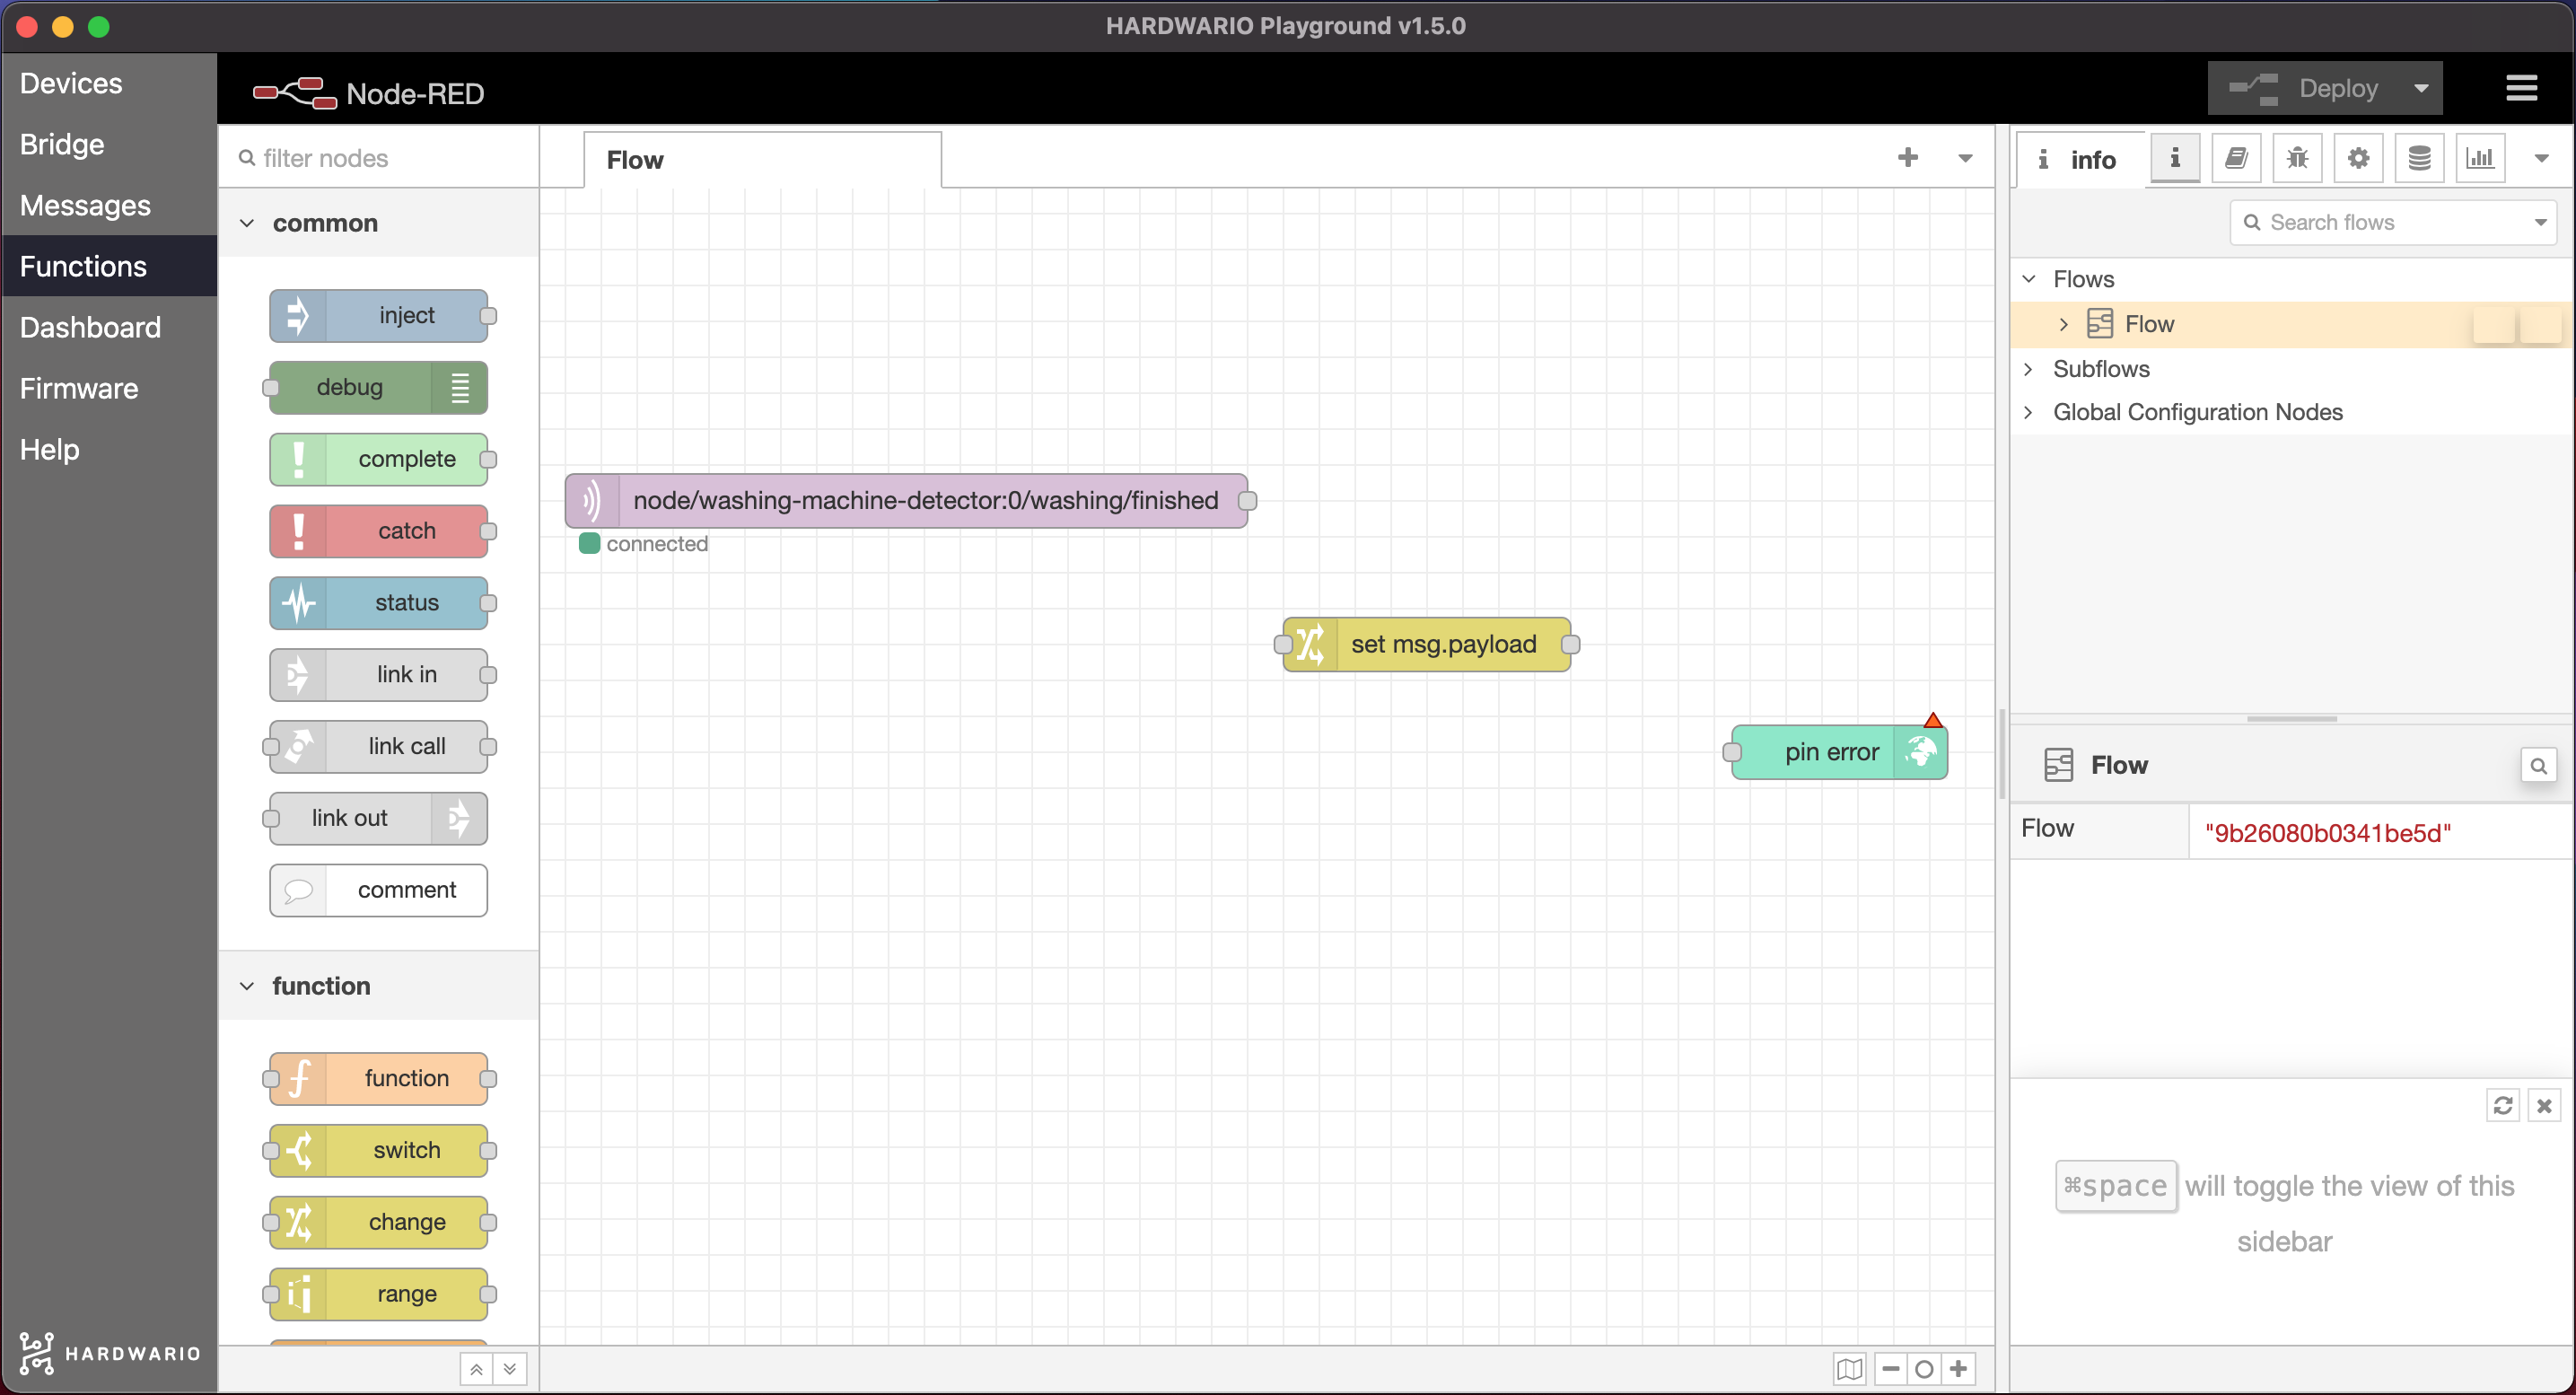
- Start as always: first place an mqtt in node from the network section on the canvas.
Double-click it and copy this topic into the Topic field. The box uses it to report that the washing machine has stopped shaking:
node/washing-machine-detector:0/washing/finished
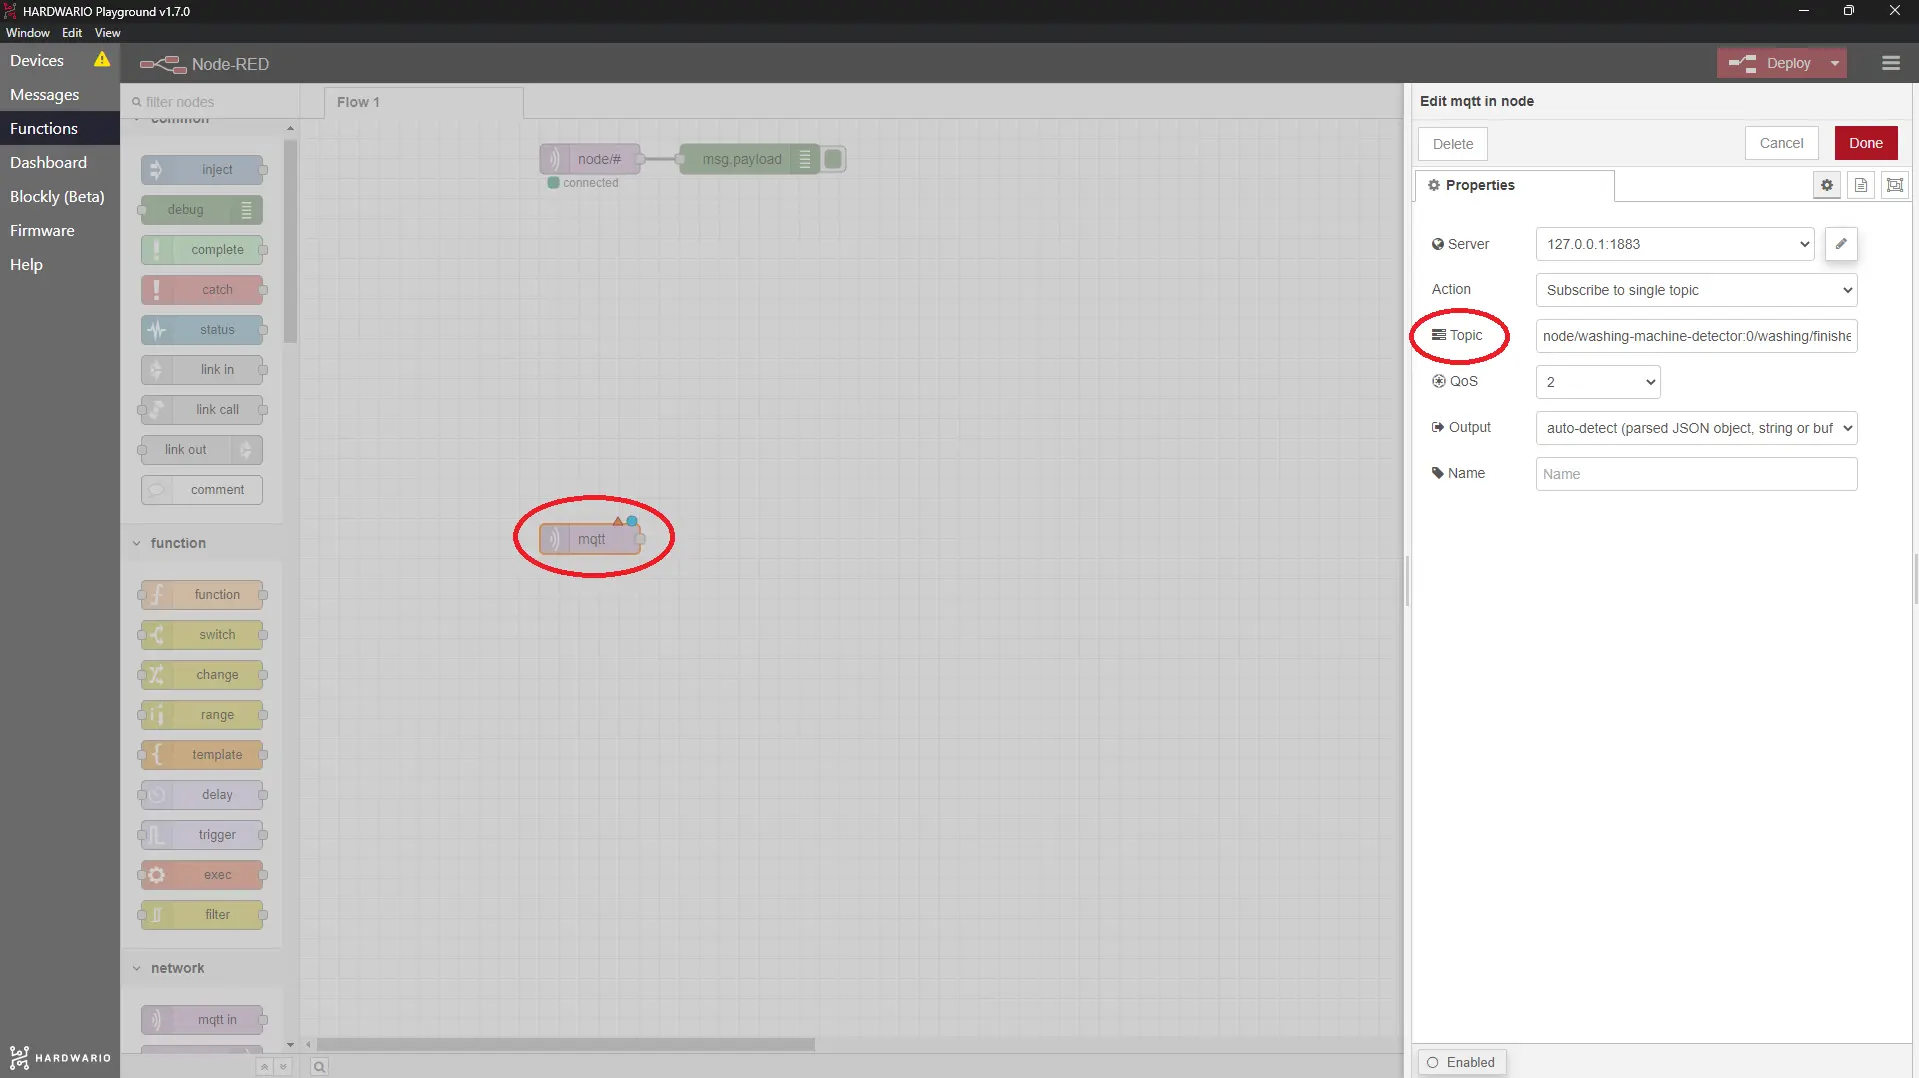
Confirm with Done.
- Next to it, place a Change node from the Function section.
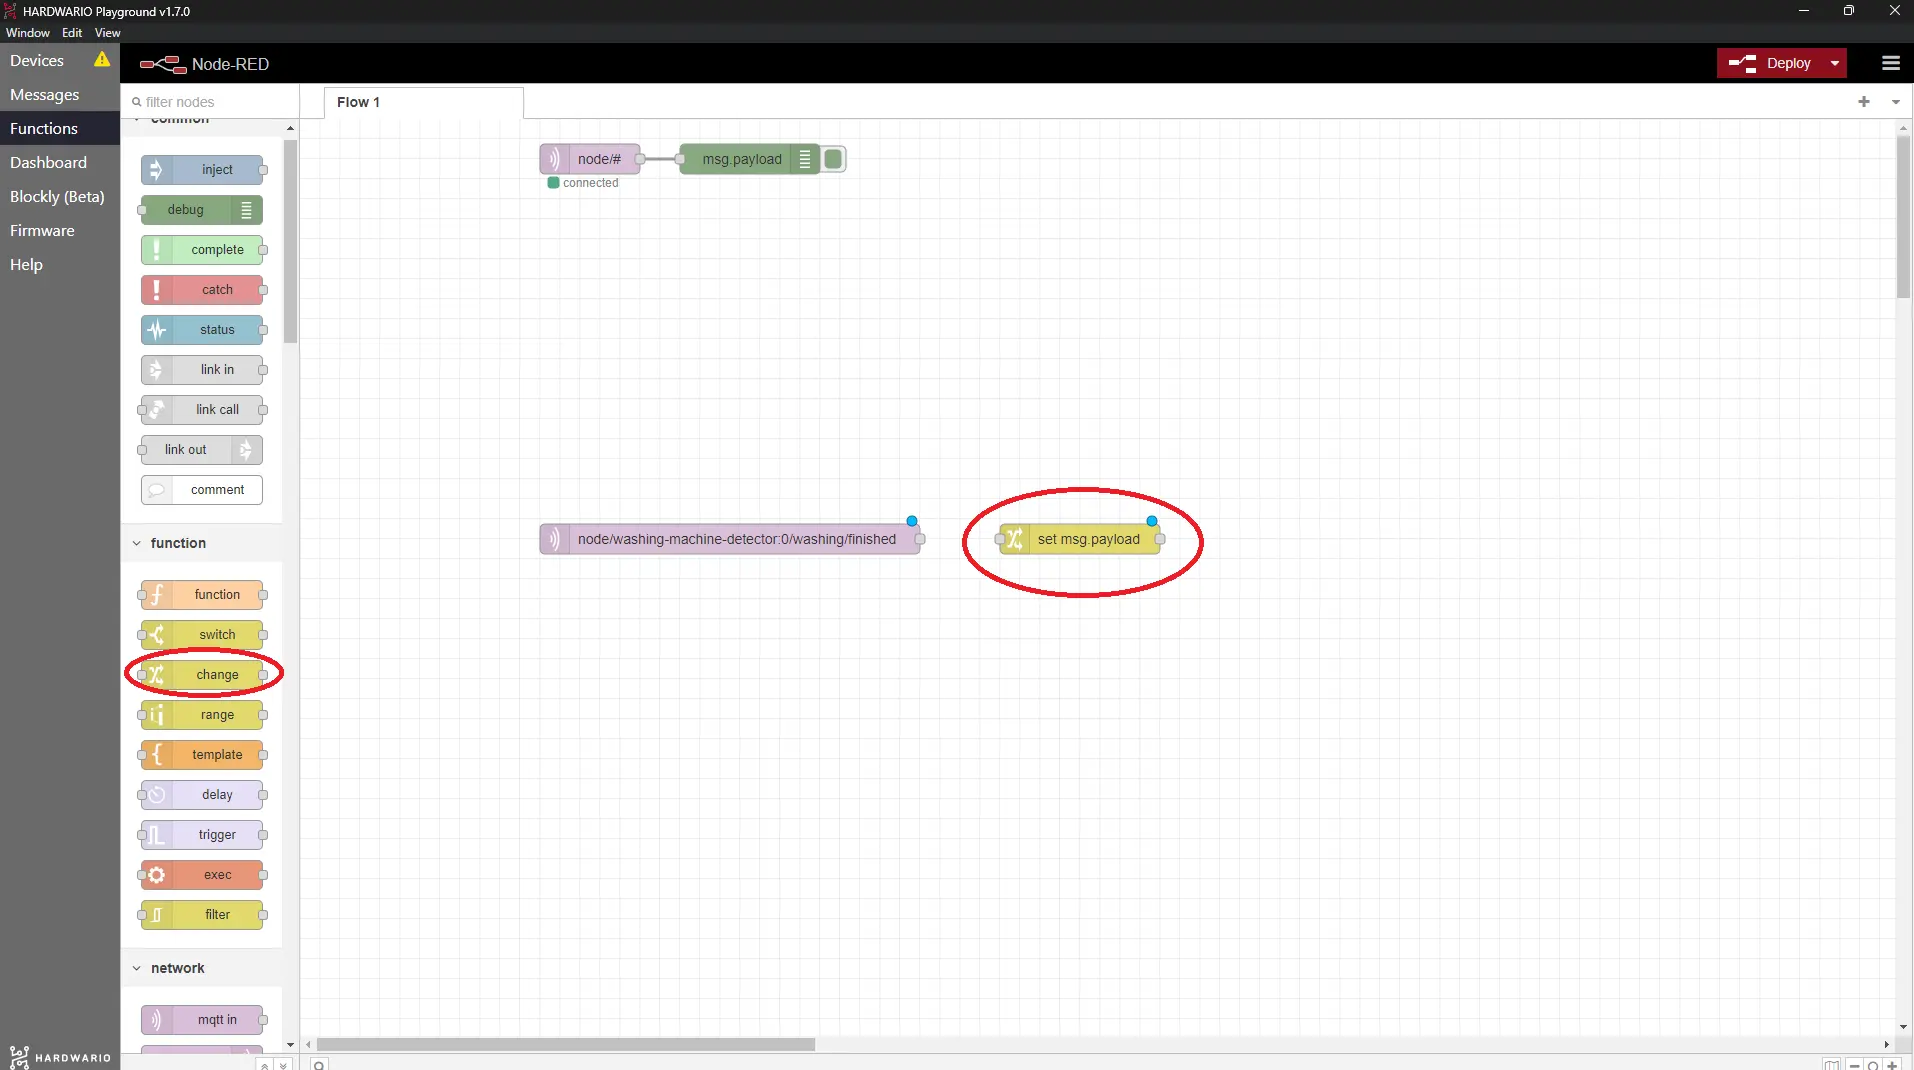
- In the Change node, set the message your parents will get on their phone when the laundry is done. Leave out accented letters.
A little inspiration:
- Your clean laundry is waiting.
- I'm done. Do I get a week off now?
- Washing's done, so leave me alone. Your washing machine.
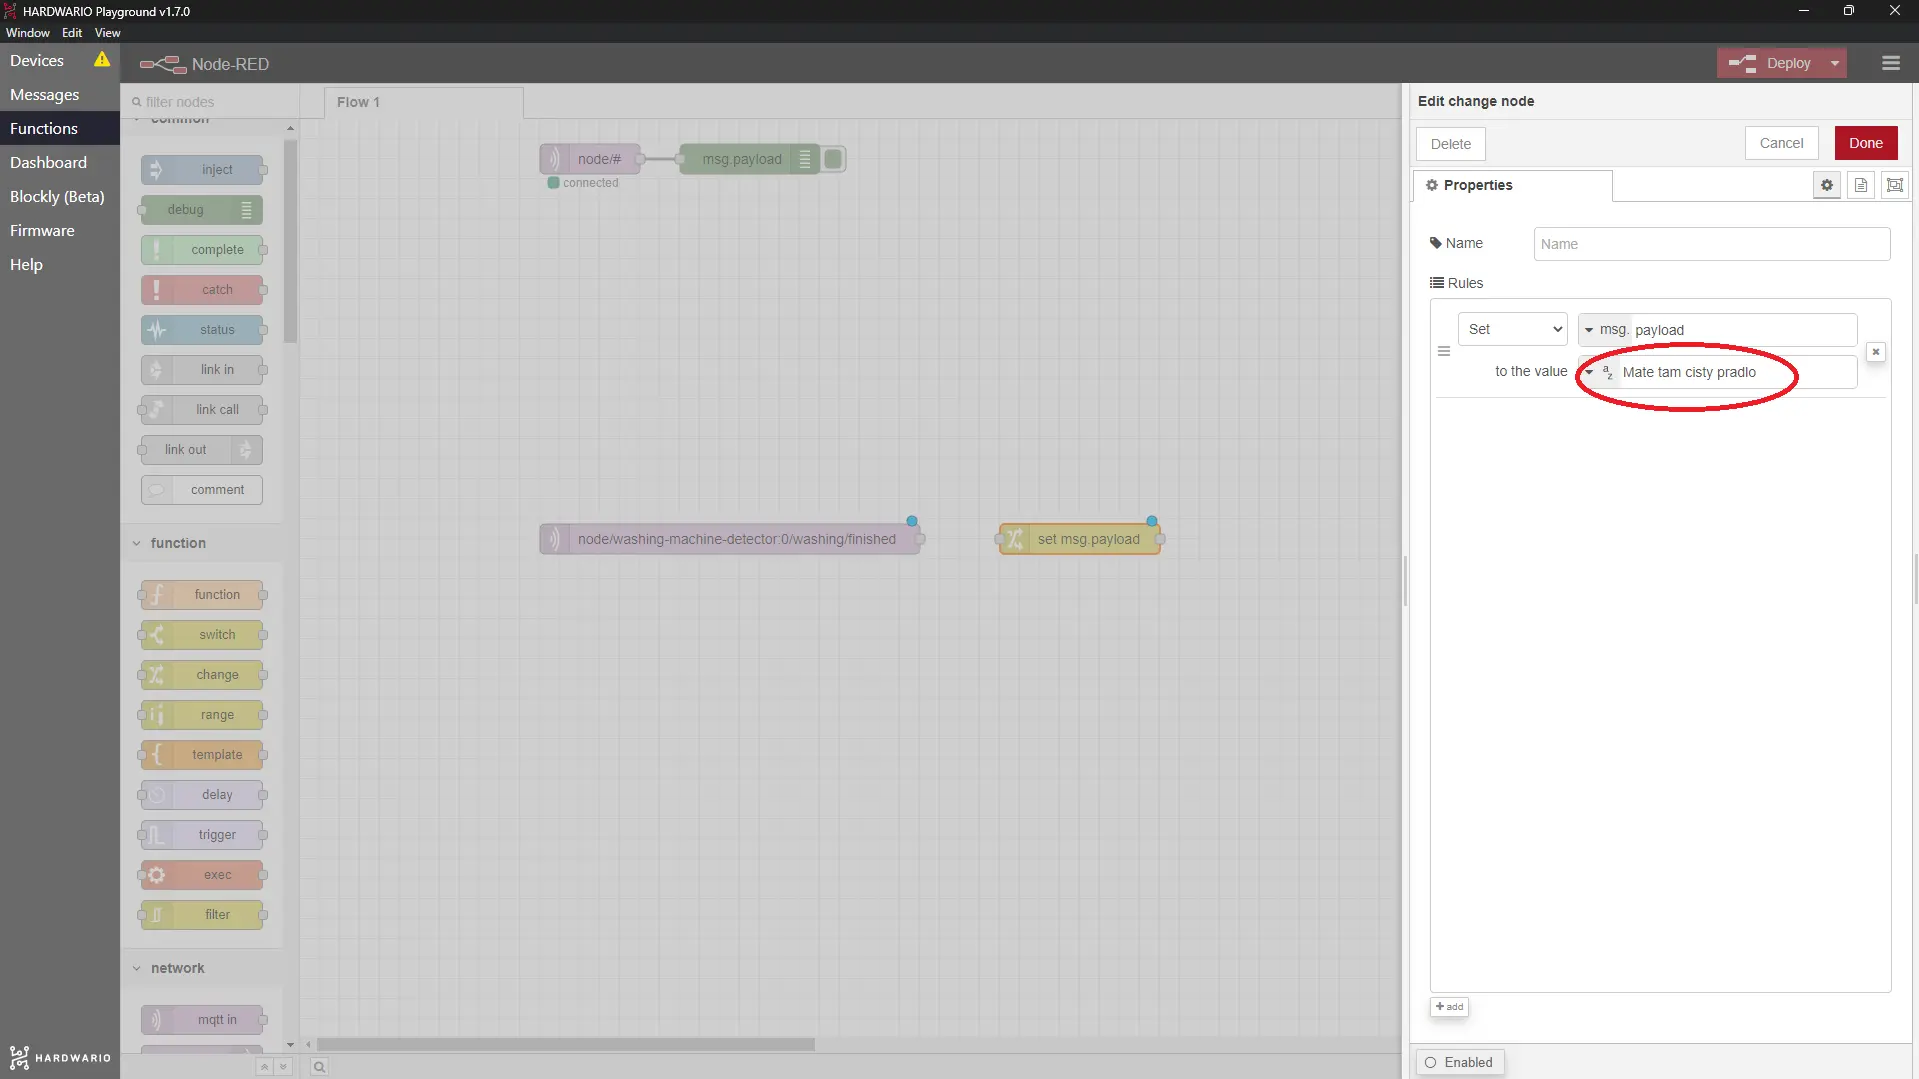
Confirm with Done.
Prepare the Blynk IoT app
-
If you don't have an account yet, create one in the Blynk IoT app. This guide shows how, and also how to create templates and datastreams. You'll need both.
-
Next, create a device template, again following the same guide. If you already have a template from previous projects, feel free to reuse it.
-
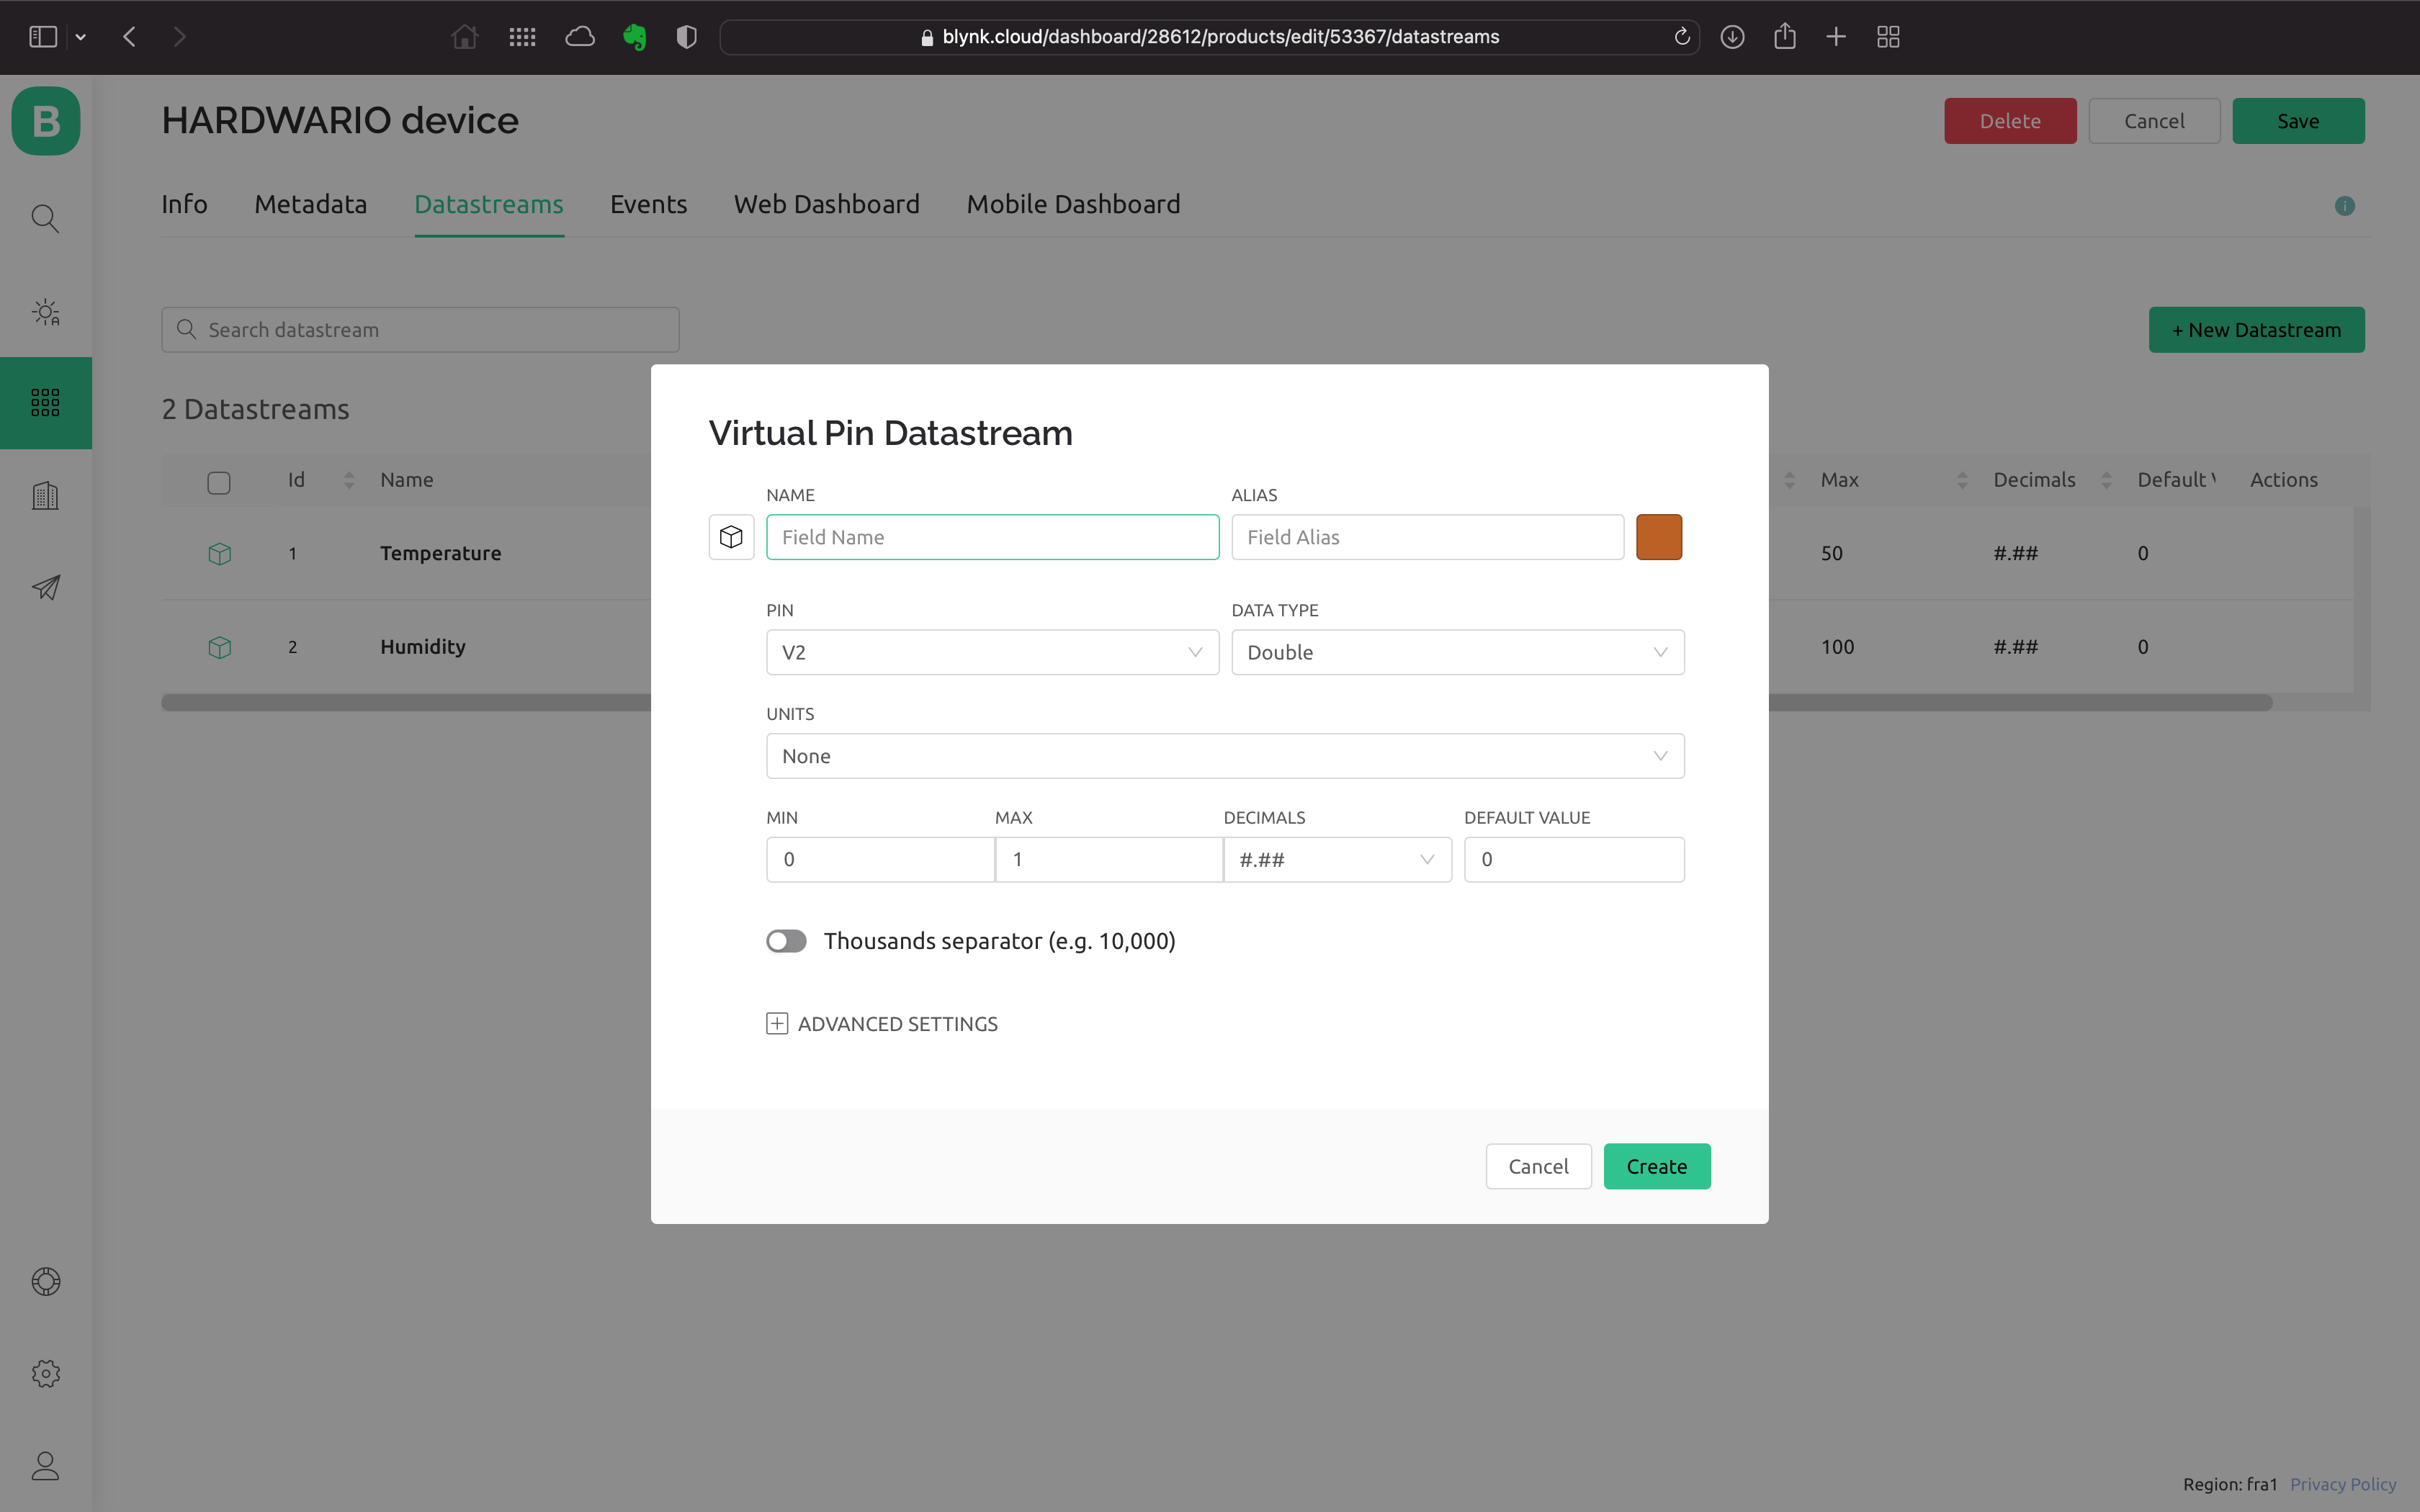
Now set up a new datastream. In the template detail, click the Datastreams tab and then Edit in the top right. A + New Datastream button appears. Click it, choose Virtual Pin, and a dialog opens:
-
Name the new datastream and pick one of the free pins. We want the phone notification to show your own message, so choose String as the data type (a text string).
-
At the bottom of the dialog, also expand Advanced settings and tick the last option, Expose to Automation, so the datastream can be used in automations. In the menu next to it, choose Sensor and also tick Available in Conditions. Create the datastream by clicking Create.
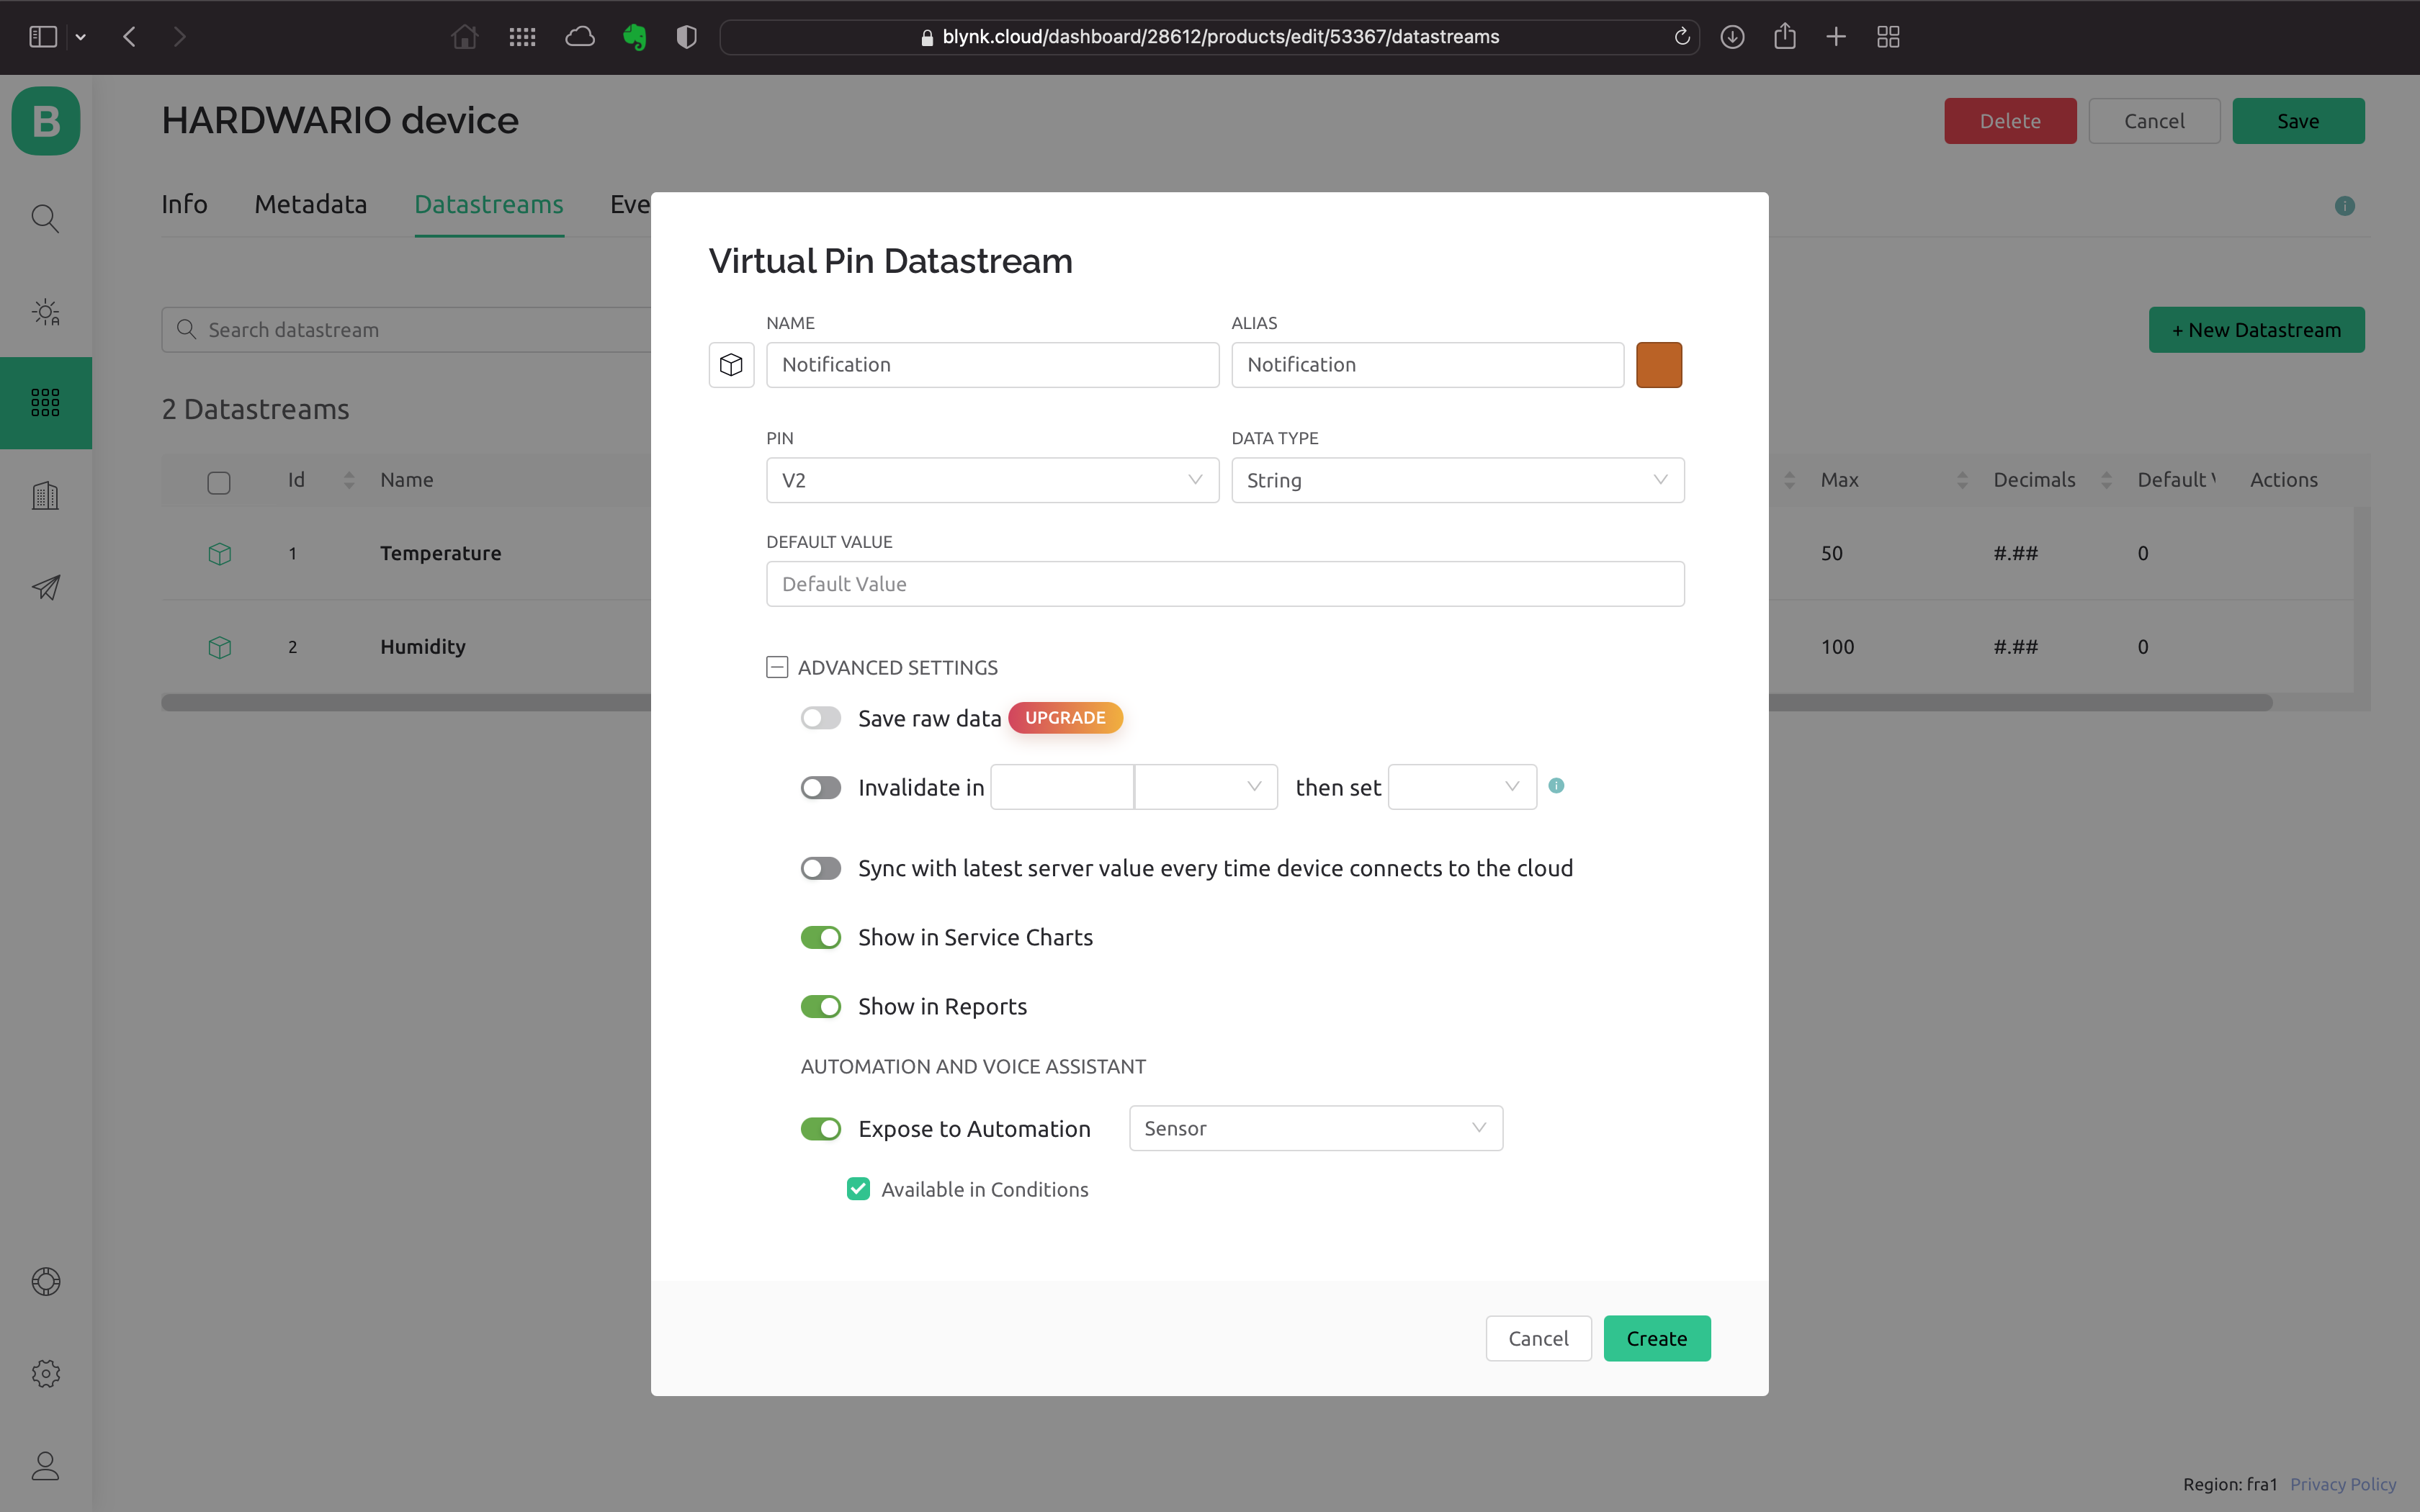
- Save your work with the Save button in the top right.
Create a device
If you don't have a device yet, create one from your template. We describe how in the guide you already know.
Create an automation
- Switch to the Automation section and click the + Create Automation button.
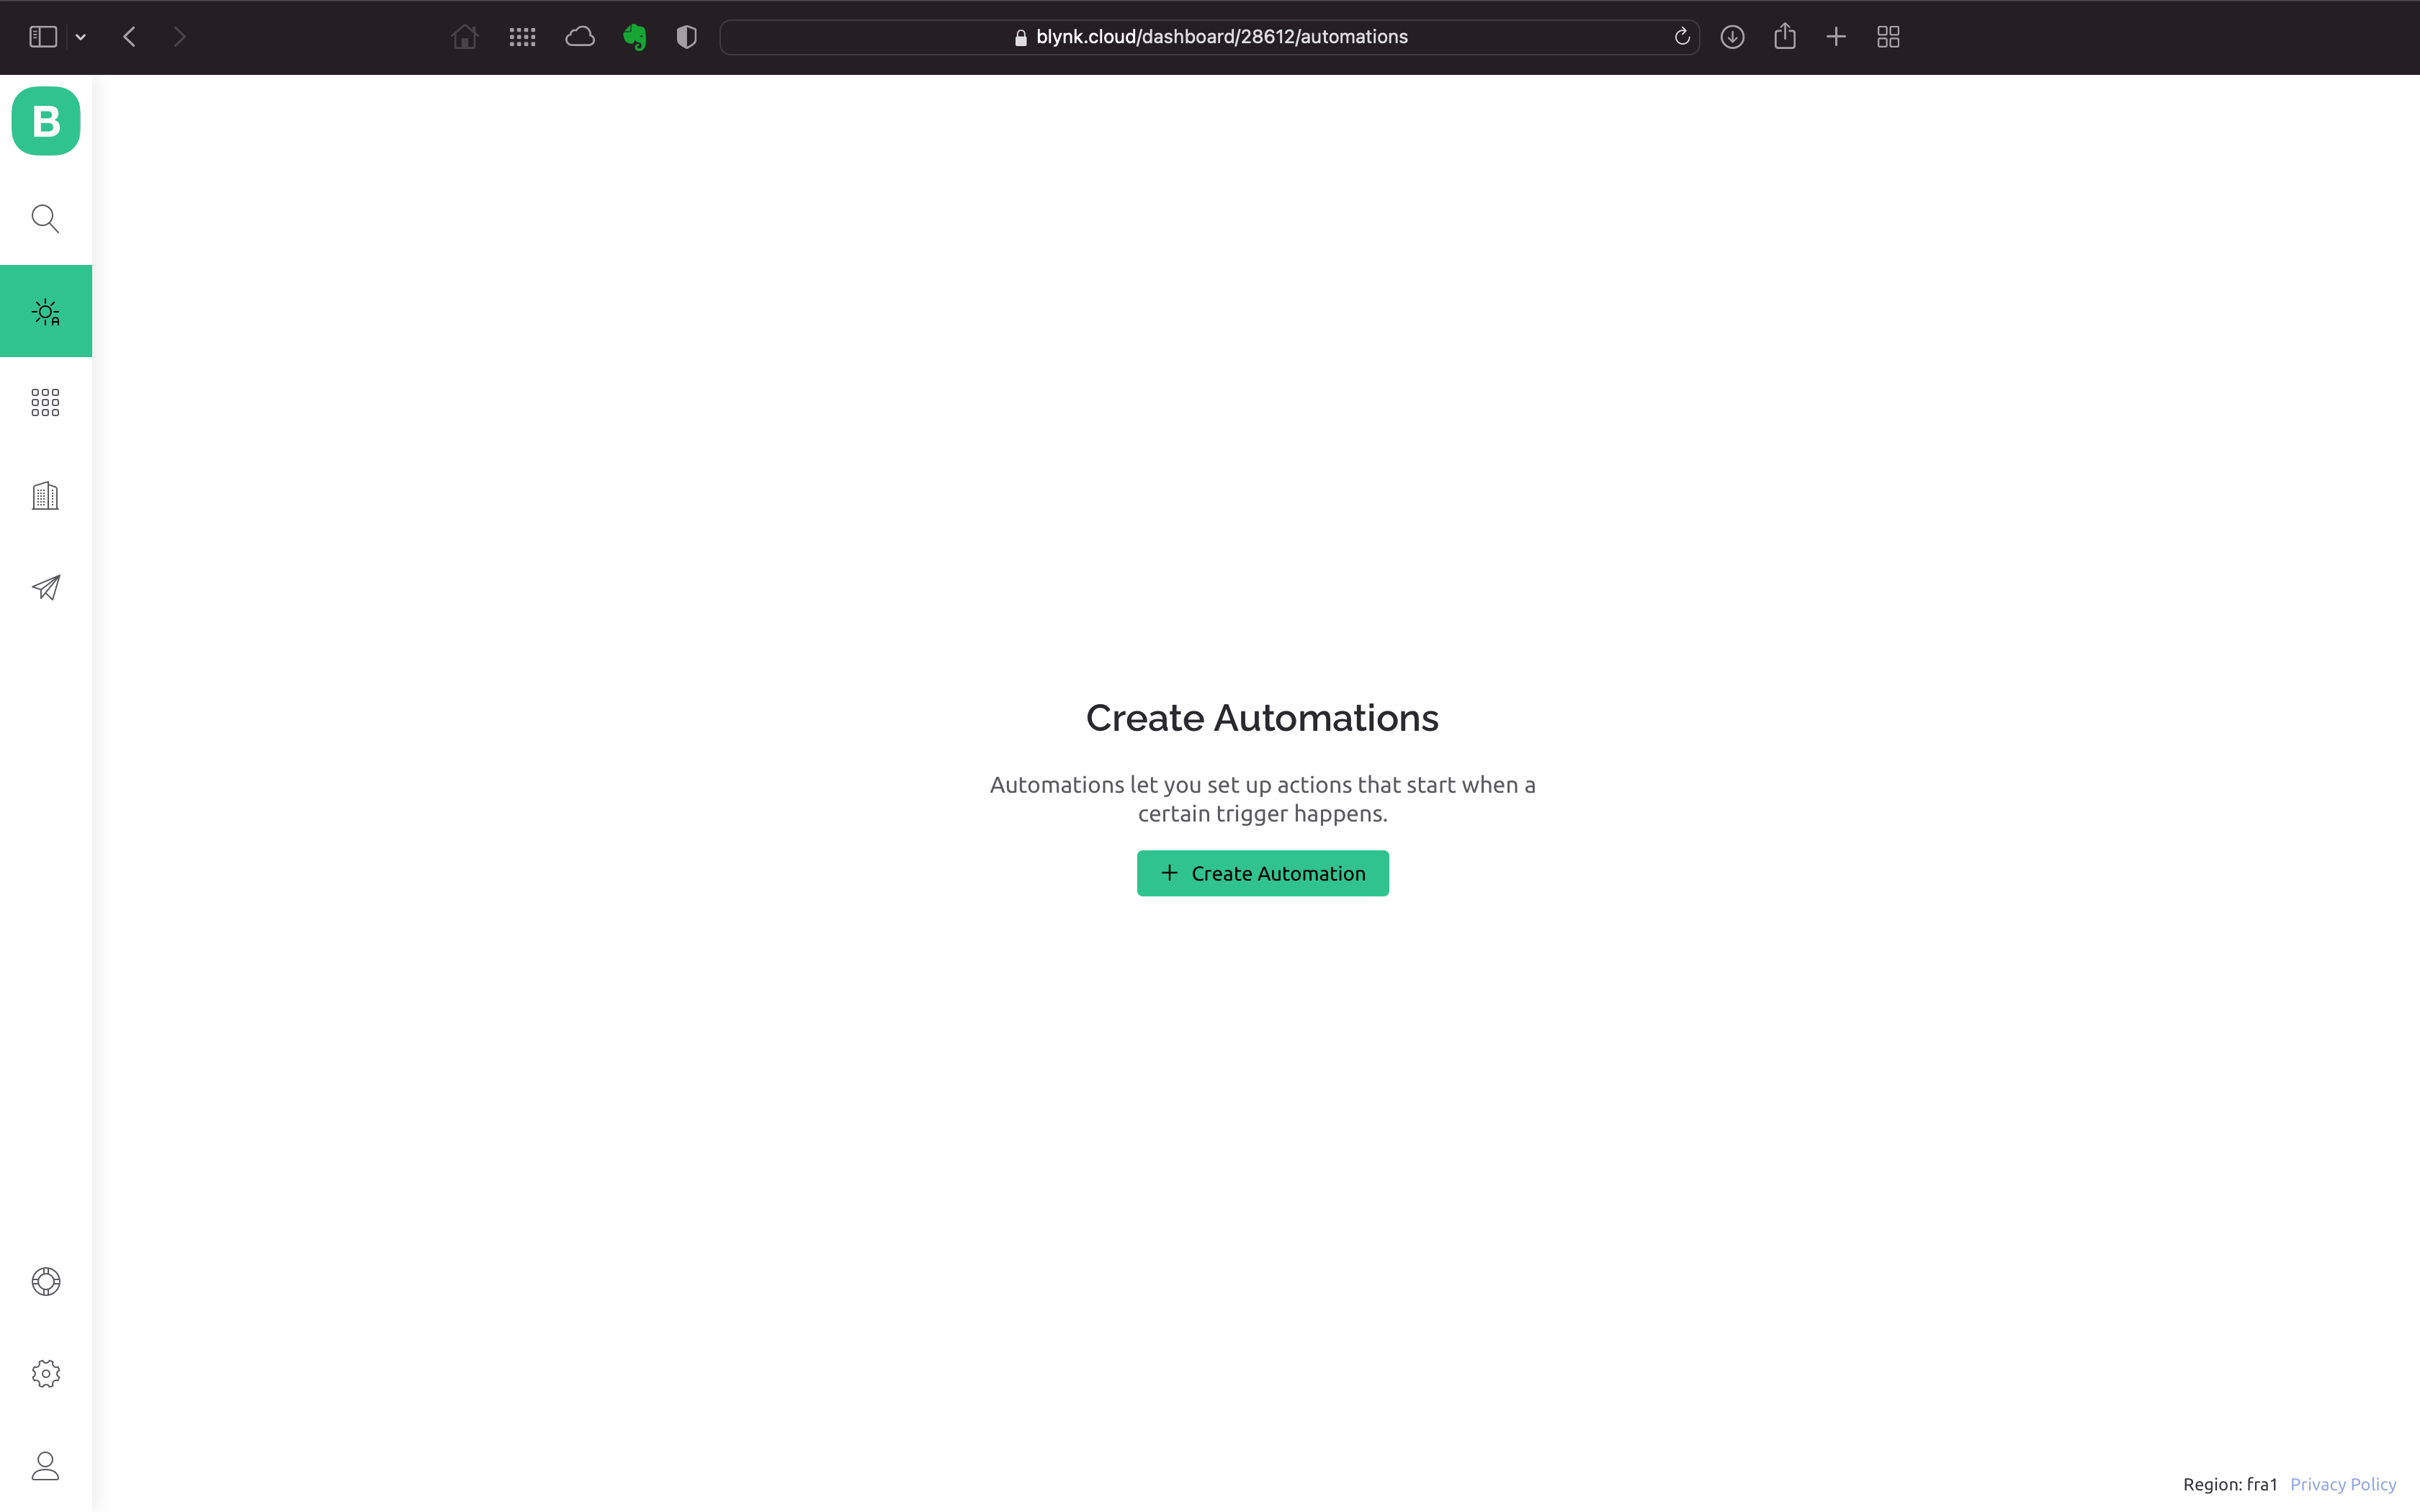
- From the options offered, choose Device State. The automation runs every time you send a message to the app.
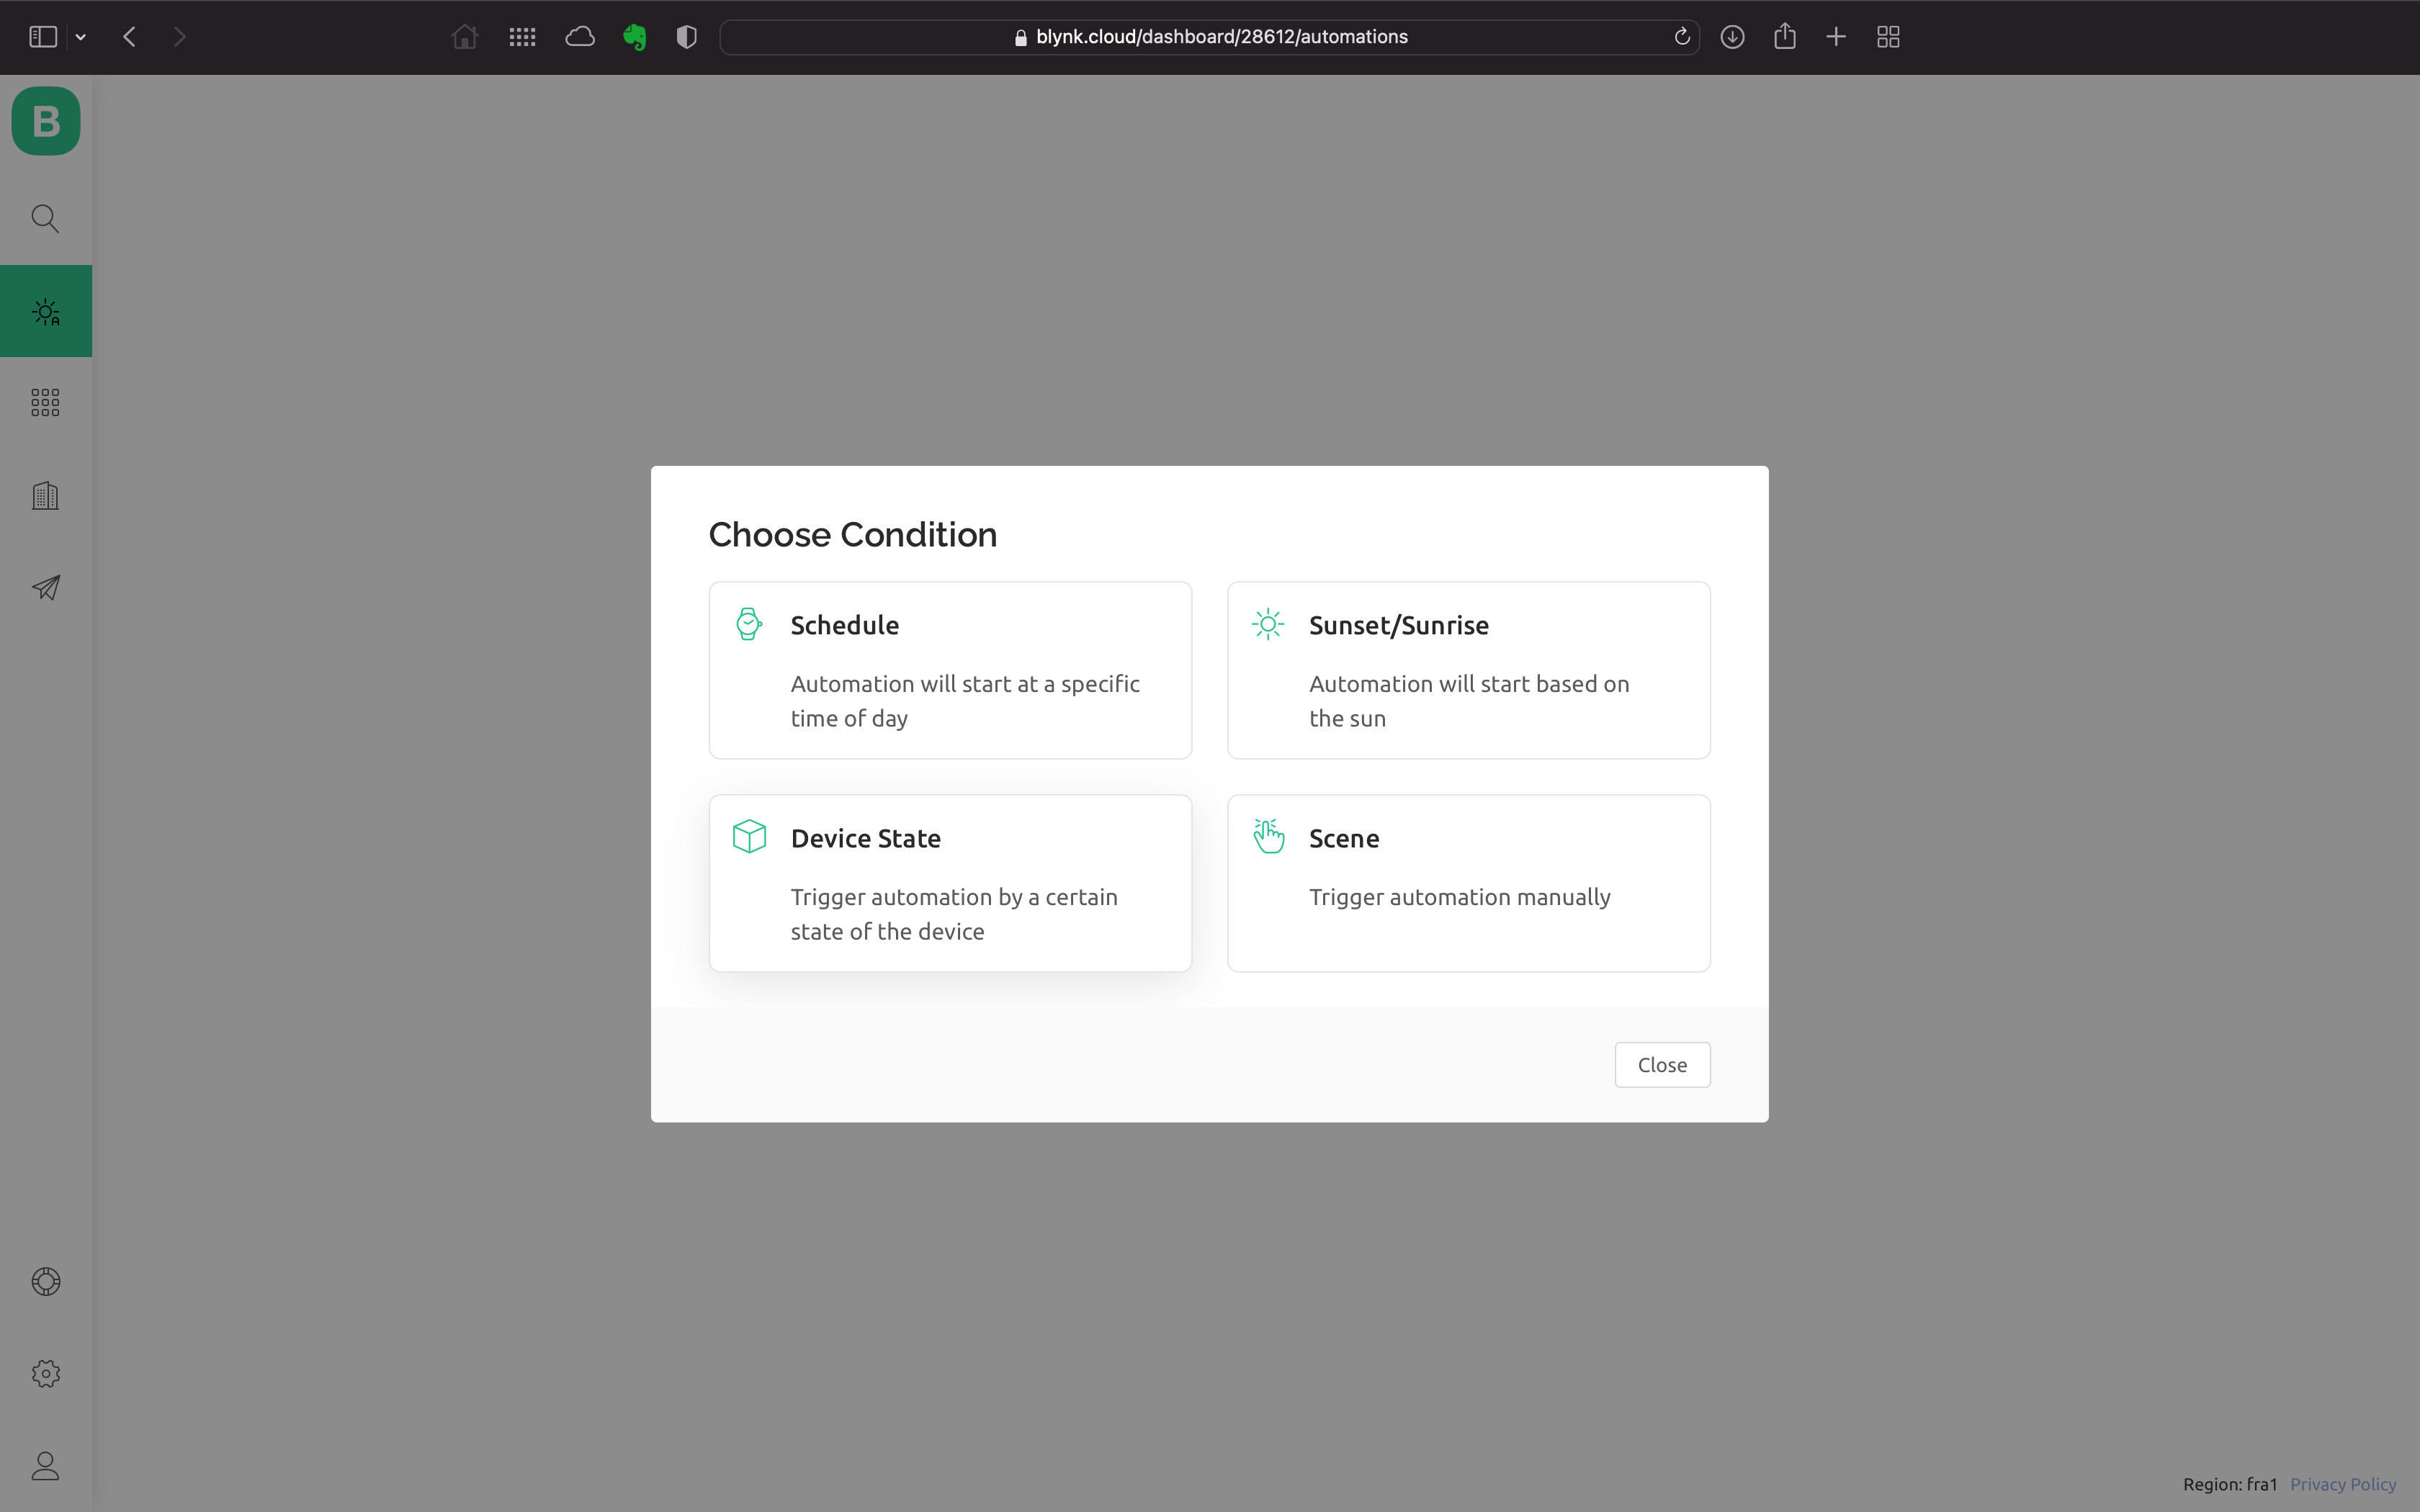
-
Setting up the automation is simple: in the When section you set when it should run, and in the Do this section what should happen next.
-
Set up the When section first: choose your device and the datastream you created. A third menu appears; leave it set to Is Any.
-
In the Do This section, click Send app notification and set the recipient. To keep it simple, choose yourself. With your mouse, drag the Trigger value item into the Subject and Message fields. It's the variable that holds the text of your message.
-
Finally, don't forget to fill in the automation name. In the Limit period menu, you can set how soon another notification may follow the previous one.
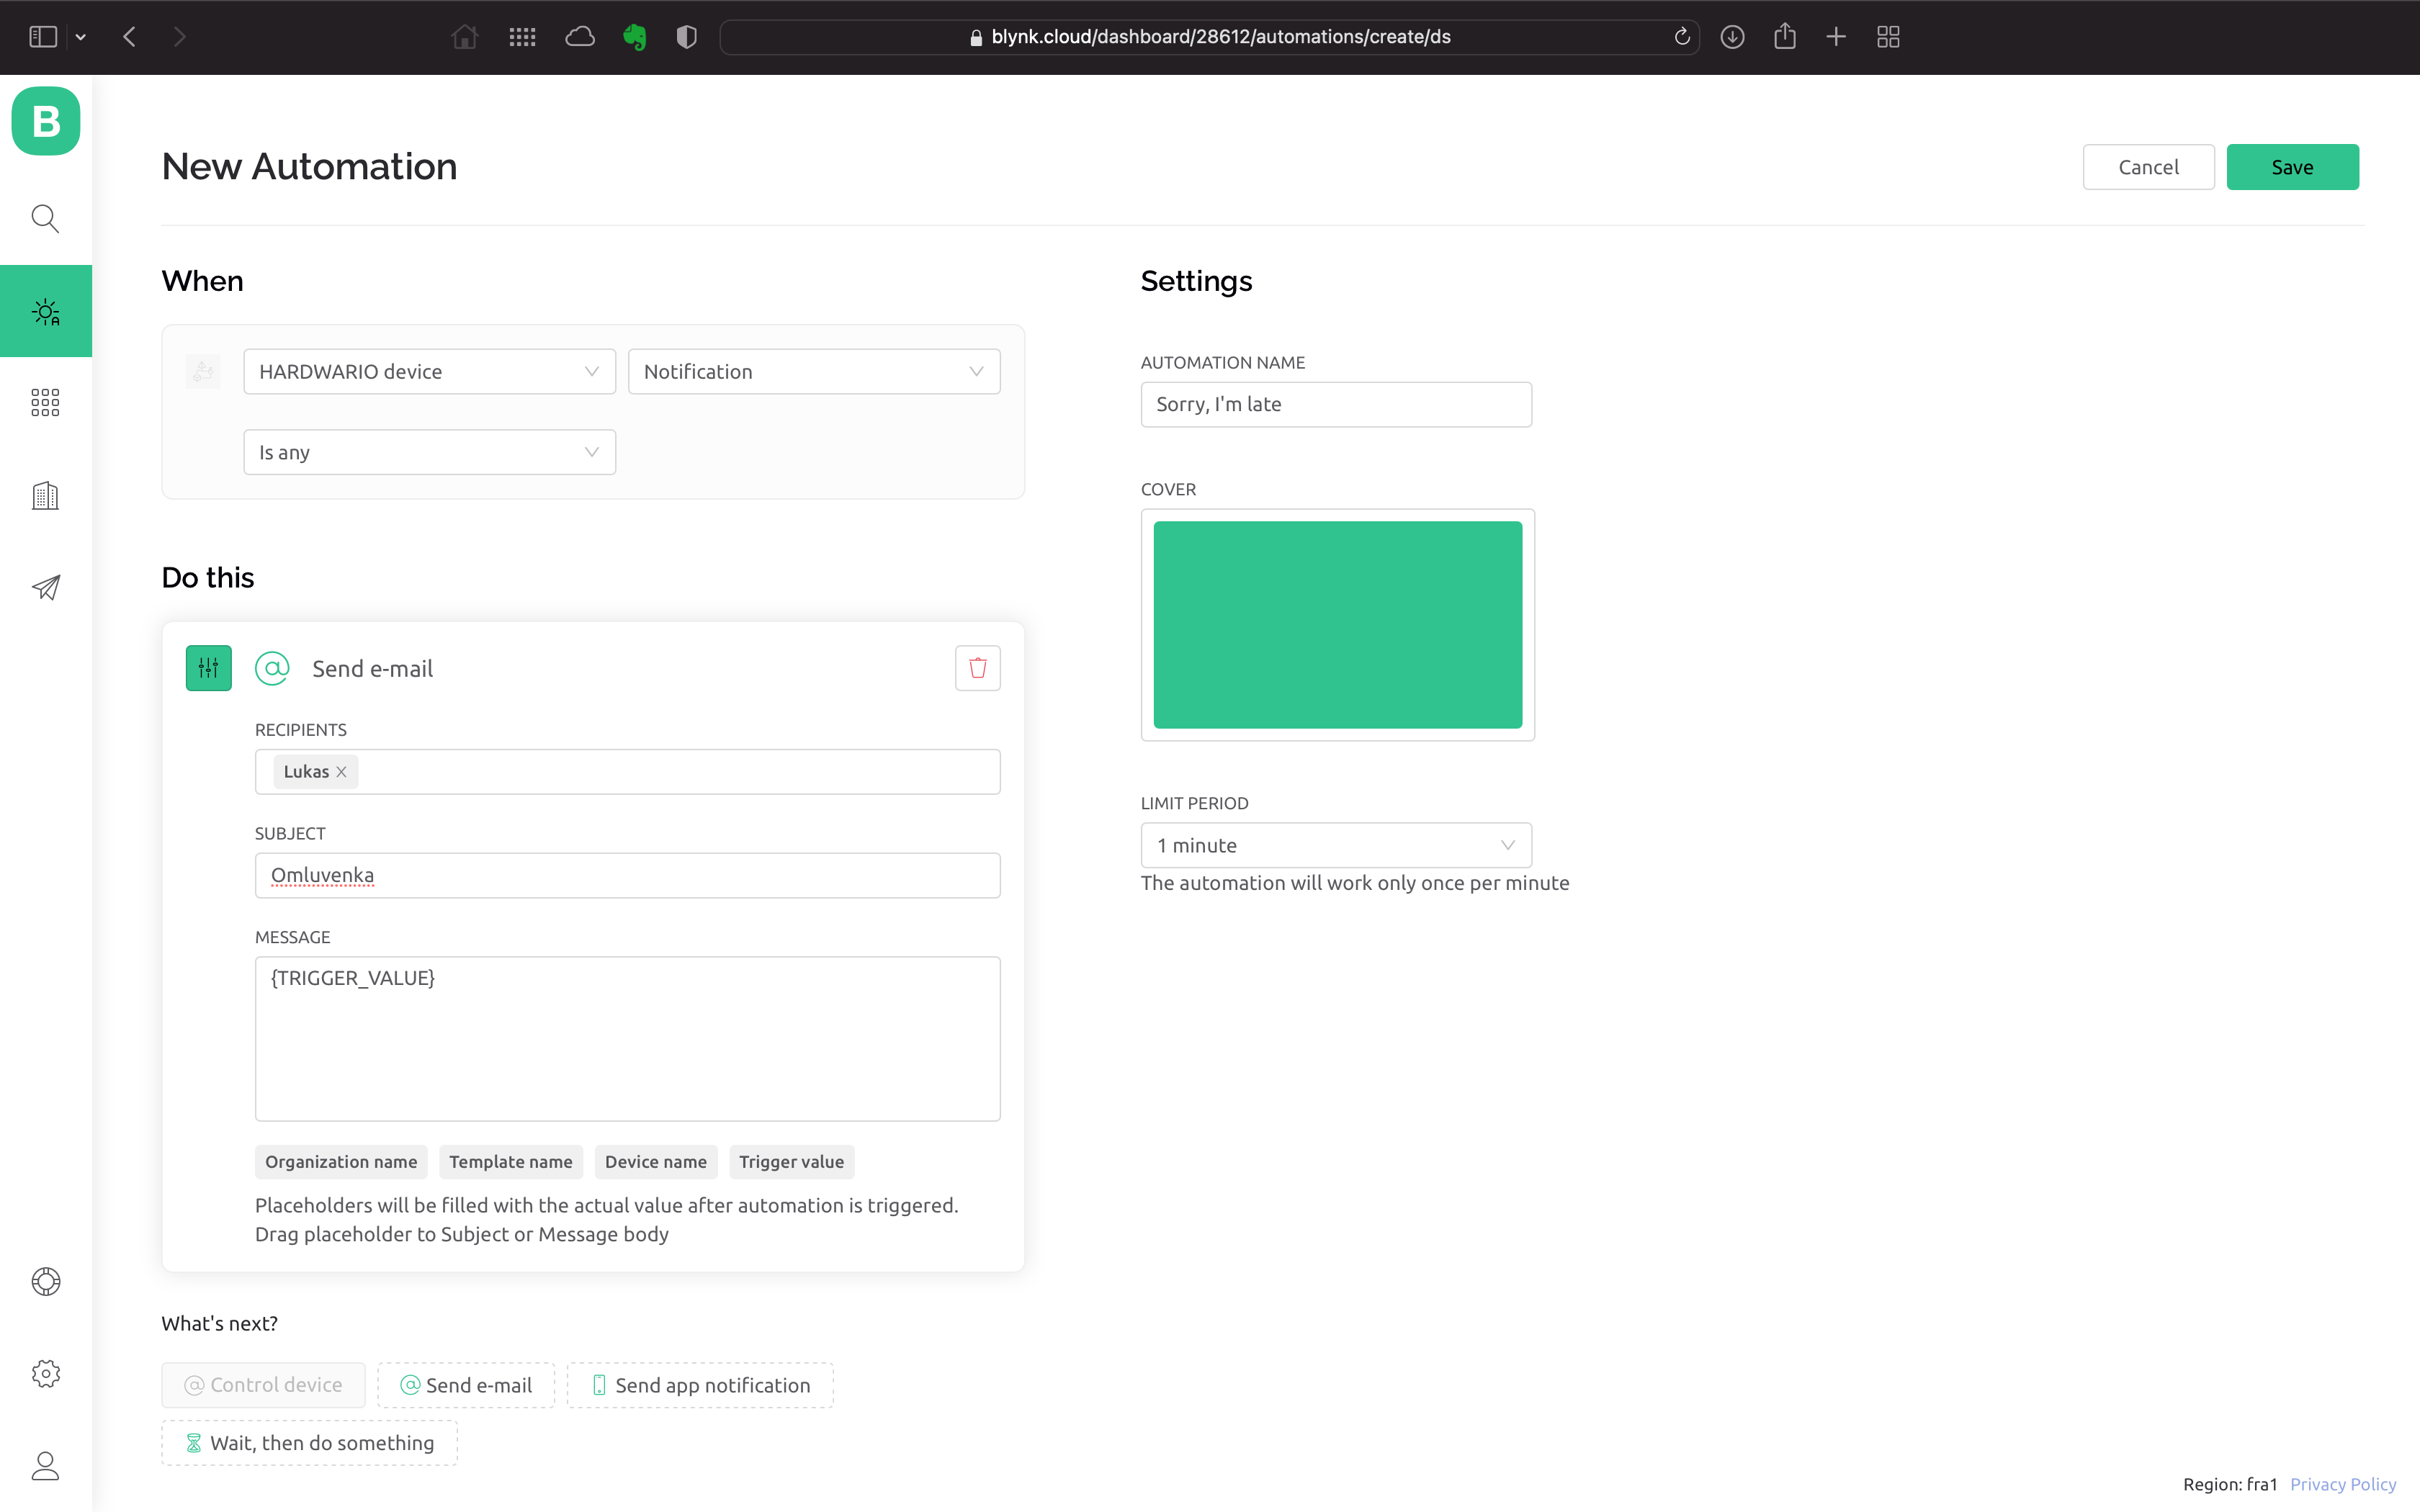
- Save the automation with the Save button.
Set up the phone
-
Time to steal your mom's or dad's phone for a minute and set up Blynk IoT on it. If you're new to Blynk, check out the guide.
-
Sign in to Blynk with your account.
Finish the programming
- Go back to your computer. On the Node-RED canvas, add a green Write node after the two nodes. You'll find it on the left in the Blynk IoT section (careful, not Blynk ws).
- Double-click the node, then click the pencil. ✏
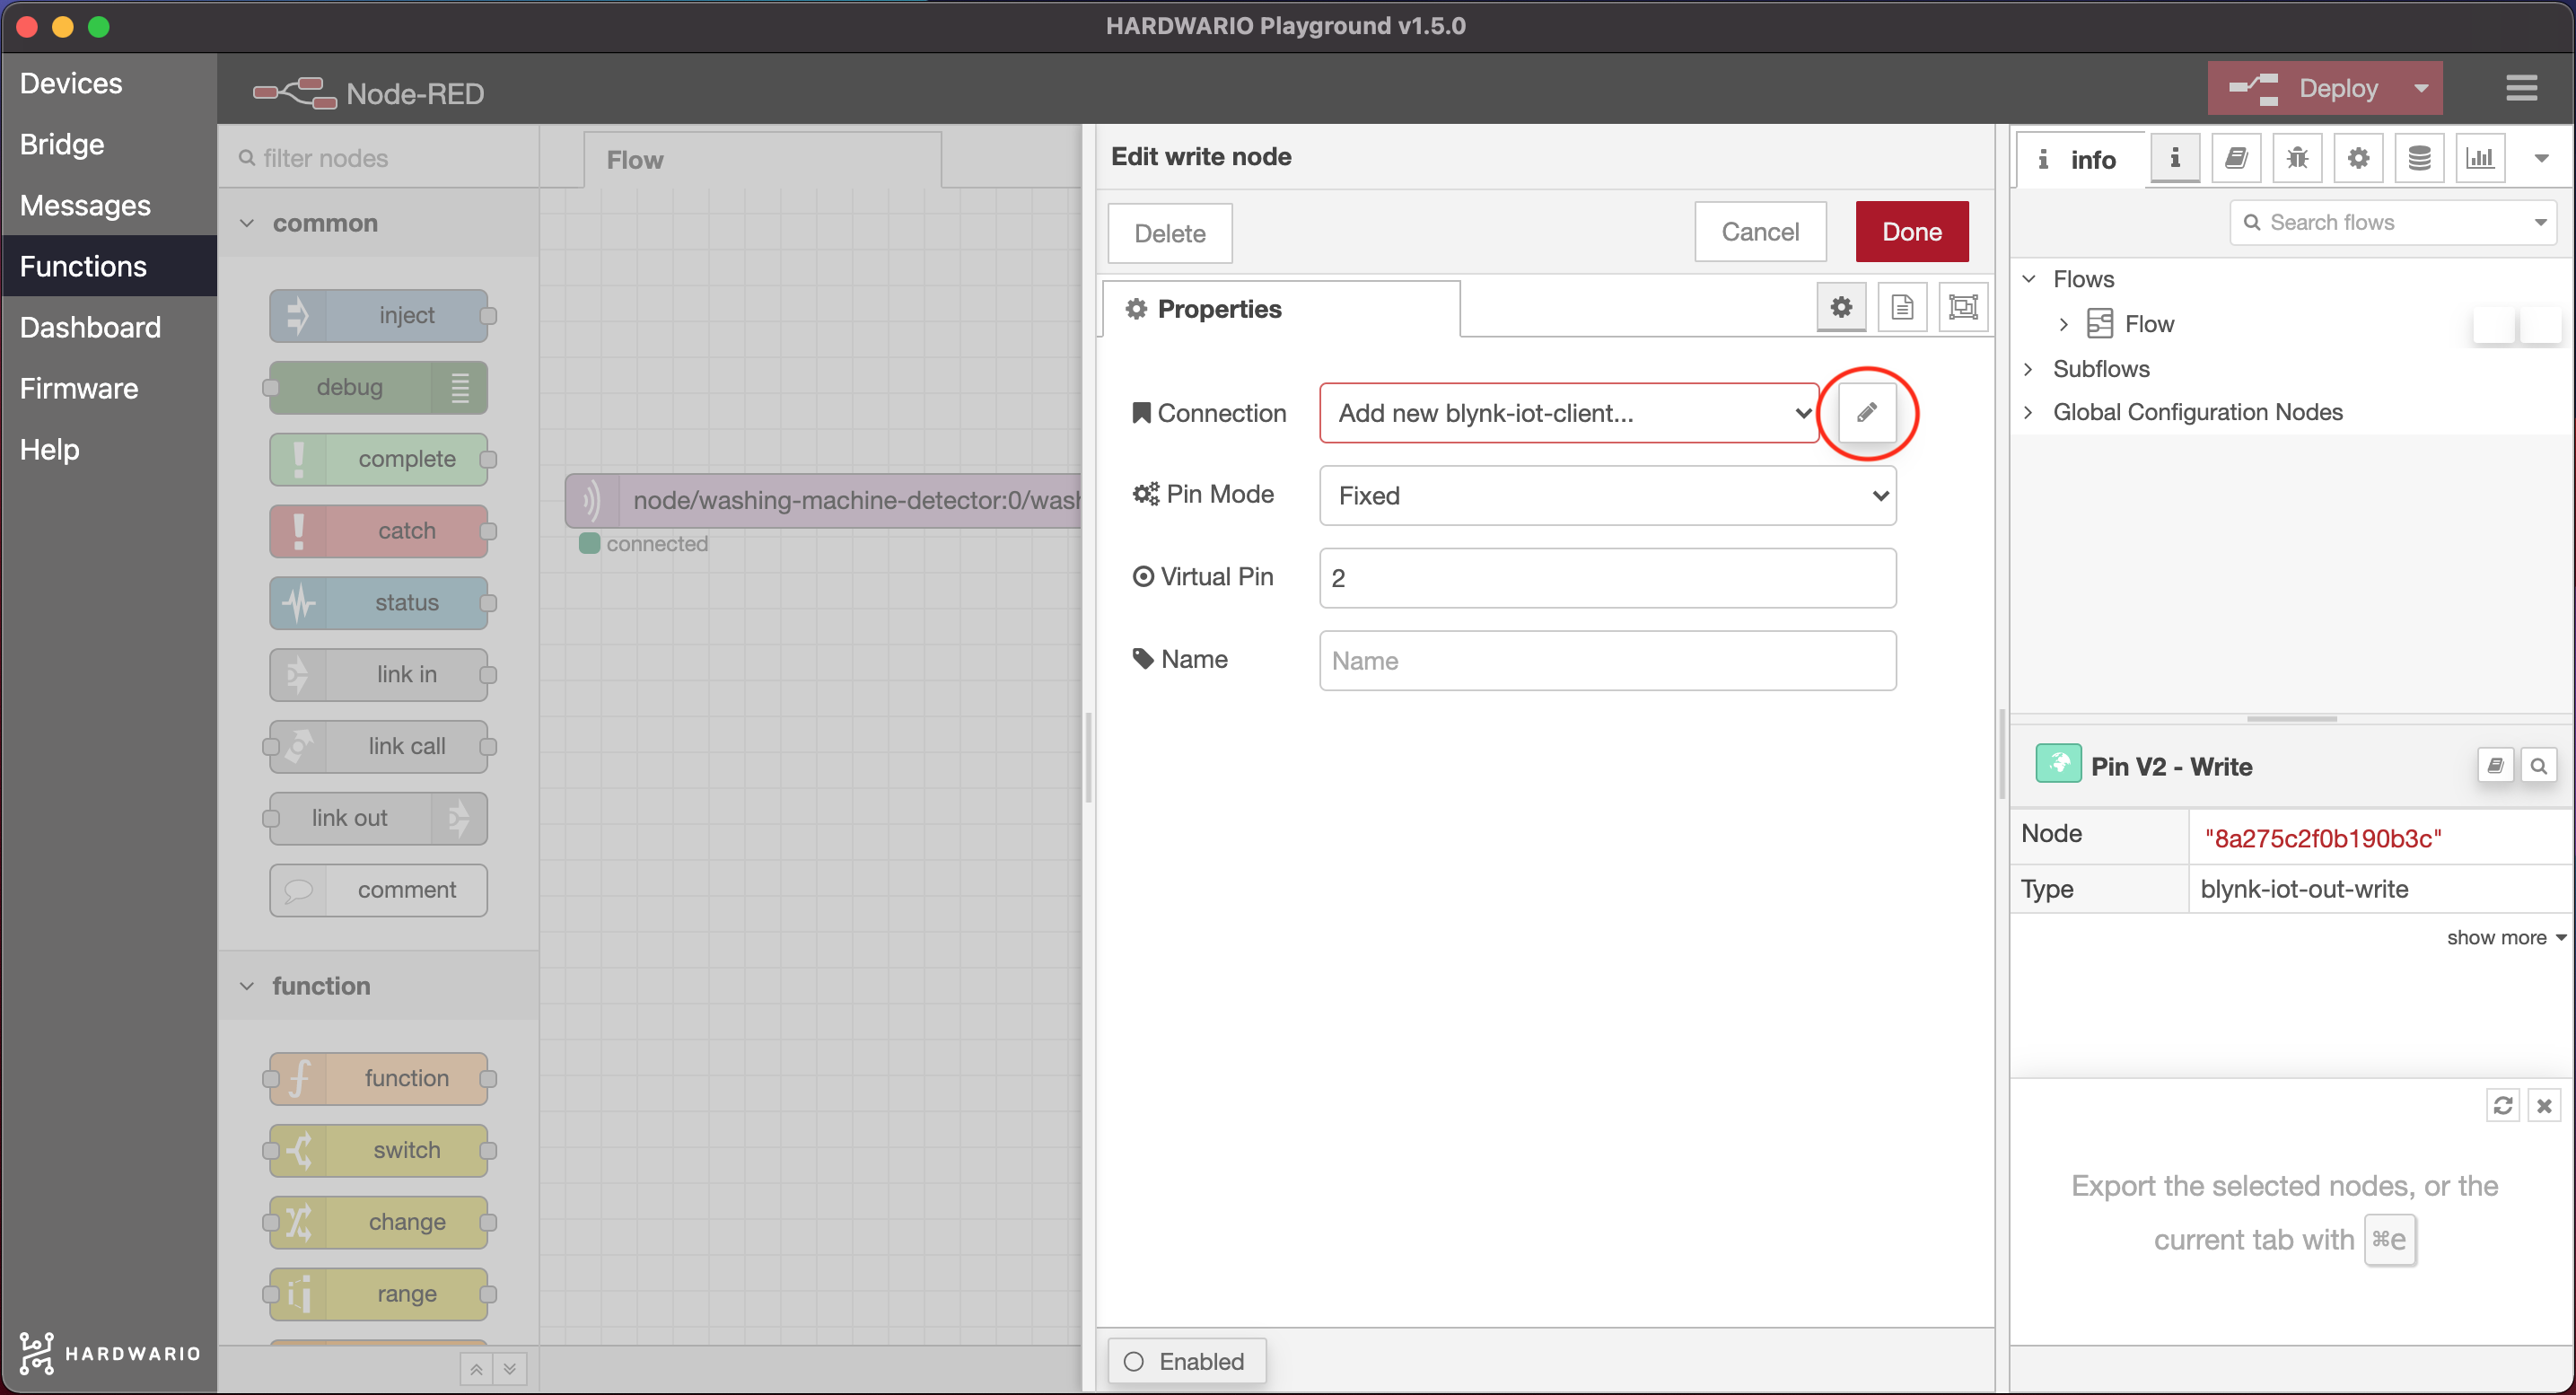
- A window opens for connecting to Blynk. Enter
blynk.cloudin the Url field, and copy the values from the device detail in the web app on your computer into the Auth Token and Template ID fields.
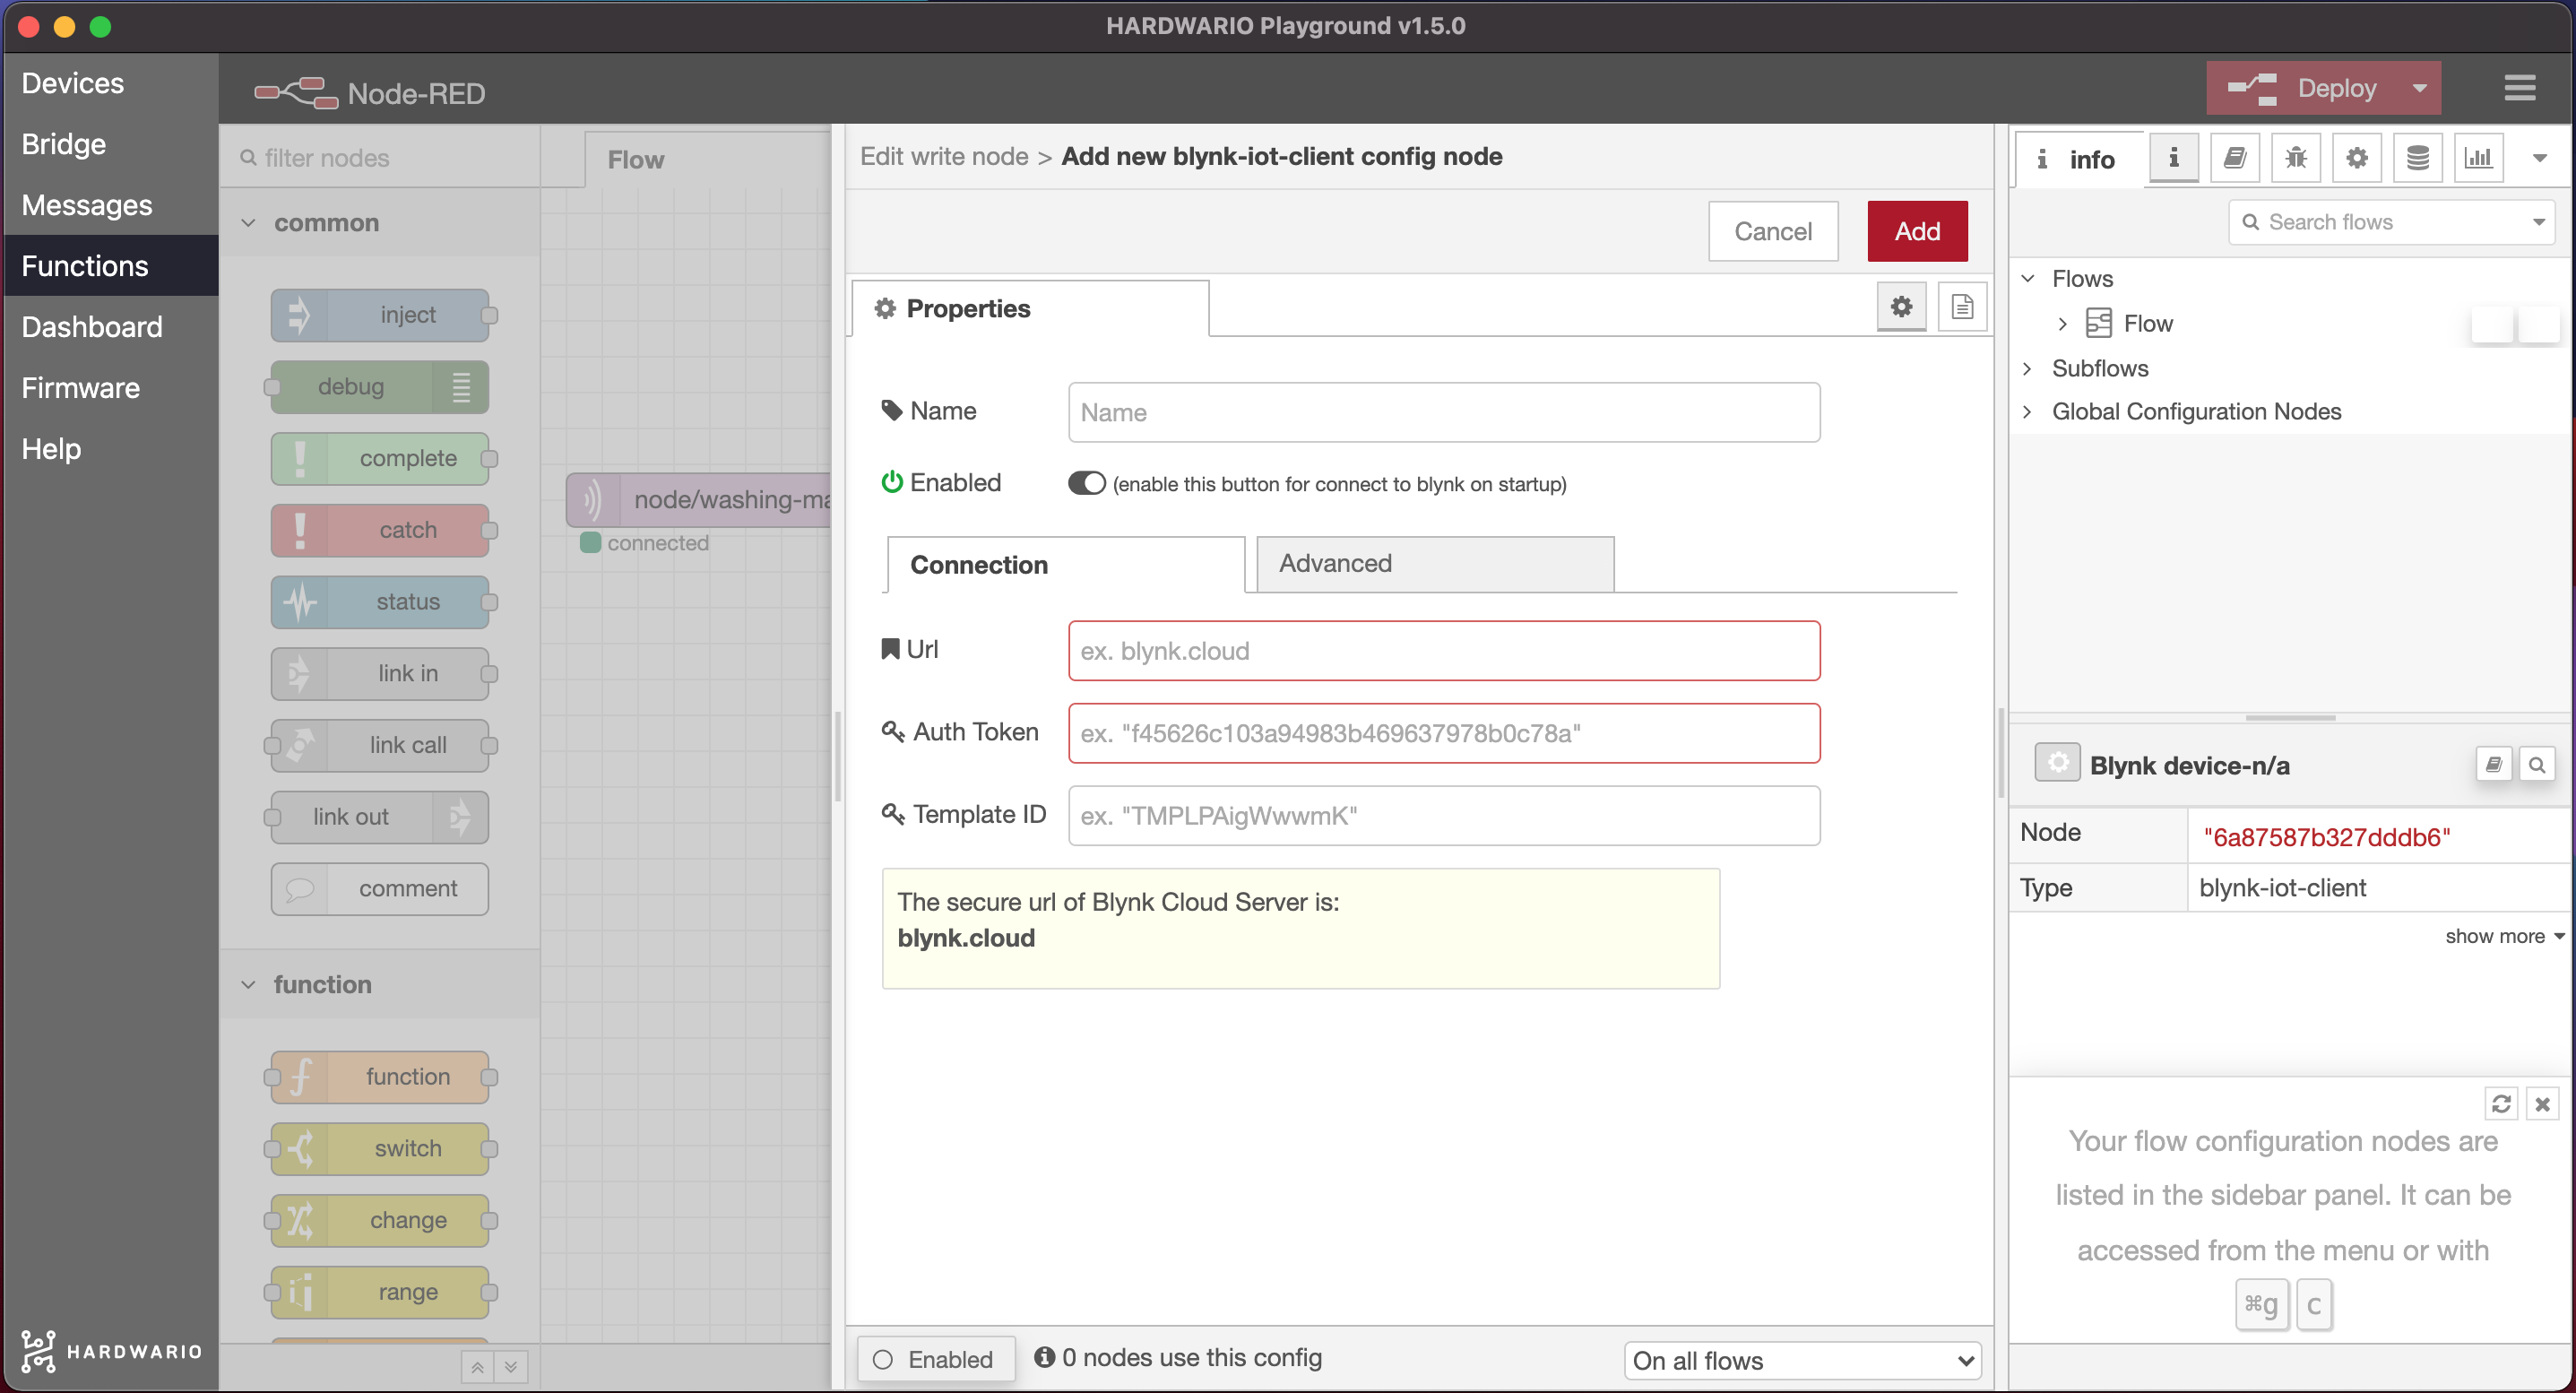
Confirm the settings with Add.
-
Fill in the virtual pin number of the datastream you created and save everything with Done.
-
All that's left is to wire the nodes together and send the command off into space with the red Deploy button in the top right. 👏
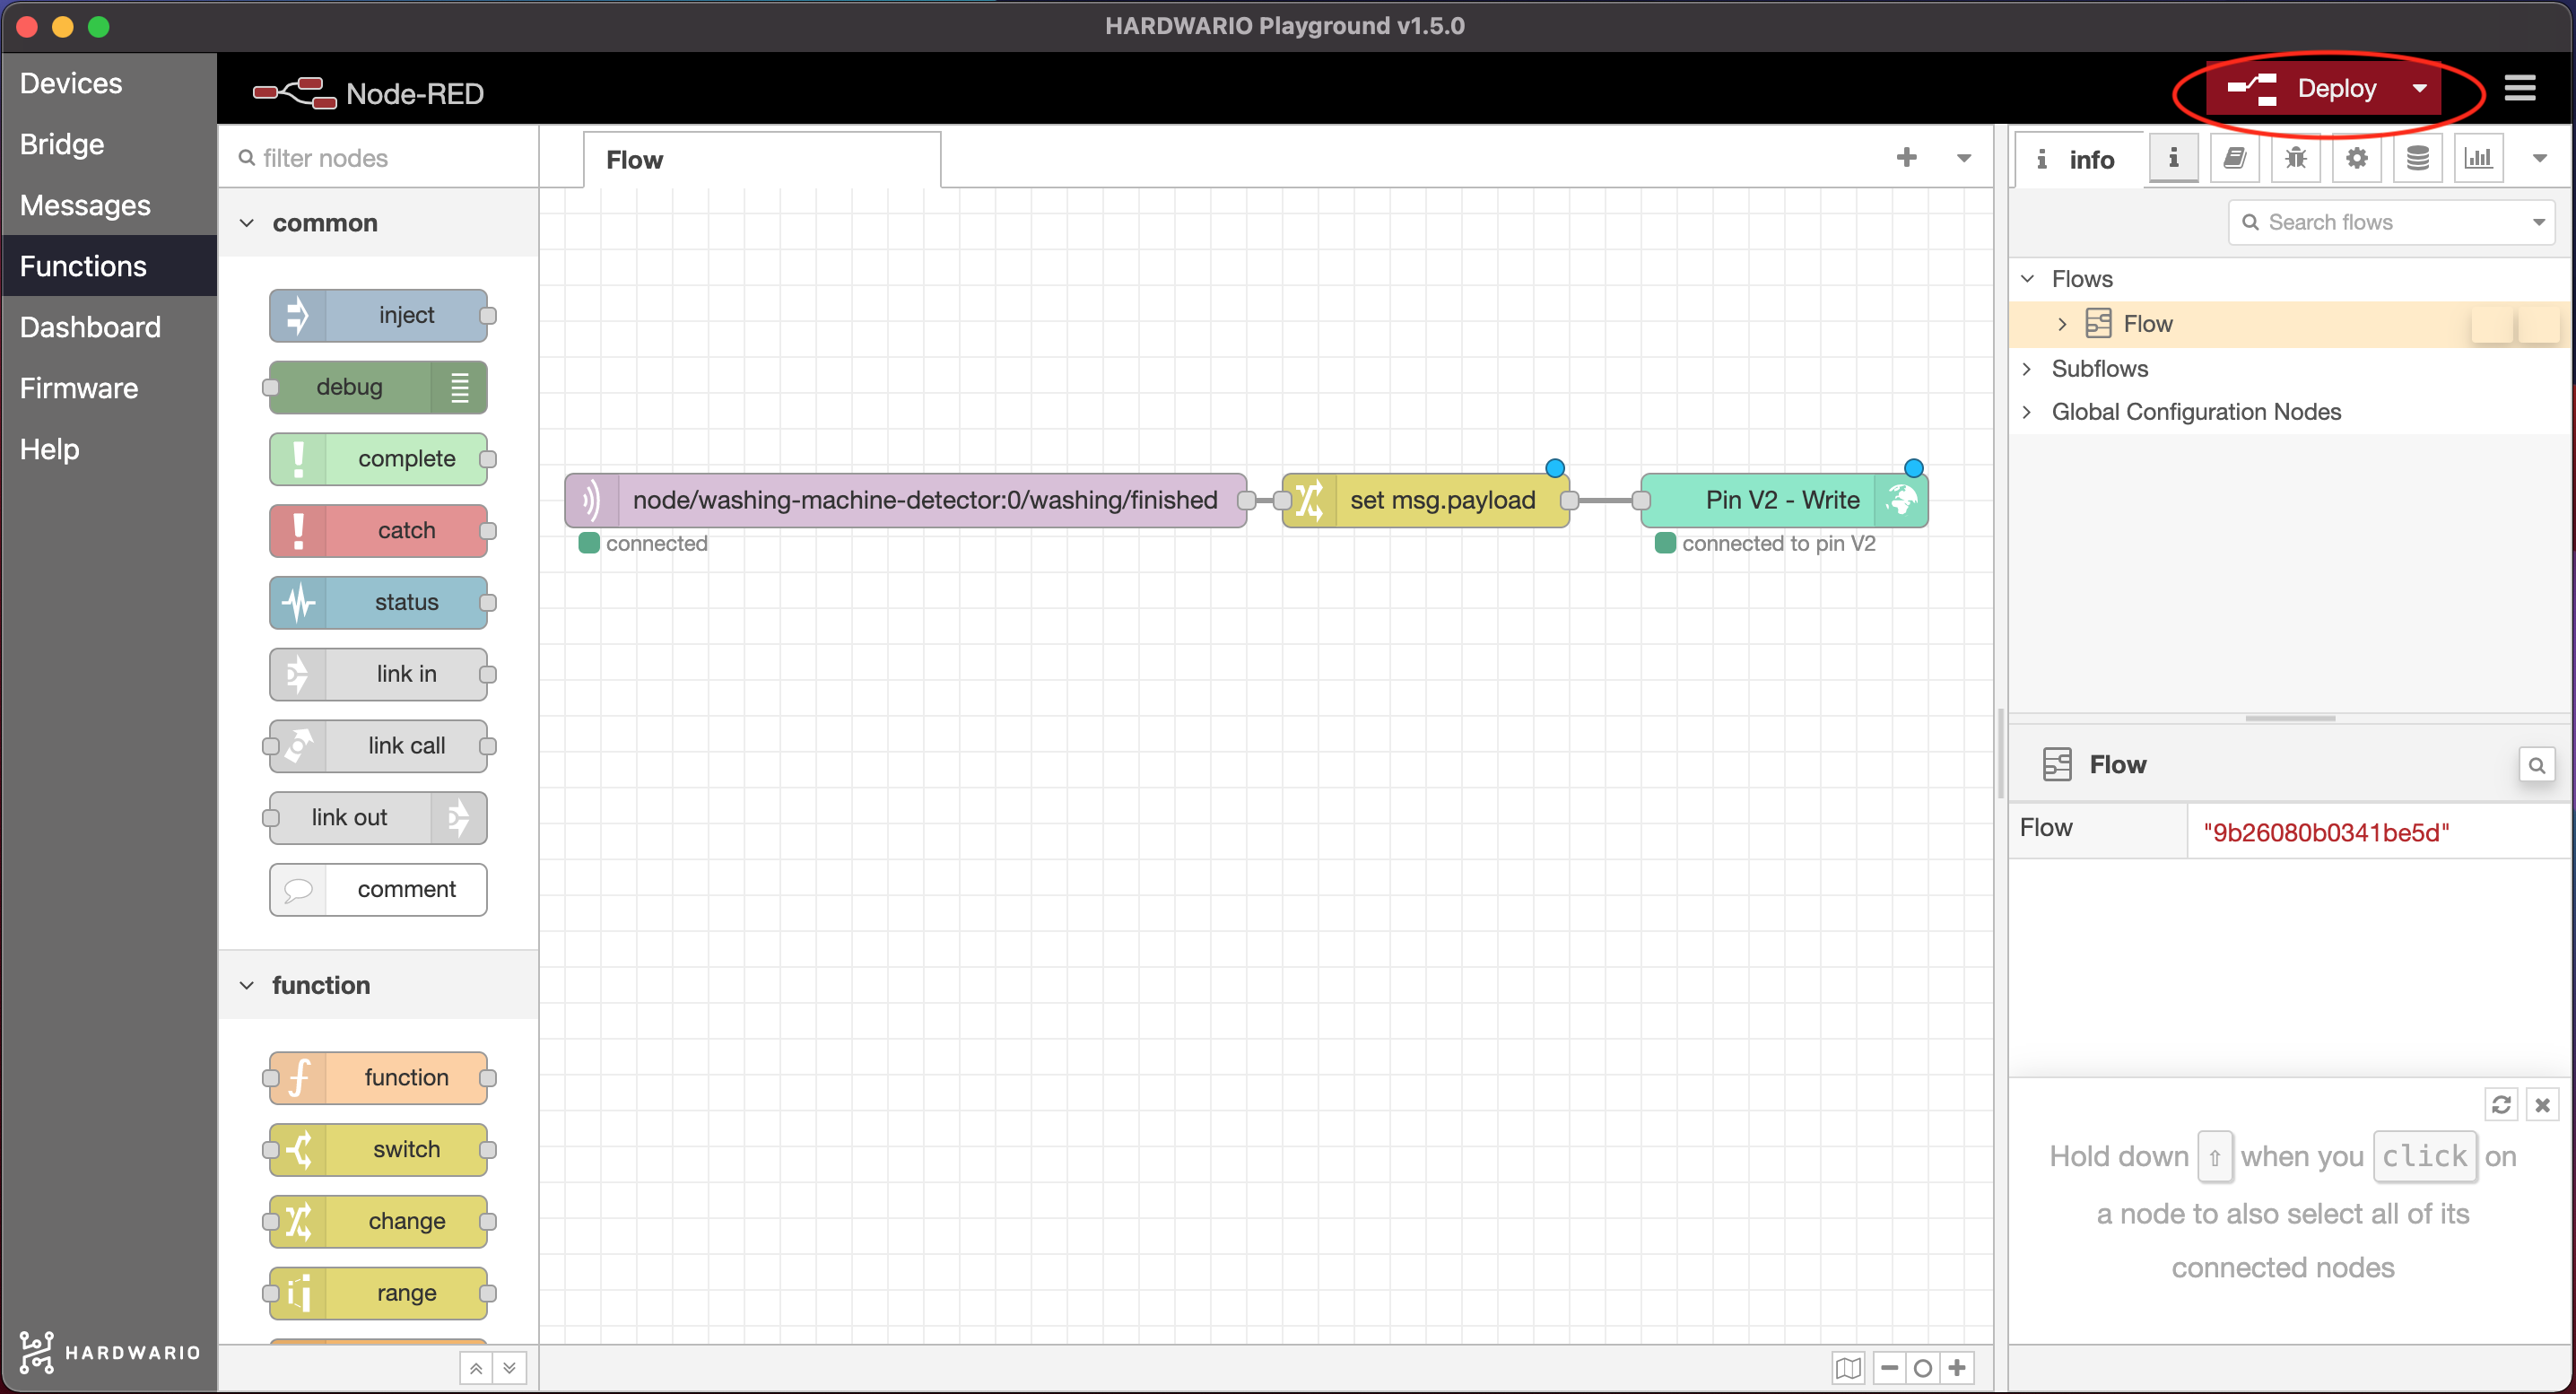
Give it a spin!
-
Put the box on the washing machine and stick it down with a small piece of tape so it doesn't fall off.
-
The box recognizes when the washing machine has finished, because it stops shaking, and sends a message to your mom's or dad's phone. Cool, right? Suddenly you're living in a smart home! 🤡