Radio LCD Thermostat
This guide walks you through the Radio LCD Thermostat project. With this gadget, you can control the temperature remotely.
Block Diagram
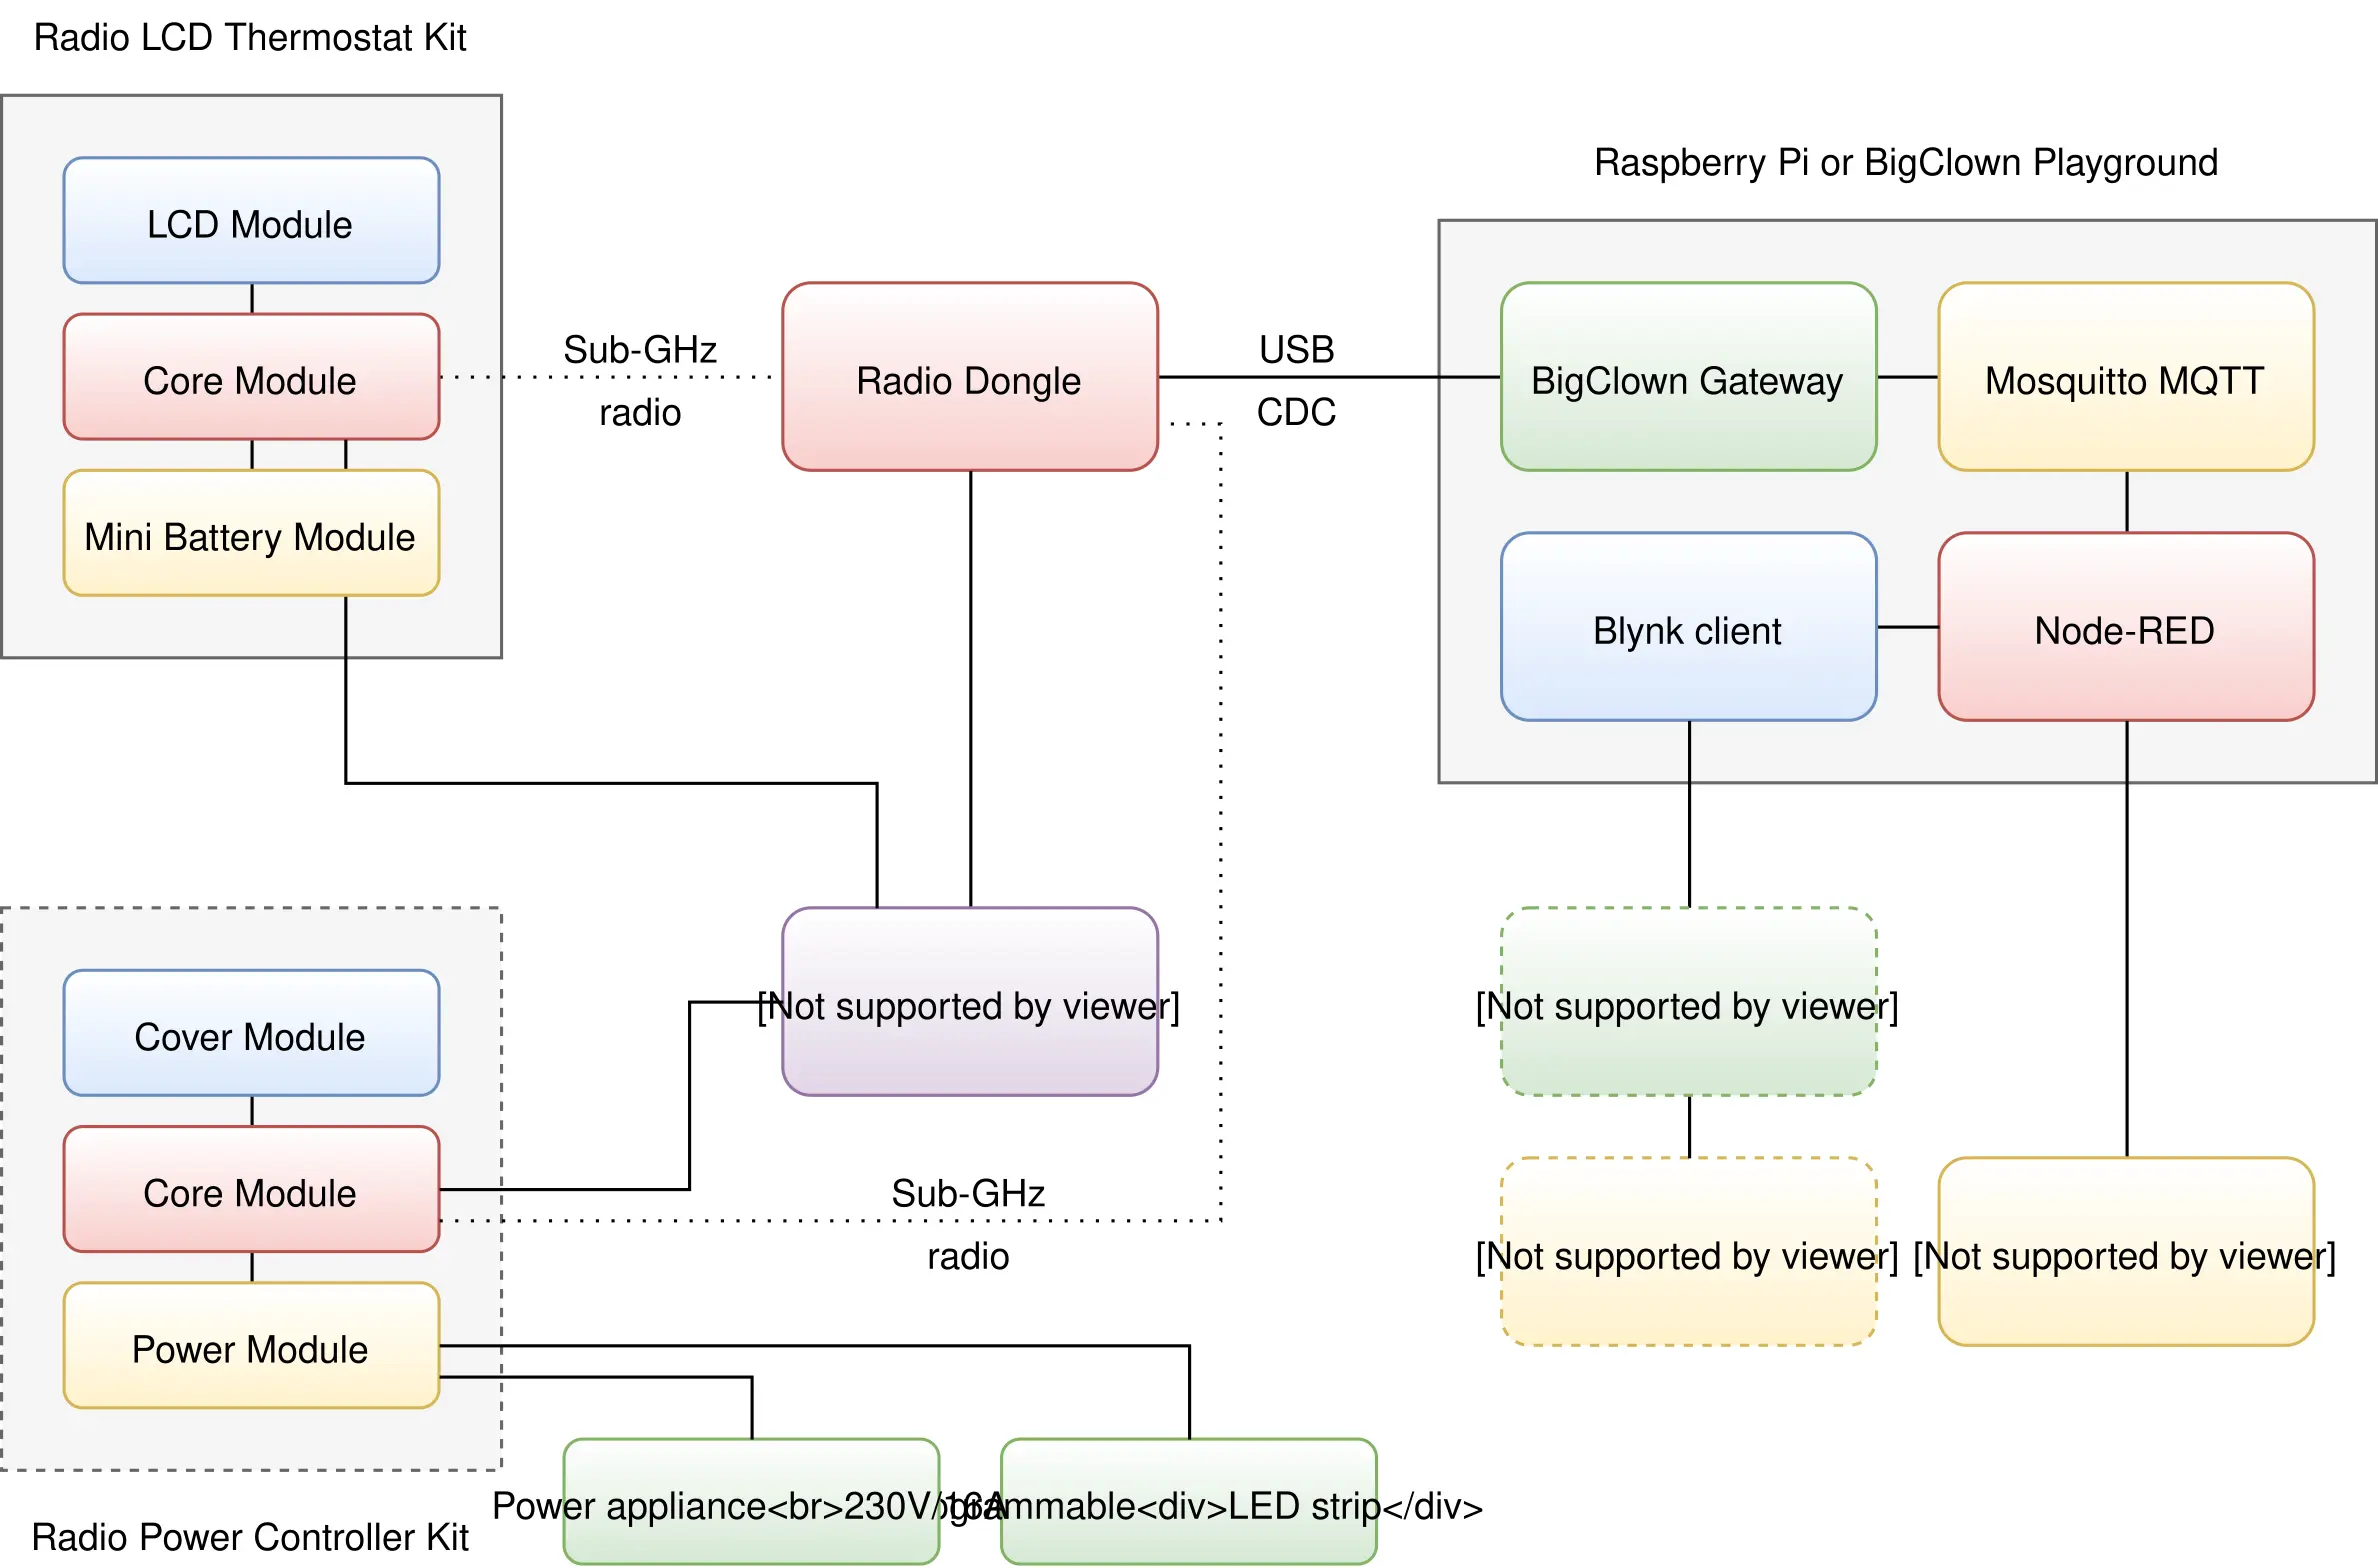
Requirements
-
Either the Display Set or these individual components:
- 1x LCD Module
- 1x Core Module
- 1x Mini Battery Module
- 1x Radio Dongle
-
One of the following:
- HARDWARIO Playground installed (recommended) See Playground Installation for details.
- Raspberry Pi with the HARDWARIO Raspbian distribution See Raspberry Pi Installation for details.
- HARDWARIO Firmware Tool installed See Firmware Flashing Tool for details.
Firmware Upload
You'll upload the firmware to the Core Module with HARDWARIO Playground.
Step 1: Connect the Core Module to your computer with a Micro USB cable
Step 2: Flash the firmware
Start HARDWARIO Playground, select the hardwario/twr-radio-lcd-thermostat firmware on the Firmware tab and upload it to the Core Module.
Flashing Core Module R1 and R2 The older Core Module 1 and the newer Core Module 2 are flashed differently; see Core Module R1 and R2 comparison in the Hardware section.
Step 3: Disconnect the Micro USB cable from the Core Module and the computer
Your firmware is now uploaded.
Hardware Assembly
Watch this short video for a simple step-by-step demonstration:
Playing the video loads it from YouTube (Google).
Step 1: Start with the Mini Battery Module
Check that there are no batteries in the Mini Battery Module.
Step 2: Plug the Core Module onto the Mini Battery Module
Step 3: Plug the LCD Module onto the Core Module
Playground Setup
If you use the new HARDWARIO Playground, open the Functions tab instead of http://localhost:1880/. Pairing now happens on the Devices tab, and you test communication on the Messages tab.
Step 1: Open Node-RED in your web browser
Step 2: You should see an empty workspace with Flow 1
Step 3: Import the following snippet into the flow (Menu >> Import)
[{"id":"2fc604fc.3b6abc","type":"inject","z":"dfc861b.b2a02a","name":"List all gateways","topic":"gateway/all/info/get","payload":"","payloadType":"str","repeat":"","crontab":"","once":false,"x":560,"y":460,"wires":[["a2c10833.24d5d8"]]},{"id":"1e4502b8.2f63fd","type":"inject","z":"dfc861b.b2a02a","name":"Start node pairing","topic":"gateway/usb-dongle/pairing-mode/start","payload":"","payloadType":"str","repeat":"","crontab":"","once":false,"x":570,"y":580,"wires":[["795ff5a7.8e266c"]]},{"id":"3d844ce2.932864","type":"inject","z":"dfc861b.b2a02a","name":"Stop node pairing","topic":"gateway/usb-dongle/pairing-mode/stop","payload":"","payloadType":"str","repeat":"","crontab":"","once":false,"x":560,"y":640,"wires":[["5967c452.c838bc"]]},{"id":"f202b253.2705b","type":"inject","z":"dfc861b.b2a02a","name":"List paired nodes","topic":"gateway/usb-dongle/nodes/get","payload":"","payloadType":"str","repeat":"","crontab":"","once":false,"x":560,"y":520,"wires":[["f0aca138.0b2c3"]]},{"id":"349f02fd.890f6e","type":"inject","z":"dfc861b.b2a02a","name":"Unpair all nodes","topic":"gateway/usb-dongle/nodes/purge","payload":"","payloadType":"str","repeat":"","crontab":"","once":false,"x":560,"y":700,"wires":[["2f1c5bb6.53d6f4"]]},{"id":"cf61d75d.4ad8f8","type":"mqtt in","z":"dfc861b.b2a02a","name":"","topic":"#","qos":"2","broker":"67b8de4a.029d3","x":530,"y":400,"wires":[["a5cb0658.f5d658"]]},{"id":"a5cb0658.f5d658","type":"debug","z":"dfc861b.b2a02a","name":"","active":true,"console":"false","complete":"false","x":790,"y":400,"wires":[]},{"id":"a2c10833.24d5d8","type":"mqtt out","z":"dfc861b.b2a02a","name":"","topic":"","qos":"","retain":"","broker":"717f7c18.ba0a24","x":770,"y":460,"wires":[]},{"id":"f0aca138.0b2c3","type":"mqtt out","z":"dfc861b.b2a02a","name":"","topic":"","qos":"","retain":"","broker":"717f7c18.ba0a24","x":770,"y":520,"wires":[]},{"id":"795ff5a7.8e266c","type":"mqtt out","z":"dfc861b.b2a02a","name":"","topic":"","qos":"","retain":"","broker":"717f7c18.ba0a24","x":770,"y":580,"wires":[]},{"id":"5967c452.c838bc","type":"mqtt out","z":"dfc861b.b2a02a","name":"","topic":"","qos":"","retain":"","broker":"717f7c18.ba0a24","x":770,"y":640,"wires":[]},{"id":"2f1c5bb6.53d6f4","type":"mqtt out","z":"dfc861b.b2a02a","name":"","topic":"","qos":"","retain":"","broker":"717f7c18.ba0a24","x":770,"y":700,"wires":[]},{"id":"67b8de4a.029d3","type":"mqtt-broker","z":"","broker":"127.0.0.1","port":"1883","clientid":"","usetls":false,"compatmode":true,"keepalive":"60","cleansession":true,"willTopic":"","willQos":"0","willPayload":"","birthTopic":"","birthQos":"0","birthPayload":""},{"id":"717f7c18.ba0a24","type":"mqtt-broker","z":"","broker":"127.0.0.1","port":"1883","clientid":"","usetls":false,"compatmode":true,"keepalive":"60","cleansession":true,"willTopic":"","willQos":"0","willPayload":"","birthTopic":"","birthQos":"0","birthPayload":""}]
It looks like this:
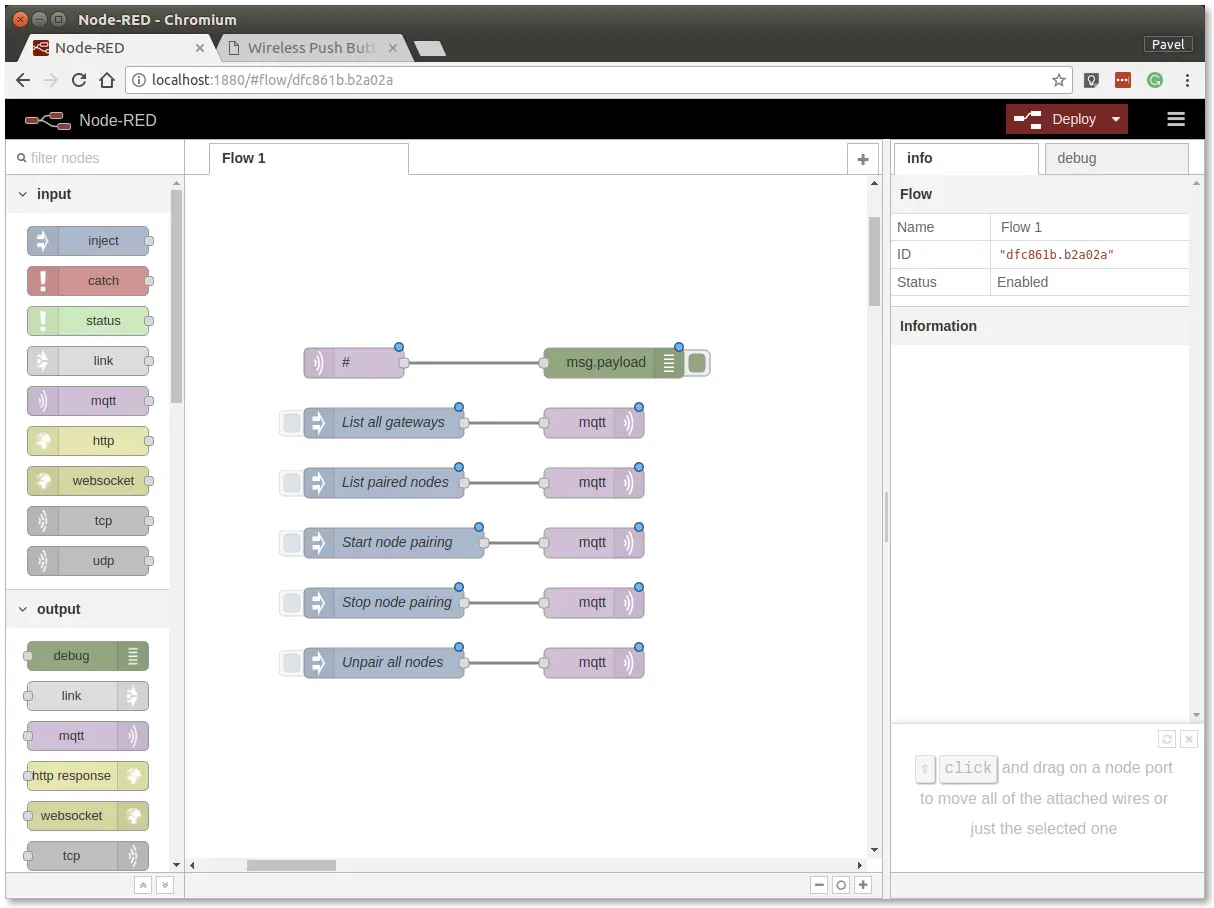
The snippet adds buttons for the gateway and radio commands, which are sent over MQTT.
Step 4: Deploy the flow with the Deploy button in the top-right corner
Step 5: Open the debug tab
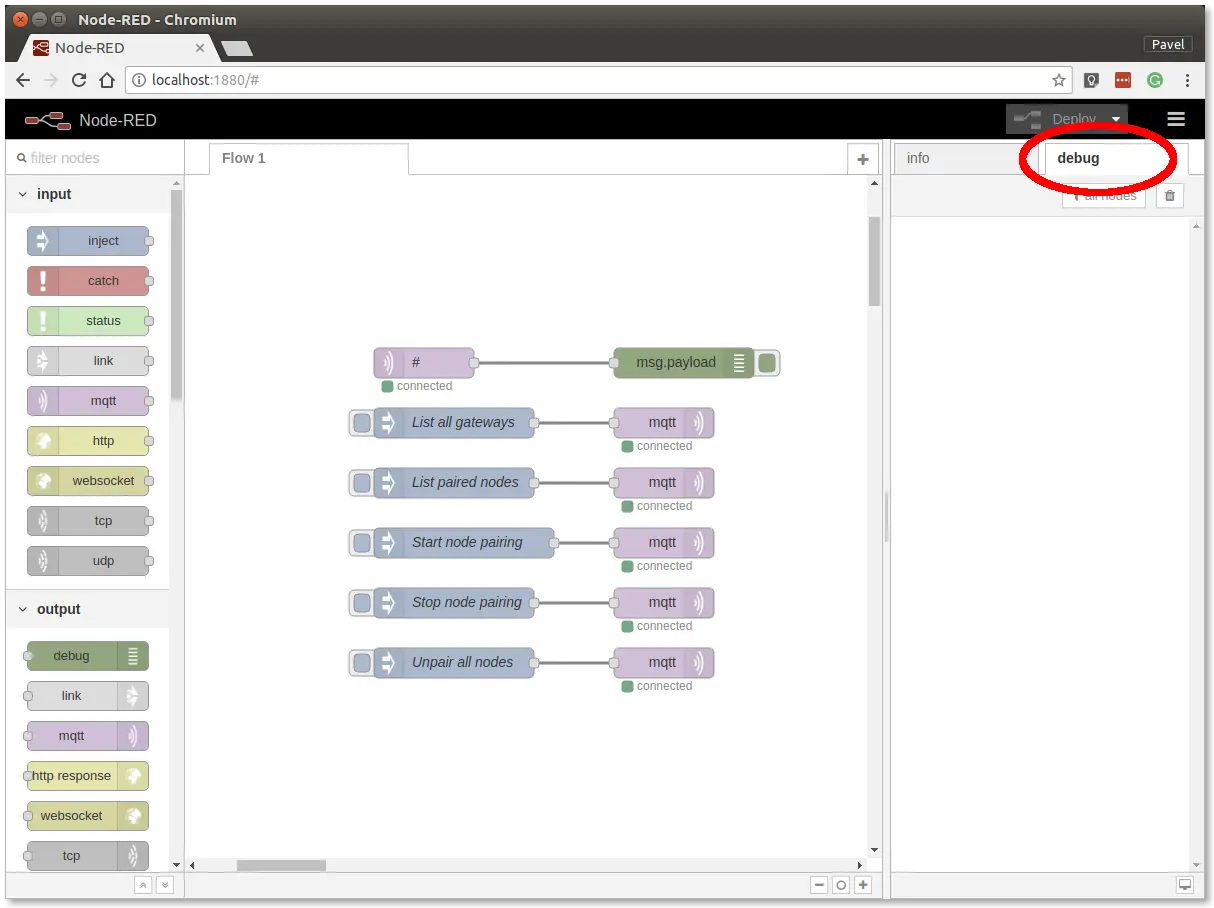
The debug tab shows all MQTT messages.
Step 6: Click the List all gateways button. The debug tab should show a response like this
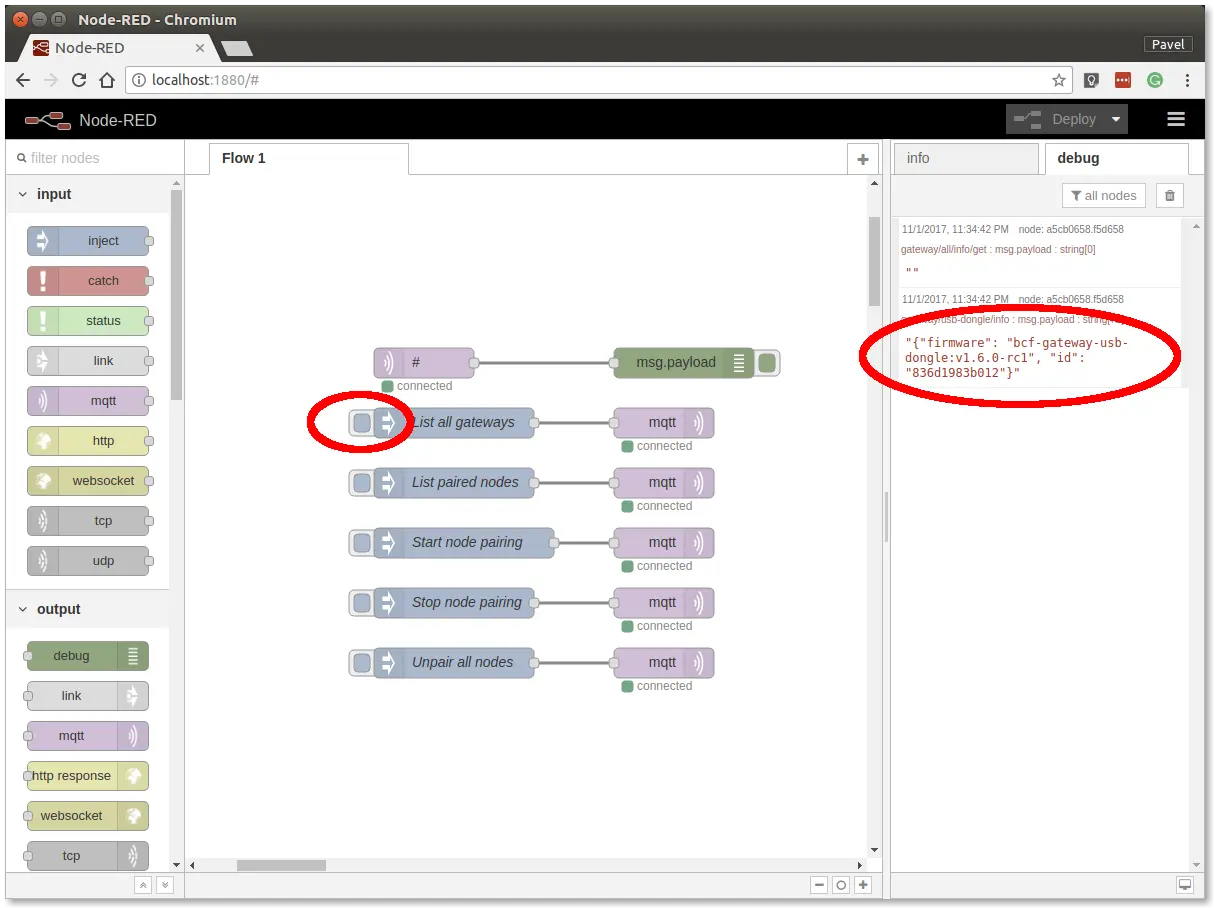
You now have working Node-RED, MQTT, HARDWARIO Radio Dongle and HARDWARIO Gateway.
Radio Pairing
In this section, we'll establish a radio link between the Radio Dongle and the Radio LCD Thermostat.
In Node-RED, follow these steps:
Step 1: Click the Start node pairing button
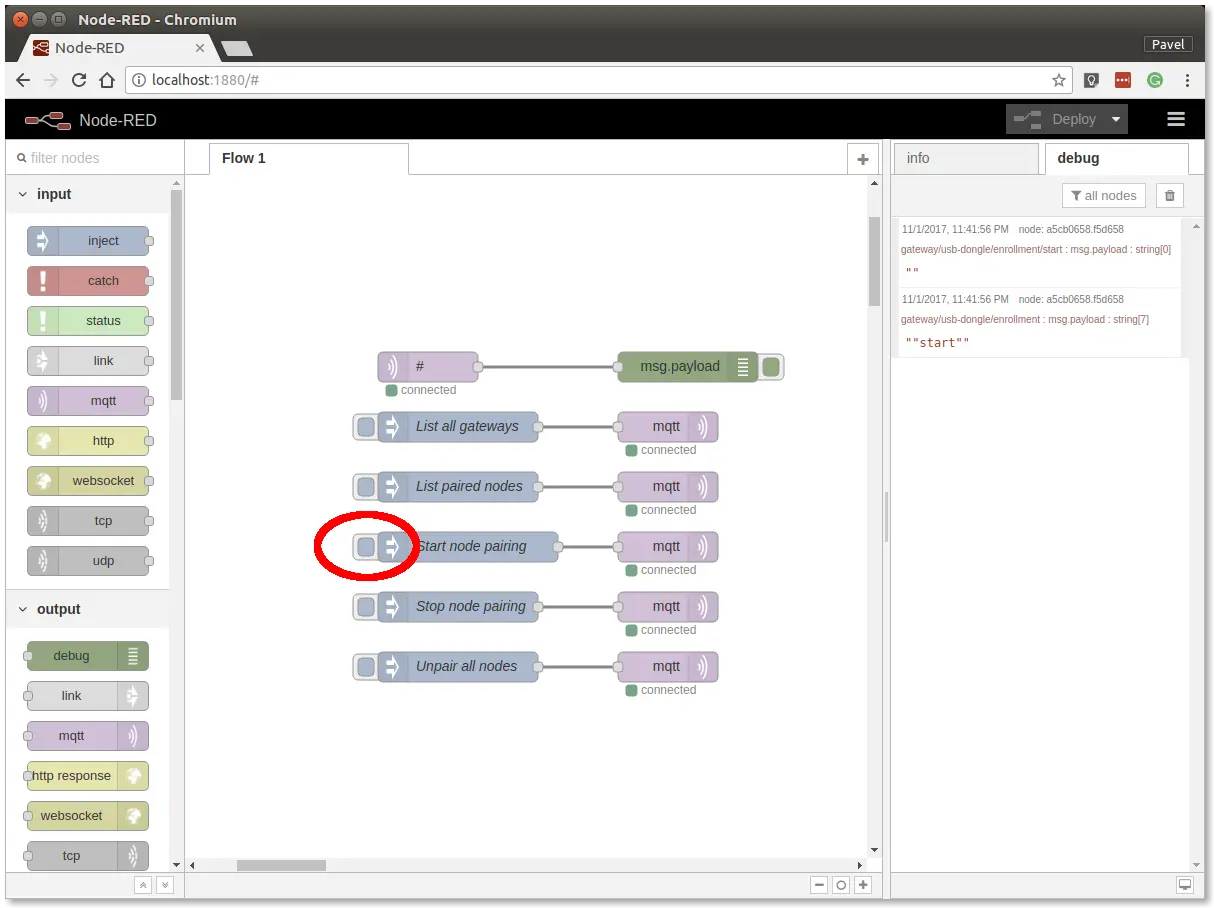
Step 2: Insert the batteries into the Radio LCD Thermostat to send the pairing request (the red LED on the Core Module should also light up for about 2 seconds)
Step 3: Click the Stop node pairing button
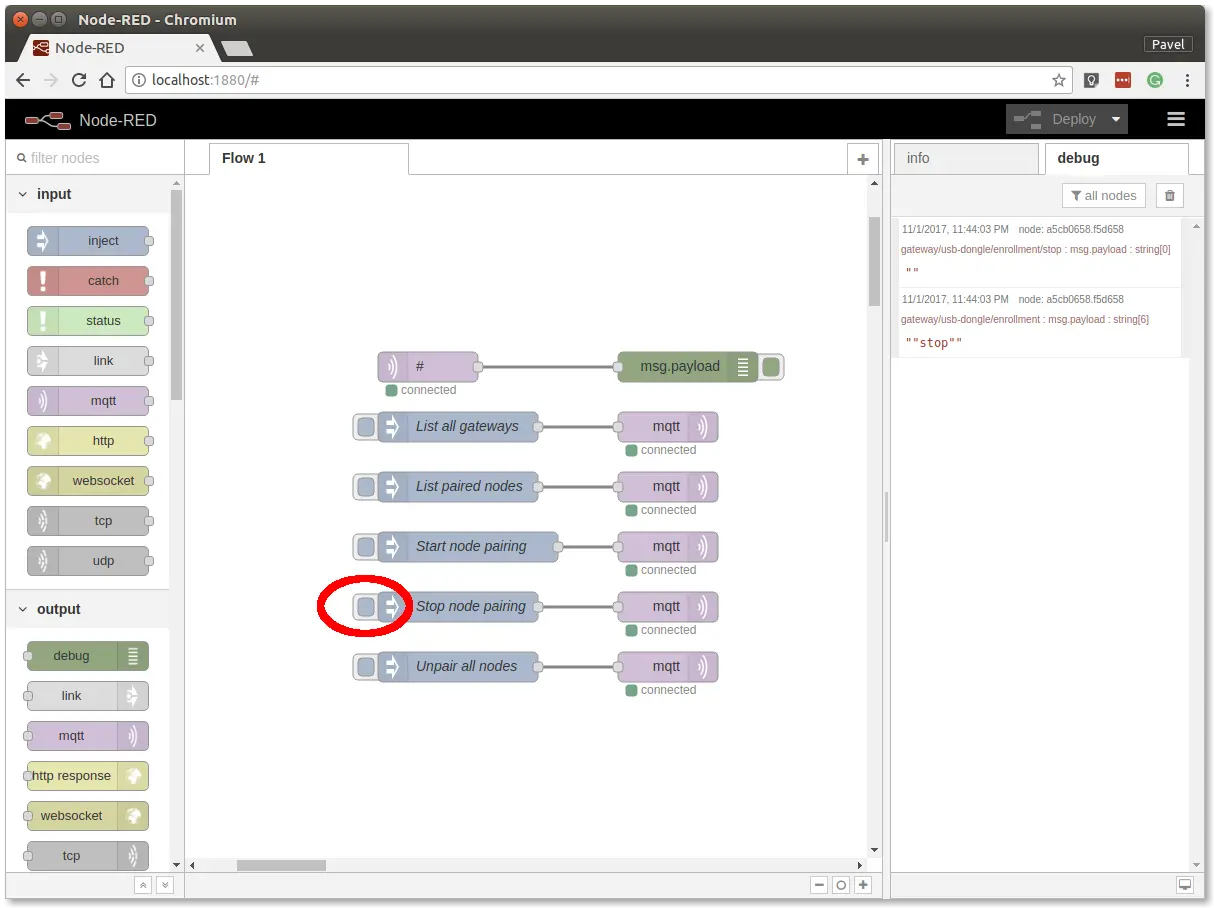
You now have a radio link between the node (Radio LCD Thermostat) and the gateway (Radio Dongle).
Communication Test
In Node-RED, follow these steps:
Step 1: Switch to the debug tab on the right
Step 2: Import the following snippet into the flow (Menu >> Import)
[{"id":"12b3deae.bbbdf1","type":"mqtt in","z":"f2f80e07.95983","name":"","topic":"node/lcd-thermostat:0/#","qos":"2","broker":"25b87ea5.743312","x":390,"y":320,"wires":[["7694514b.9b64d"]]},{"id":"7694514b.9b64d","type":"debug","z":"f2f80e07.95983","name":"","active":true,"console":"false","complete":"false","x":630,"y":320,"wires":[]},{"id":"25b87ea5.743312","type":"mqtt-broker","z":"","broker":"127.0.0.1","port":"1883","clientid":"","usetls":false,"compatmode":true,"keepalive":"60","cleansession":true,"willTopic":"","willQos":"0","willPayload":"","birthTopic":"","birthQos":"0","birthPayload":""}]
Step 3: If you see messages in the debug log (such as the temperature), your kit works correctly
Radio communication is now verified.