Party draw game
Introduction
Why play spin the bottle with a real bottle when a smart box will do? Set up your Start Set to pick one member of your group at random, whether at a party, in a prize draw or when you need to decide who does the tidying up.
In this project, you will learn how to set up the box so that it picks one member of your group at random. 😱
You will need the box with the button and the USB dongle, so the basic HARDWARIO Start Set is all you need.
Make it happen in Node-RED
- Assemble the Start Set and pair it. Upload the twr-radio-move-detector-x-axis firmware to the Core Module, so that the box reacts to movement.
- In Playground, click the Functions tab, where you'll find the programming workspace.
- Here we go. 🤞 Place an mqtt in node from the network section on the workspace.
Double-click the node to open it and set up the key function: the box reacting to movement.
Copy this line into the Topic field:
node/x-axis-detector:0/accelerometer/-/event-count
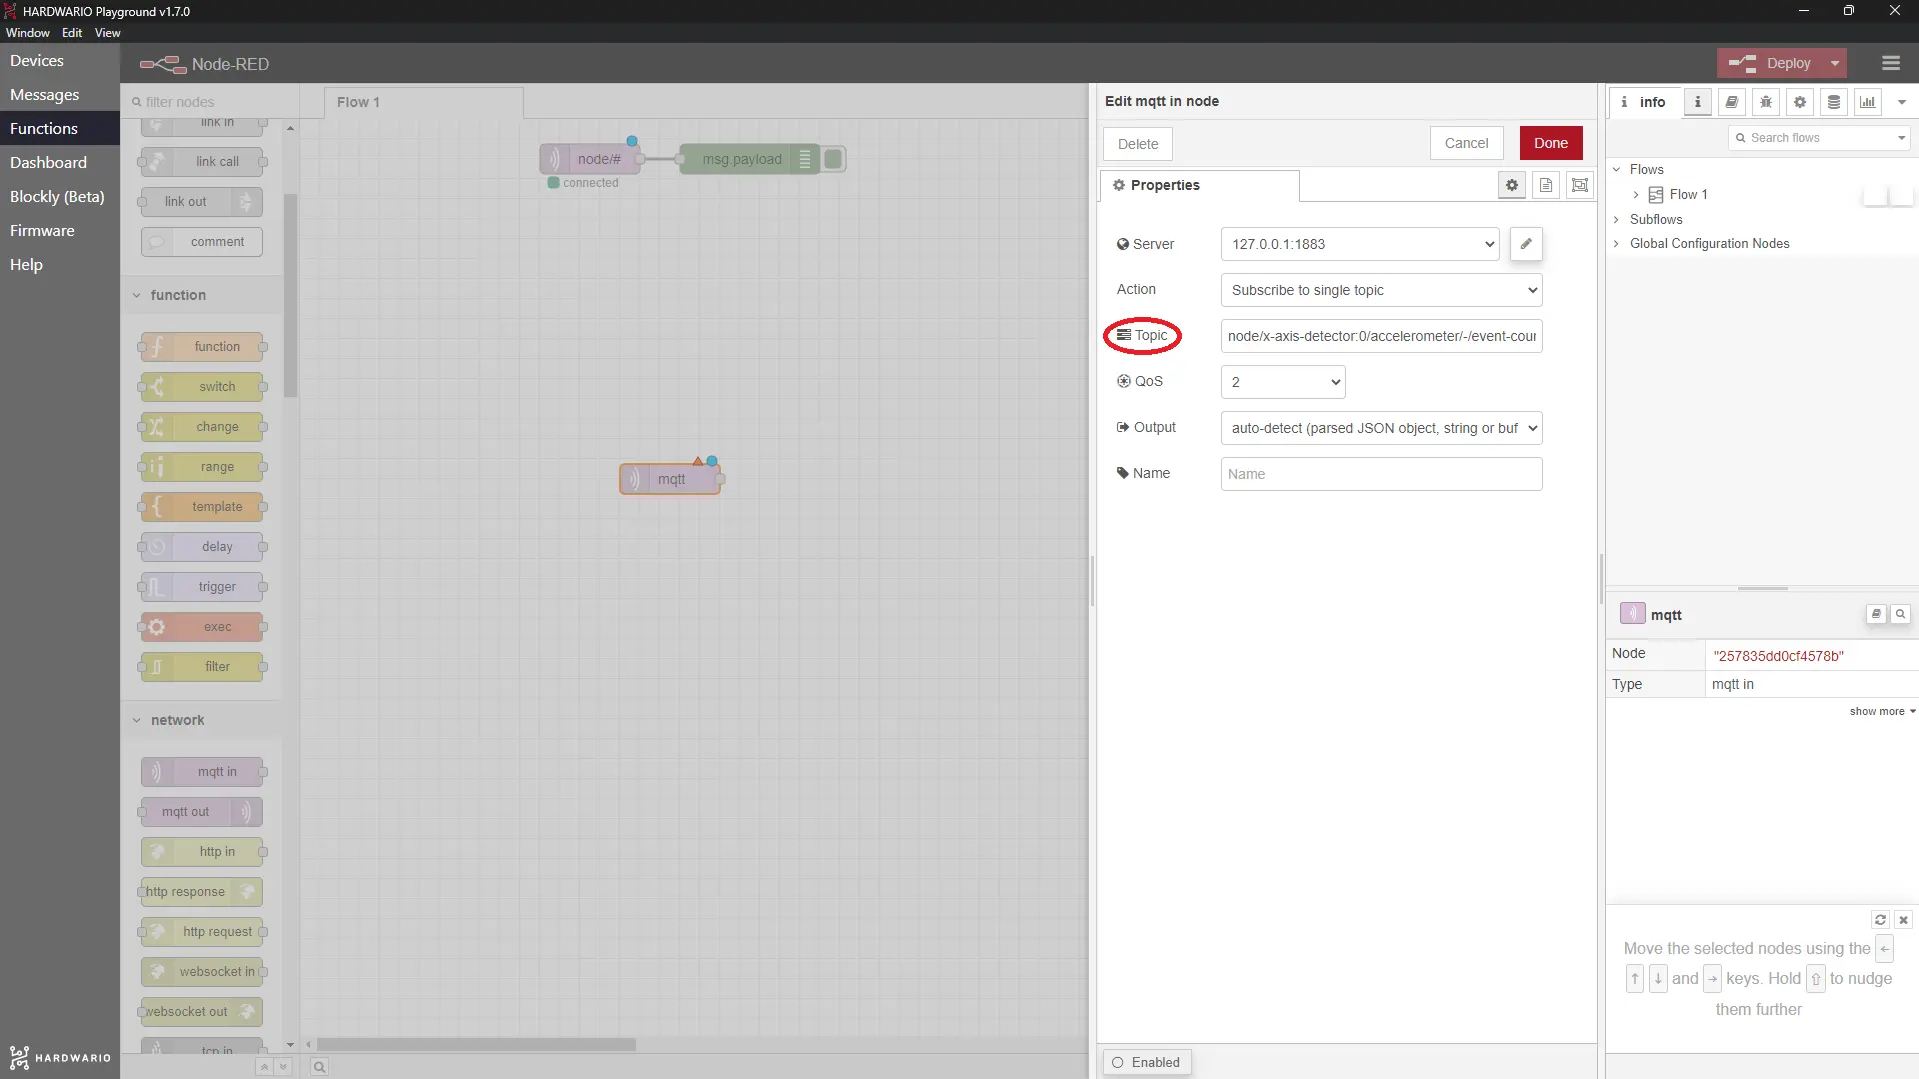
Confirm with Done.
Set up the random draw
- You program the random draw with a little JavaScript. Don't worry, we'll help you. First, place a function node from the function section next to the MQTT node.
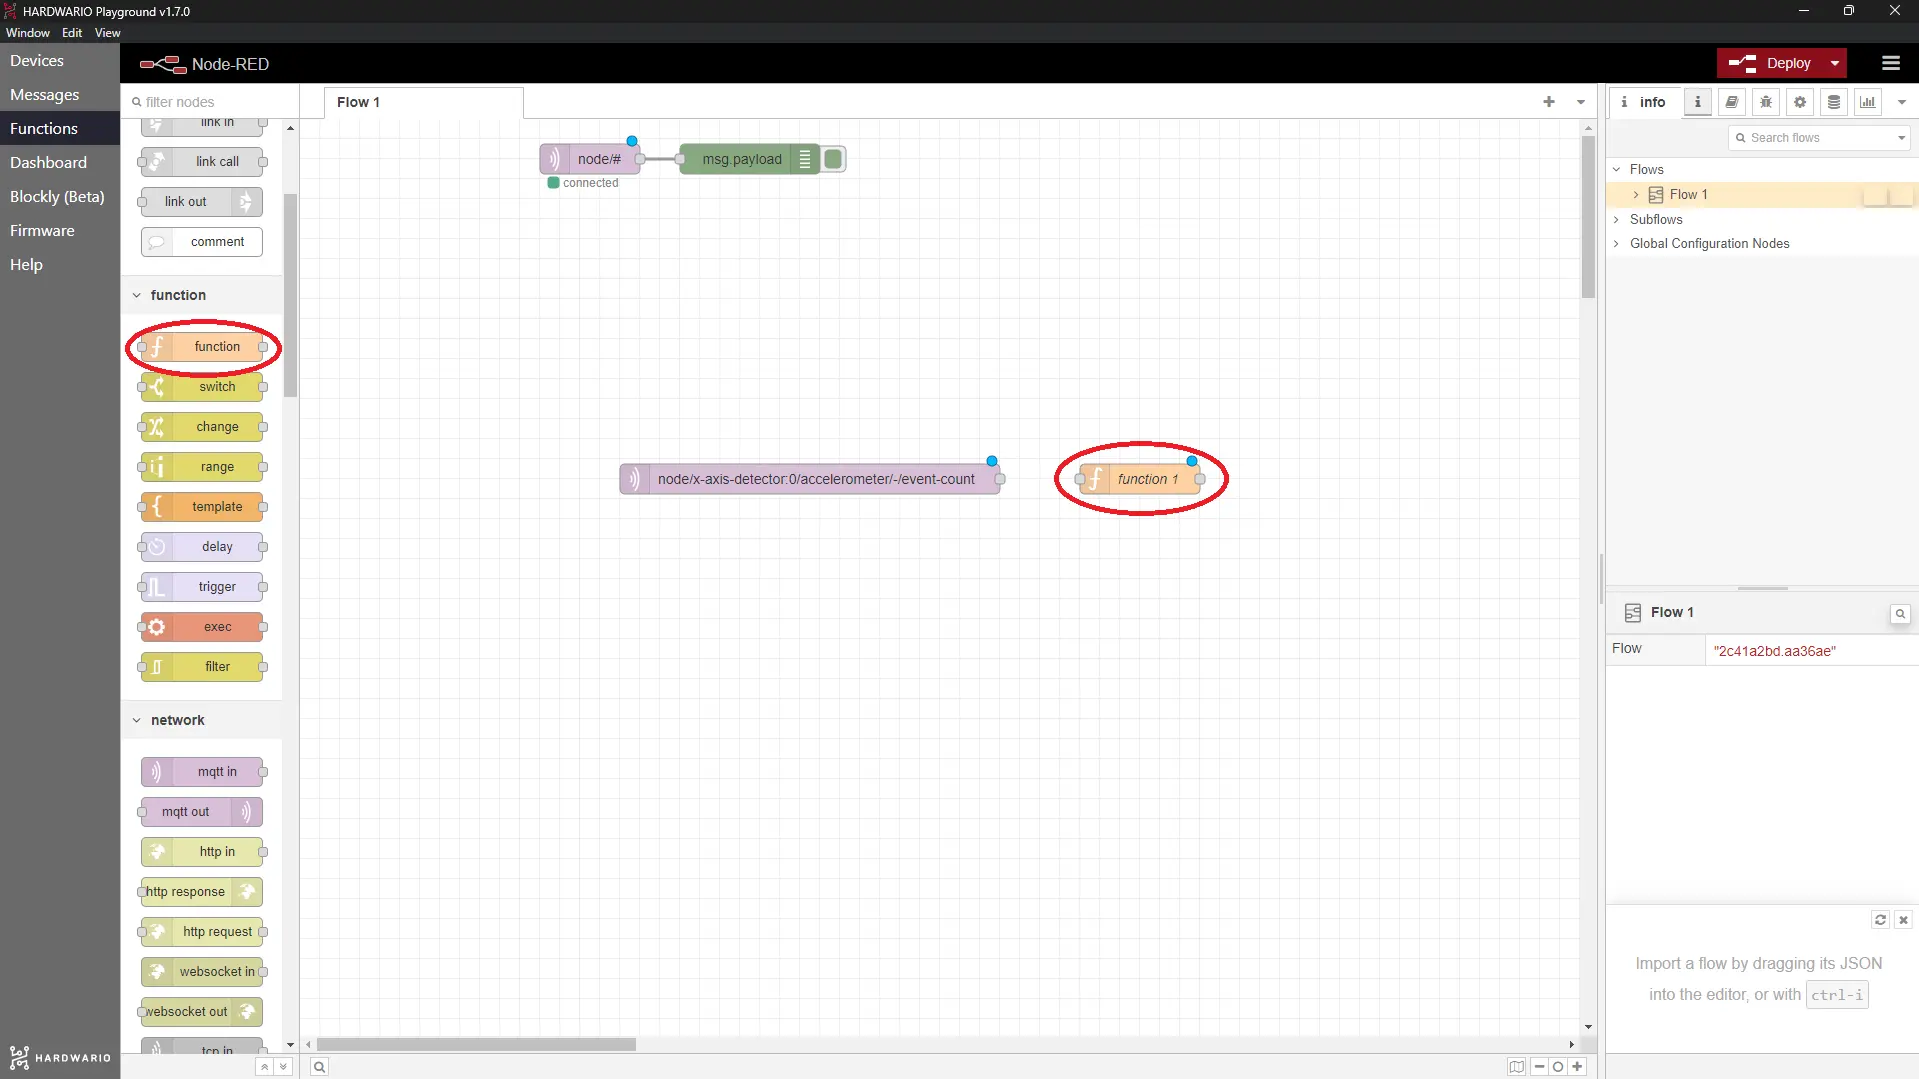
- Double-click the node to open it. In the Name field, give it a name (for example, Random pick). Copy this code into the On Message tab. The code draws one of the participants, each with the same chance.
var rand = Math.floor(Math.random() * flow.get("numberOfContestants"));
msg.payload = flow.get("contestantArr")[rand];
return msg;
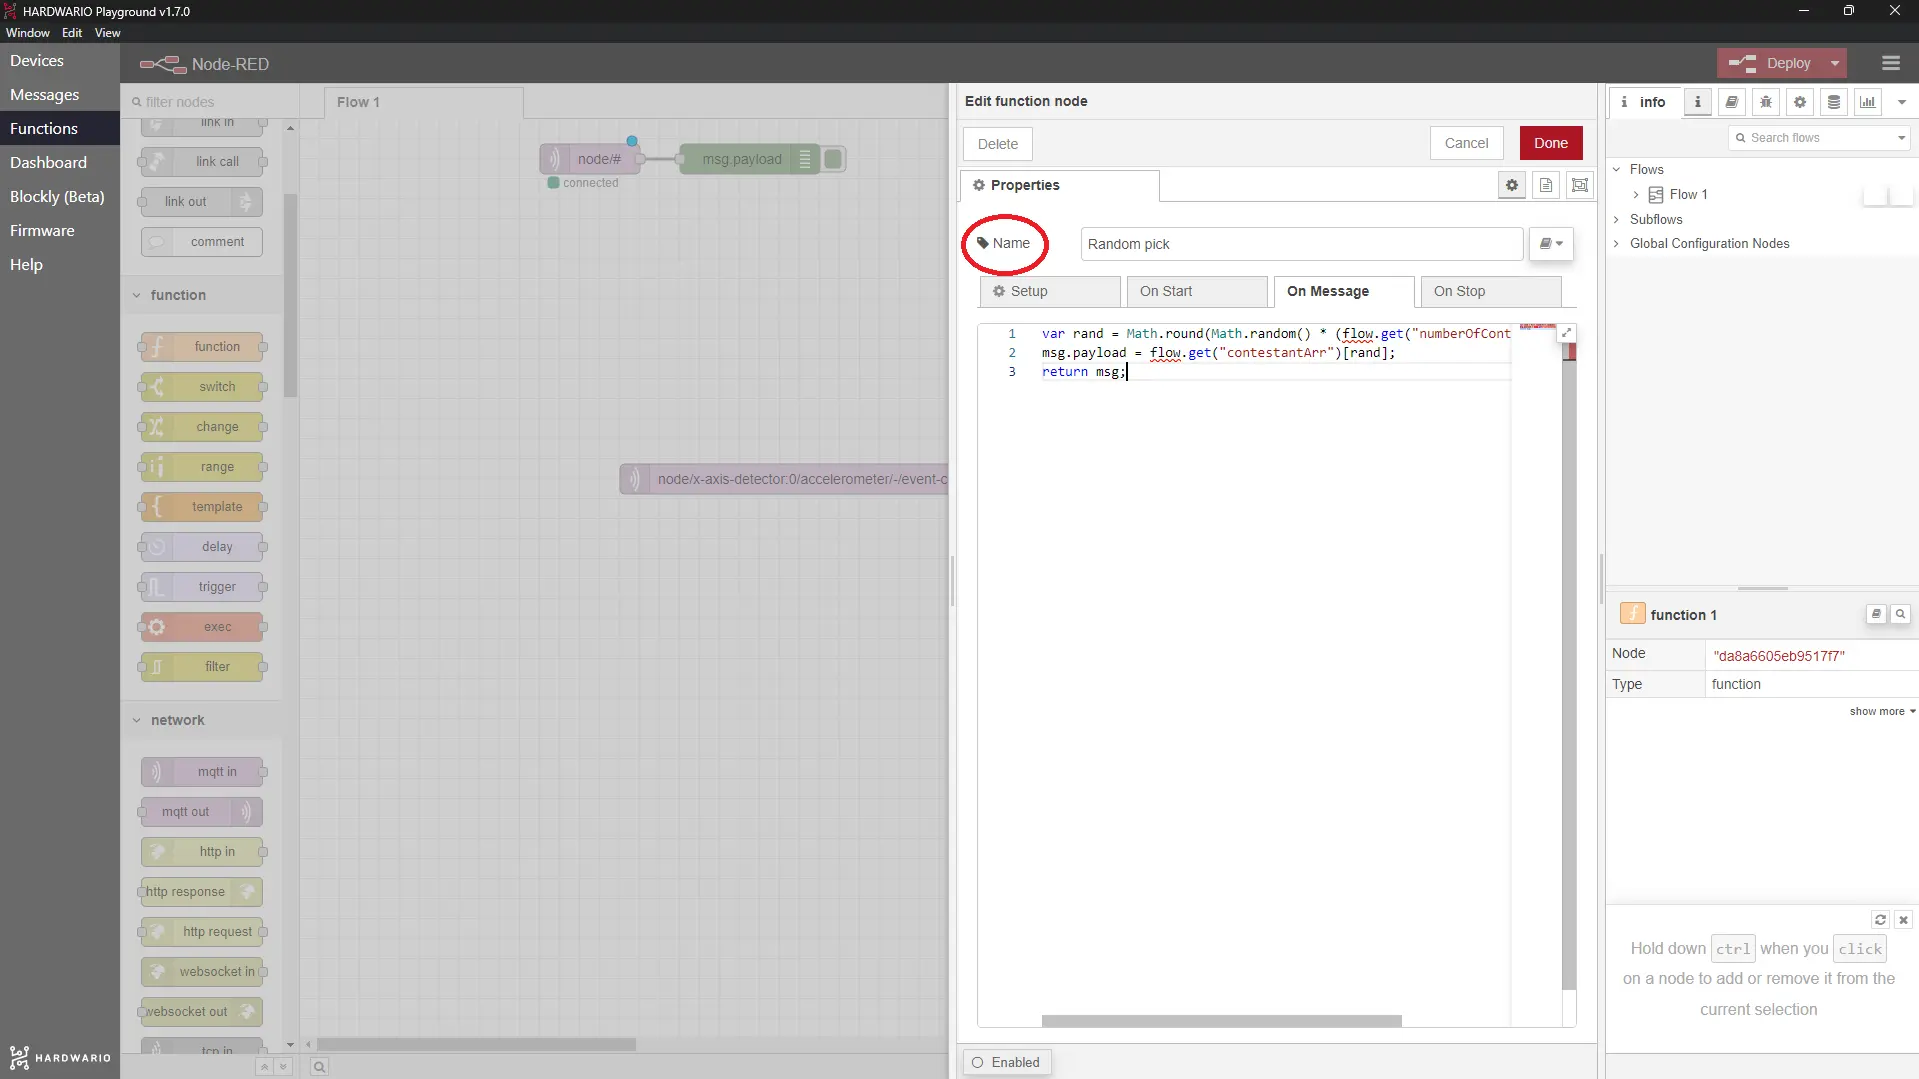
Confirm with Done.
- Next to the Random pick node, add one more node: delay (you'll find it in the function section too). It holds the answer back for a moment and builds up the suspense. Boo! 😲
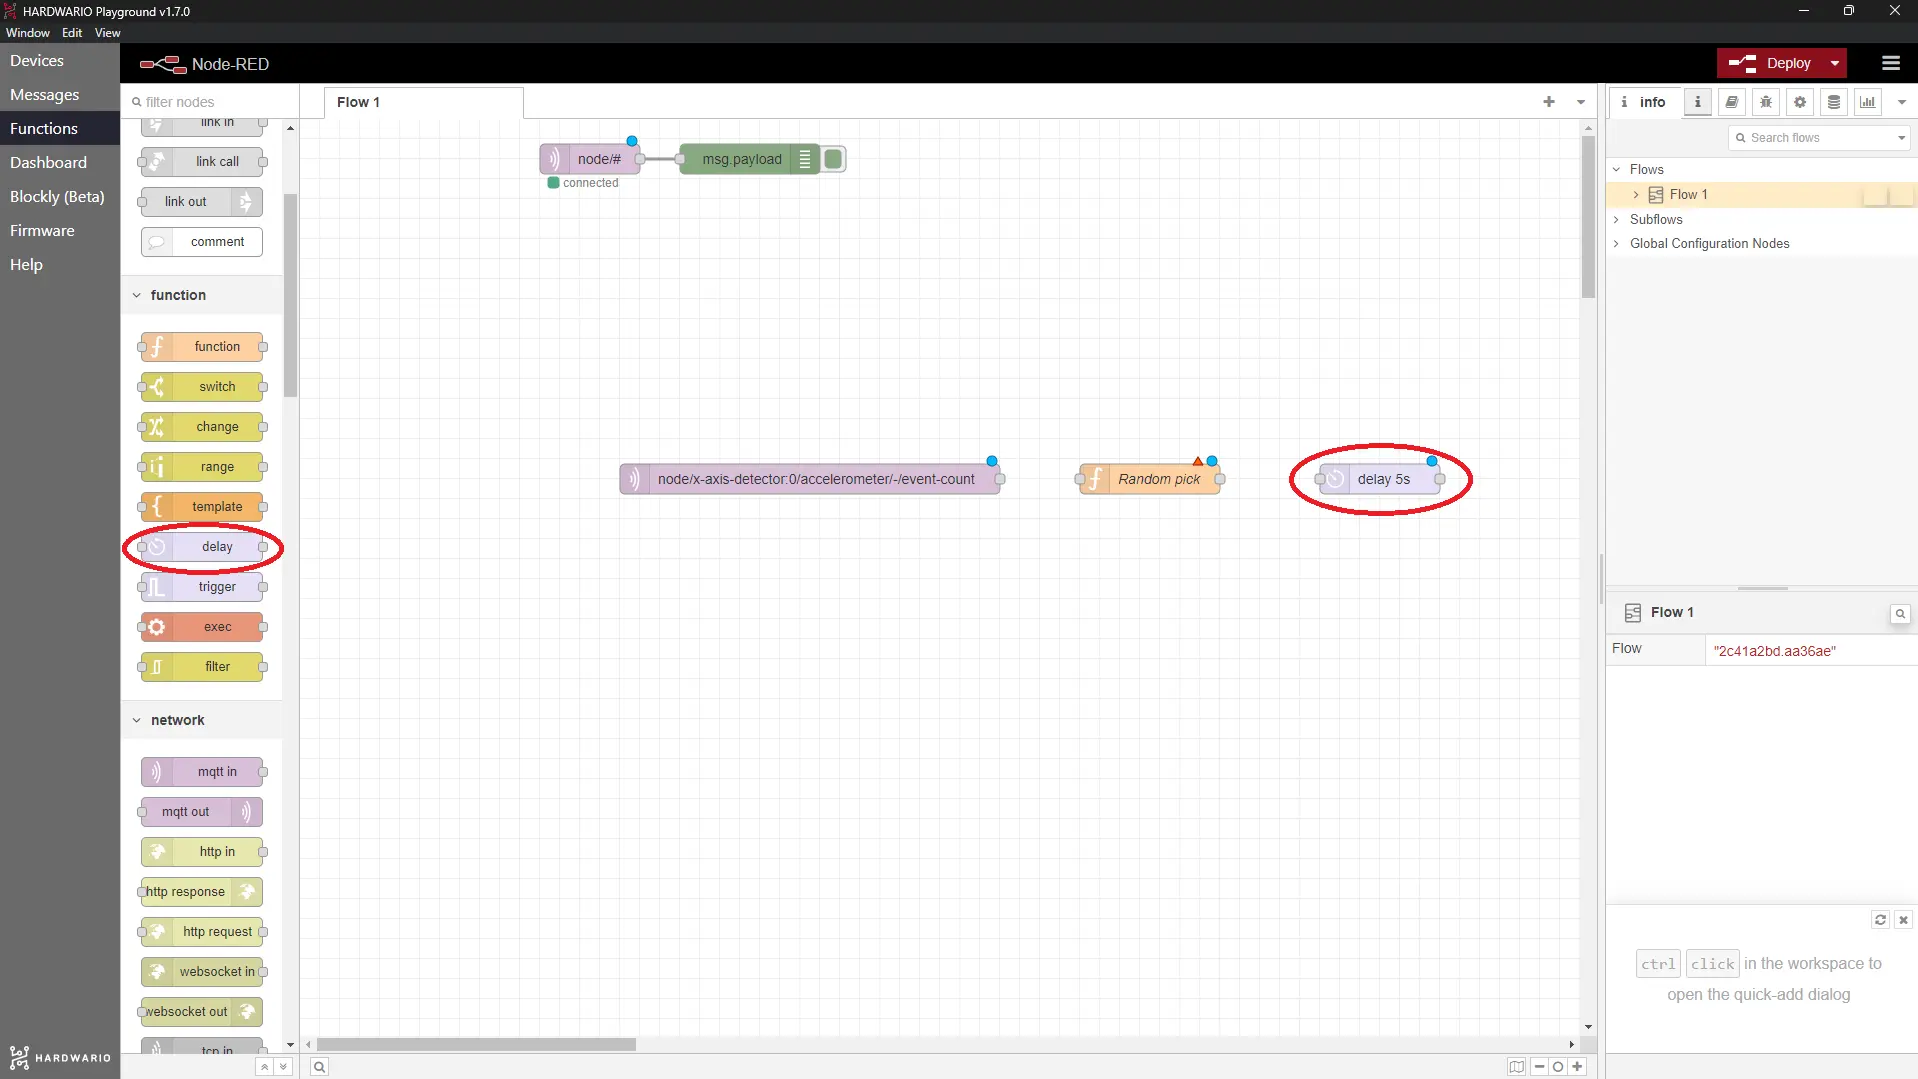
- To make the draw even more unpredictable, set a random delay in the node: click random delay and choose a time between 2 and 4 seconds. That's just right to keep everyone on the edge of their seats.
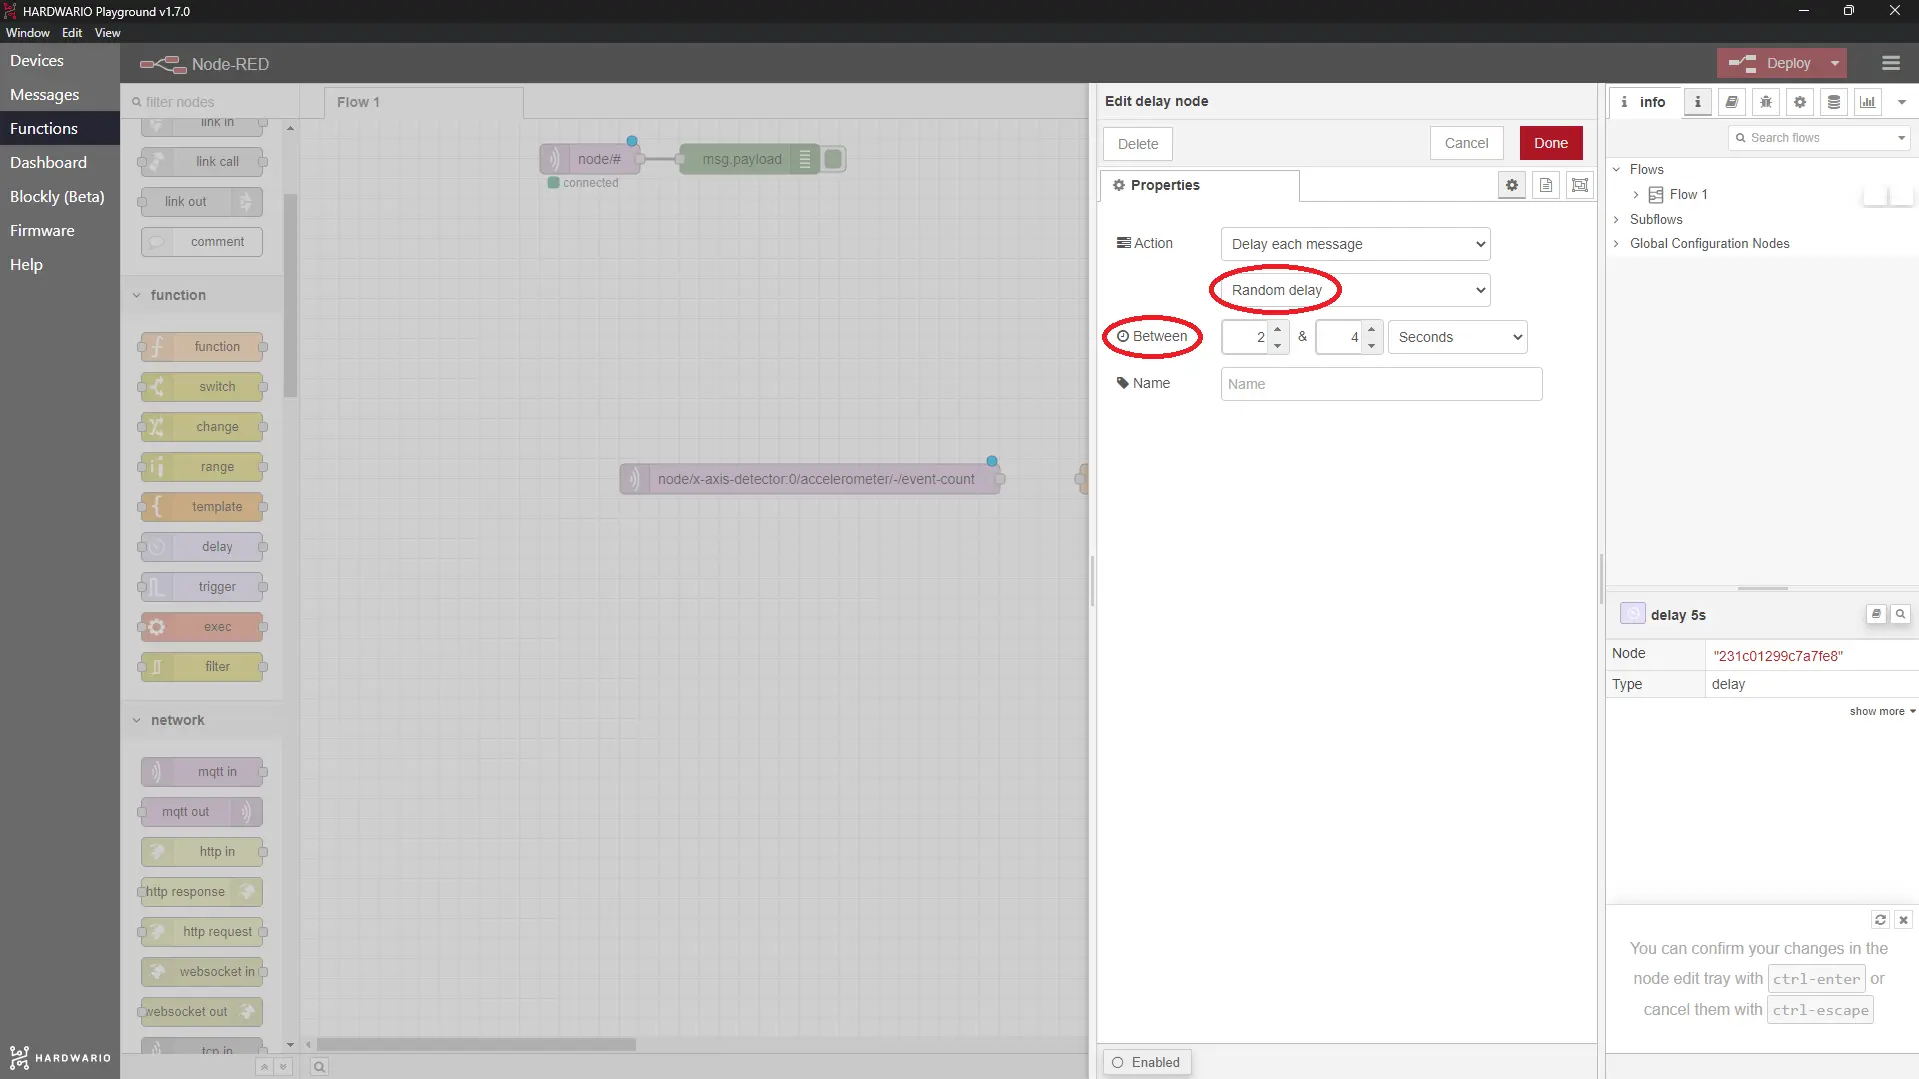
Confirm with Done.
- Above all these nodes, place a node that sets the message shown while the draw is running. Use a change node from the same section.
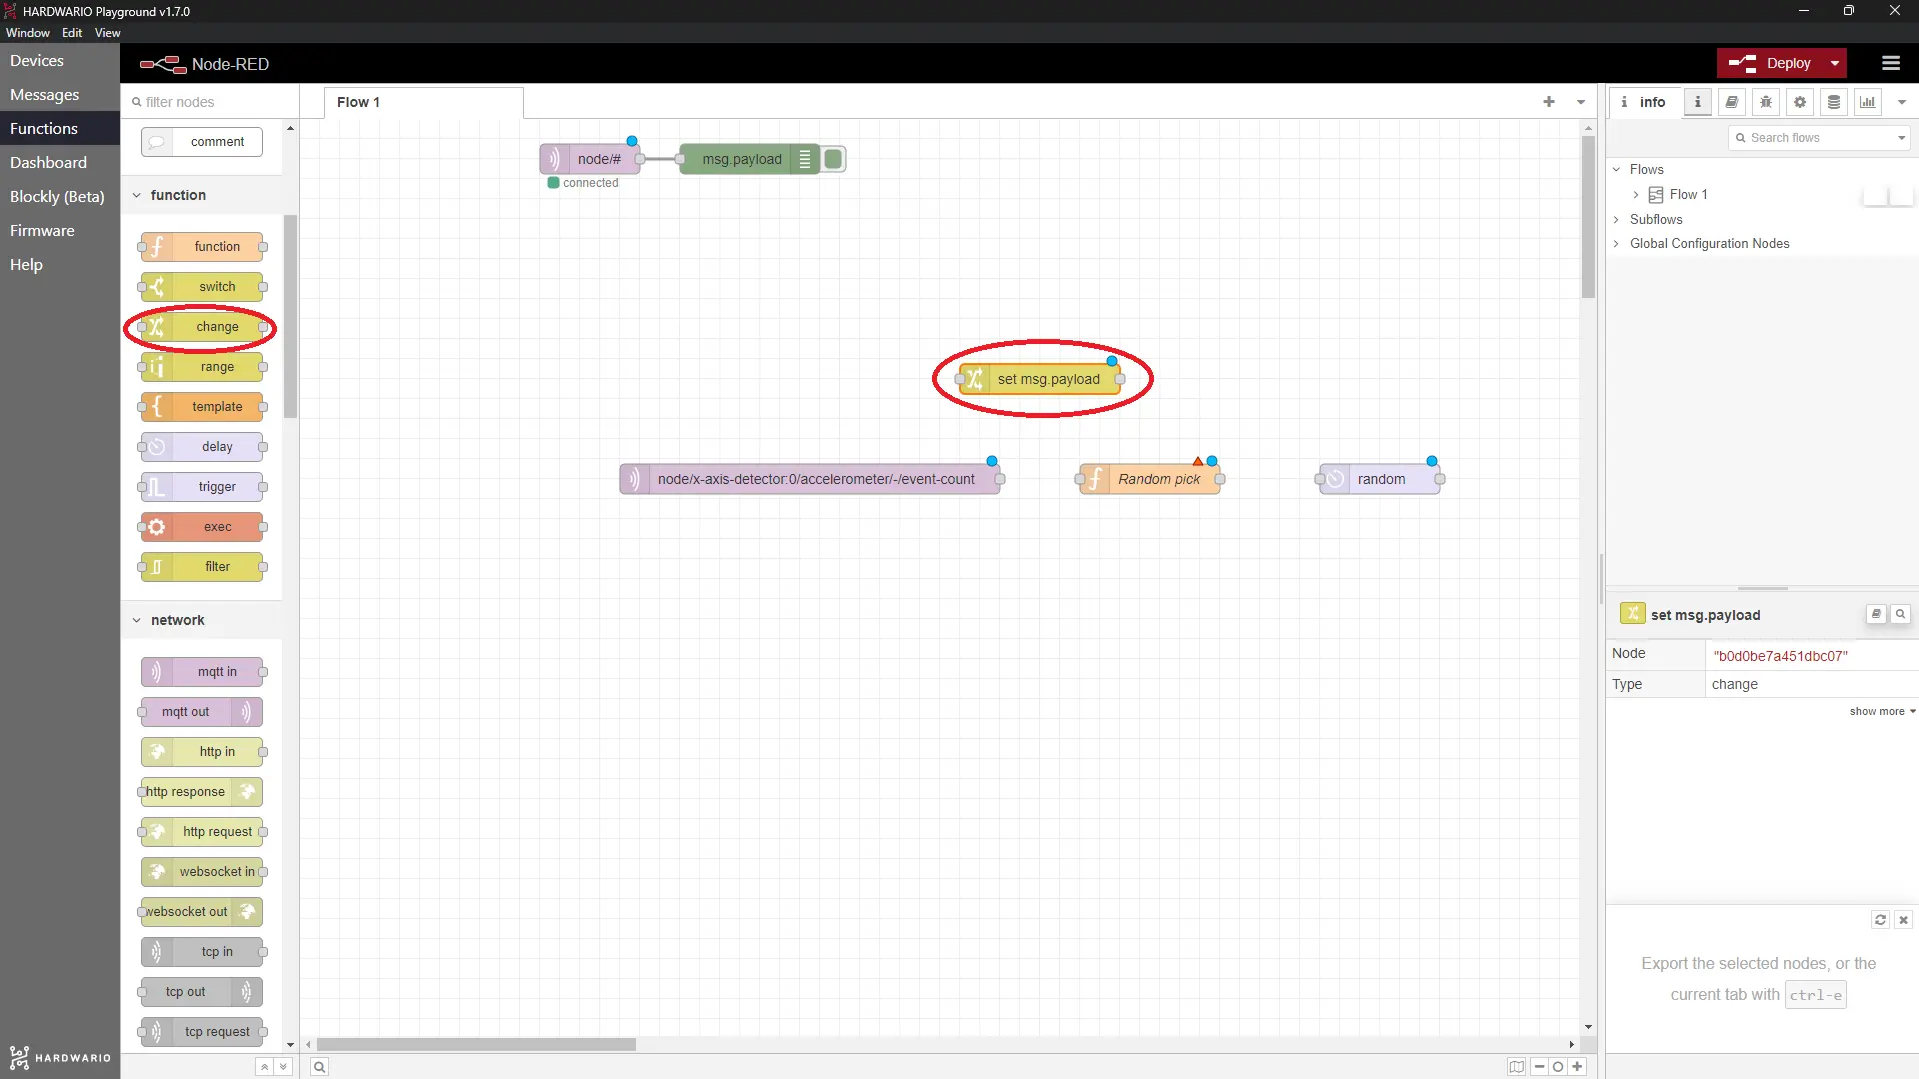
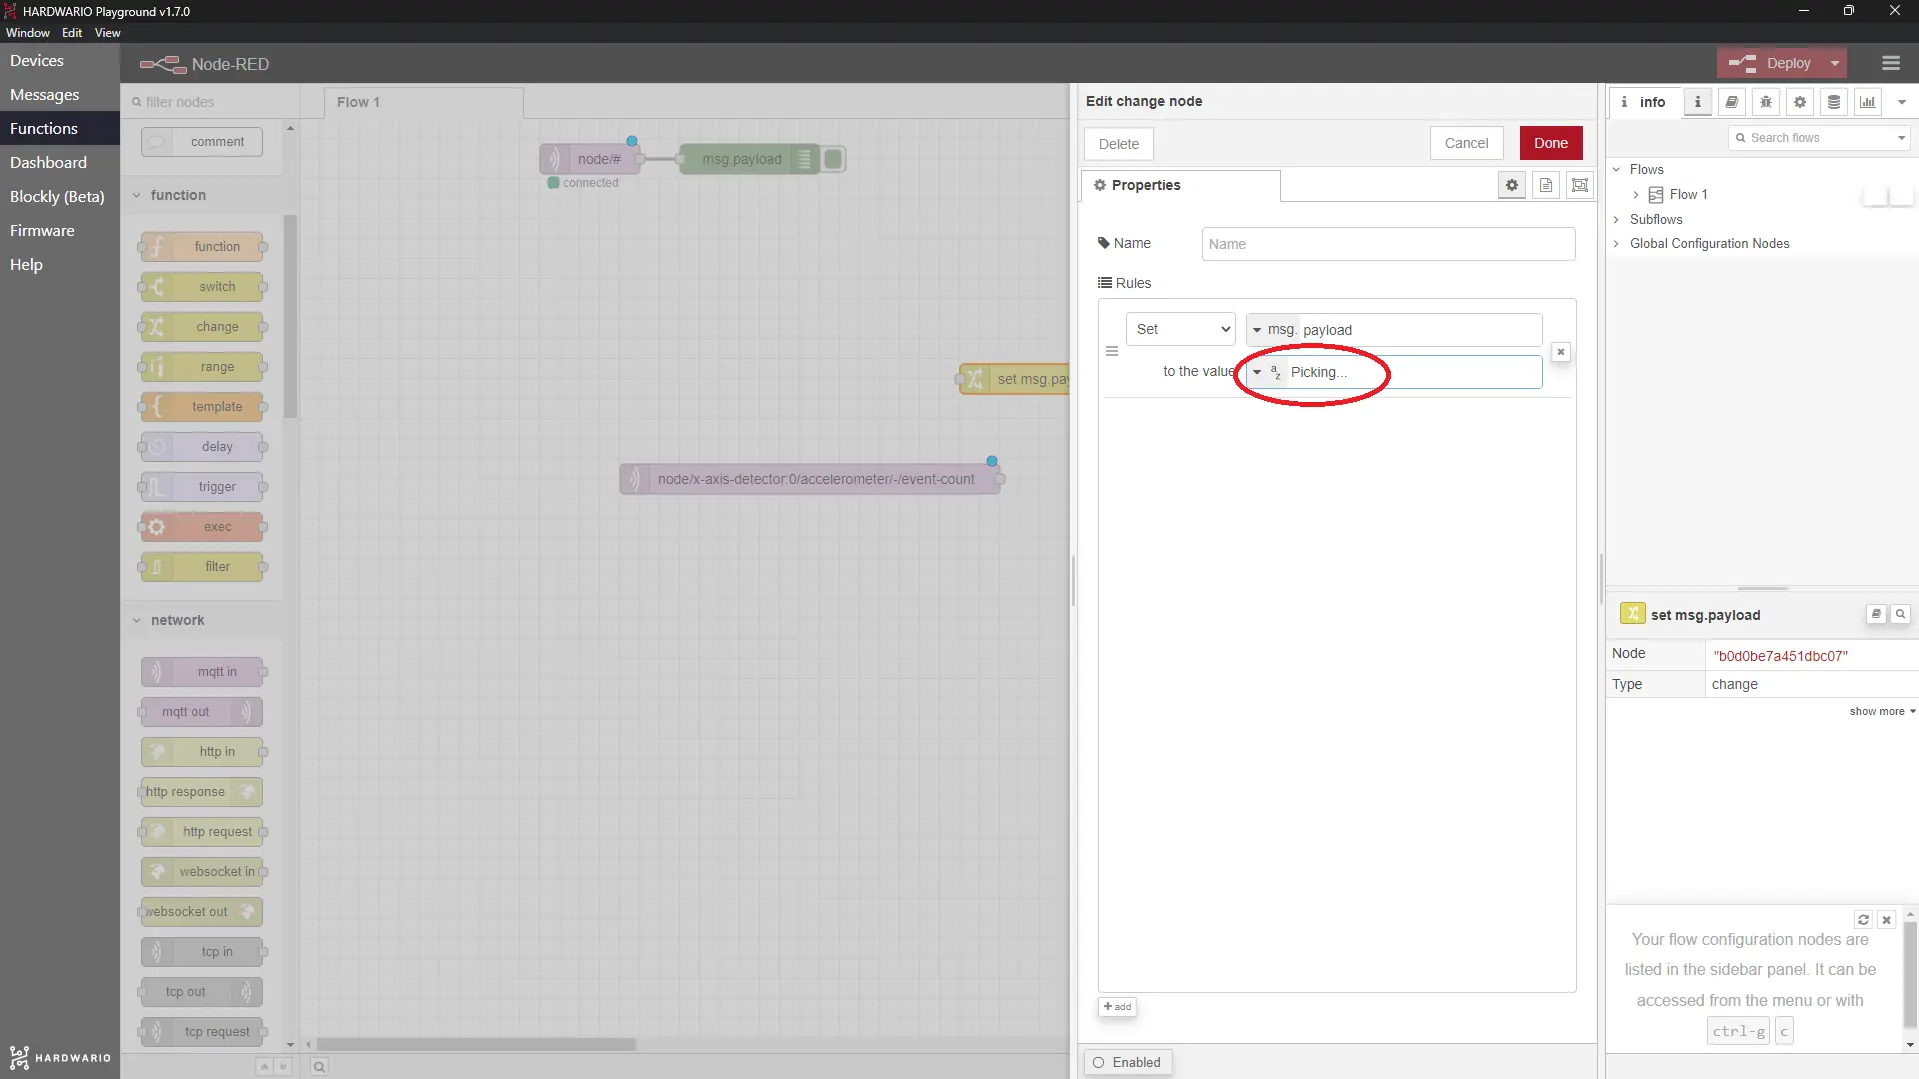
- Double-click the node to open it and type your message, for example: Picking…
Set up the participants
- Your draw needs a button that clears the table, so you can keep playing. Below the MQTT node, place a button node, this time from the dashboard section.
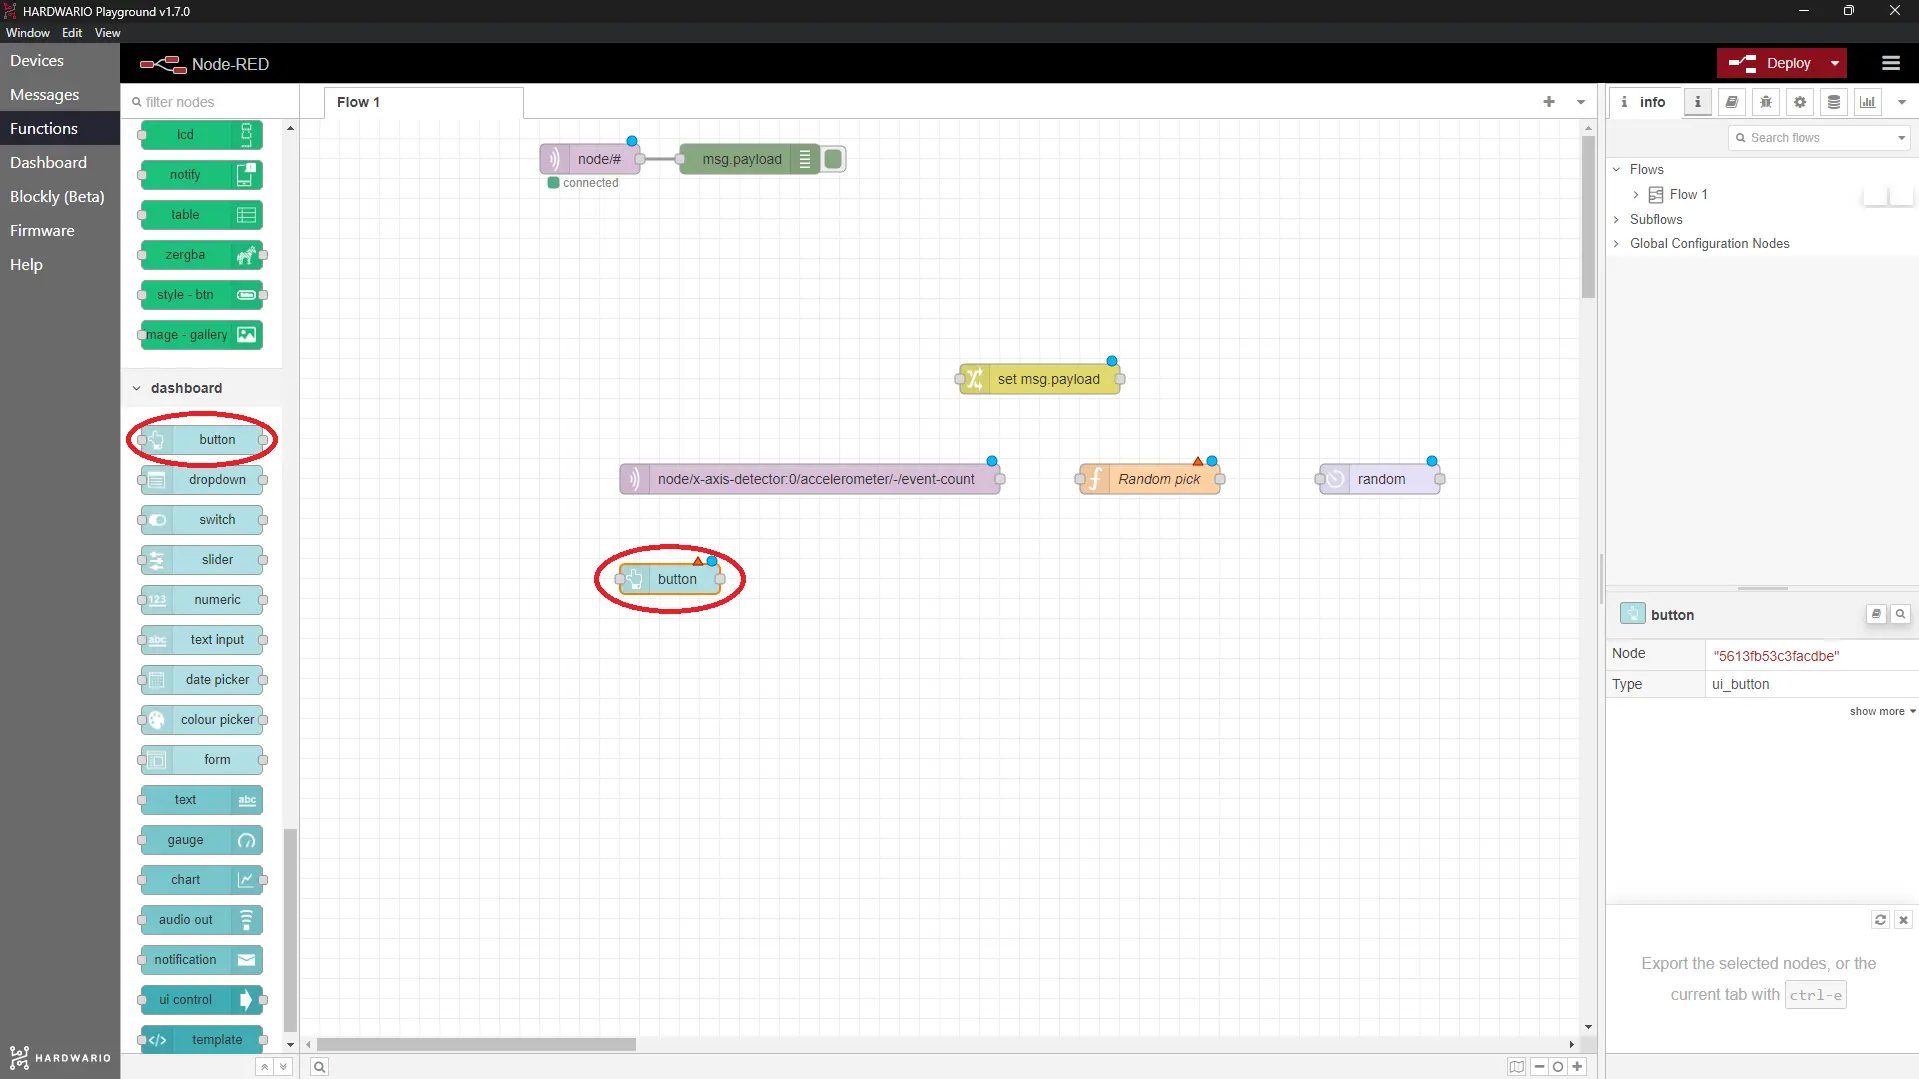
- Double-click the node to open it and type Reset in the Label field.
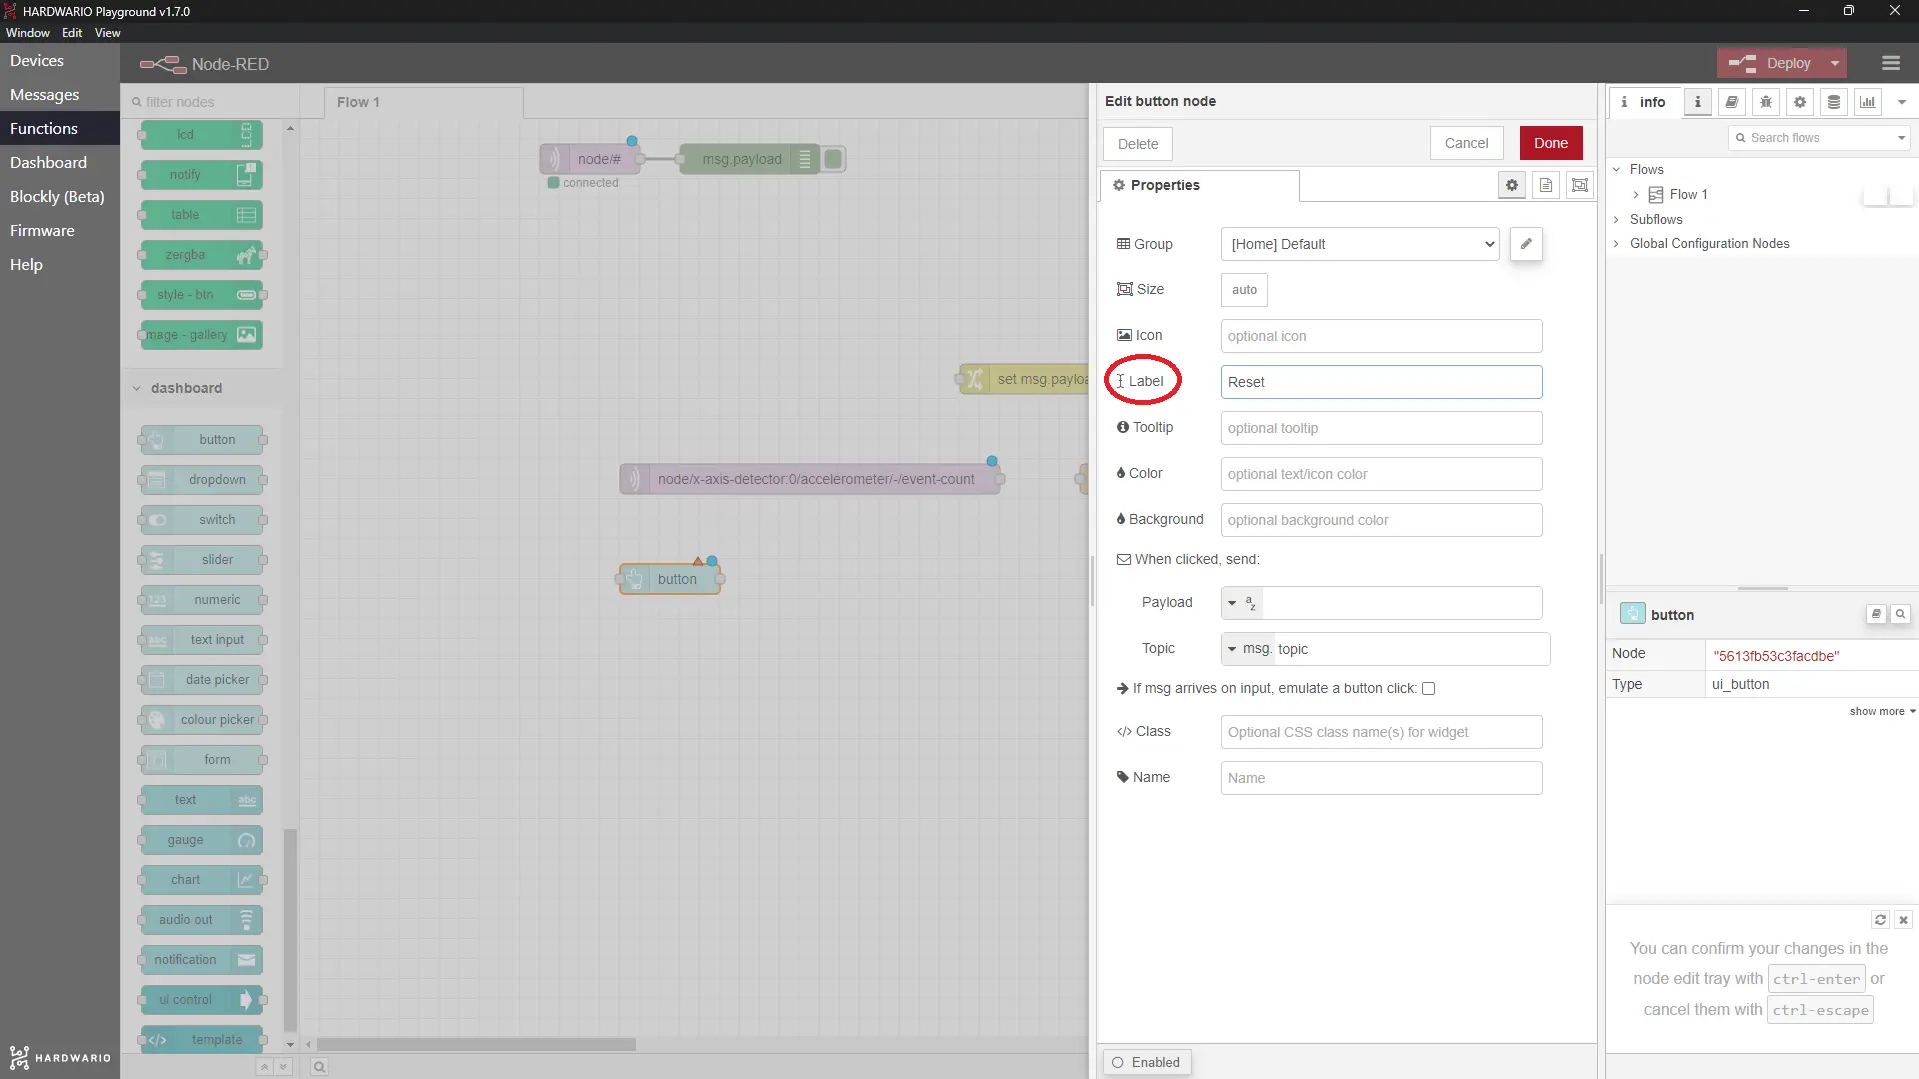
Confirm with Done.
- Let's keep going! Now set up all the friends who will play, anonymously for now. Add them to the workspace as text input nodes from the dashboard section, one node for each player.
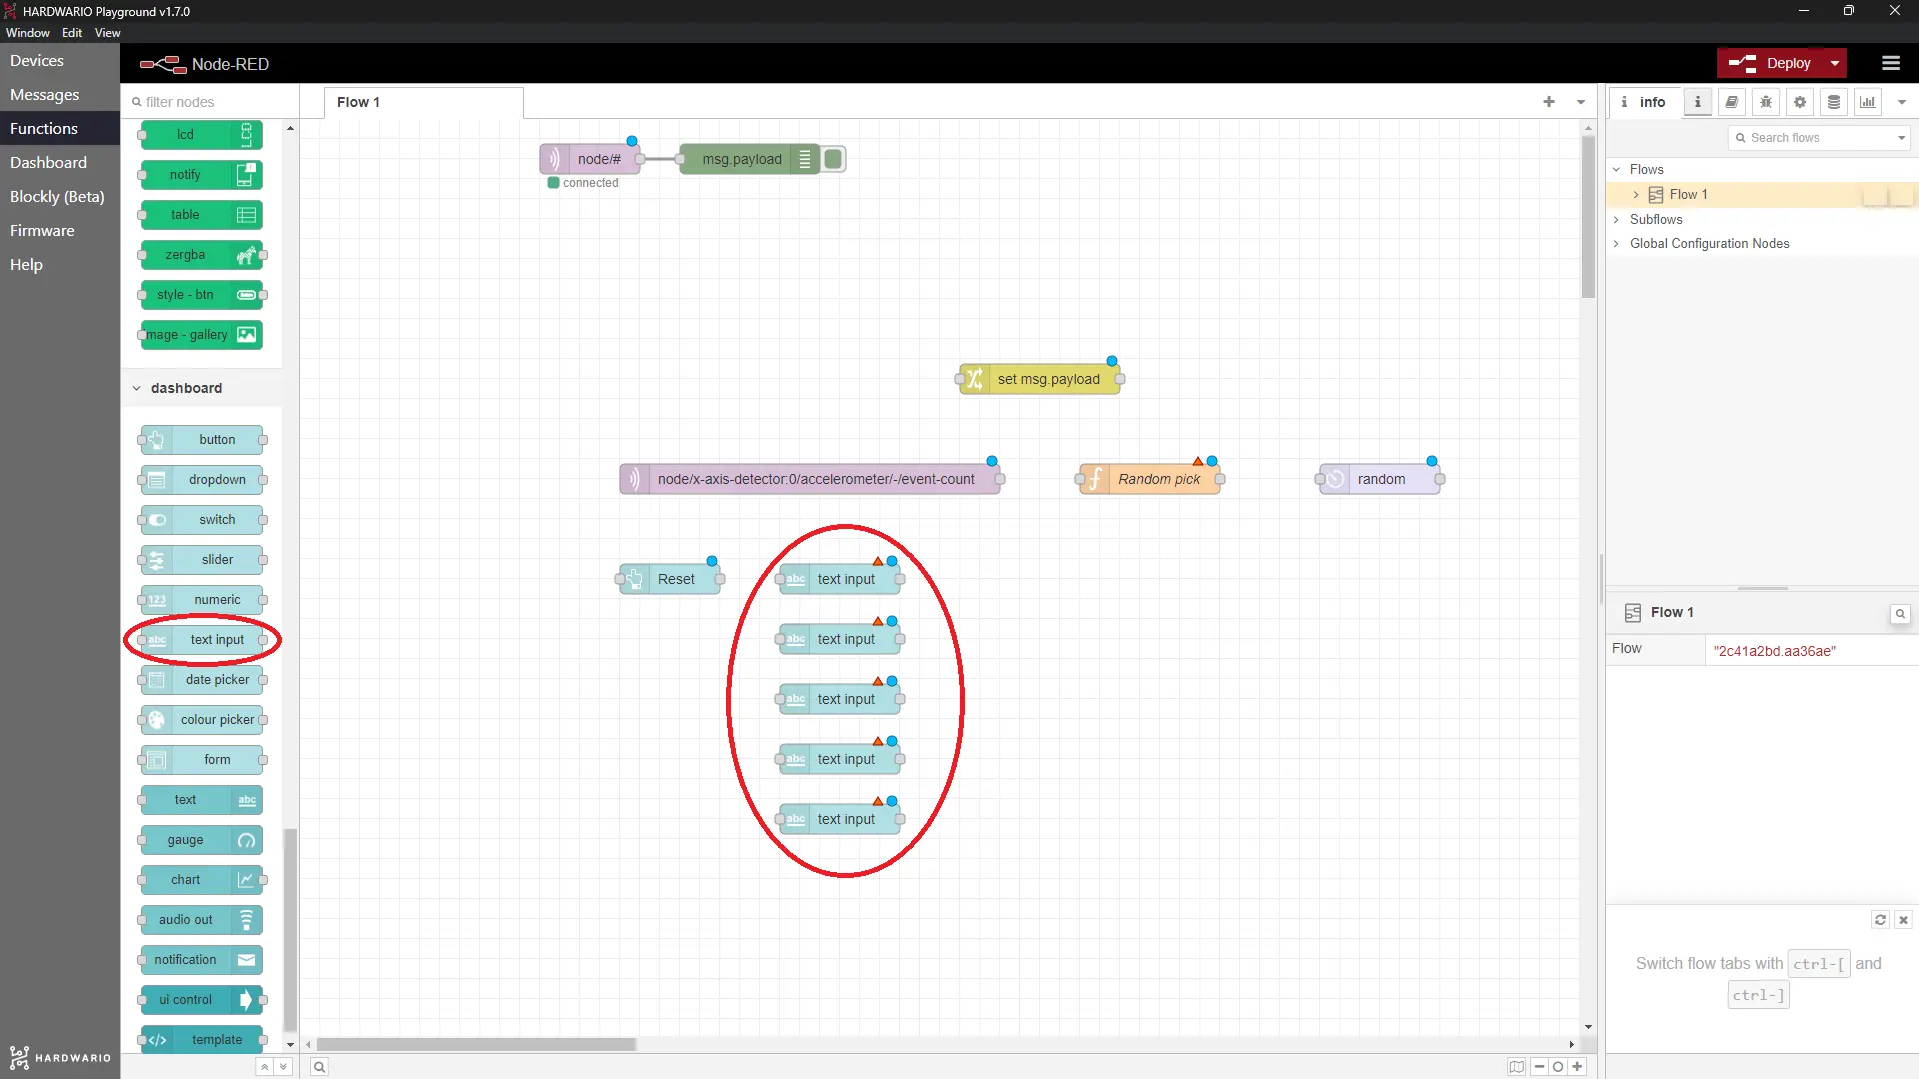
- In each node, set:
- In the Label field, type Participant 1, Participant 2 and so on, according to the number of players.
- In the Delay field, enter 0.
- Uncheck the box just below it, so that the fields really clear when you press Reset.
Set this up in every participant node.
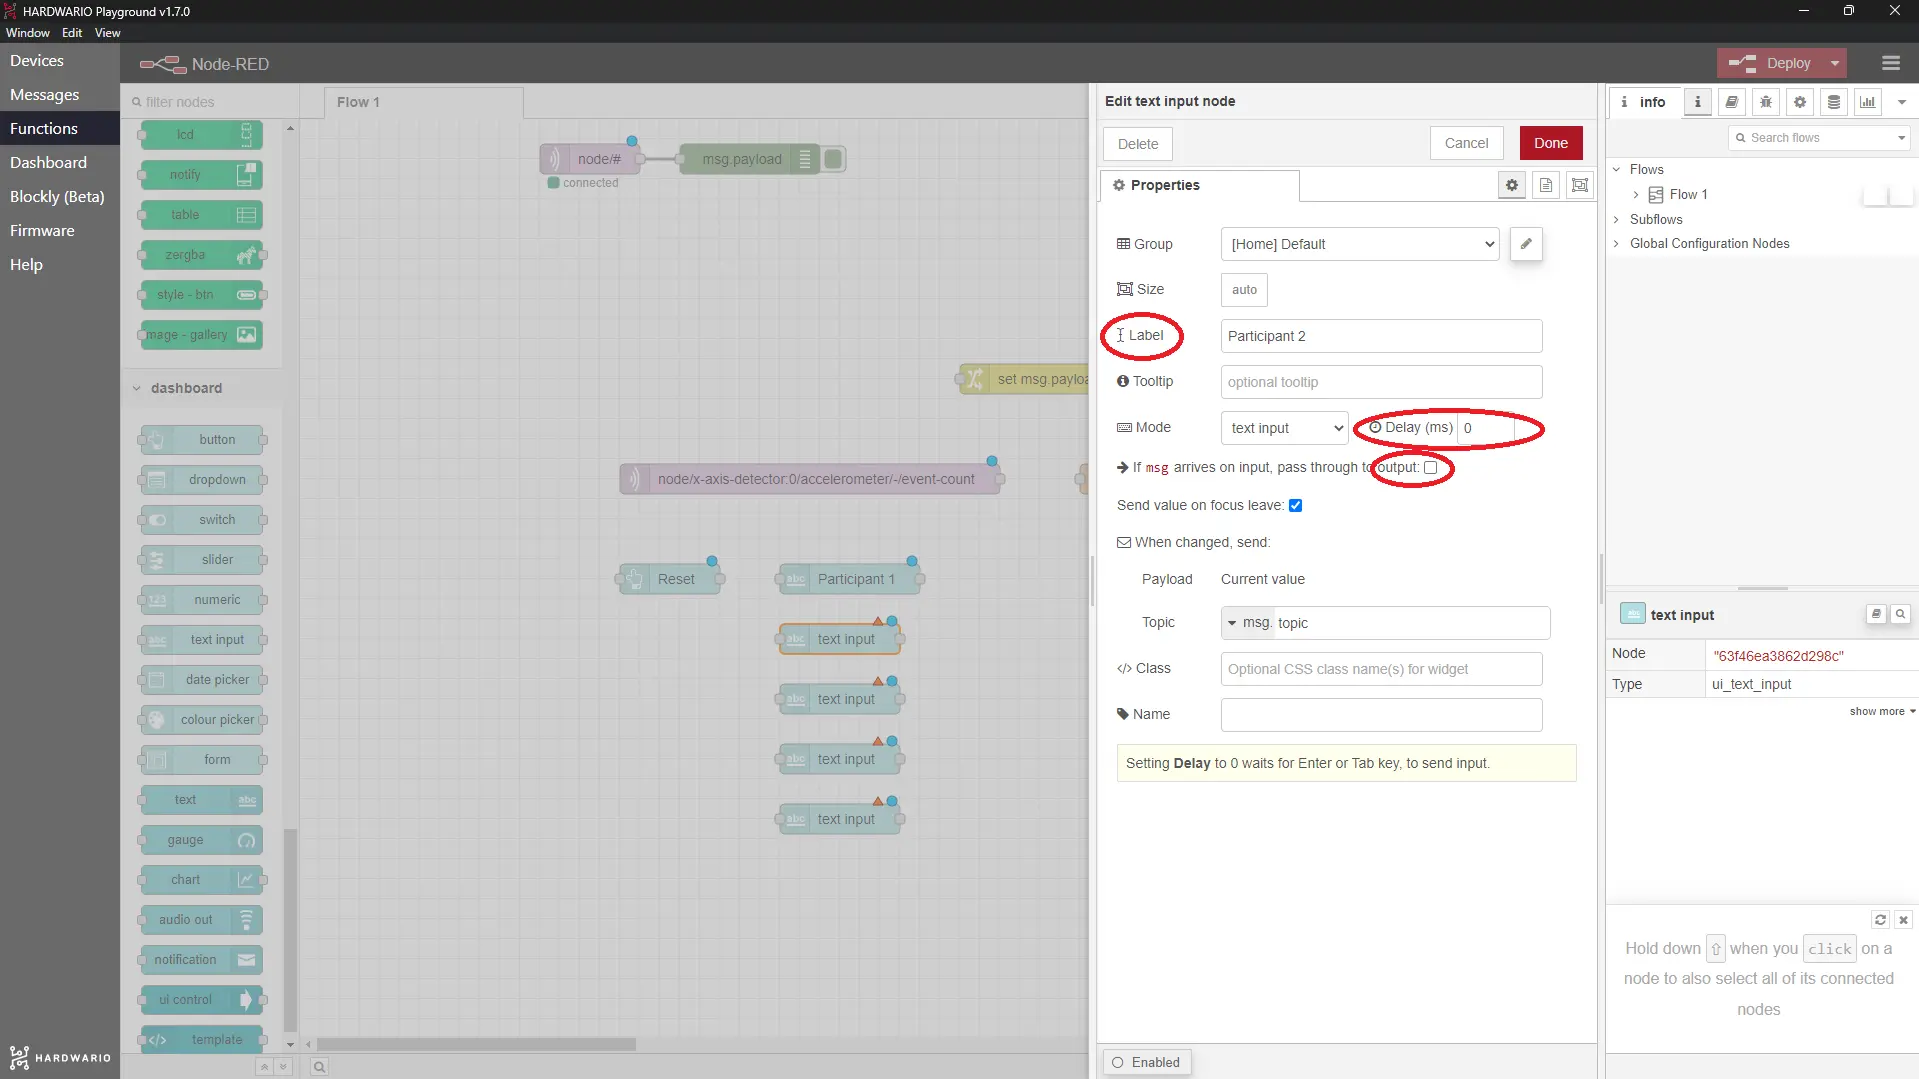
Confirm with Done.
- Next to the participants, add some more JavaScript. It puts the participants' names in the right places. Again, you add it as a function node.
- Double-click the node to open its settings. Type a name for the node in the Name field and copy this code into the On Message tab:
var contestants = flow.get("numberOfContestants") || 0;
var contestantArray = flow.get("contestantArr") || [msg.payload];
contestants++;
flow.set("numberOfContestants", contestants);

if(contestants != 1)
{
    contestantArray.push(msg.payload);
}

flow.set("contestantArr", contestantArray);
return msg;
Make sure the node really has just one output (the Outputs field on the Setup tab). ❗
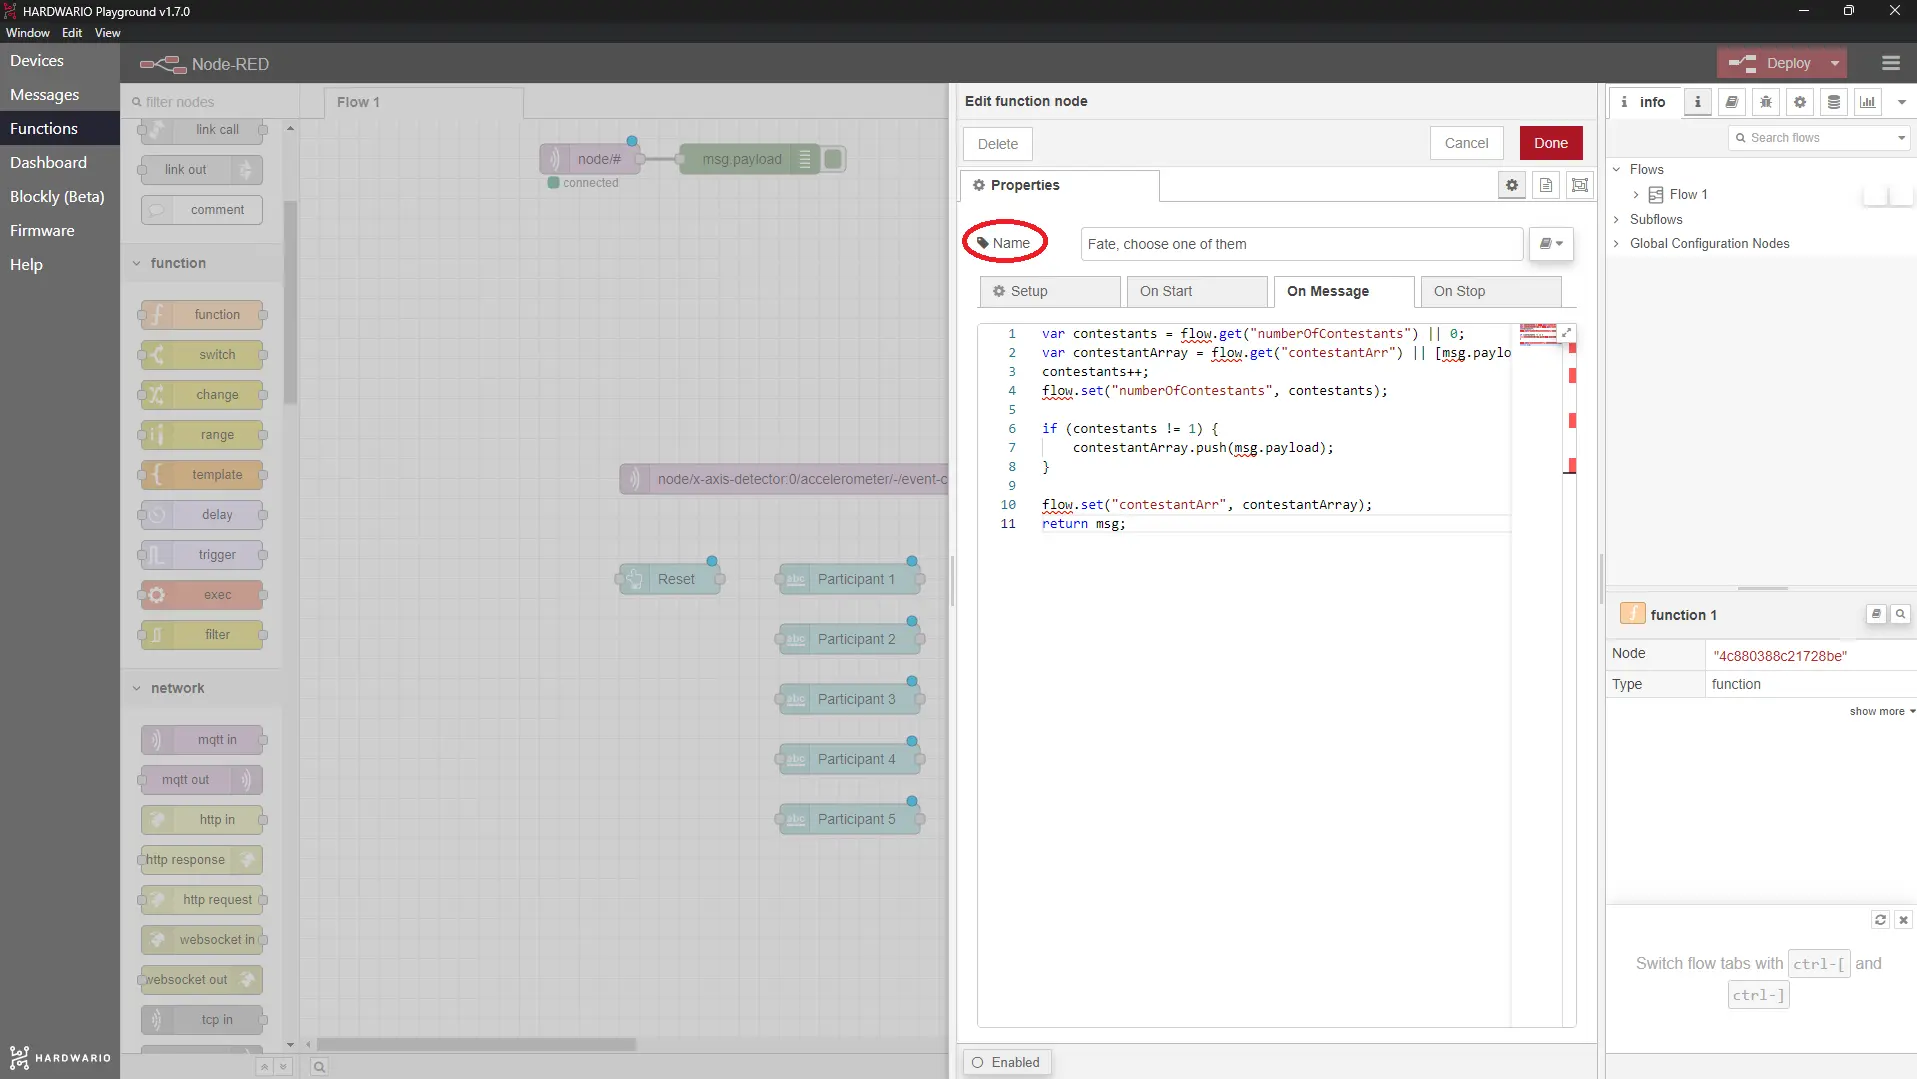
Confirm with Done.
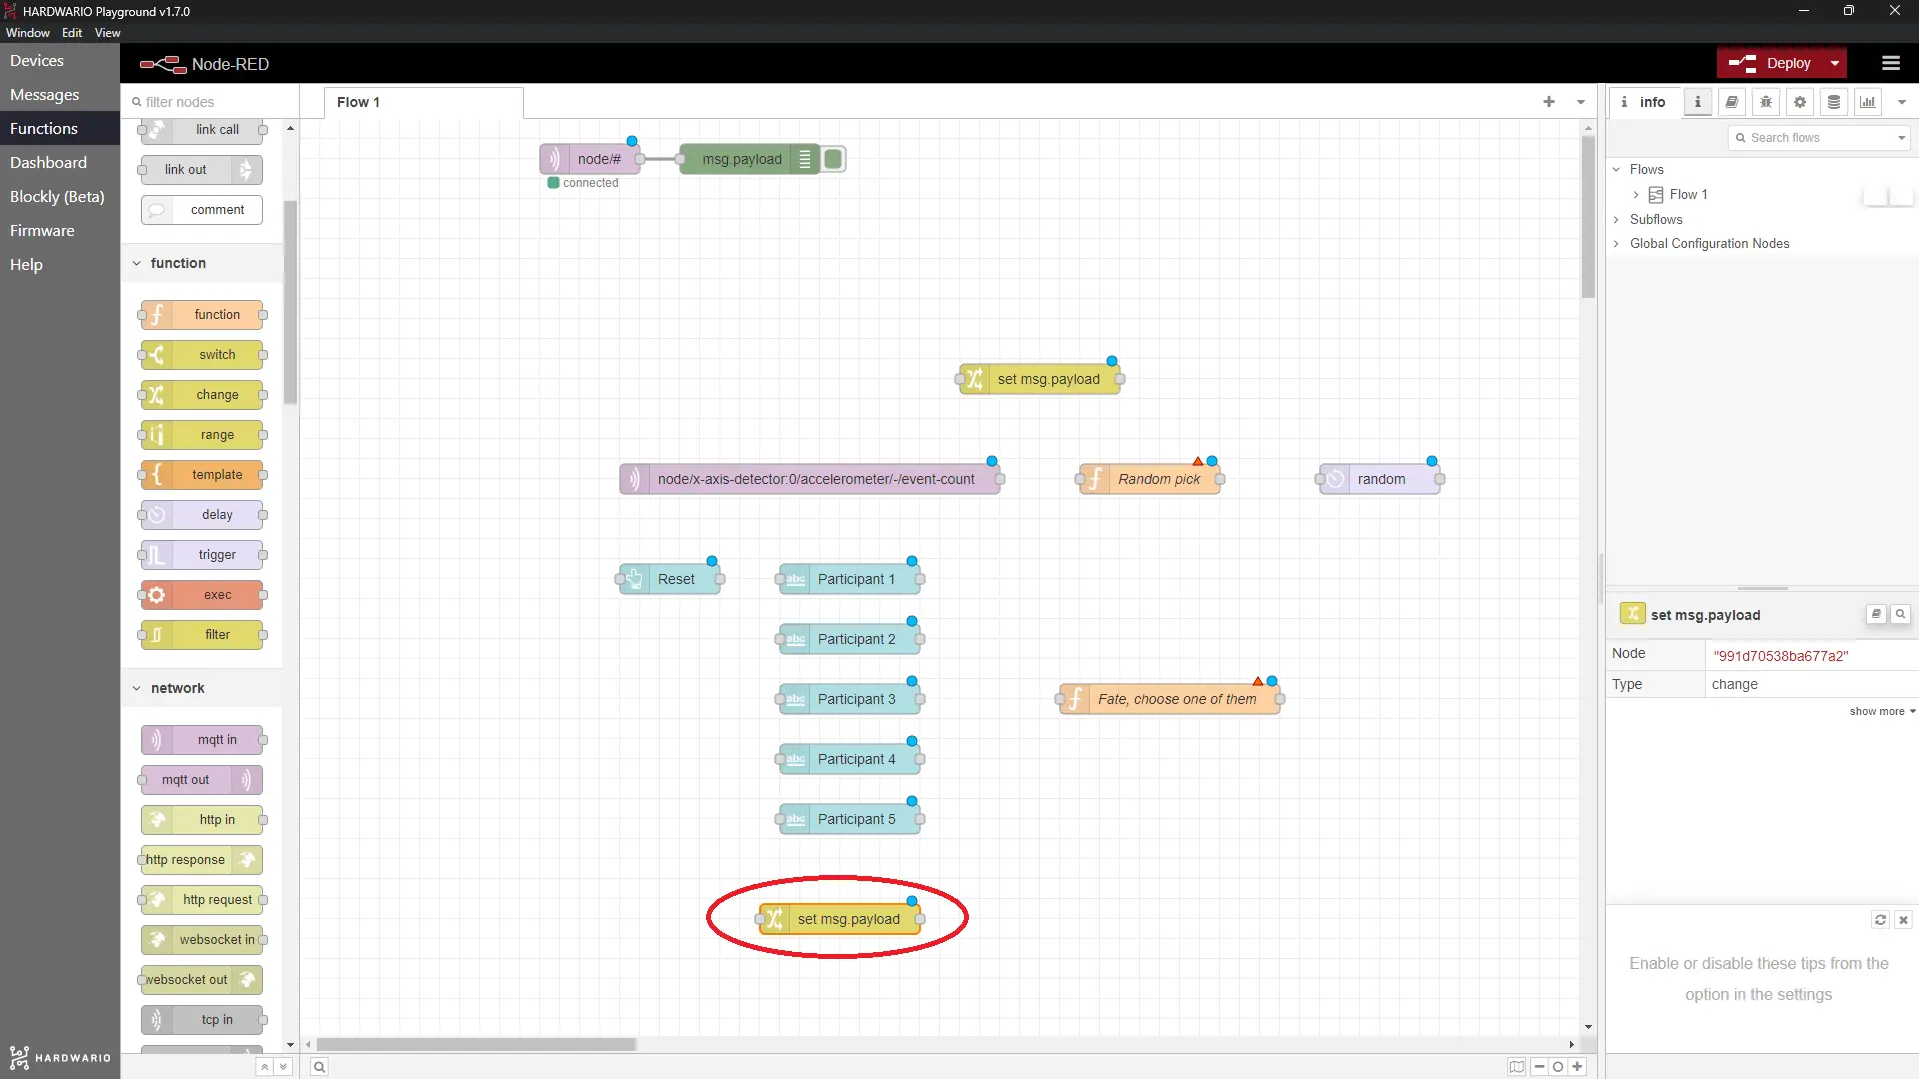
- Don't worry, we're almost there. 🙌 Place a change node on the workspace. It puts everything back the way it was when you reset the game. 🖖
- In this node's settings, fill in two Rules as shown in the picture. The first one is Delete | flow | contestantArr. You add the next rule with the small + Add button below the field. In this second rule, set Delete | flow | numberOfContestants.
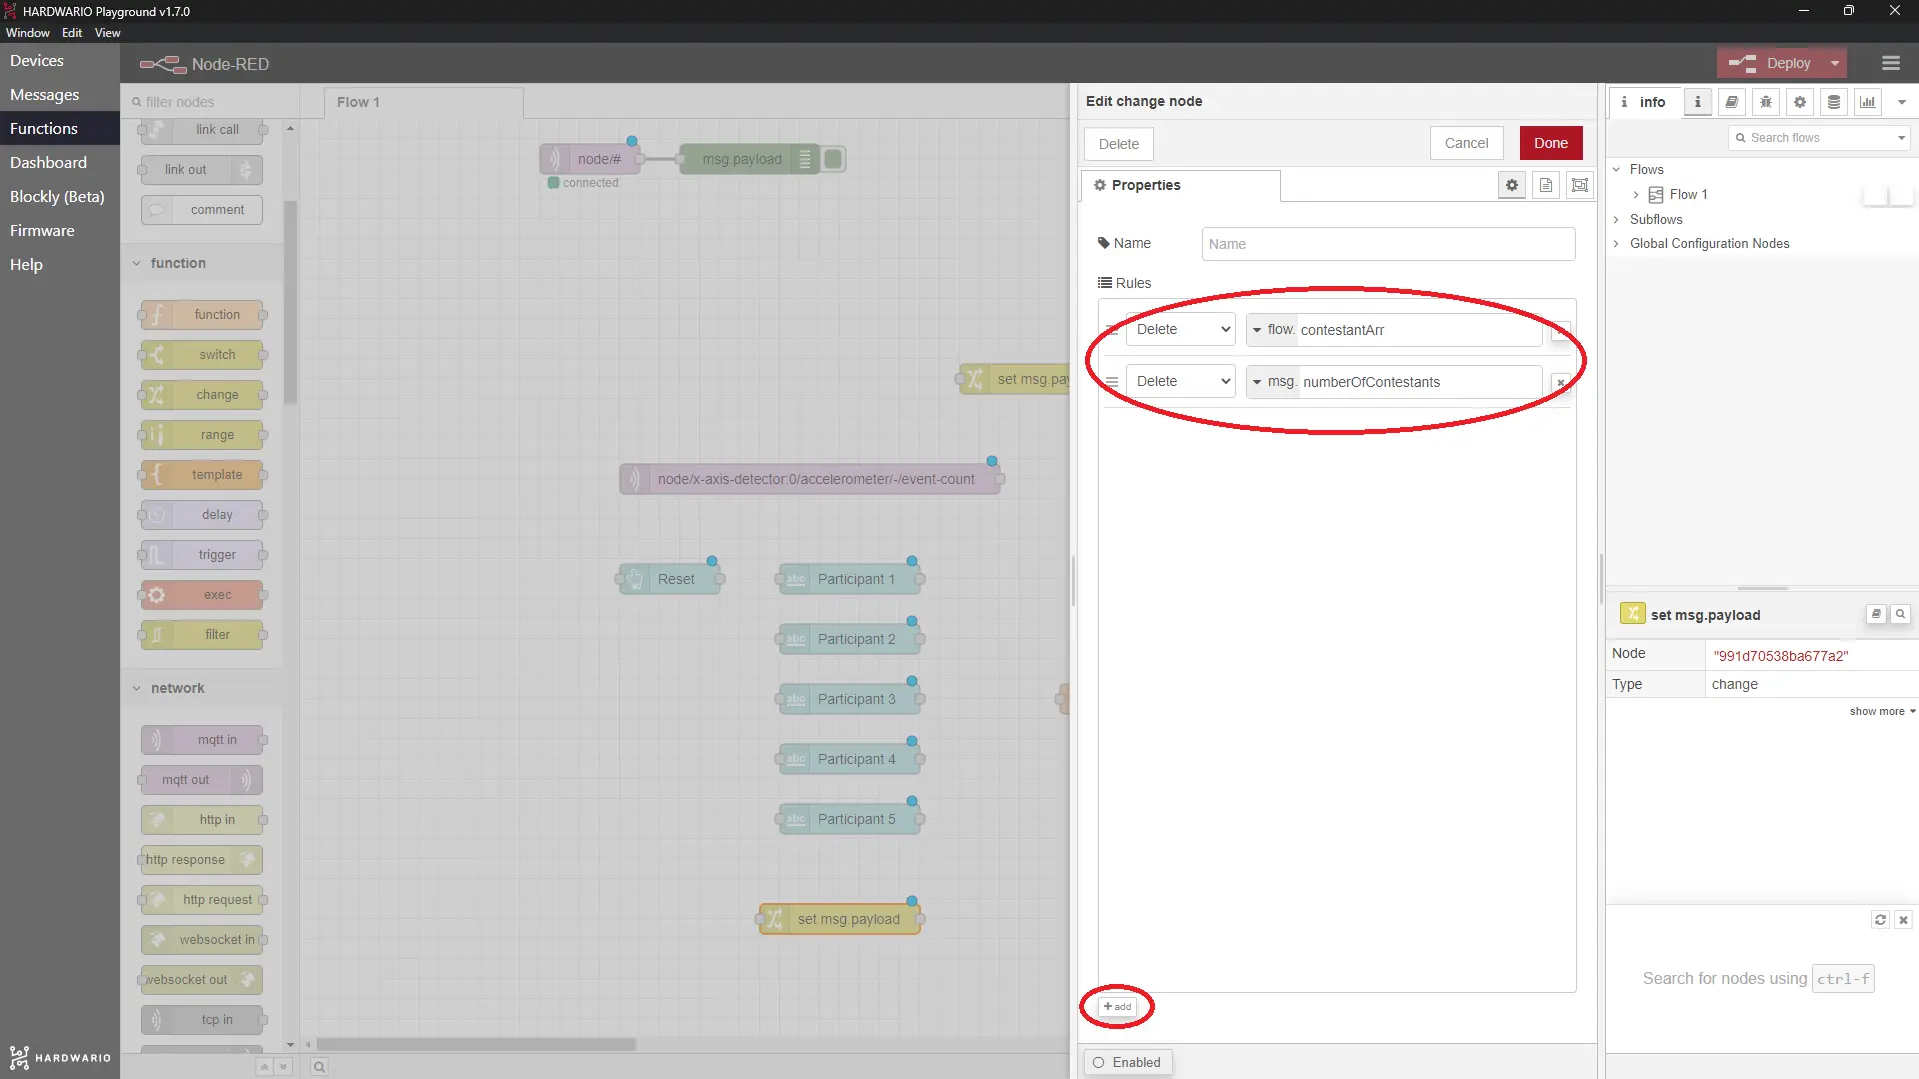
Confirm with Done.
Only one can be chosen
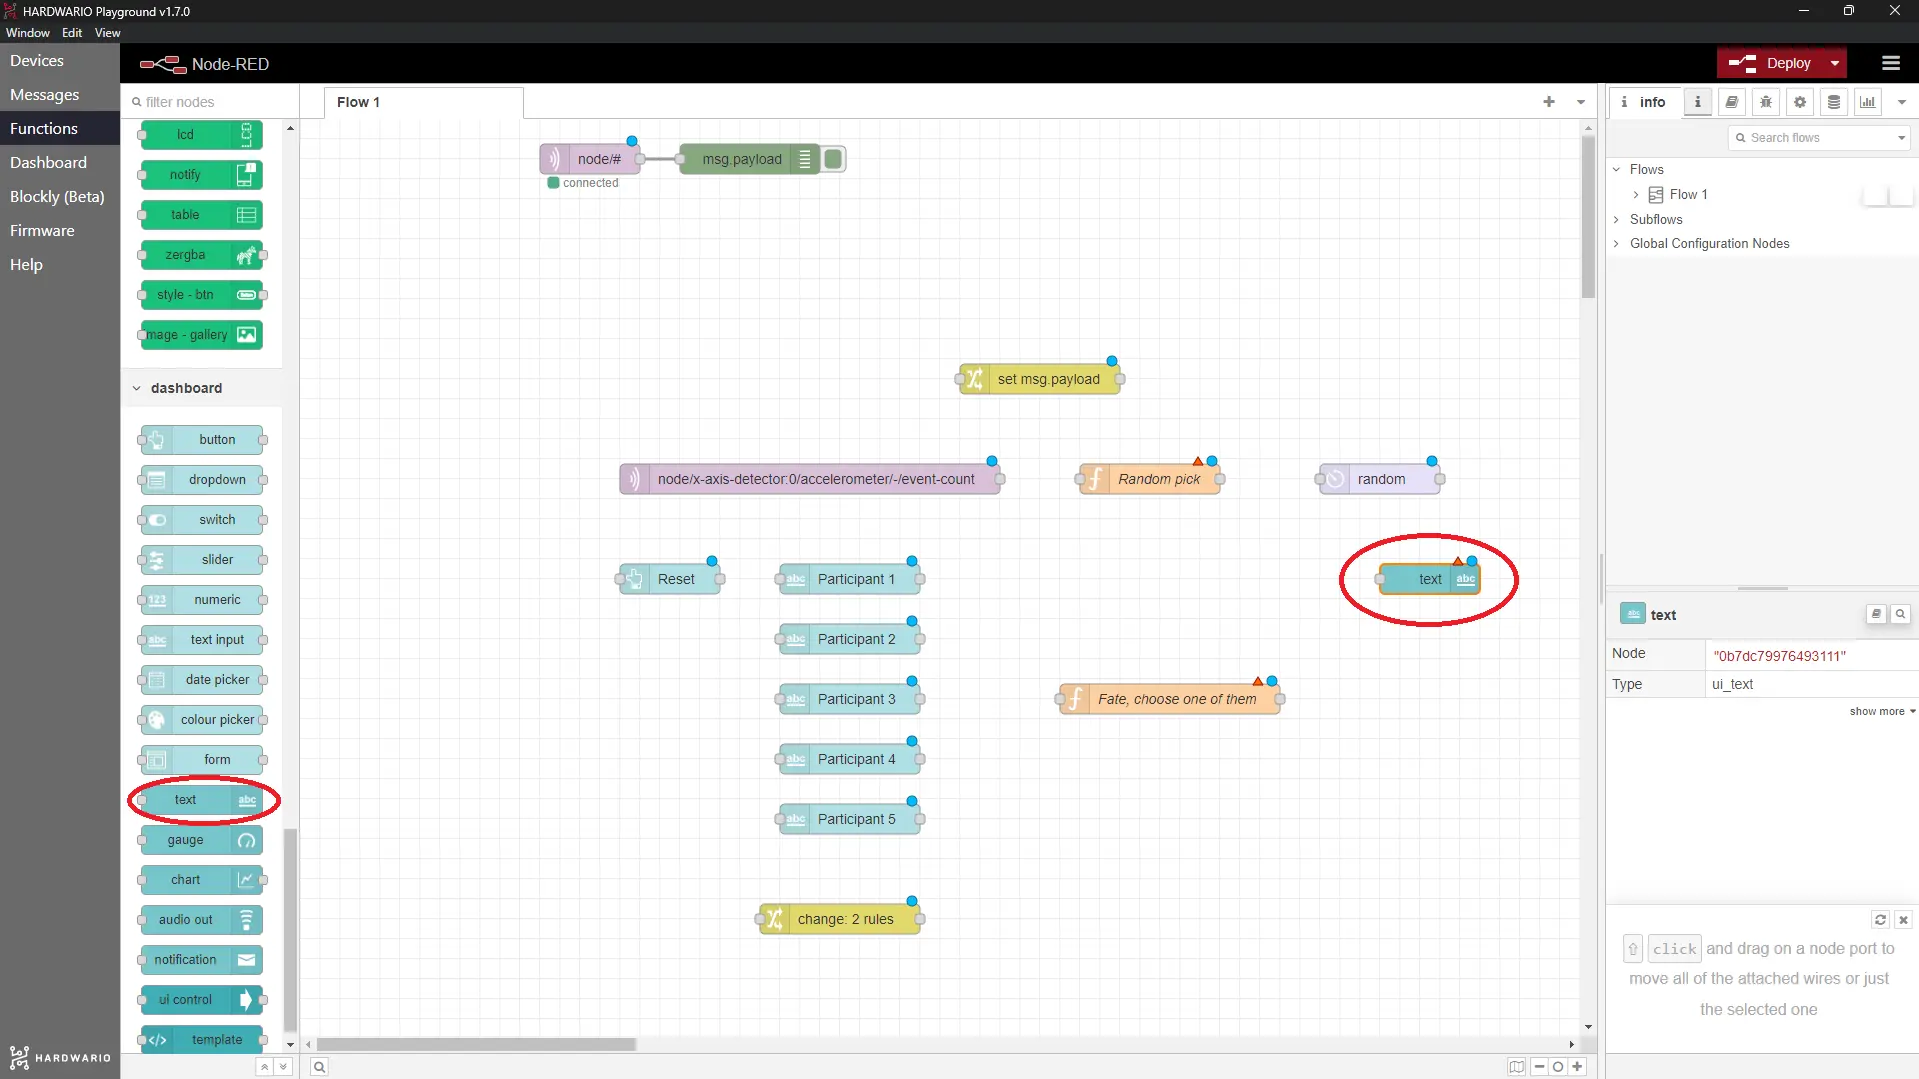
- Place the last node on the workspace. It announces who has been chosen. 🙏 You'll find it simply as the text node in the dashboard section.
- In the node's Label field, set how the message about the randomly chosen participant will look.
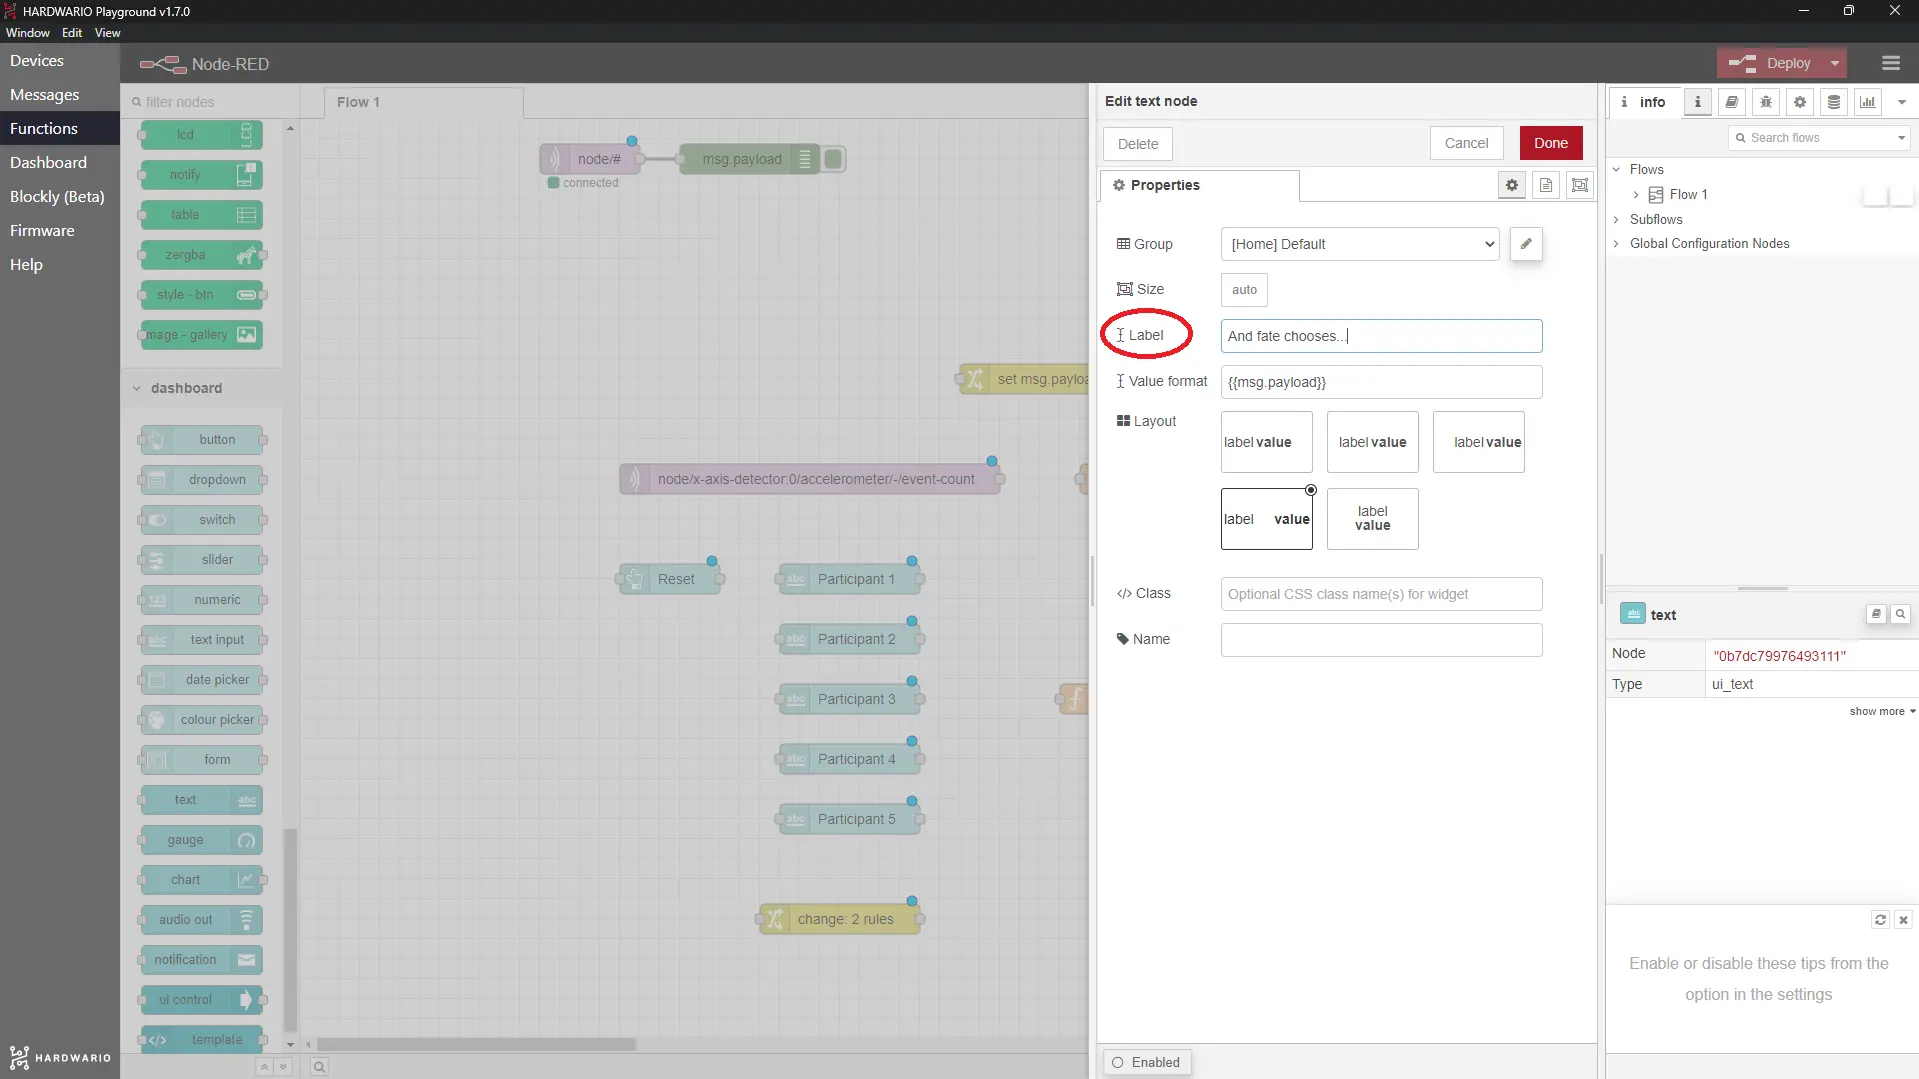
Confirm with Done.
- Then wire everything up neatly. In the upper part, connect the nodes that run the draw; in the lower part, the ones that make up the draw table.
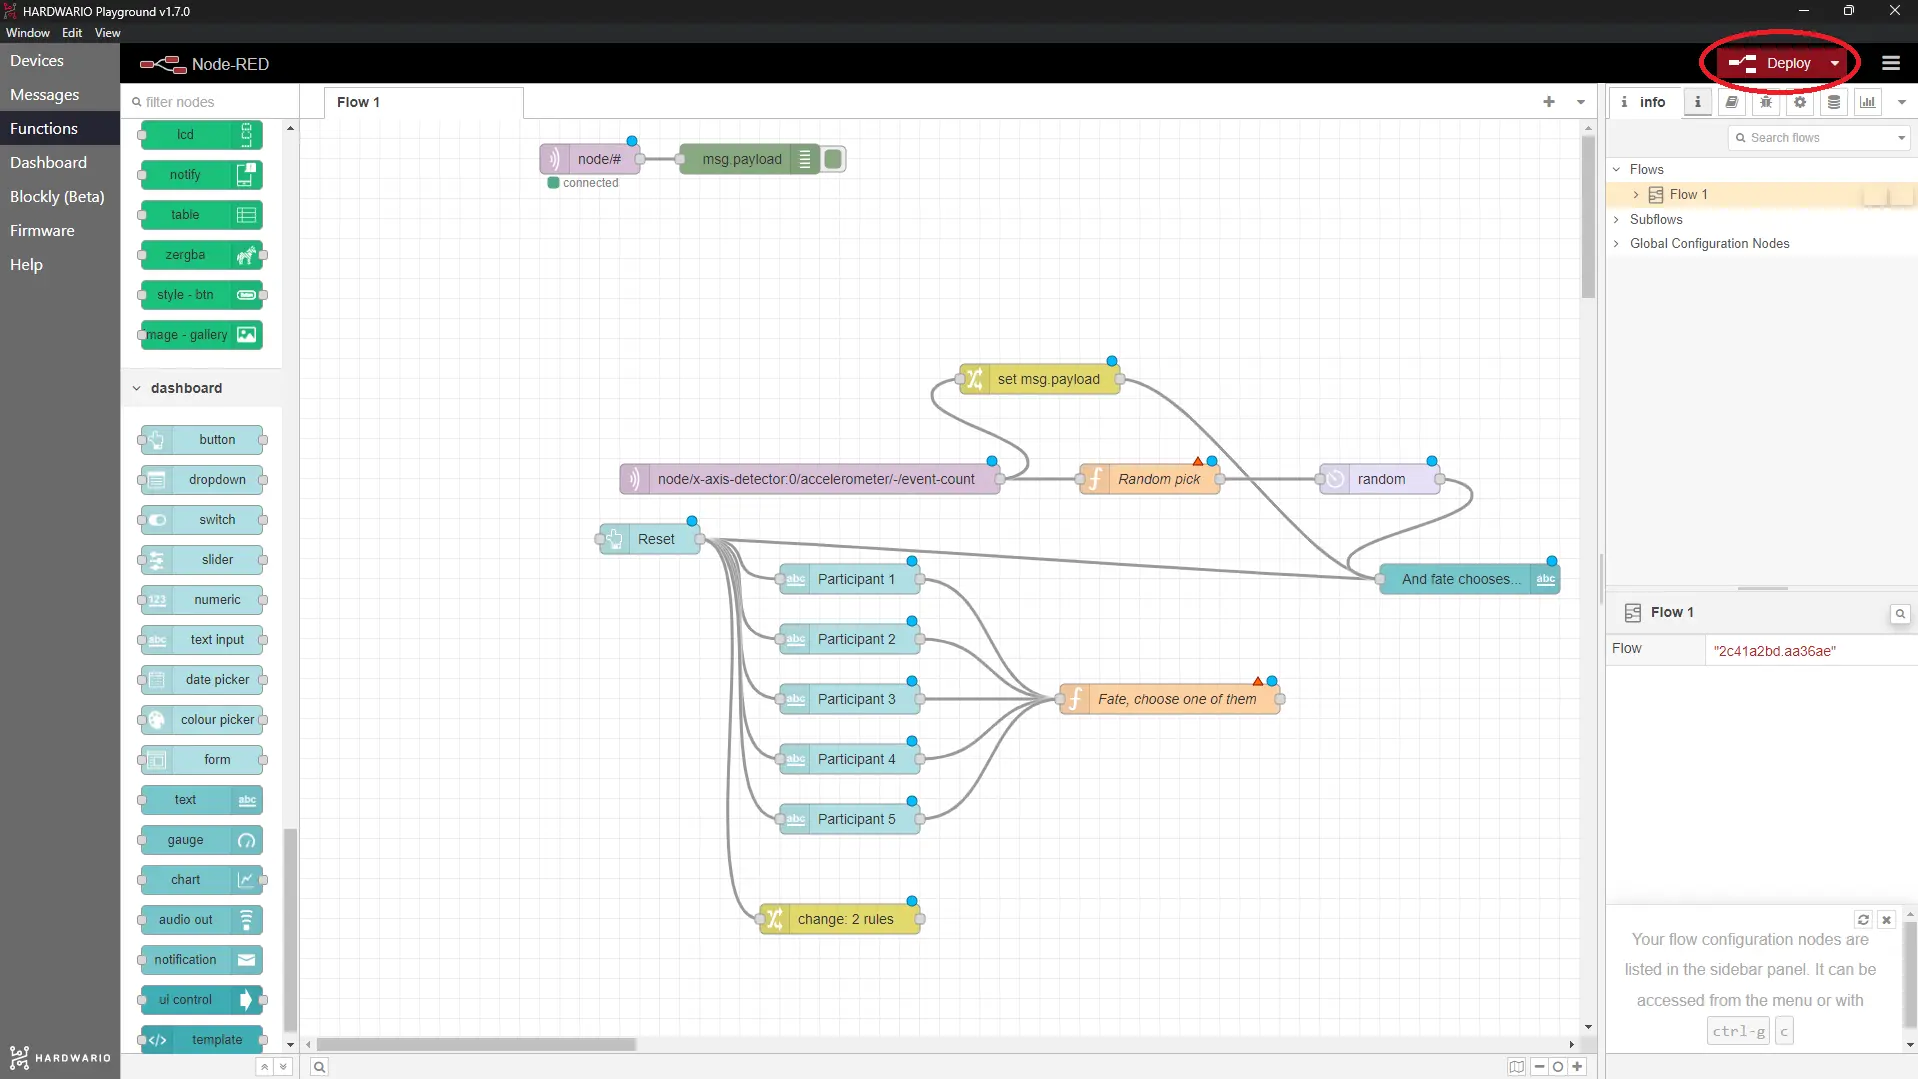
- Don't forget to click the Deploy button in the top right corner! 🚨
Let the fun begin!
- Now for the fun part! In the Dashboard tab, enter the names of all participants. If you haven't set an automatic refresh in the participant nodes, remember to press Enter after each name. Then move the box and the draw begins. 👈

- Who has fate chosen? And what for? That's entirely up to you. 😈
You can, for example:
- draw who kisses whom (woohoo),
- pull the shortest straw to decide who takes out the trash,
- pick the winner of a competition,
- hand out crazy tasks at random,
- and anything else you can think of!