Santa detector
Introduction
Santa is a very secretive character, but with IoT you can catch him right in the middle of delivering presents. 🎄 The PIR Module motion detector will help you.
In this project, you will learn how to detect movement in another room. That way you can find out whether it's Santa, Baby Jesus, Grandfather Frost or someone else entirely who visits your home. 😲
If you have the Start Set, you'll also need the PIR Module. The Motion Set contains everything you need.
Prepare the box
-
Assemble the set. The Core Module needs the twr-radio-motion-detector firmware.
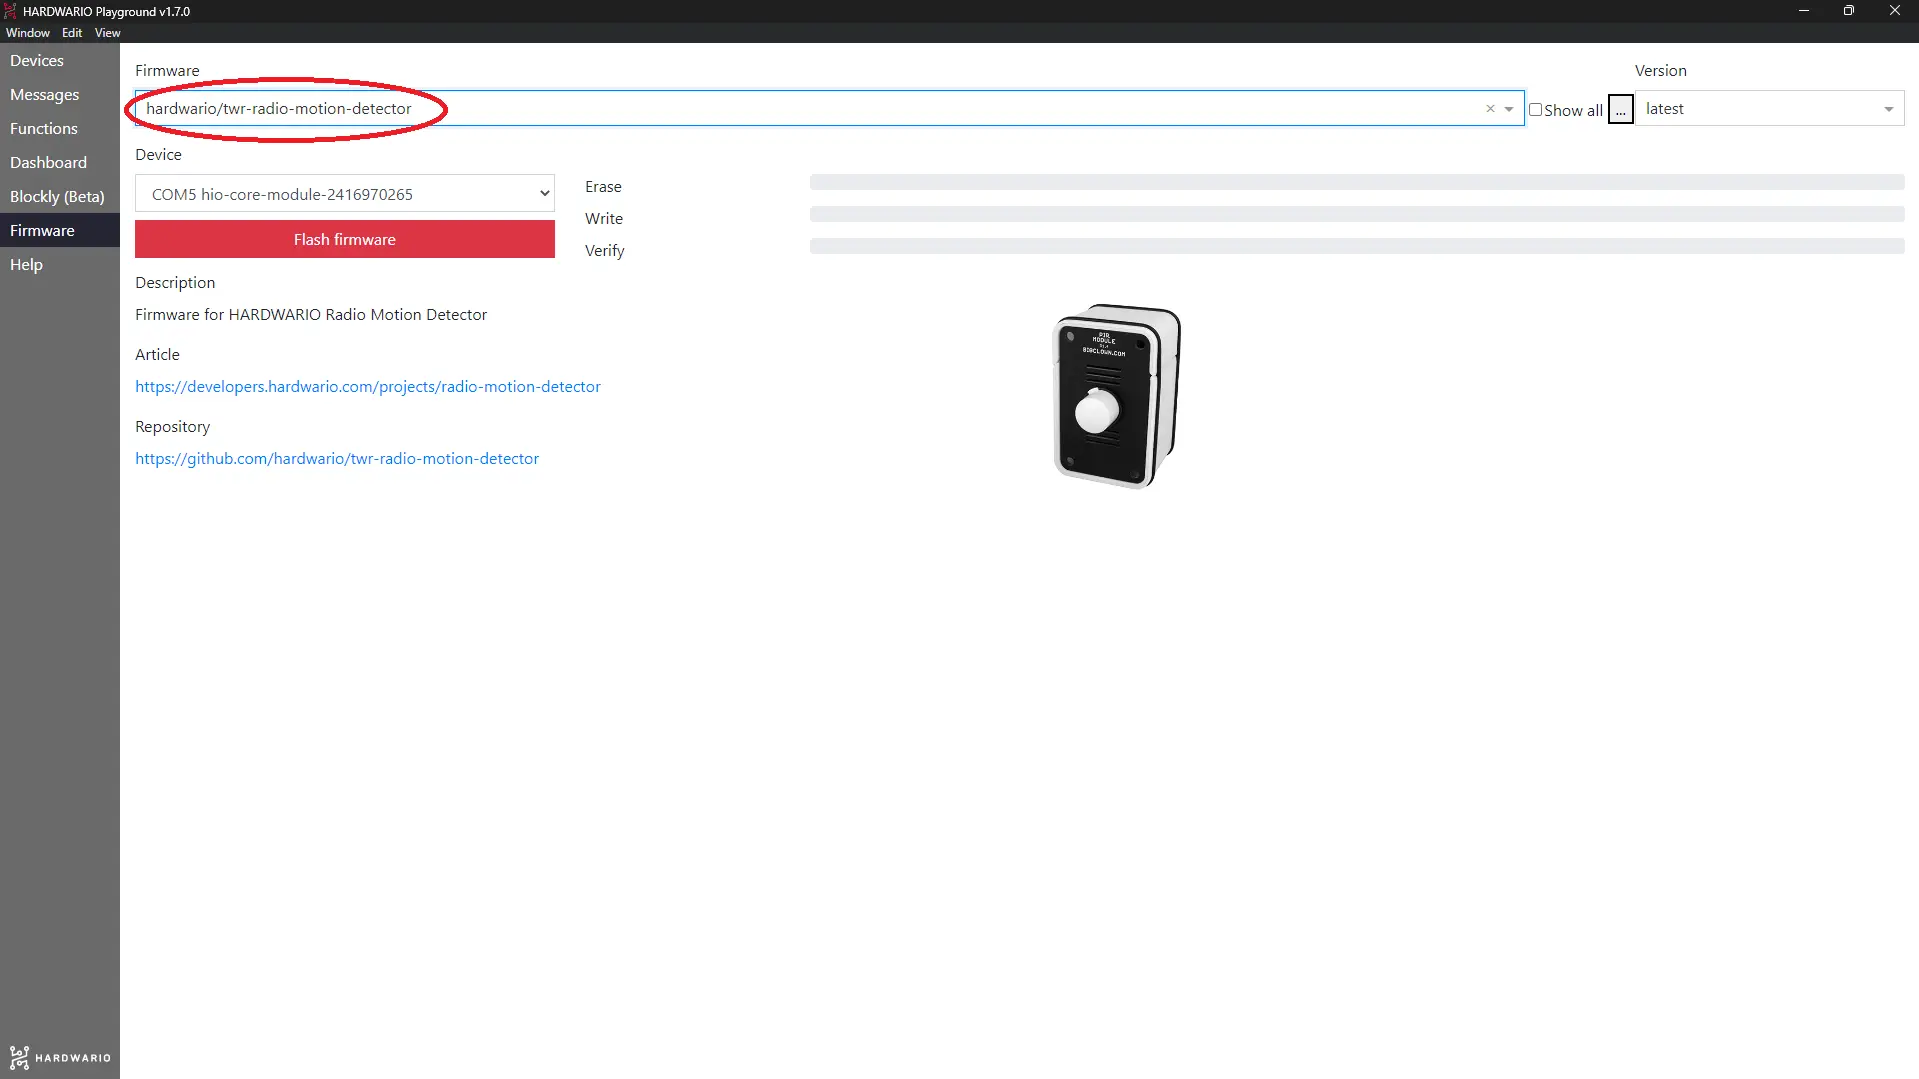
-
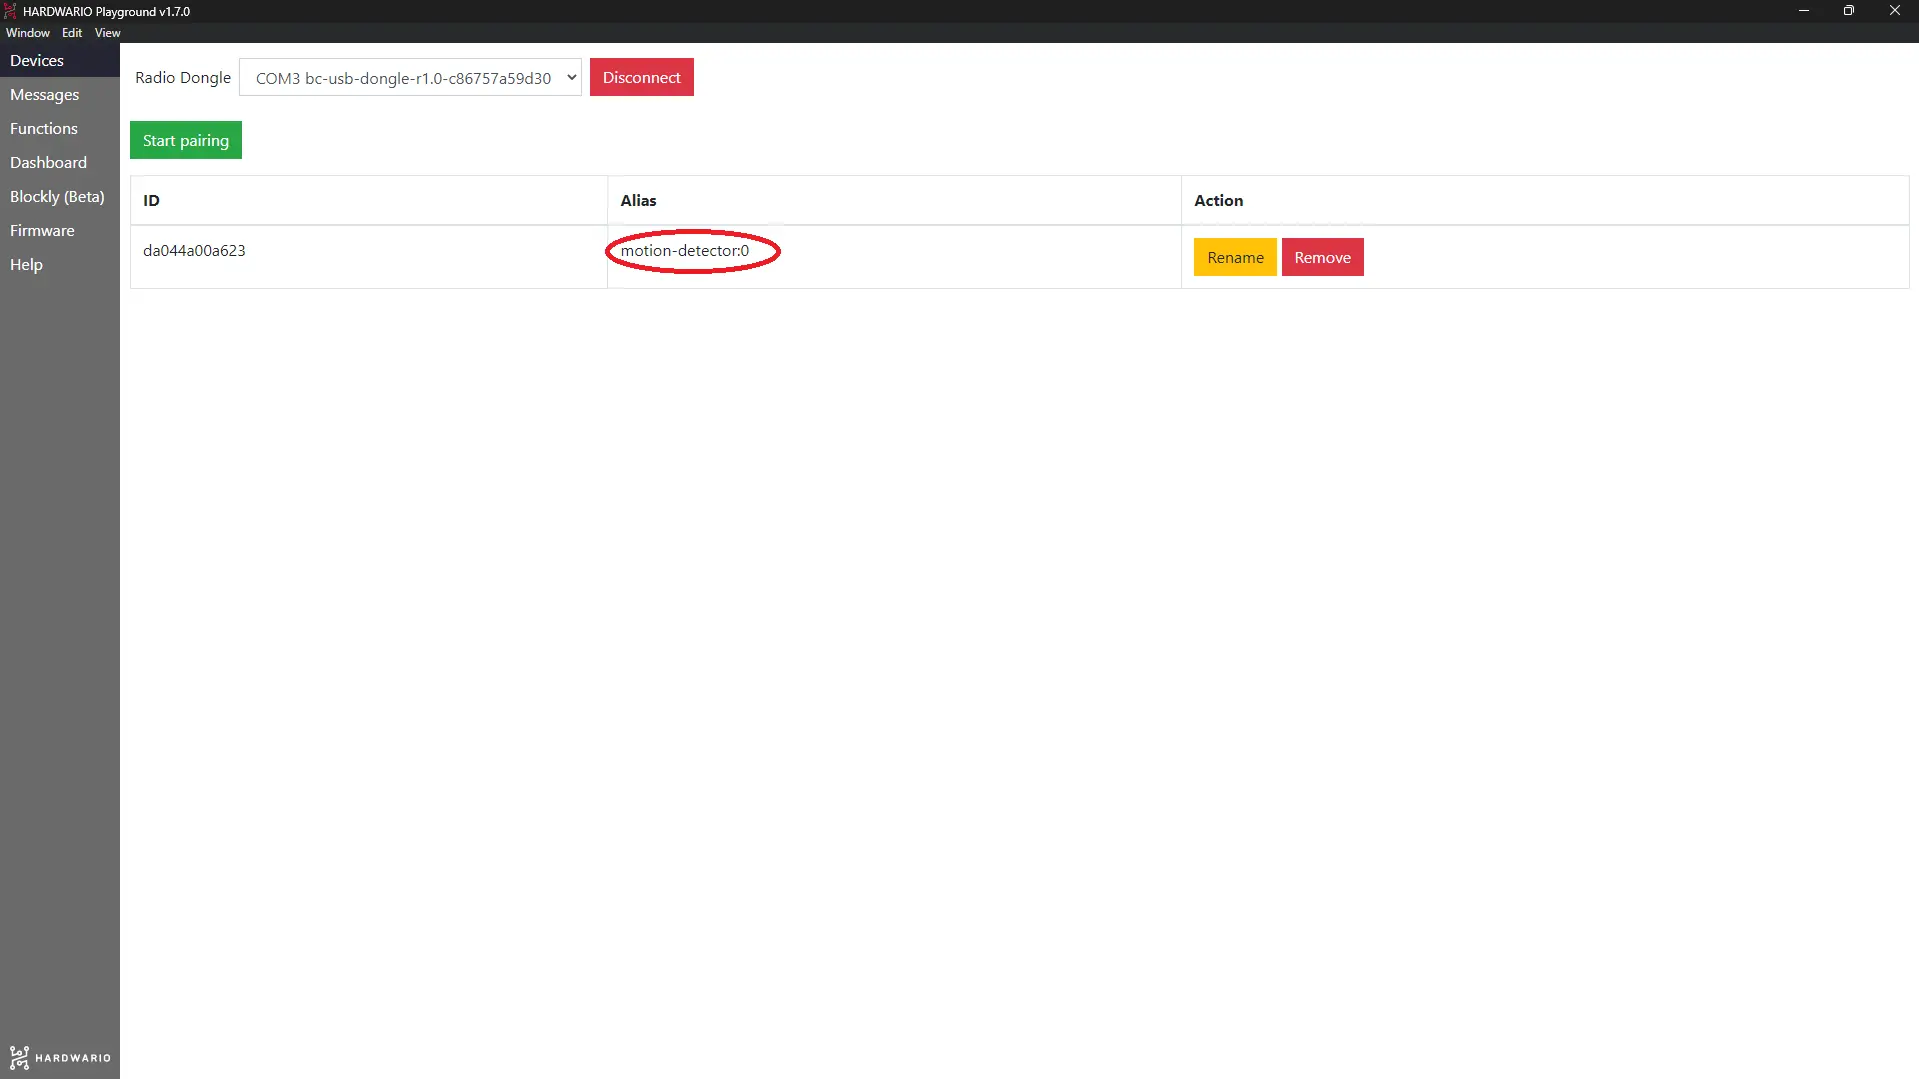
If the firmware uploaded correctly, you'll see the alias motion-detector on the Devices tab in Playground.
Set up Node-RED
-
You'll program in Node-RED. First, click the Functions tab in Playground.
-
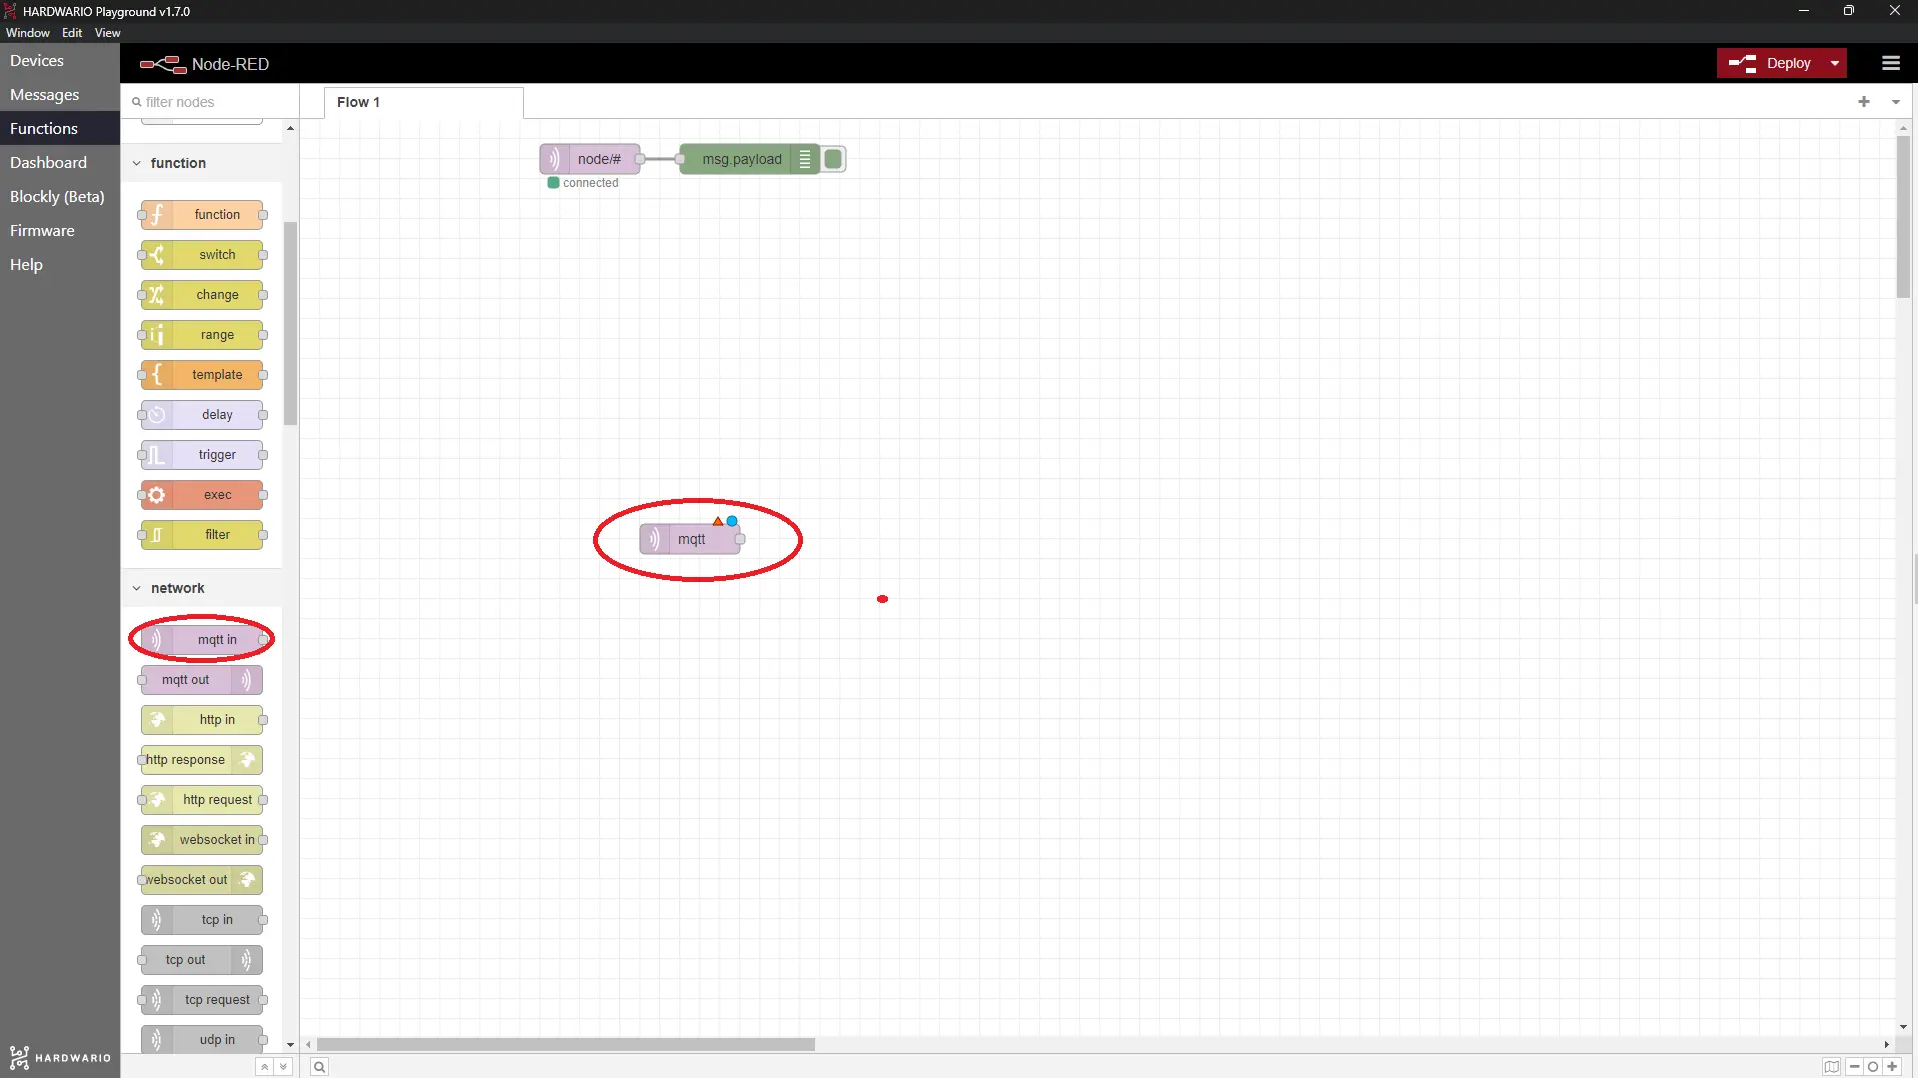
Drag a light purple node (bubble) called mqtt in onto the empty workspace. You'll find it in the network section.
- Double-click the node to open it. In the Topic field, enter the key value. The node will now count the movements it detects:
node/motion-detector:0/pir/-/event-count
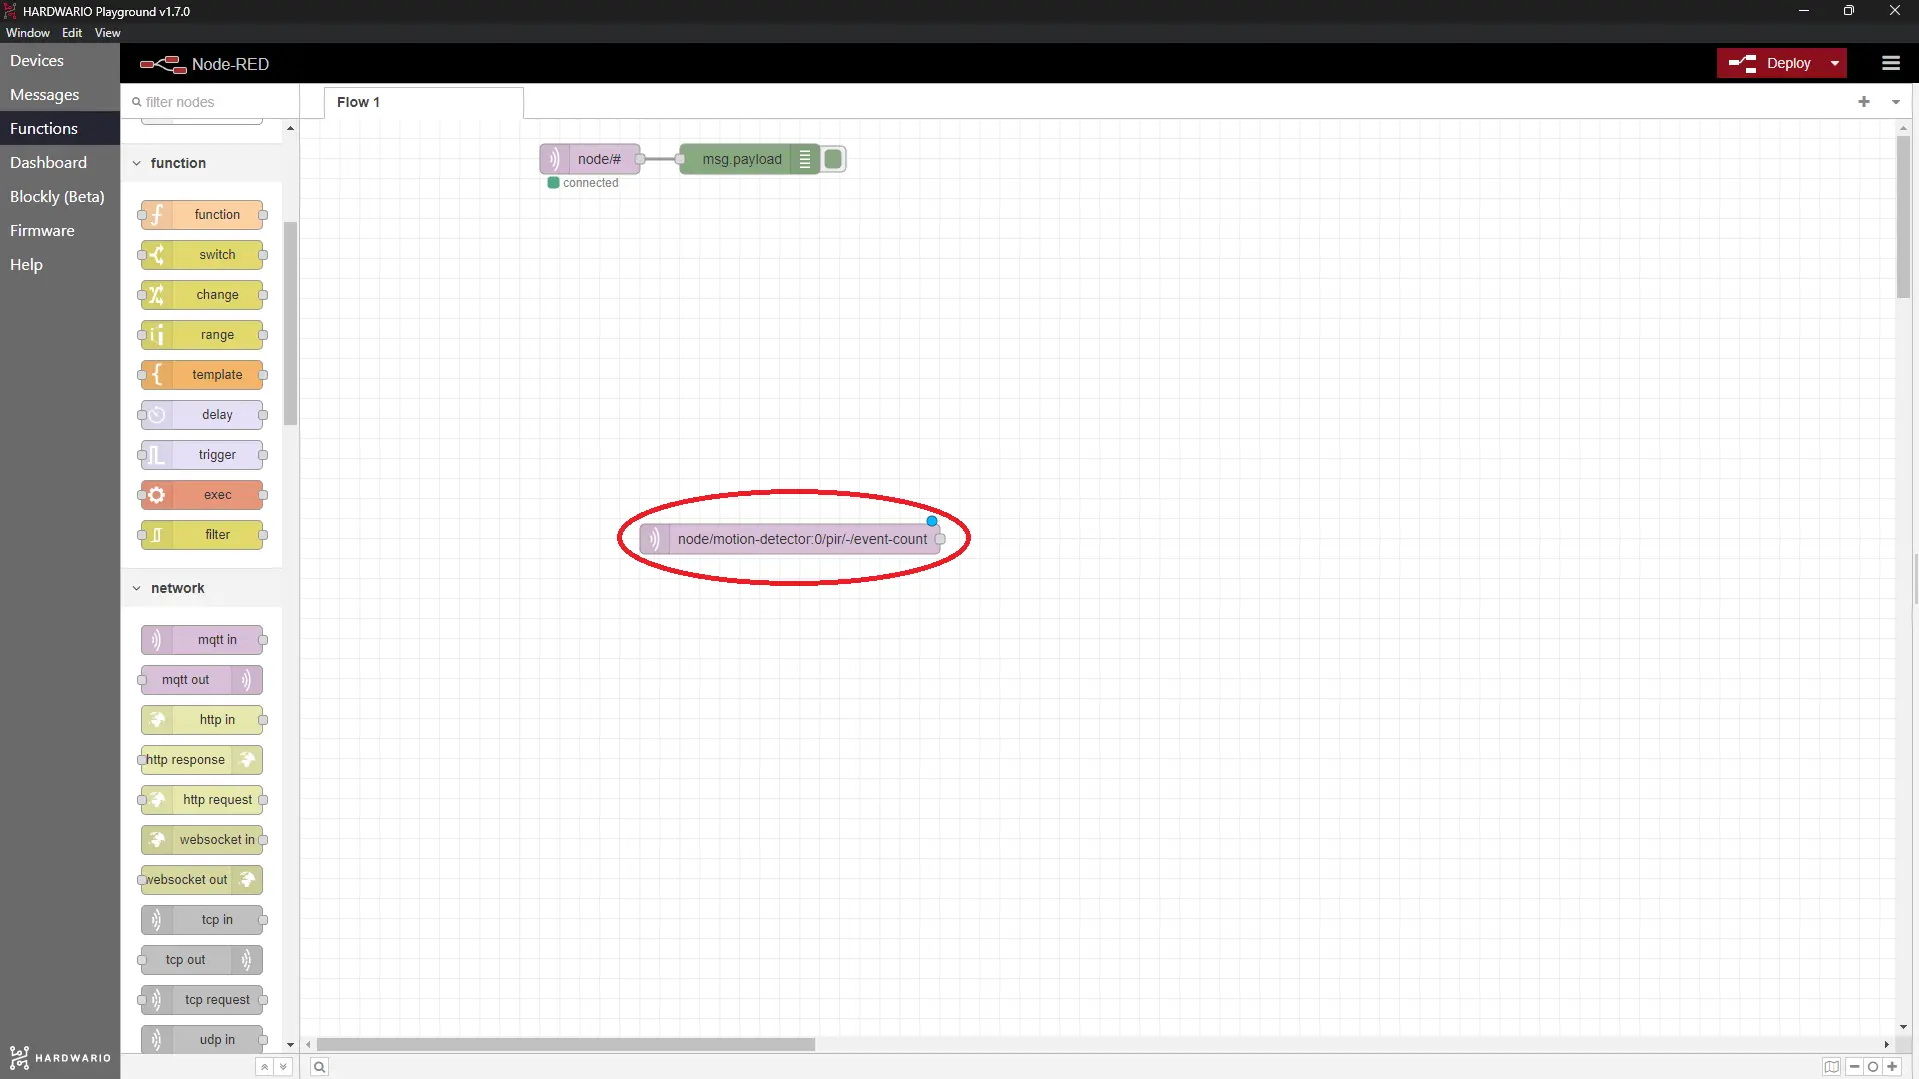
Confirm with Done.
-
After this node, place a switch node from the function section. It lets the device know that the detector is switched on and may report every movement.
-
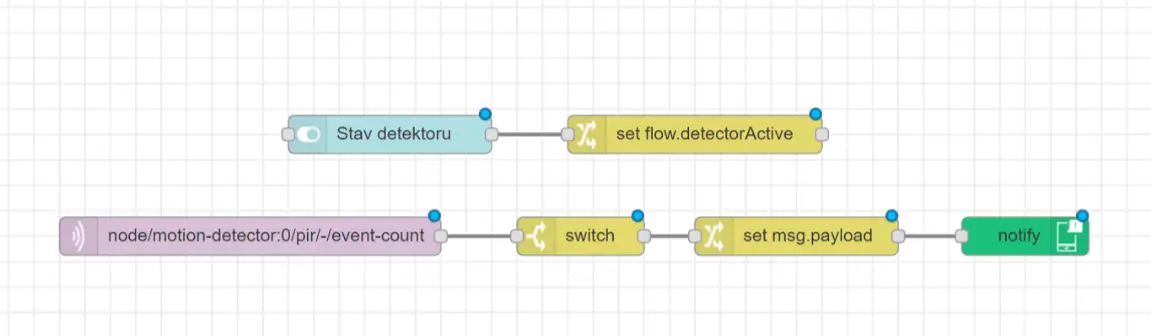
In the node, fill in the Property field as flow. detectorActive and change the condition to is true (see the picture). Our tip: You can read more about the switch node in the Node-RED documentation.
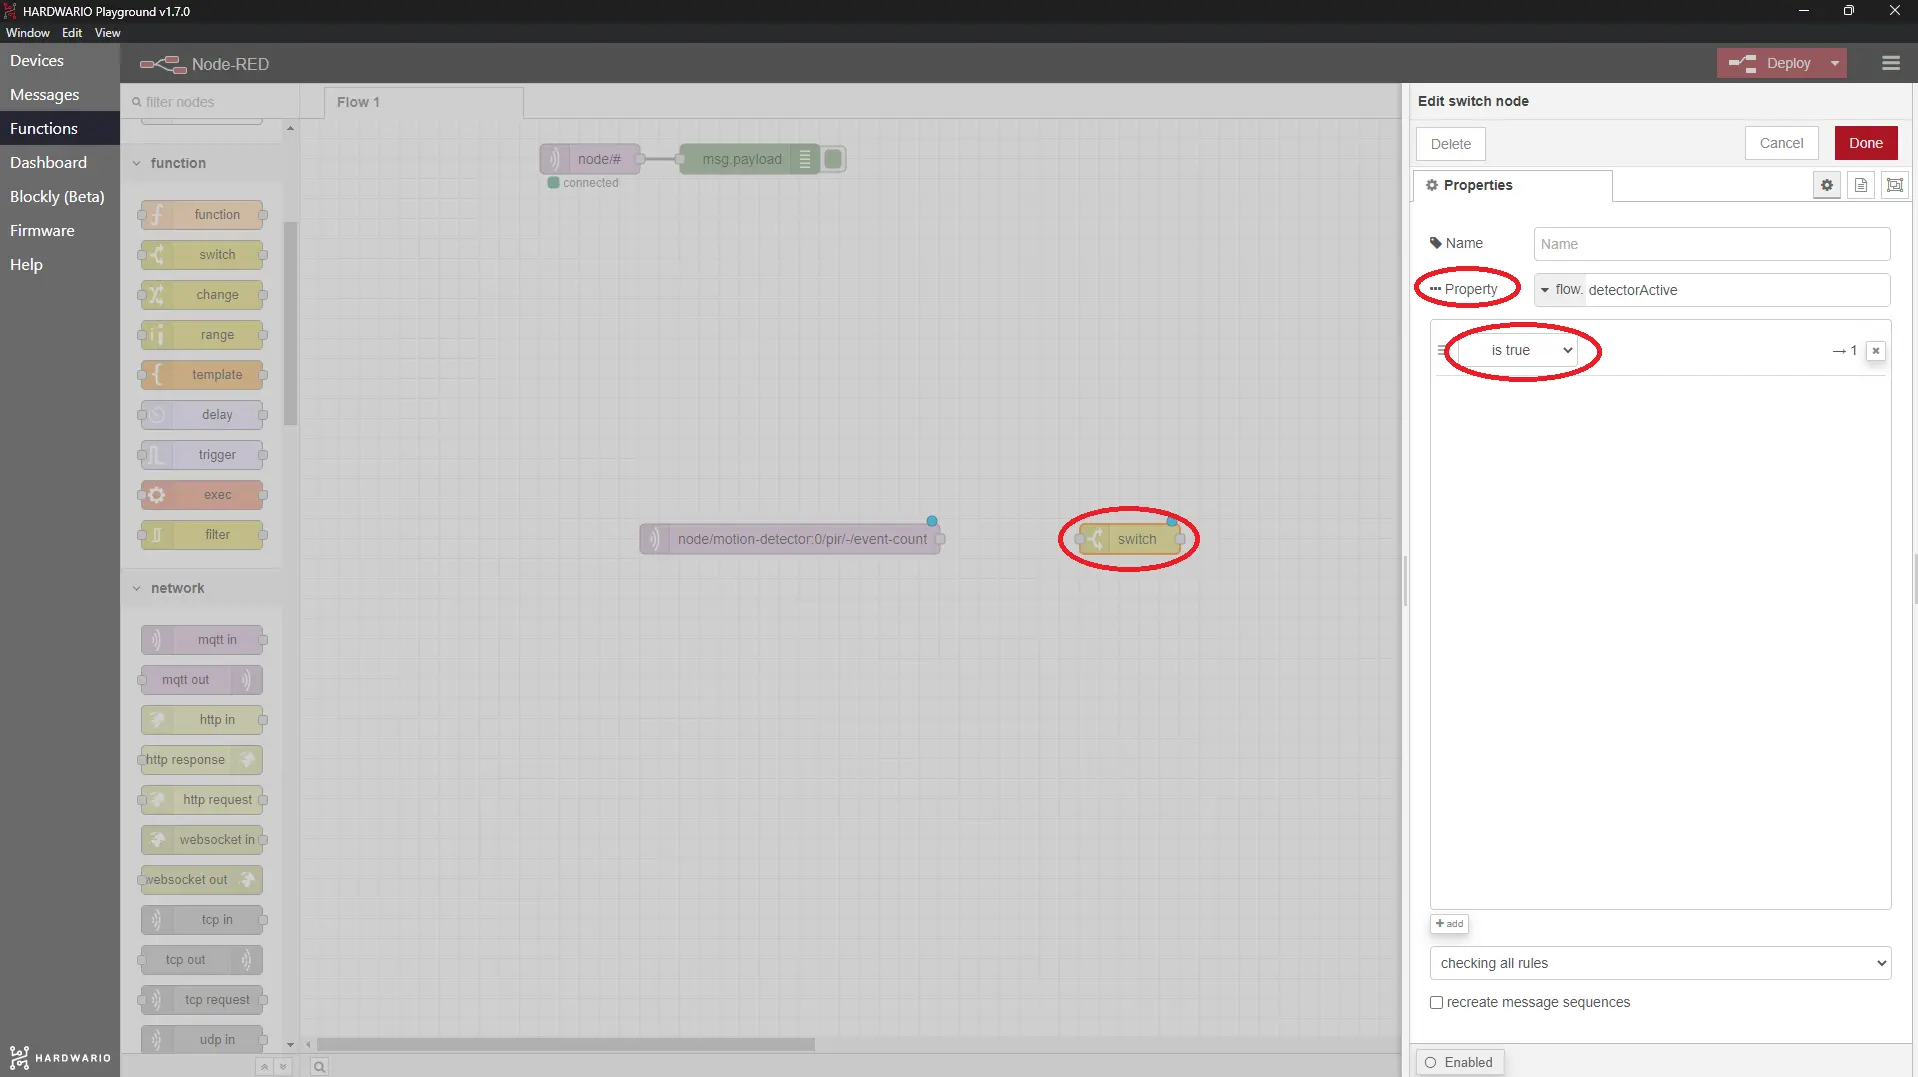
Confirm with Done.
-
After the switch node, place a change node from the same function section.
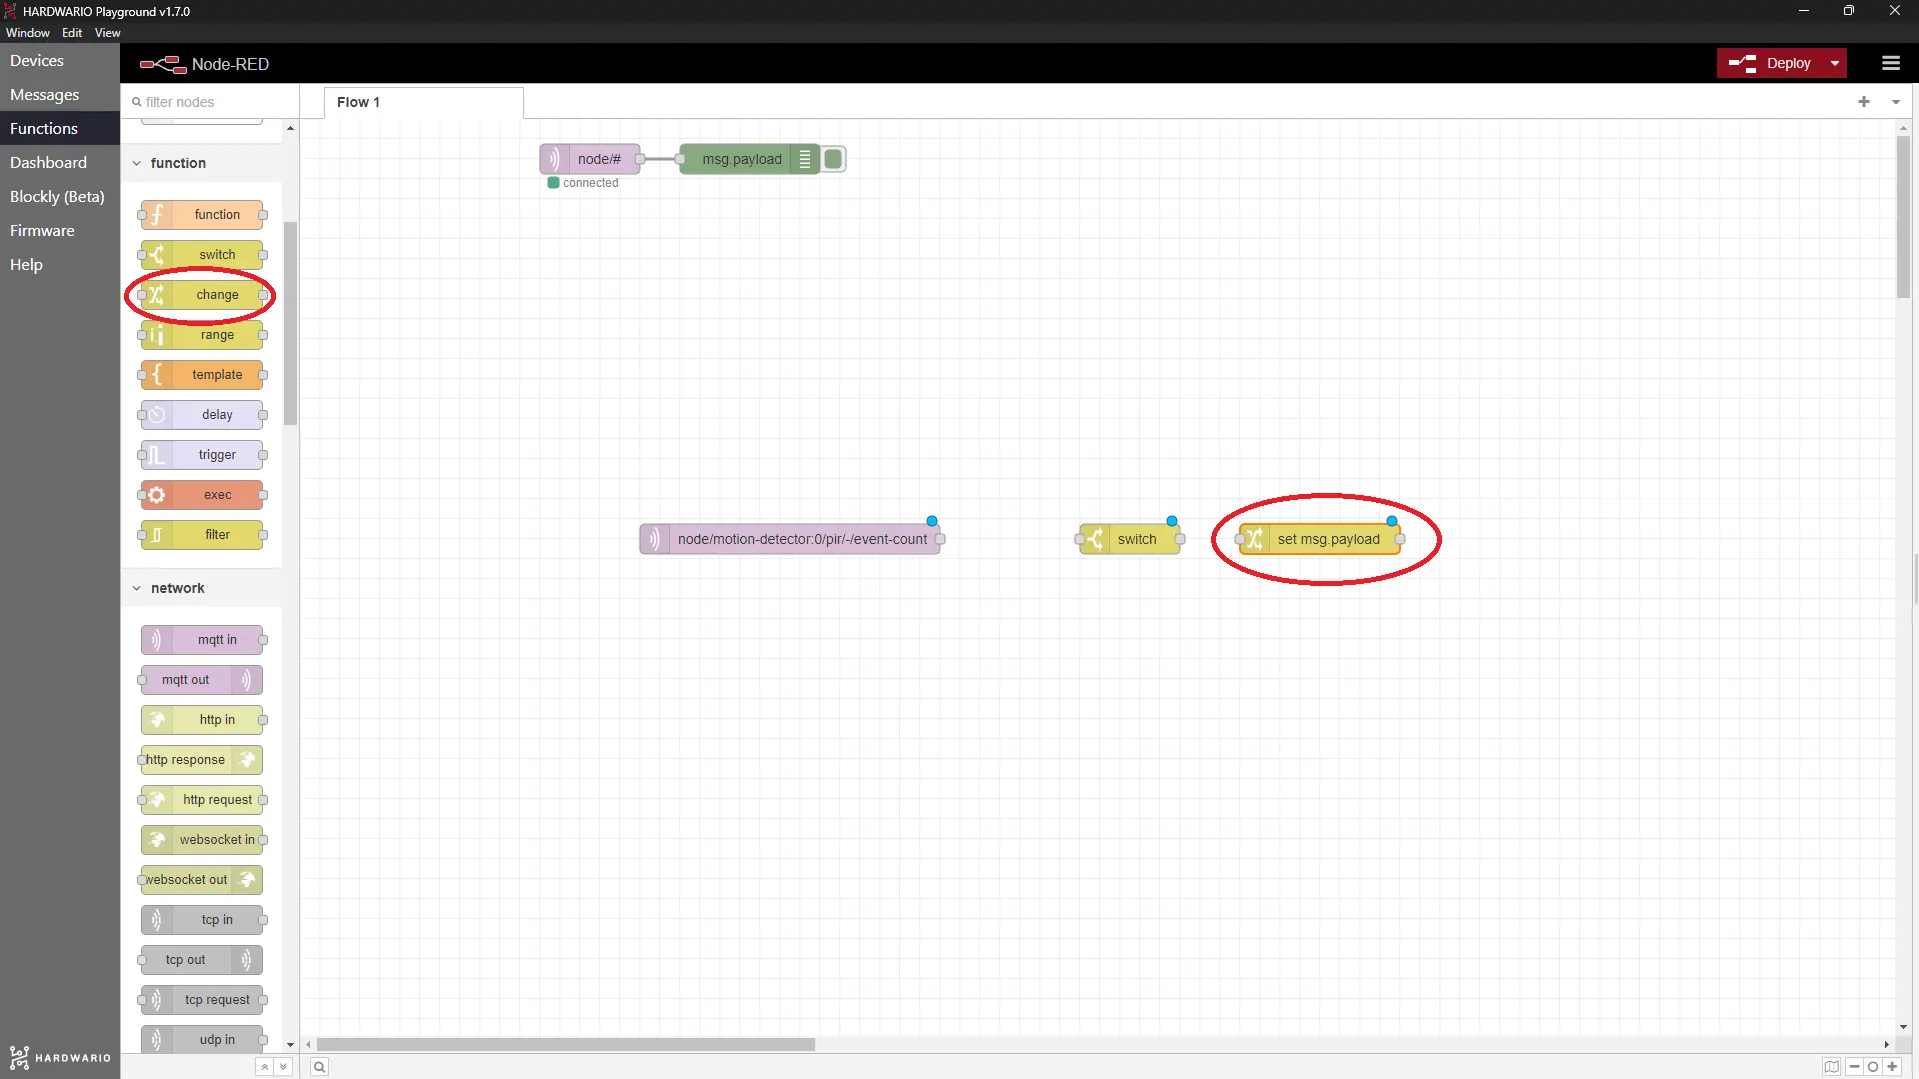
-
In it, you set the message that pops up as soon as the bearded gift-bringer (or Baby Jesus) arrives. 🎅 👼 For example: Santa is in the living room. Our tip: If you also want alerts on your phone, don't use accented letters such as č or á, because Blynk doesn't show them.
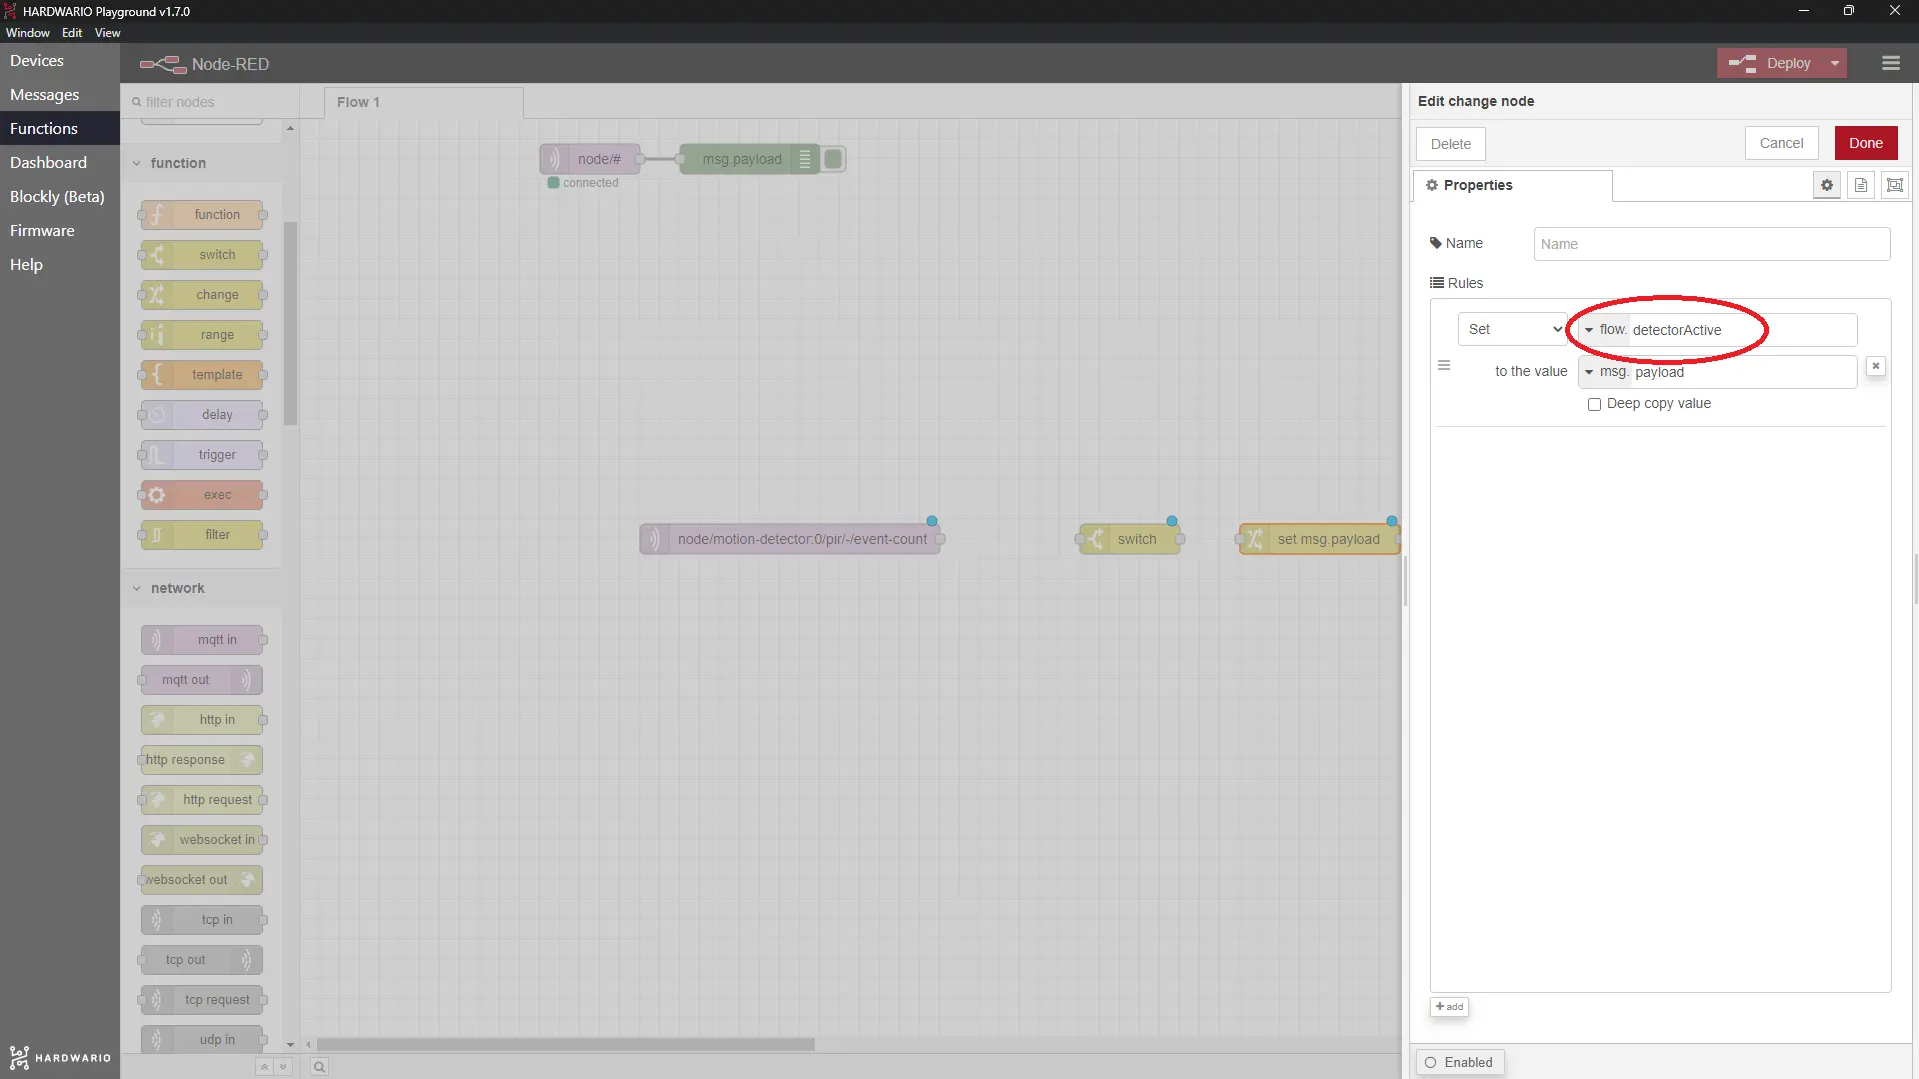
Confirm with Done.
-
Above this flow, add another one that switches the detector on and off. It has two nodes. The first is a switch node from the dashboard section.
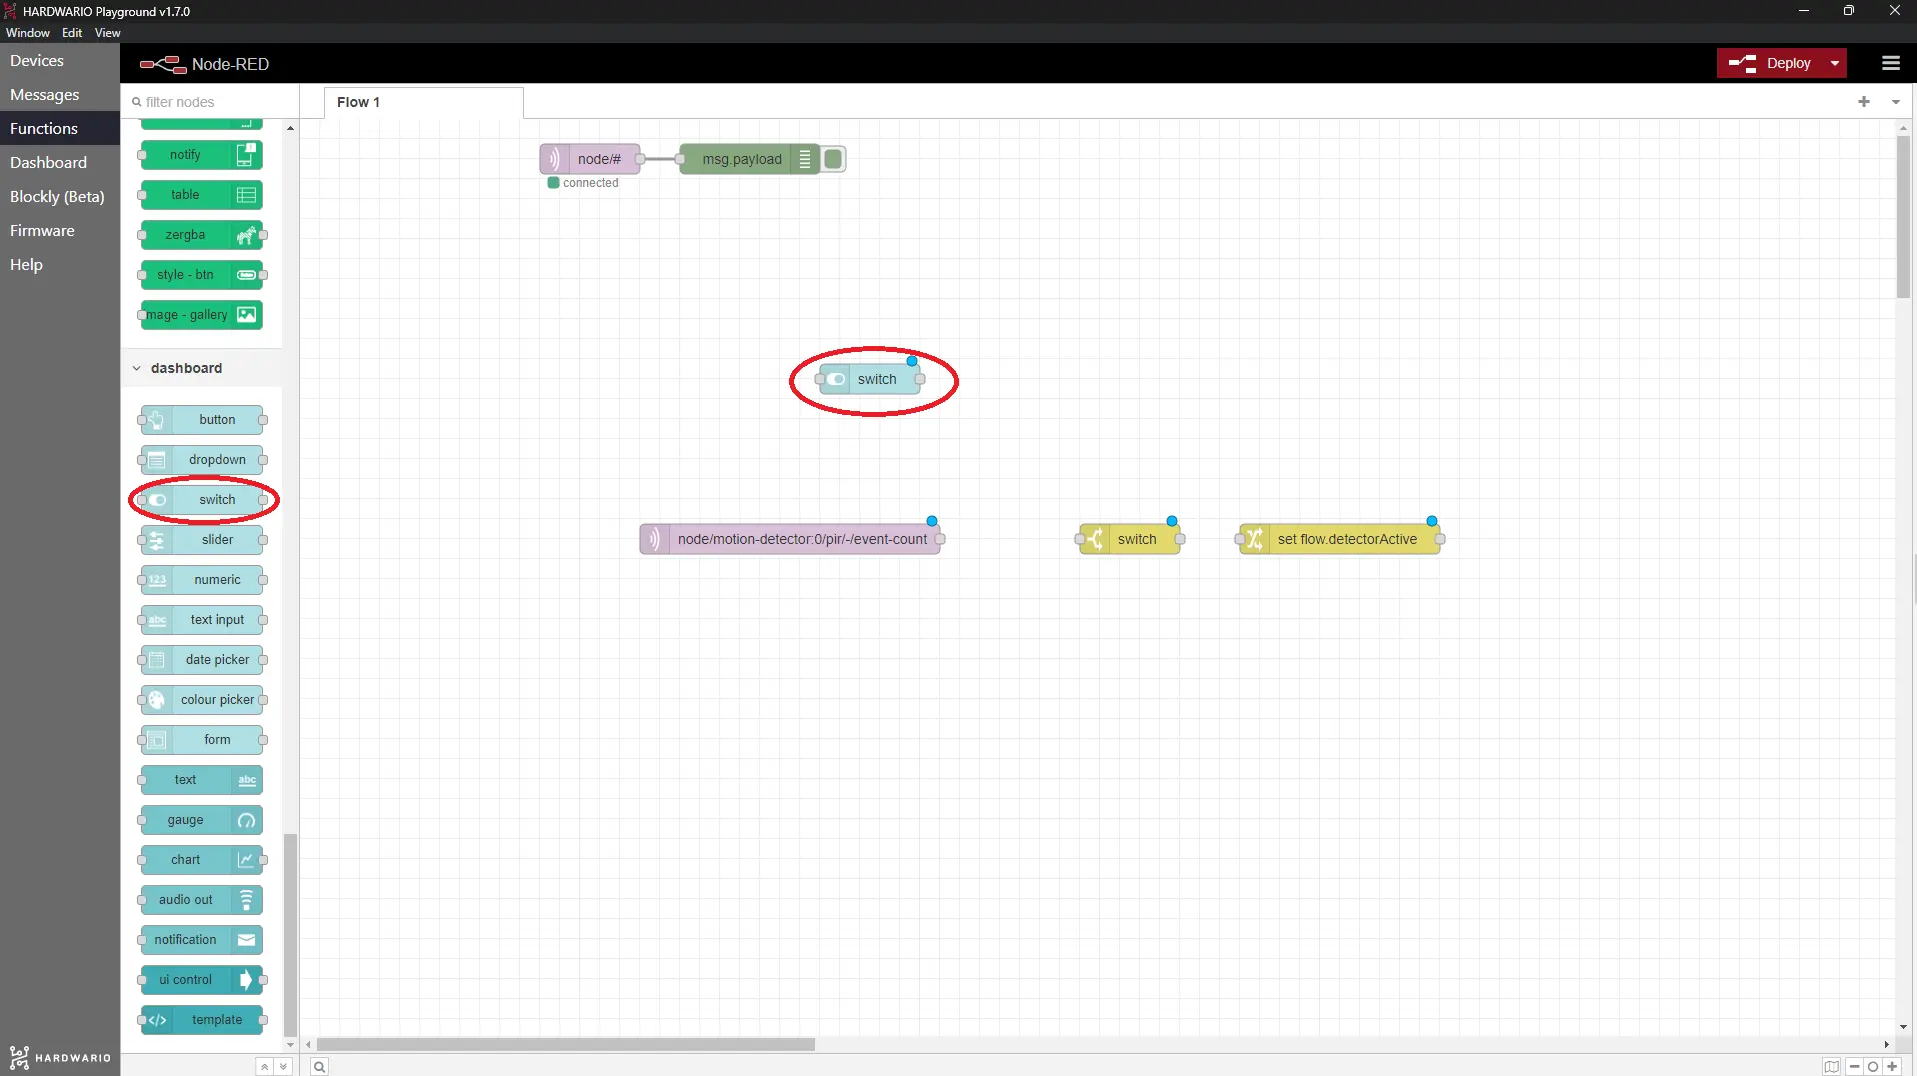
-
In this node, change the Label to Detector status. That's how your project will be labelled on the Dashboard.
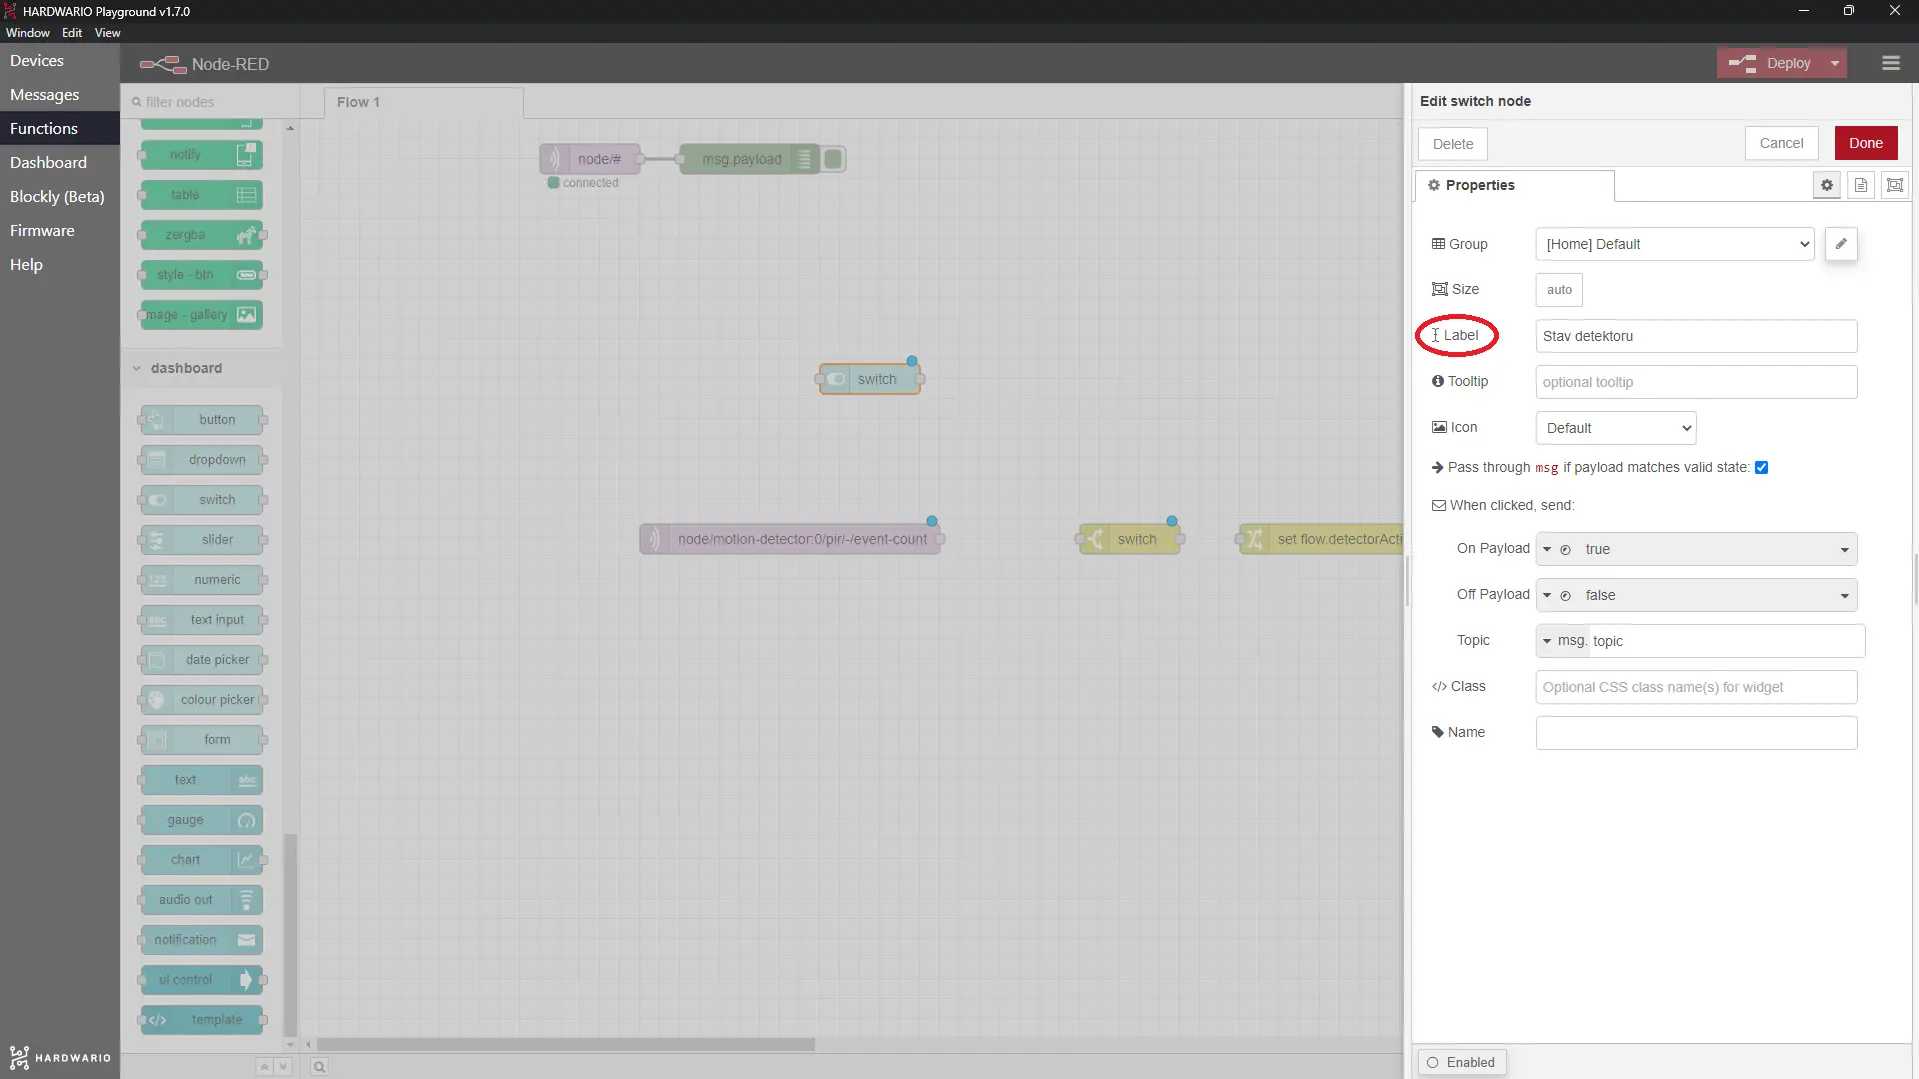
Confirm with Done.
-
After it, place a change node from the function section. Yes, the same kind you already have a little further down. 👍
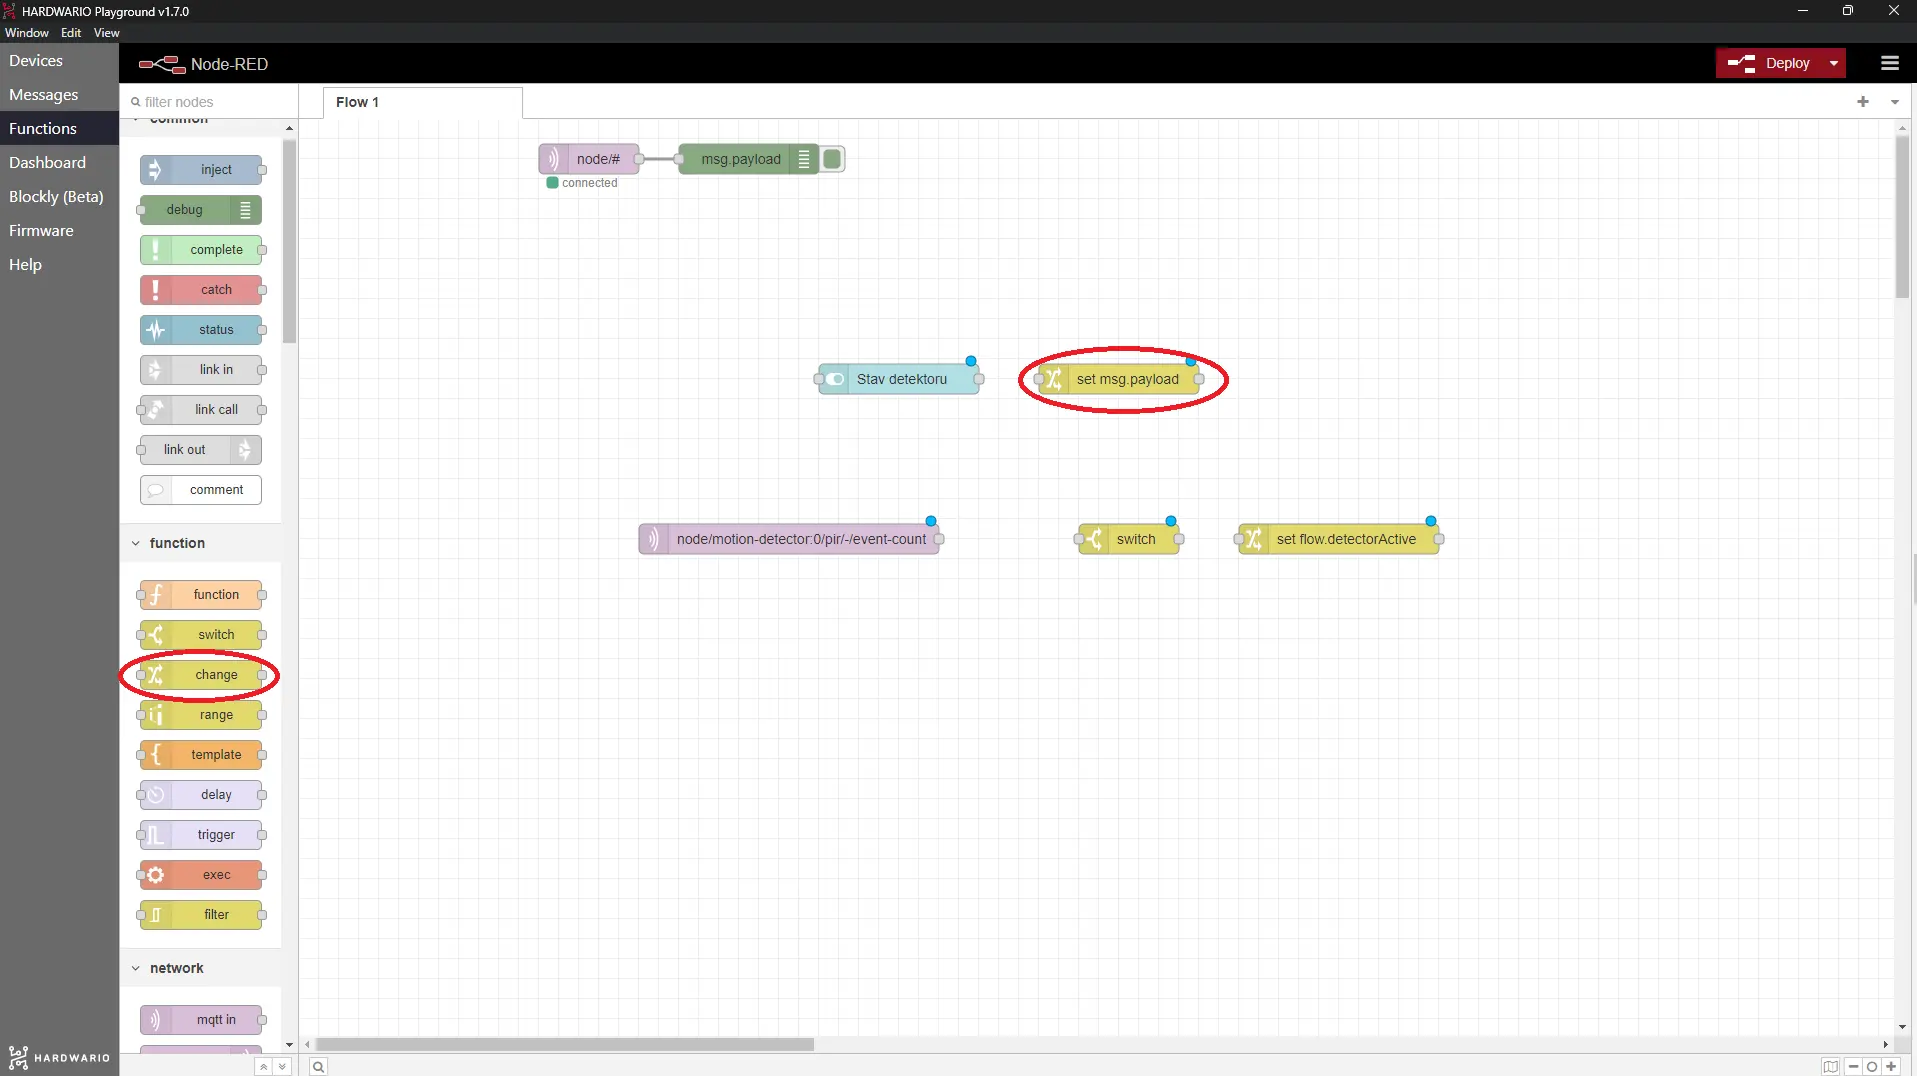
-
In the Rules field, set the rule that tells the device whether the switch is on or off: flow. detectorActive (see the picture). Watch out for typos!
Confirm with Done.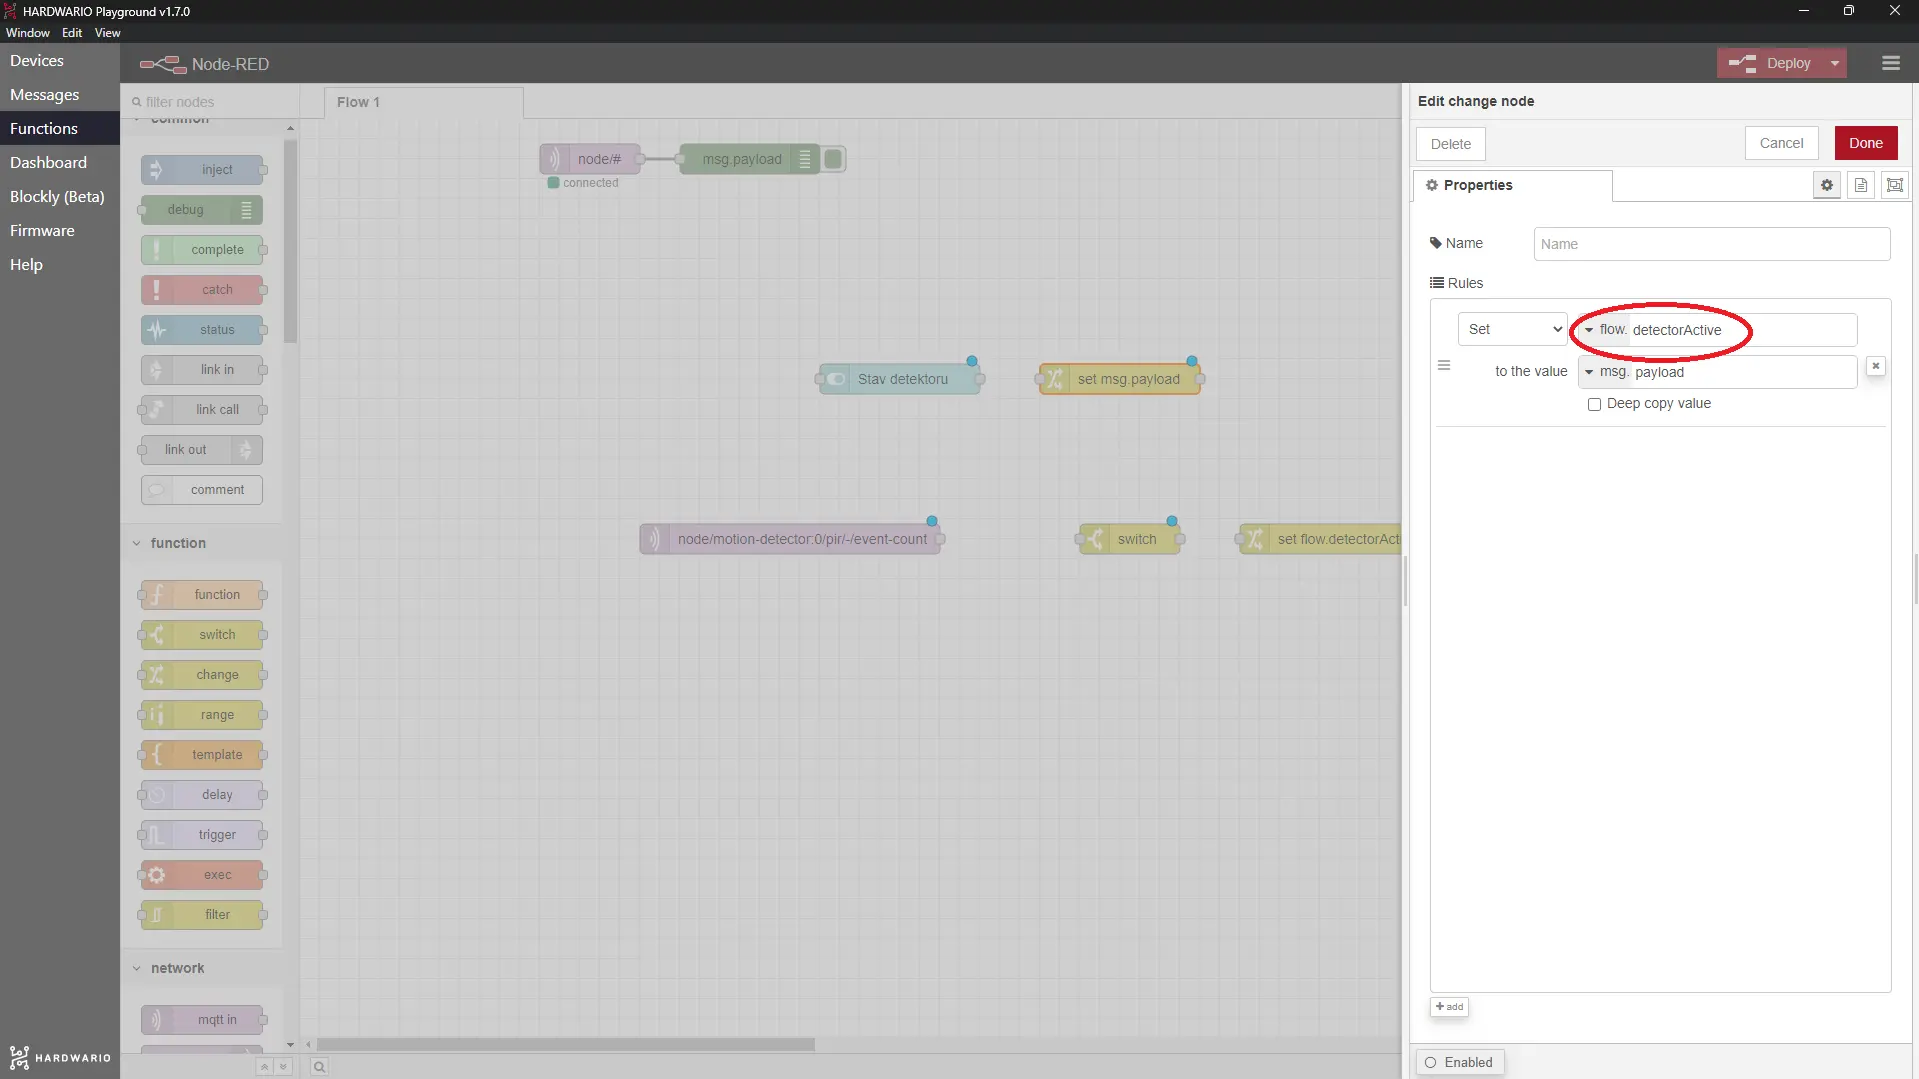
-
Now connect all the nodes as shown in the picture, but don't press Deploy yet. One last node is still missing; we'll add it in a moment. It sets up the alert on your phone. 🤳
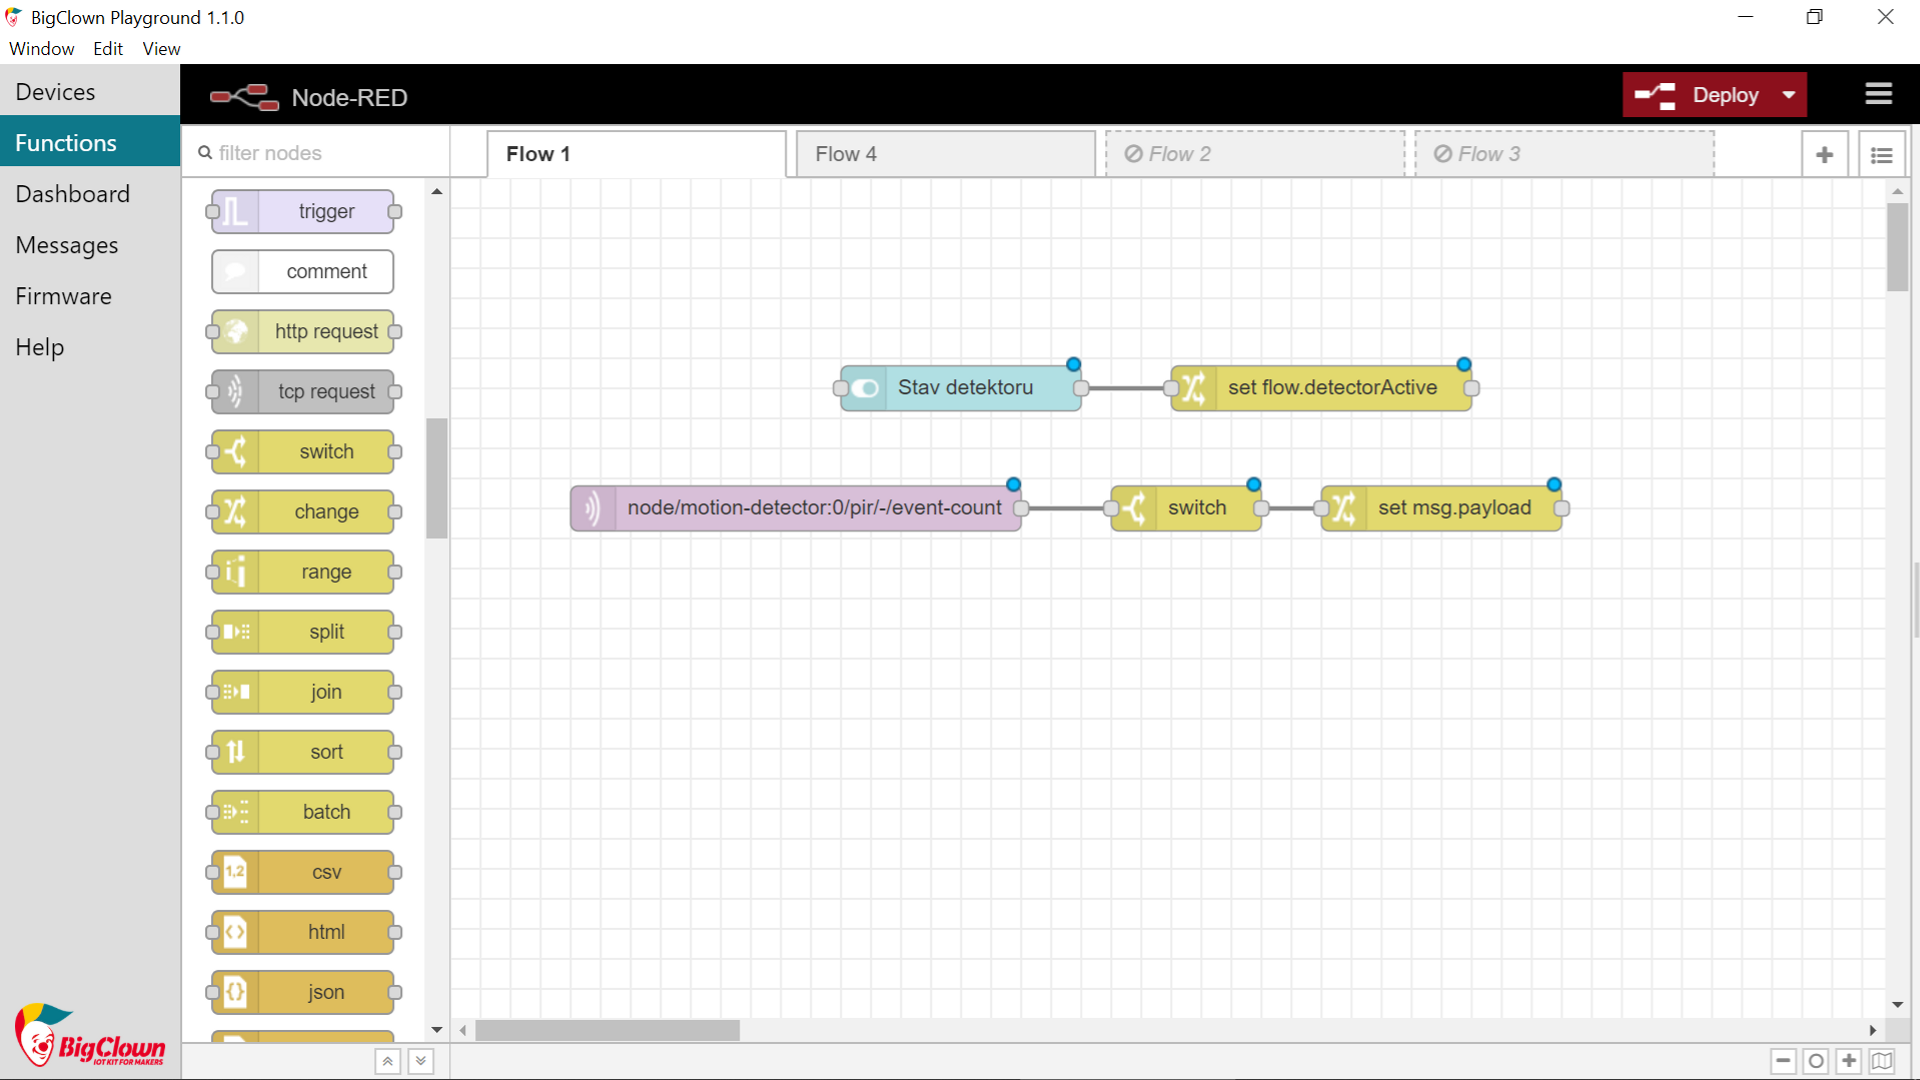
Prepare Blynk IoT for notifications
The detected movement reaches your smartphone as a push notification from the Blynk IoT app. Handy, isn't it? 😎 Node-RED sends the text of the message to Blynk, and a Blynk automation turns every new message into a notification.
-
If you don't have a Blynk IoT account yet, create one. The free plan is enough for this project: at the time of writing, it includes push notifications in the app and up to five automations.
-
Create a device template. Blynk's quick guide shows you how. You can also reuse a template from an earlier project.
-
In the template, open the Datastreams tab, click New Datastream and choose Virtual Pin. Name the datastream (for example
Message), pick a free pin (for example V2) and set the Data Type to String, because the notification will carry your own text. -
In the datastream settings, let automations use it as a trigger: in the Automations section, turn on Use as Condition. Create the datastream and save the template.
-
Create a device from the template: in Devices, add a new device, choose your template and give the device a name. You'll find its Auth Token on the device's Device Info tab. You'll need it in Node-RED.
Create the automation
-
Open Automations in Blynk and create a new automation. For the condition (When), choose Device State, then your device, your datastream and Is Any. The automation will then react to every message, even when it's the same as the last one.
-
Under Do this, add the action that sends a notification to the mobile app (Send In-App Notifications) and choose yourself as the recipient. Put the Trigger value placeholder (
{TRIGGER_VALUE}) in the message. Blynk replaces it with the text that Node-RED sends. -
Name the automation. Limit period sets how soon the automation may run again: choose the shortest option, otherwise you won't get a message about movement that comes soon after the first. Save the automation.
-
Download the Blynk IoT app to your phone from the App Store or Google Play and sign in with the same account. Make sure the app is allowed to show notifications, so the message can pop up. 📱
Connect your phone to the box
-
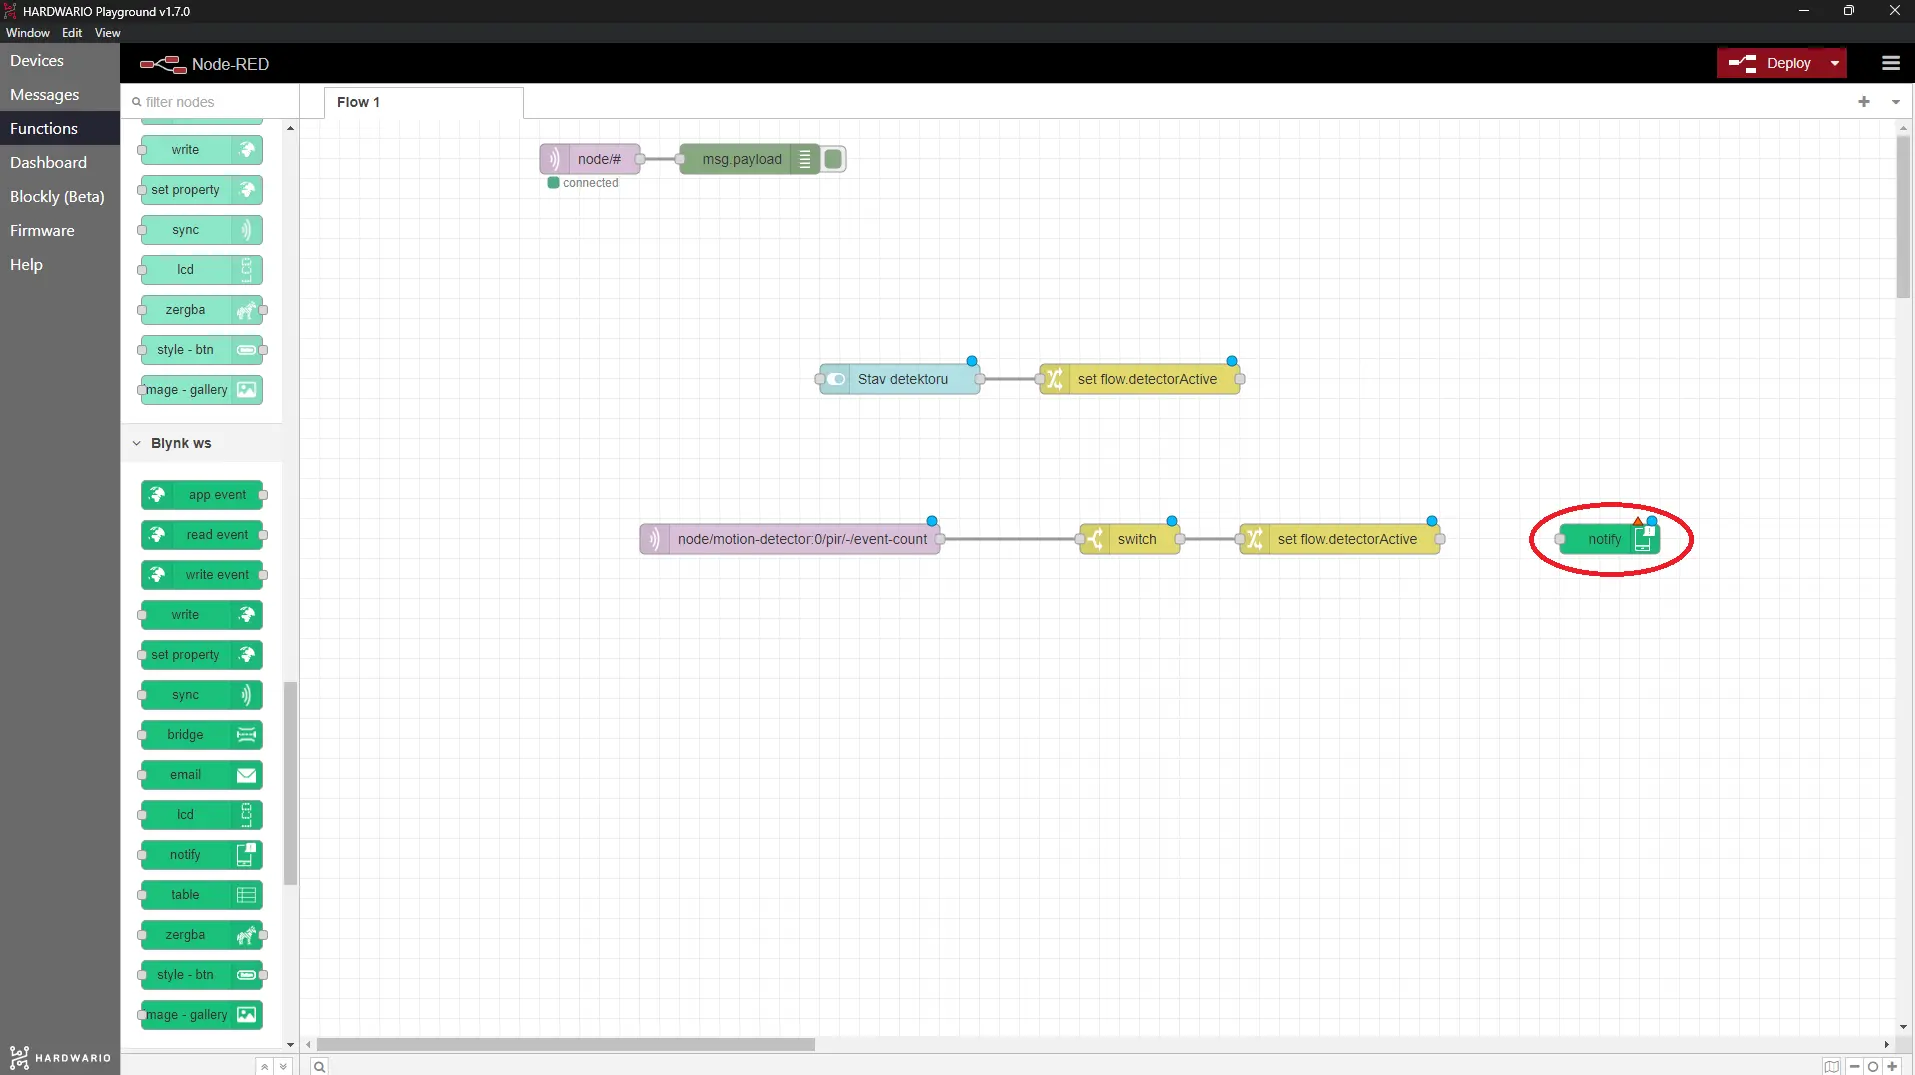
Go back to your computer. On the Node-RED workspace, place the last node of the whole project: the write node from the Blynk IoT section (not from Blynk ws, which belongs to the old Blynk that no longer works). It goes right after the flow with the switch (see the picture). 👀
-
Double-click the node to open it. Next to Connection you'll see a small pencil. Click it to open a new window. In the Url field enter
blynk.cloud, and copy the Auth Token and Template ID from the Blynk web app on your computer: the Auth Token is on the device's Device Info tab, the Template ID in the template details. Confirm with Add. -
In the Virtual Pin field, enter the number of your datastream's pin (2 for V2). This is what turns the detected movement into a push notification: the node writes the message to the datastream, and the automation sends it on. Confirm with Done.
-
Finally, connect this green node to the previous flow, so the message from the detector ➡️ goes to Blynk IoT ➡️ and lands on your phone. Then press the red Deploy button. 🚨
Ready, steady… go!
-
It's high time to find out who brings the presents. On the Dashboard tab in Playground, switch the detector on. 🕵️
-
The PIR Module picks up even the slightest movement and sends a message to your phone in no time. Santa doesn't stand a chance! Hurry and catch him in the act!
-
A word of advice: once you've caught him, make it up to him, or he might not leave you any presents at all. 😜