Fridge door detector
Introduction
You know how it goes. You've saved the last piece of birthday cake in the fridge, and when you finally get to it… it's gone. And your sweet-toothed sibling has chocolate all over their chin. Stop them with a smart box! 🎂
In this project, you will learn to build a fridge door detector. 👈
All you need is the box with a button and the USB dongle, so the basic HARDWARIO Start Set will do.
Download new firmware
- If you haven't done it yet, assemble the Start Set.
- Upload the special twr-radio-move-detector-x-axis firmware to the Core Module (you'll find it in Playground among the other firmware). It makes the box react to movement. 👌
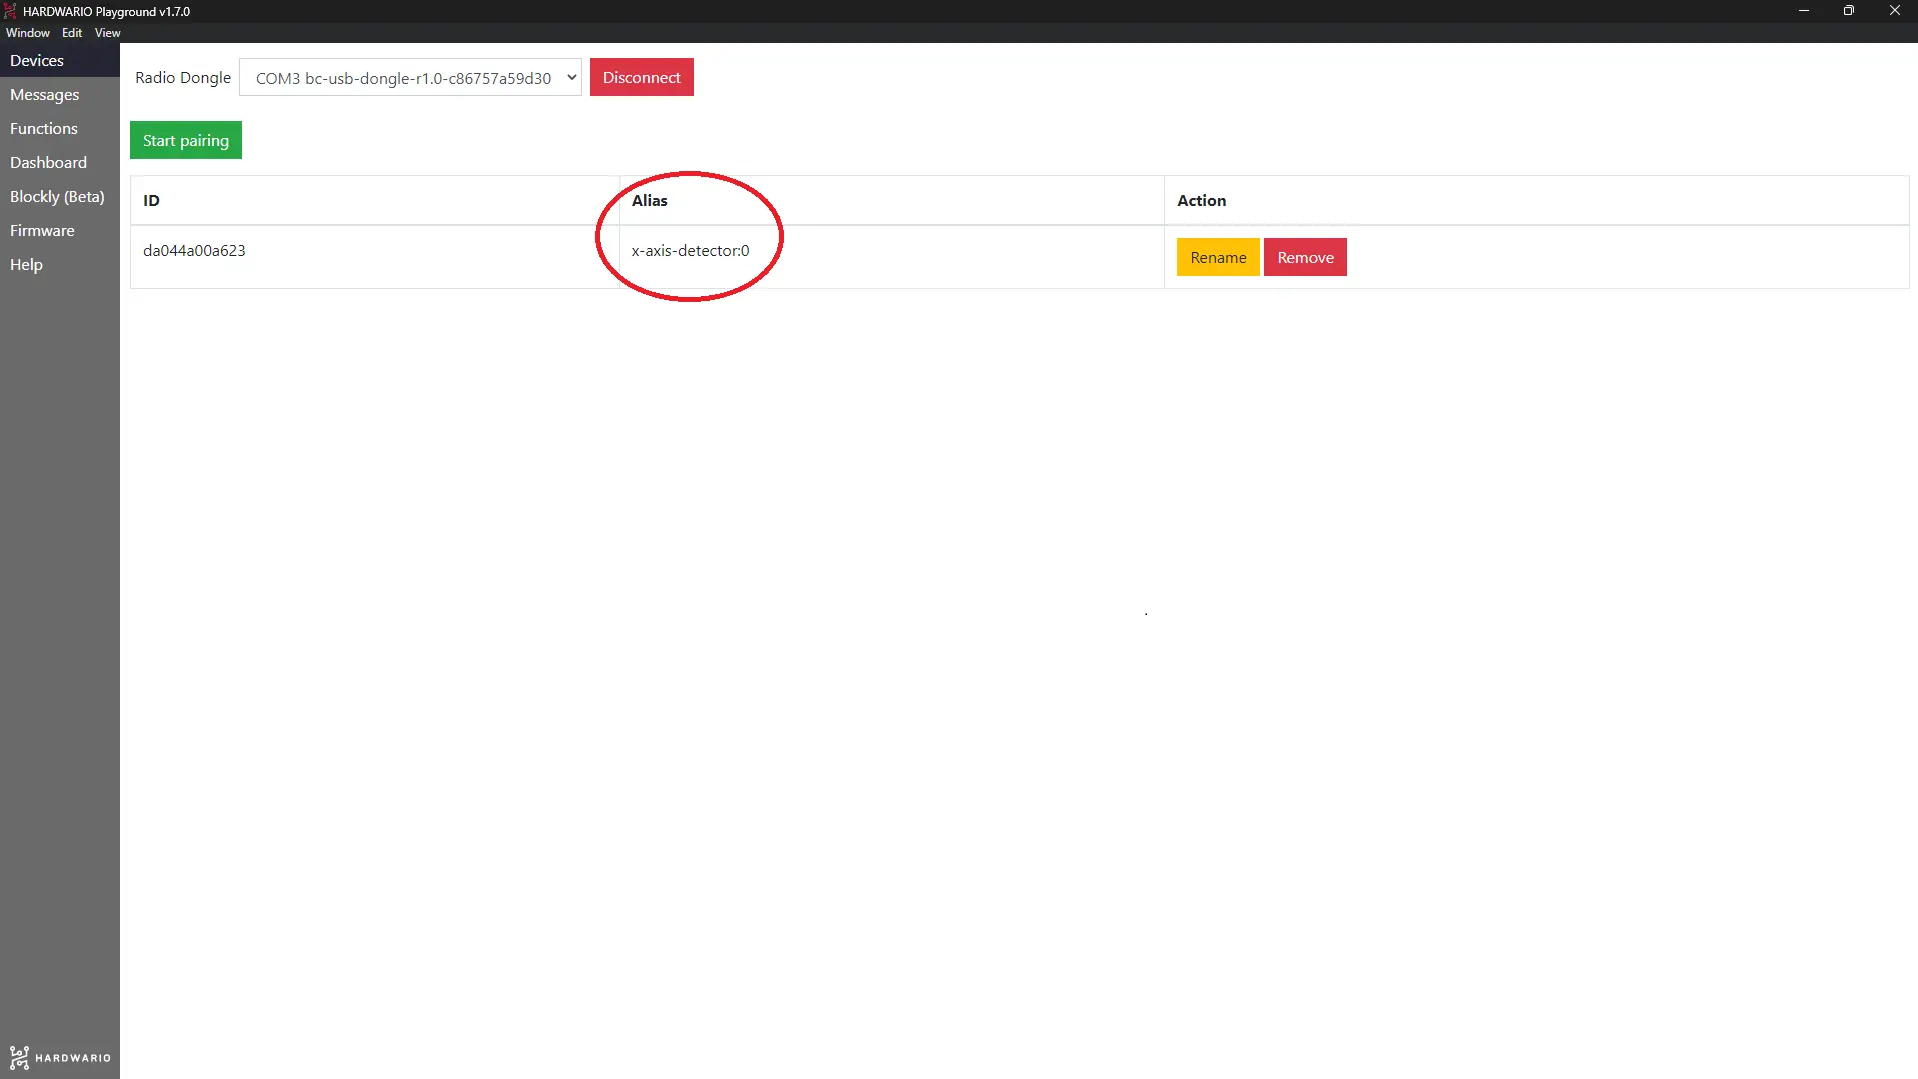
- Pair the Core Module with the USB dongle. Right after pairing, you'll see that its Alias has changed to x-axis-detector.
Get it started in Node-RED
- In Playground, click the Functions tab, where you'll find the Node-RED programming workspace.
- Start as always: first place an mqtt in node from the network section on the workspace. Double-click it and copy this line into the Topic field. It tells the box to watch for movement:
node/x-axis-detector:0/accelerometer/-/event-count
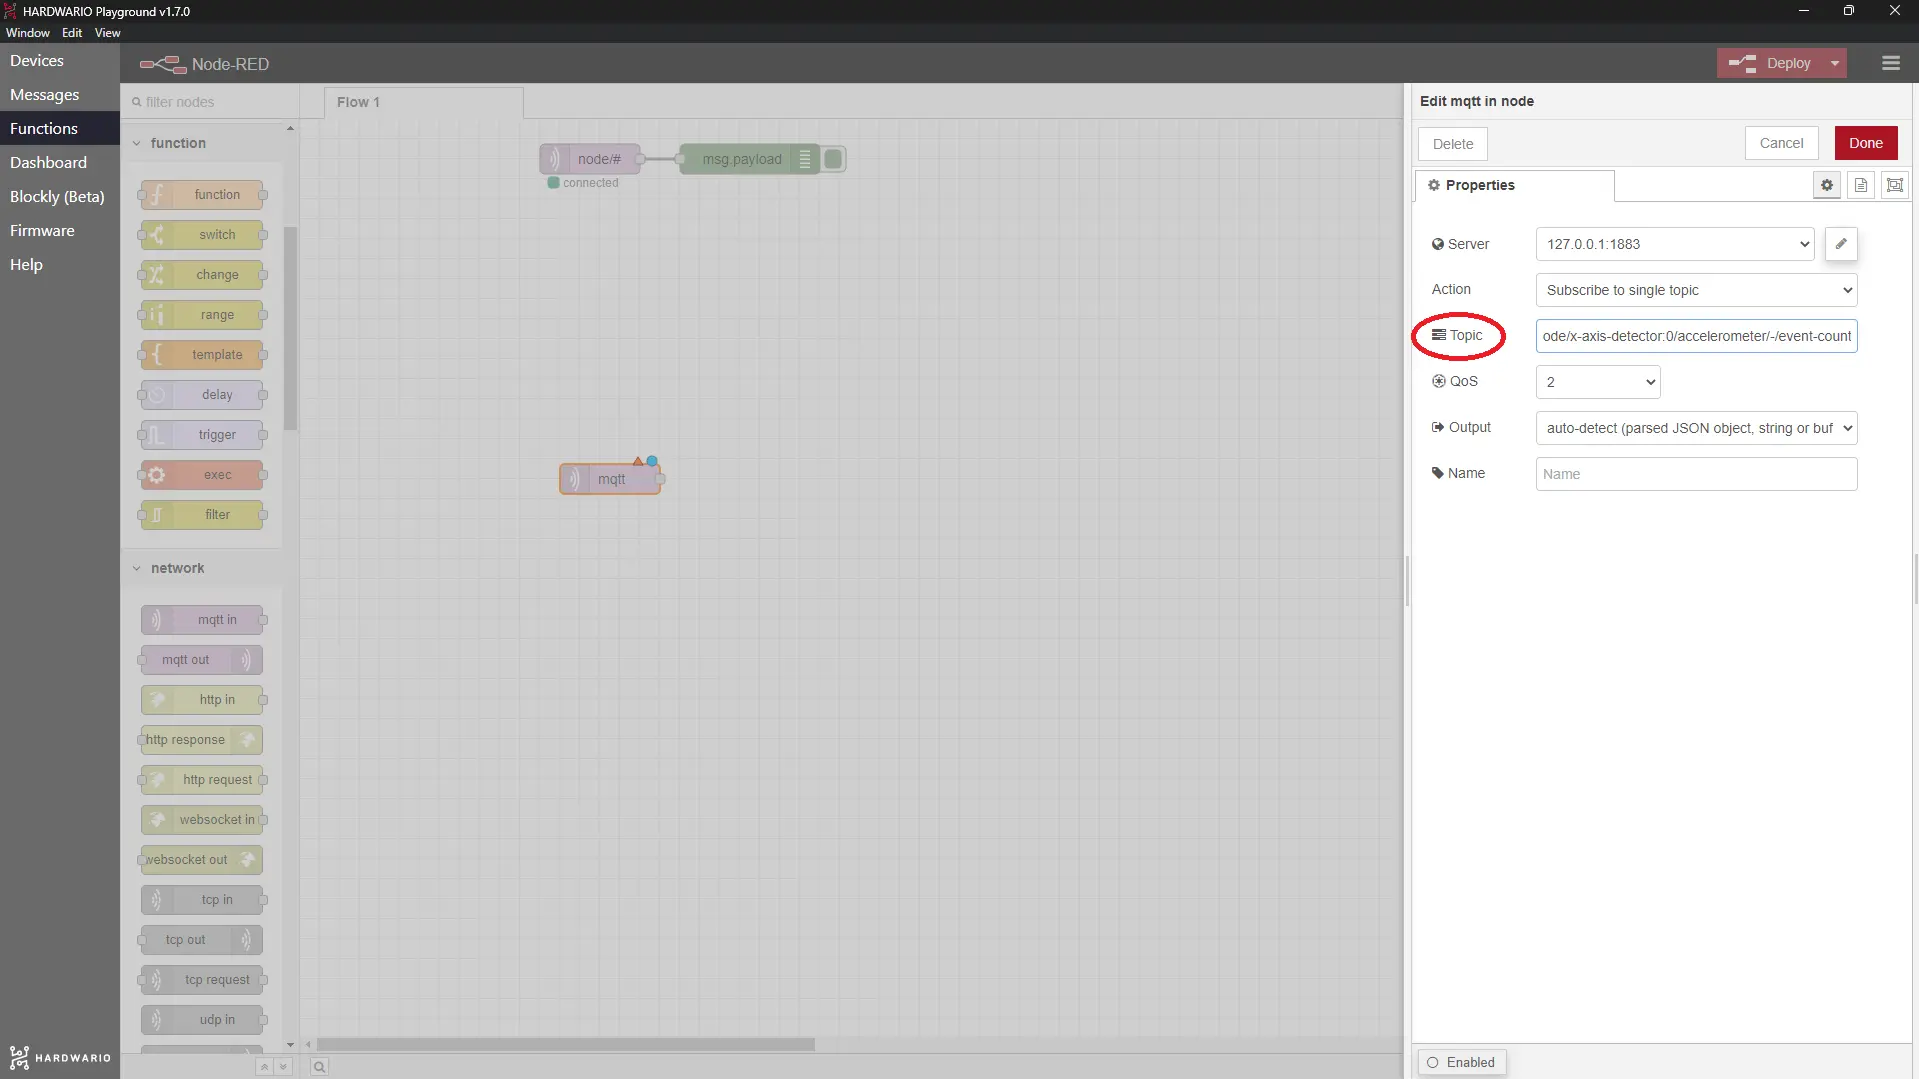
Confirm with Done.
-
Now add a little JavaScript. 🙌 First, place a function node from the section of the same name on the workspace…
-
…and then double-click it. Copy this code into the On Message tab. It counts how many times the fridge has been opened:
var count = flow.get("count") || 0;
count++;
flow.set("count", count);
msg.payload = count;
return msg;
Also give the node a name in the Name field, for example Counter.
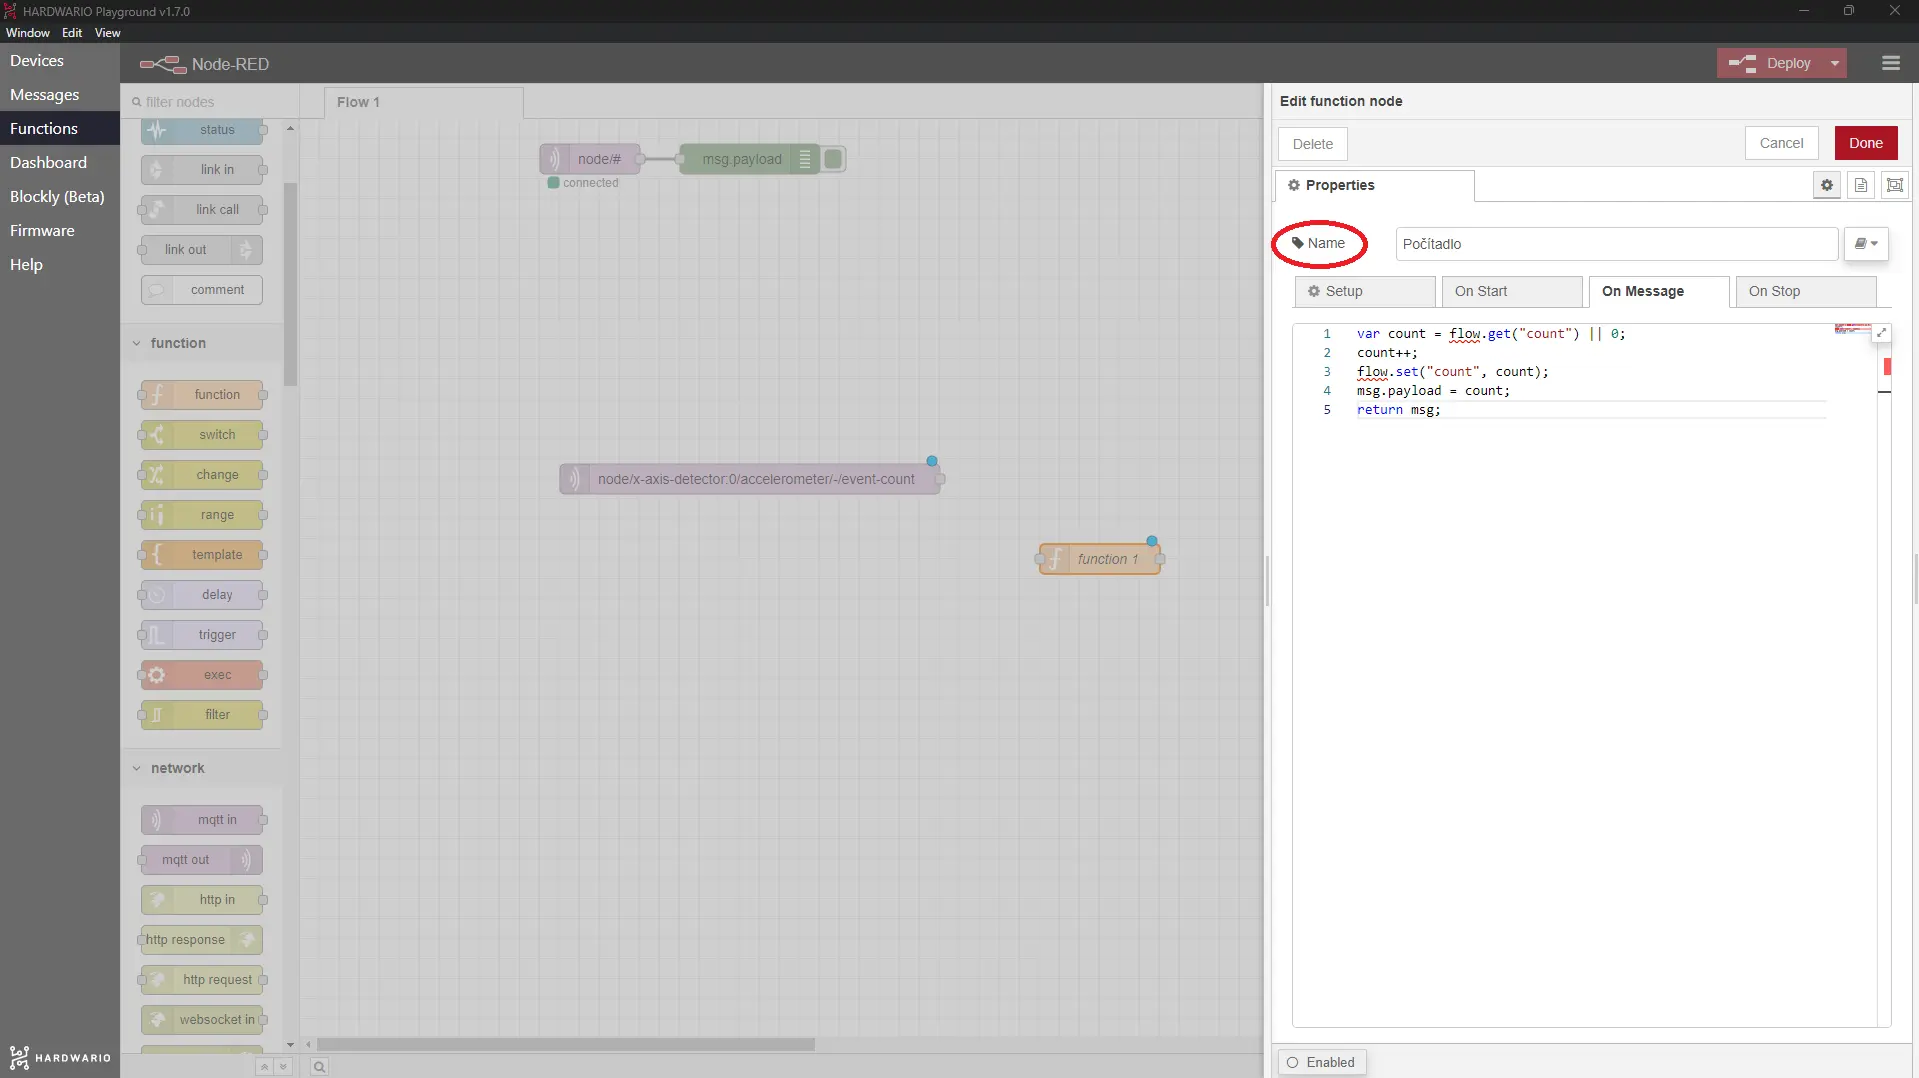
Confirm with Done.
-
Next to it, place the last node: text from the dashboard section.
-
In the node settings, change the Label field to the text you want to see next to the count, for example Fridge opened.
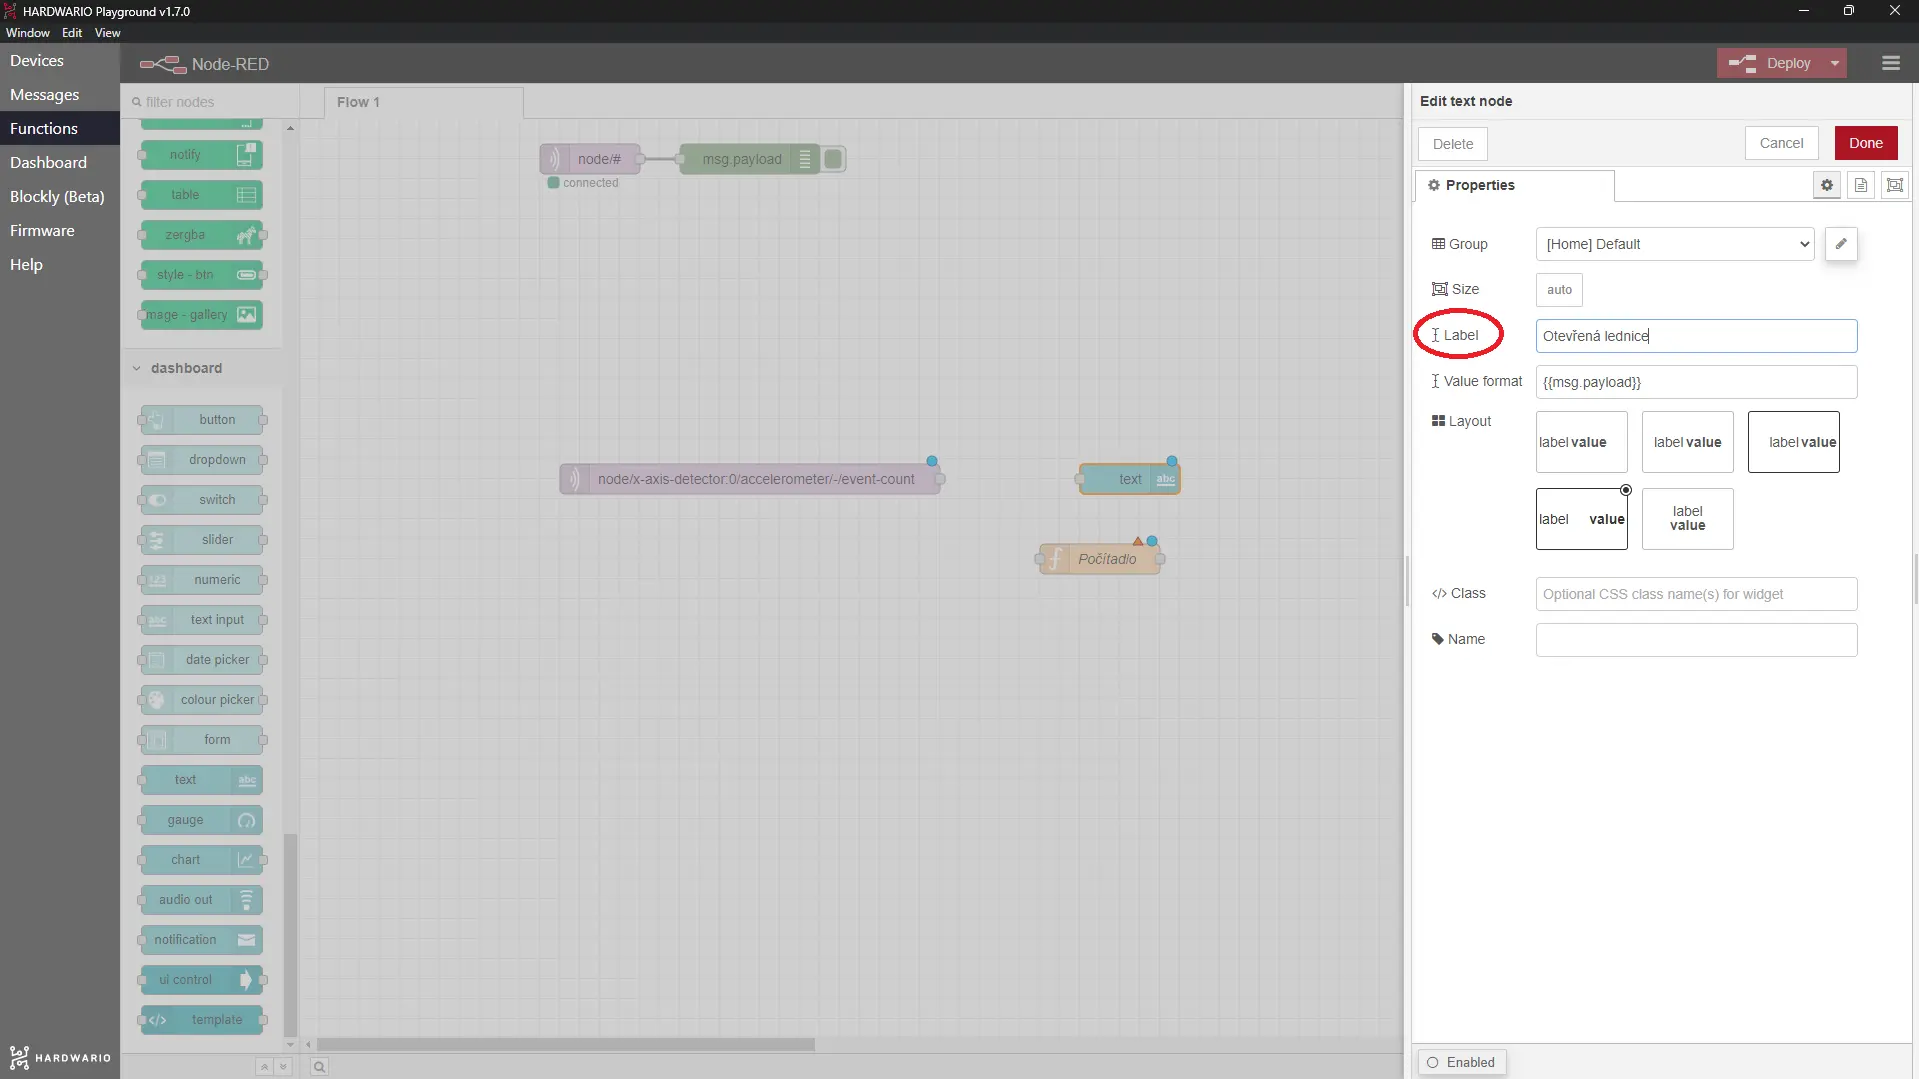
Confirm with Done.
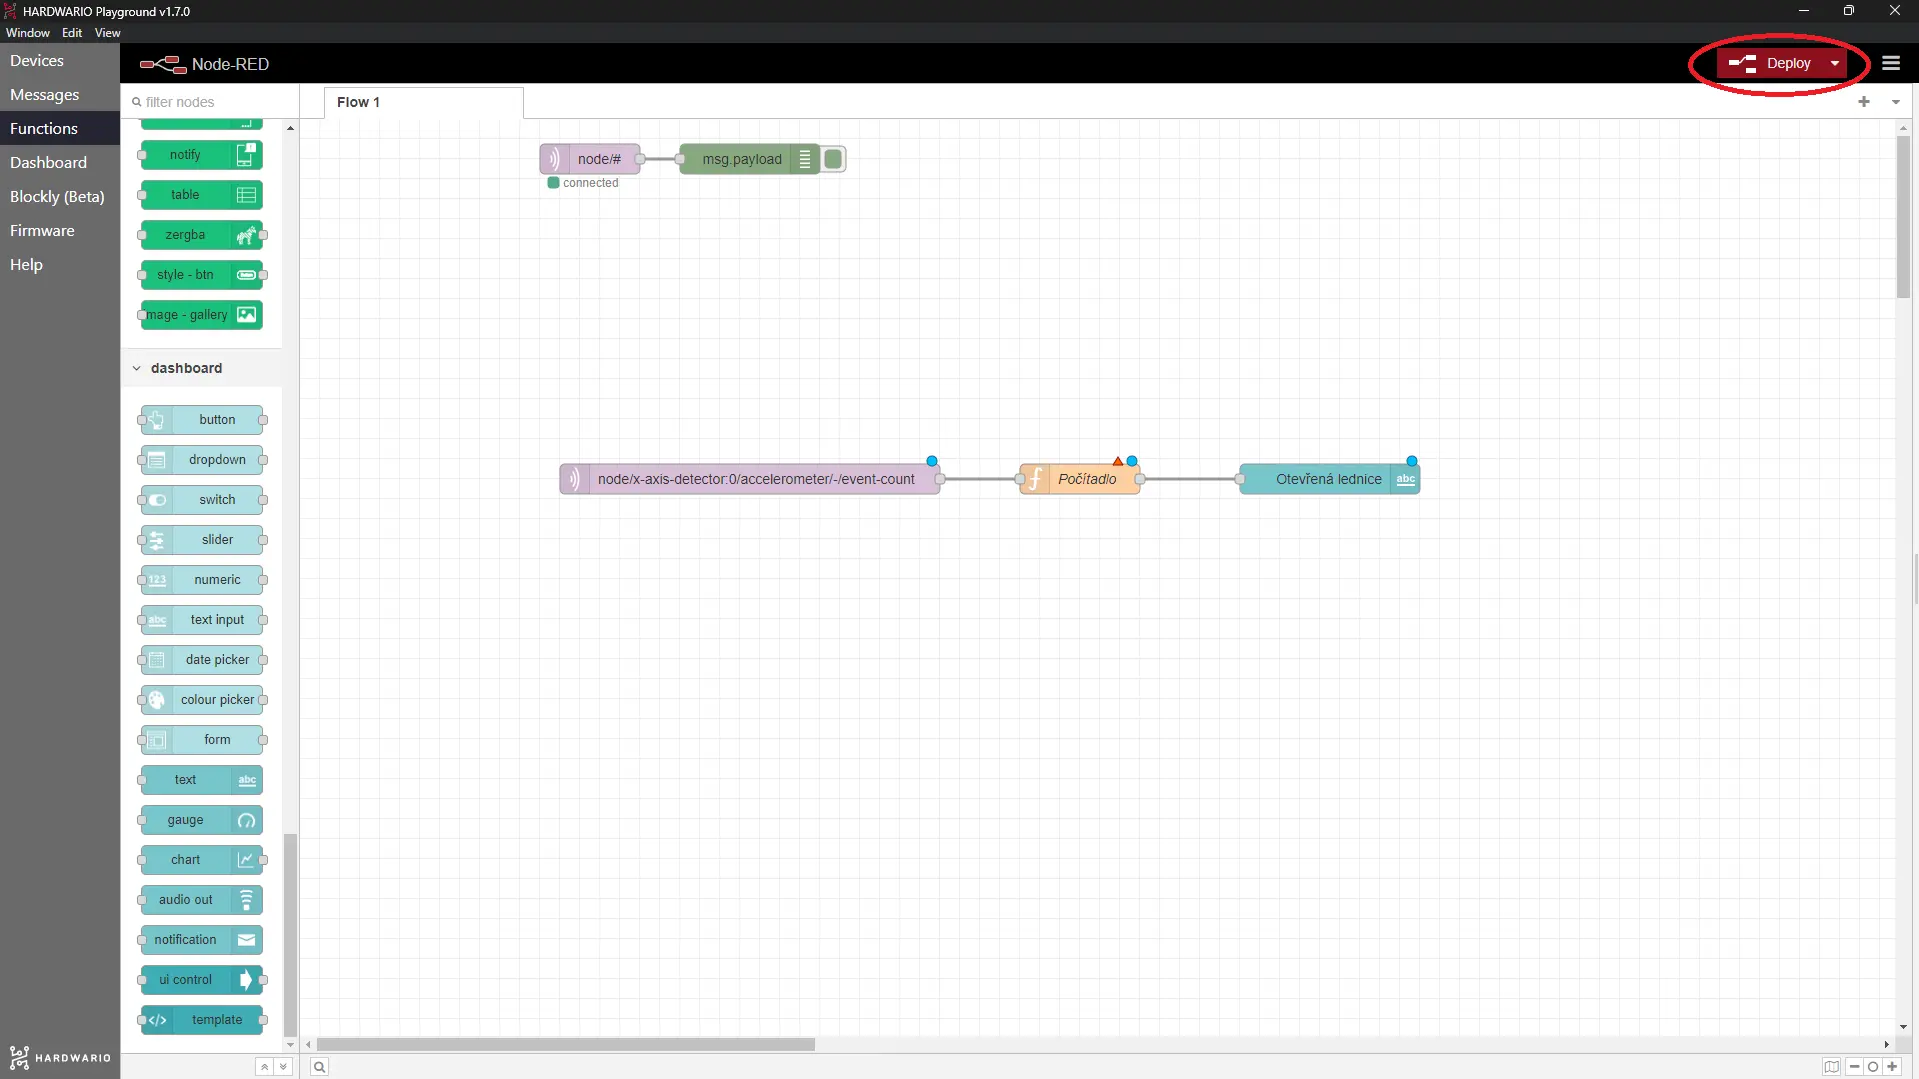
- Connect all three nodes as shown in the picture. Don't forget to click the good old Deploy button in the top right corner, which starts the whole flow.
And… action!
- Now let's set the trap. Put a cake or some other bait in the fridge. 🍰
- Lay the box flat in the fridge door.
- When someone opens the door, the box sends you an alert to the Dashboard tab.

- Run and catch the sneaky villain! 👮
- Then enjoy your sweet victory. 💘