Highest centrifugal force
Introduction
Do you remember spinning tops? You might have had a wooden or plastic one, but we bet it wasn't a smart one. Now you can finally make one that records your centrifugal force. Then compete with your friends and find out which of you is the centrifugal champion! 💪
In this project, you will learn to measure how fast the box spins. 👈
All you need is the box with a button and the USB dongle, so the basic HARDWARIO Start Set will do.
Download new firmware
-
If you haven't done it yet, assemble the Start Set.
-
Upload the new bcf radio spinning game firmware to the Core Module (you'll find it in Playground among the other firmware). It makes the box react to spinning. 👌
-
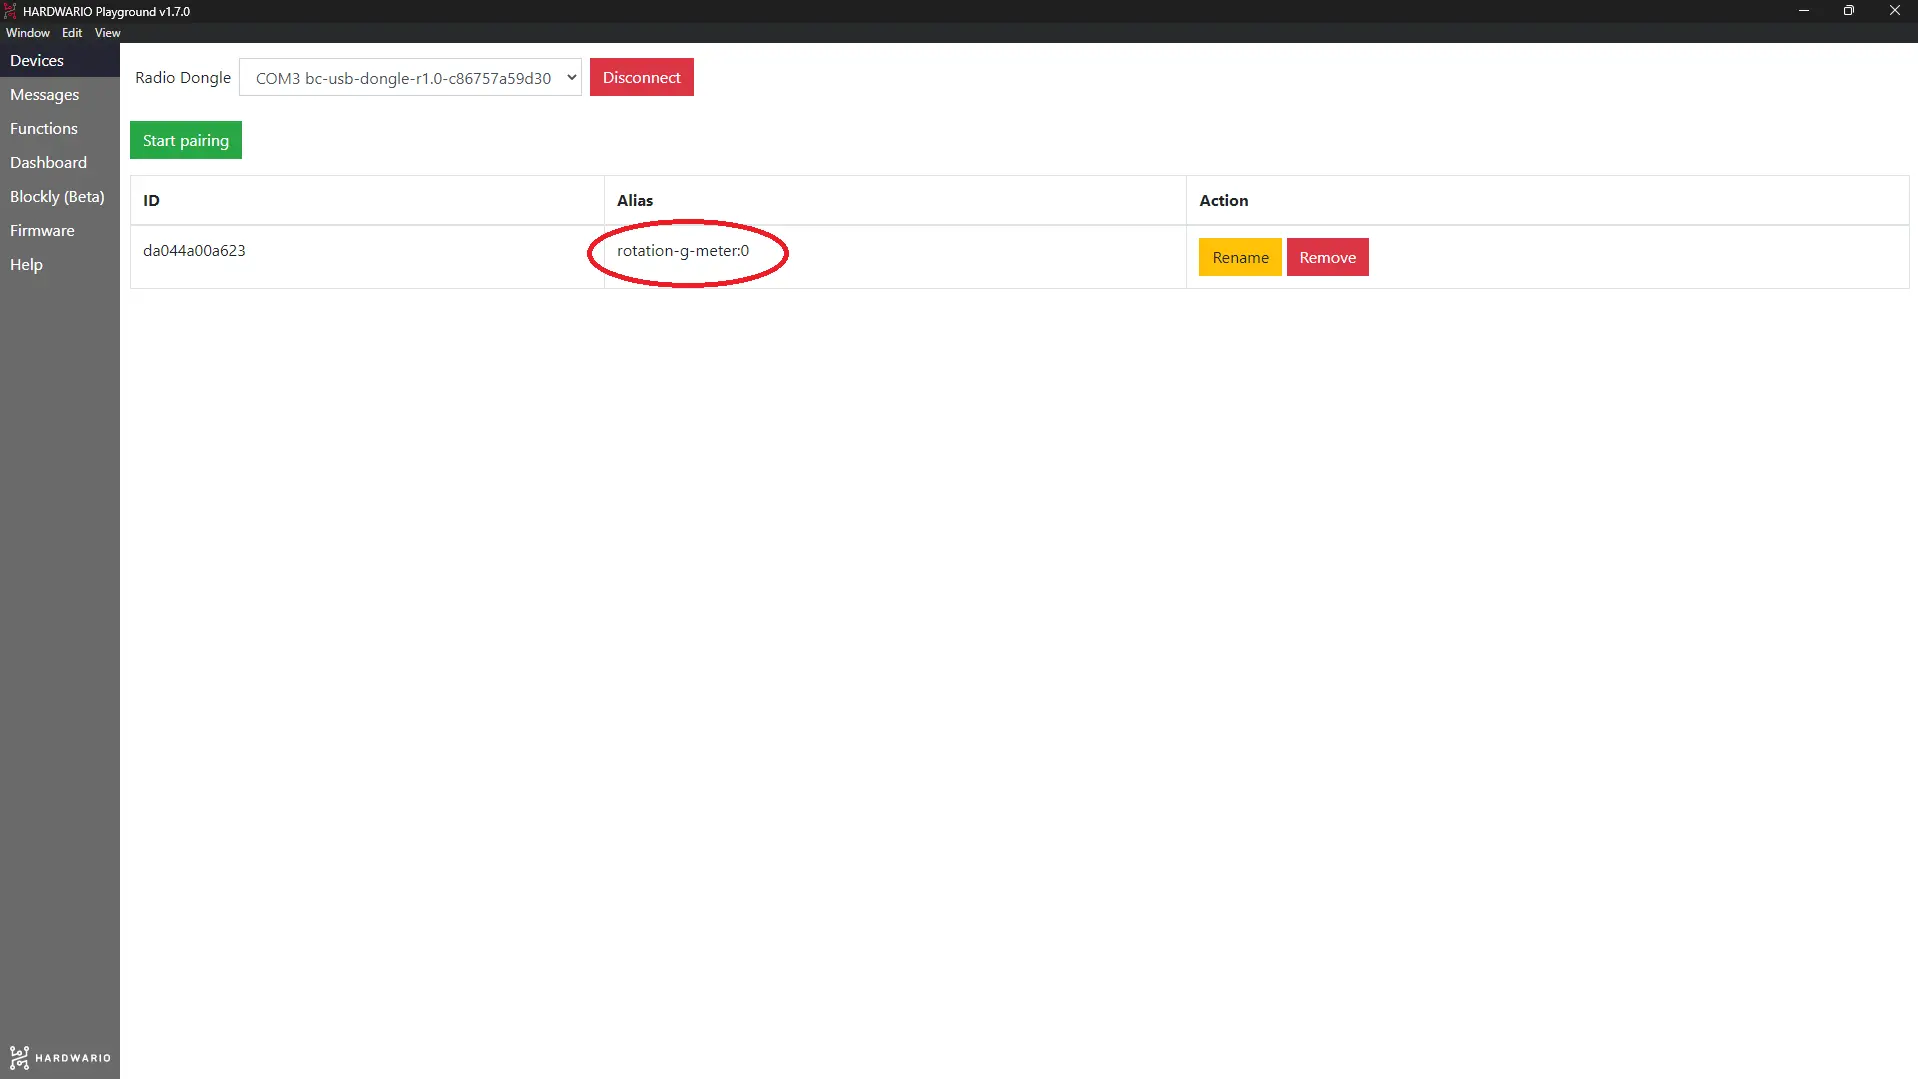
Pair the Core Module with the USB dongle. Right after pairing, you'll see that its Alias has changed to rotation-g-meter.
Build it in Node-RED
- In Playground, click the Functions tab, where you'll find the Node-RED programming workspace. 🤖
- Start as always: first place an mqtt in node from the network section on the workspace.
Double-click it and copy this line into the Topic field. It lets the box measure the centrifugal force:
node/rotation-g-meter:0/rotation-g
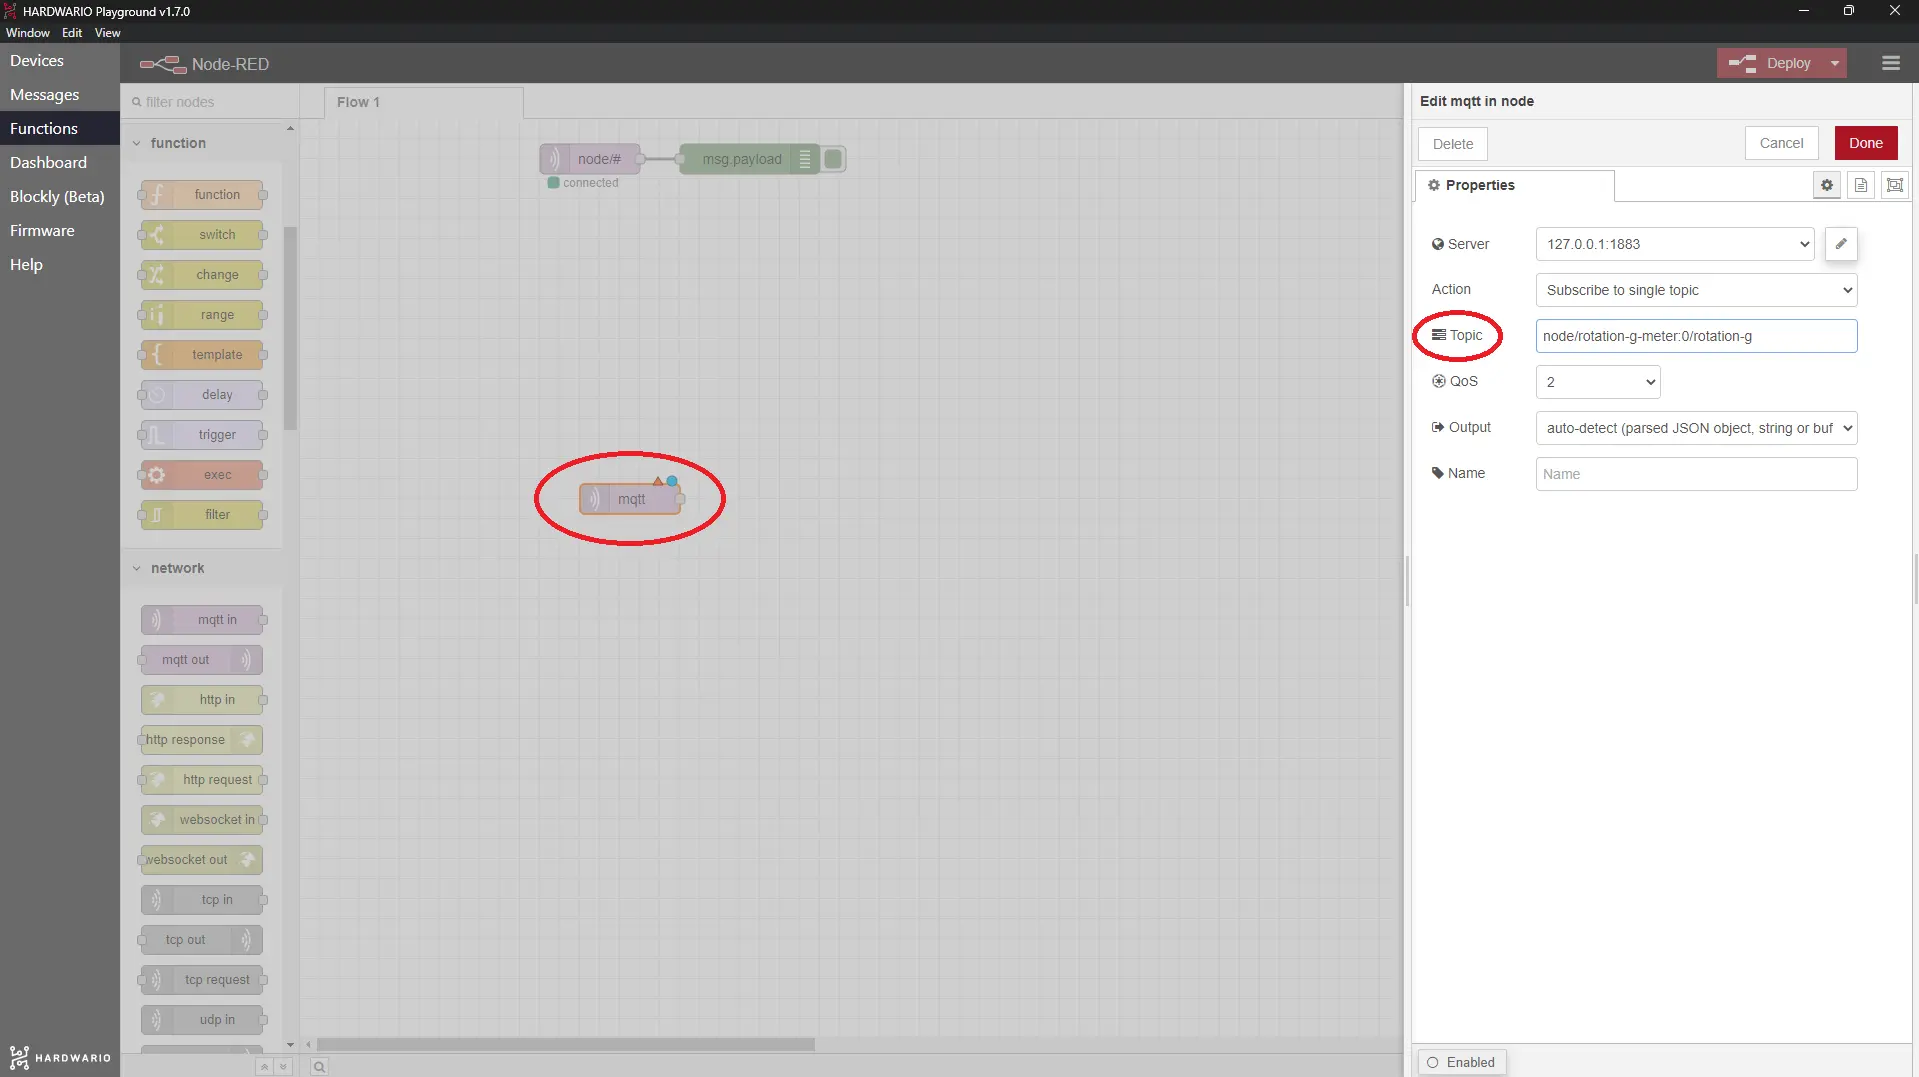
Confirm with Done.
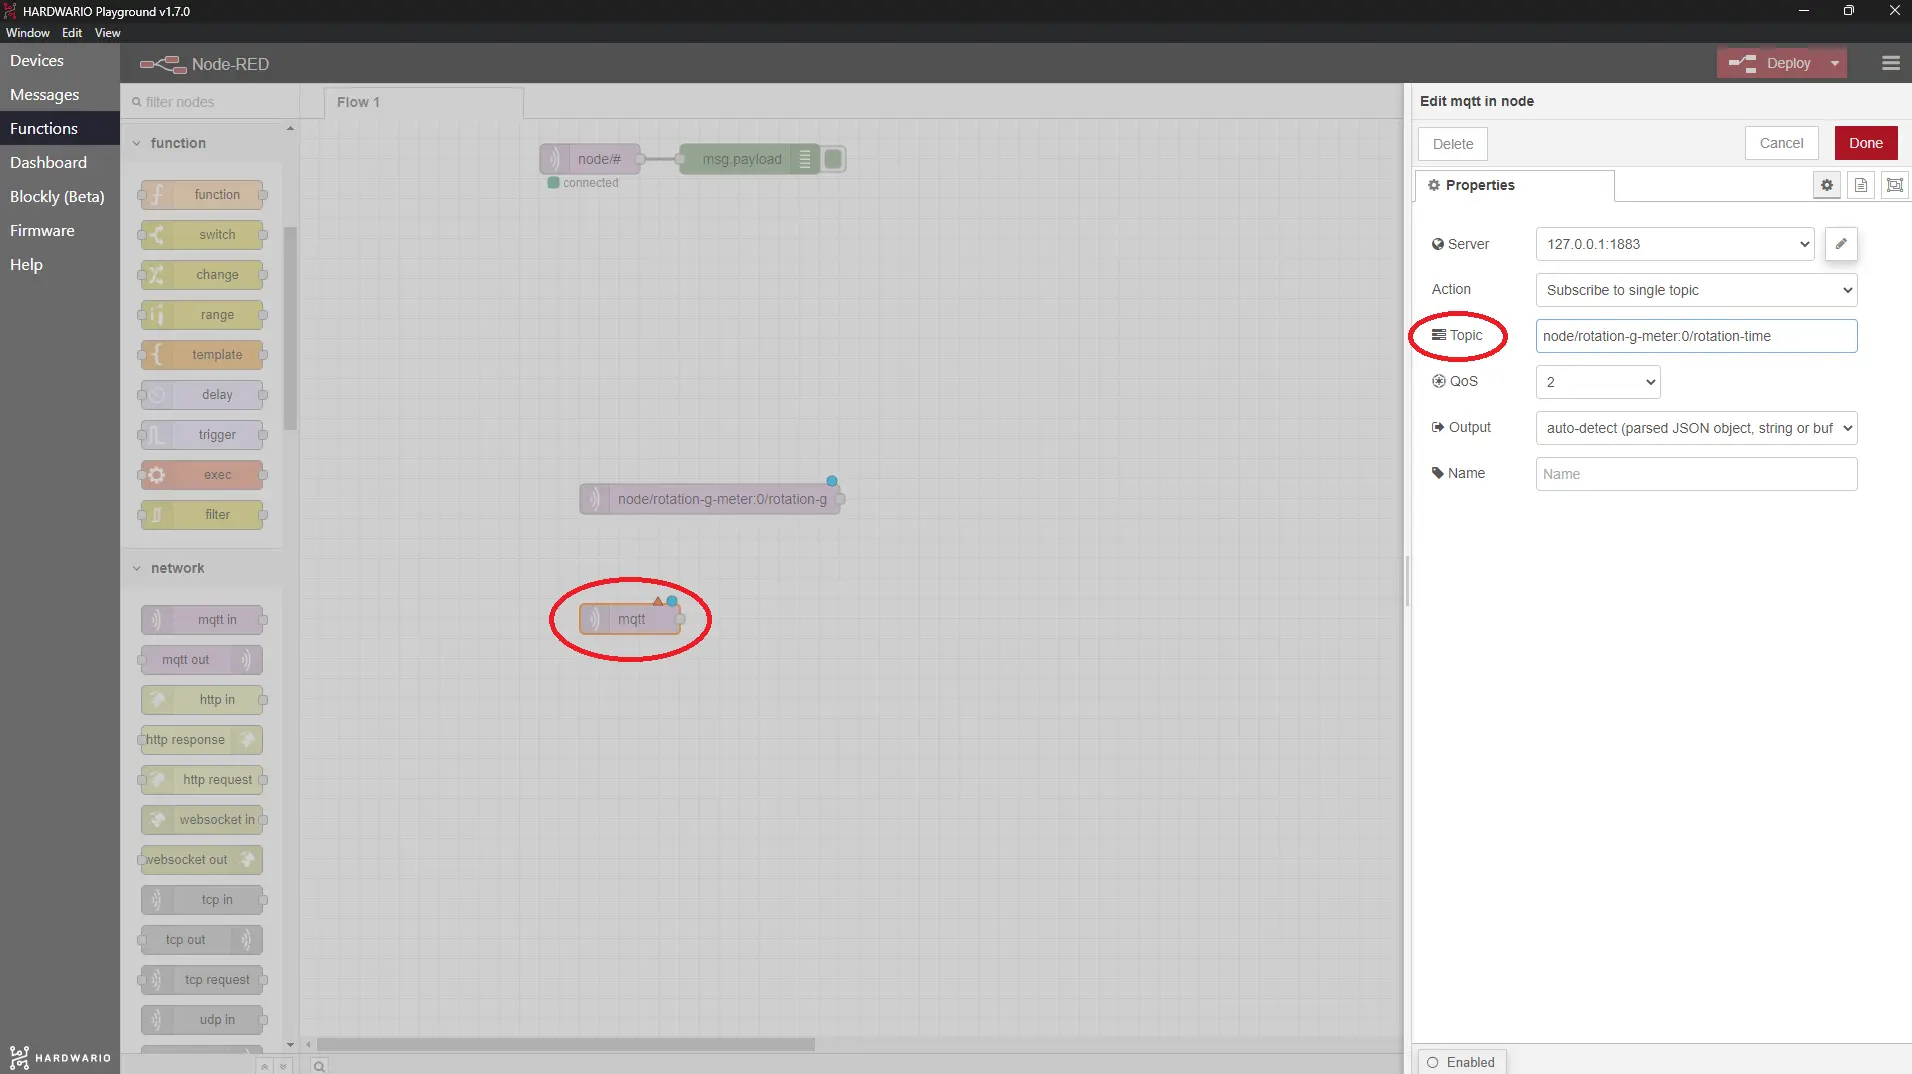
- Surprise! 😲 Below the first MQTT node, place a second mqtt in node from the network section. This time, enter a different Topic in its settings, so the box measures how long it spins:
node/rotation-g-meter:0/rotation-time
- Next to each of them, add one node for JavaScript. You'll find it in the function section under the name function (original, right? 🤡).
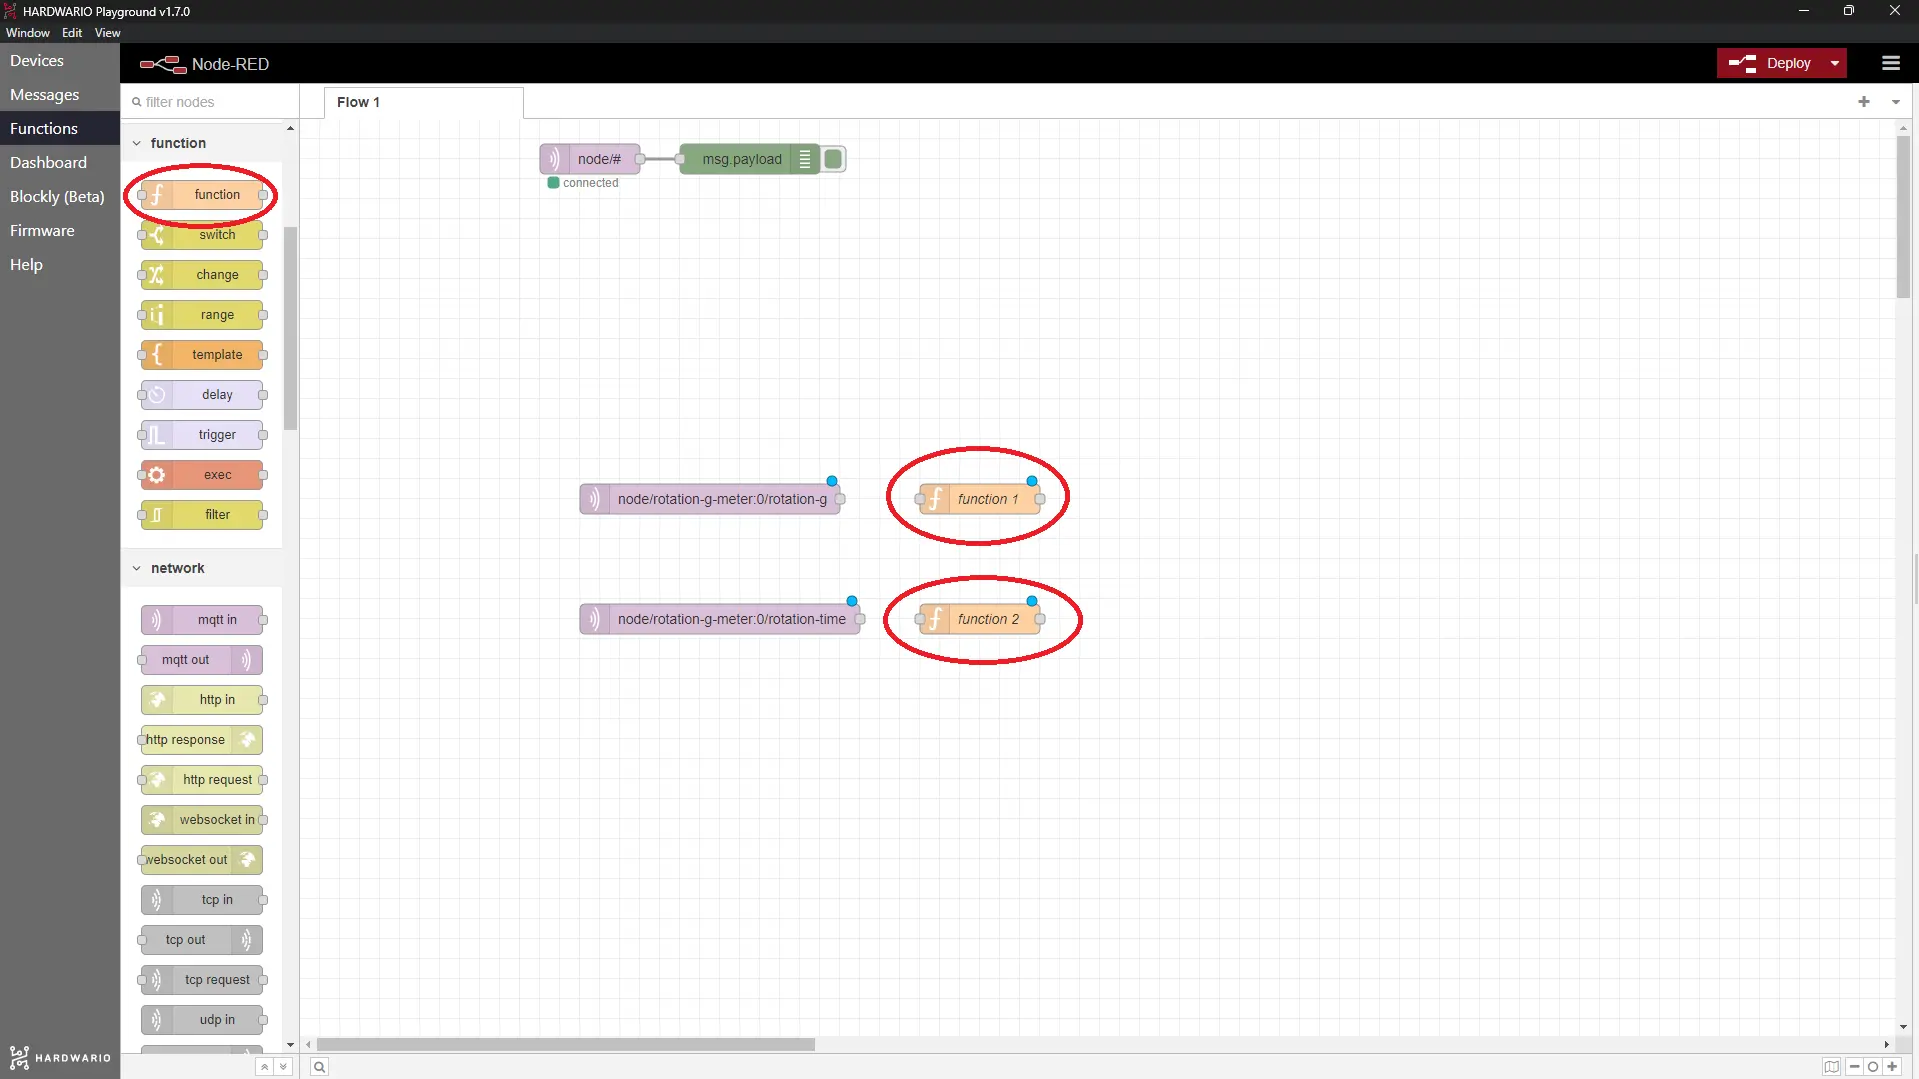
- Double-click the upper function node and paste this code into the large field on the On Message tab. It records the highest centrifugal force. 💪
var record = flow.get("record") || flow.set("record", 0.0);
var lastSpin = parseFloat(msg.payload);

if(lastSpin > flow.get("record"))
{
    flow.set("record", lastSpin);
    return msg;
}
In the Name field, name the node Save the record.
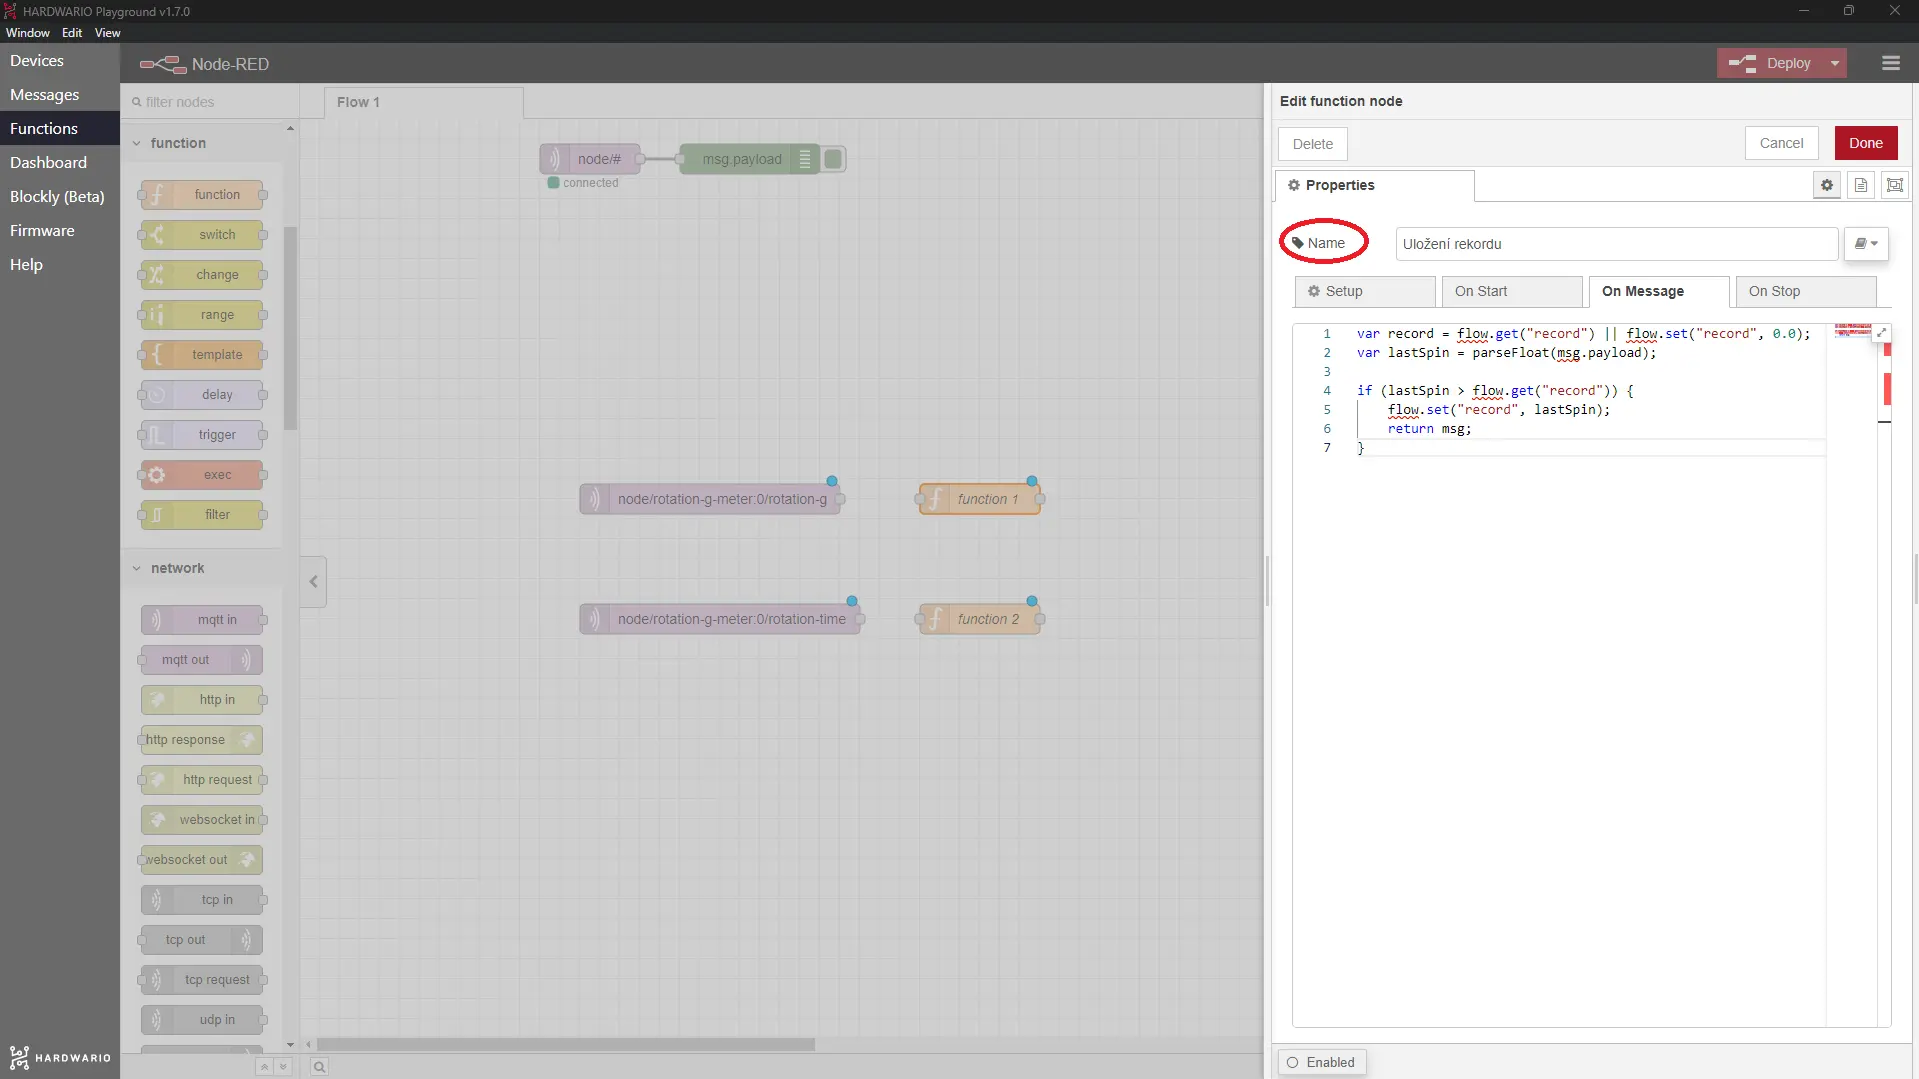
Confirm with Done.
- In the lower function node (again on the On Message tab), paste the code that records the longest spin time. ⏰
var record = flow.get("timeRecord") || flow.set("timeRecord", 0.0);
var lastSpinTime = parseFloat(msg.payload);

if(lastSpinTime > flow.get("timeRecord"))
{
    flow.set("timeRecord", lastSpinTime);
    return msg;
}
In the Name field, name the node Save the record.
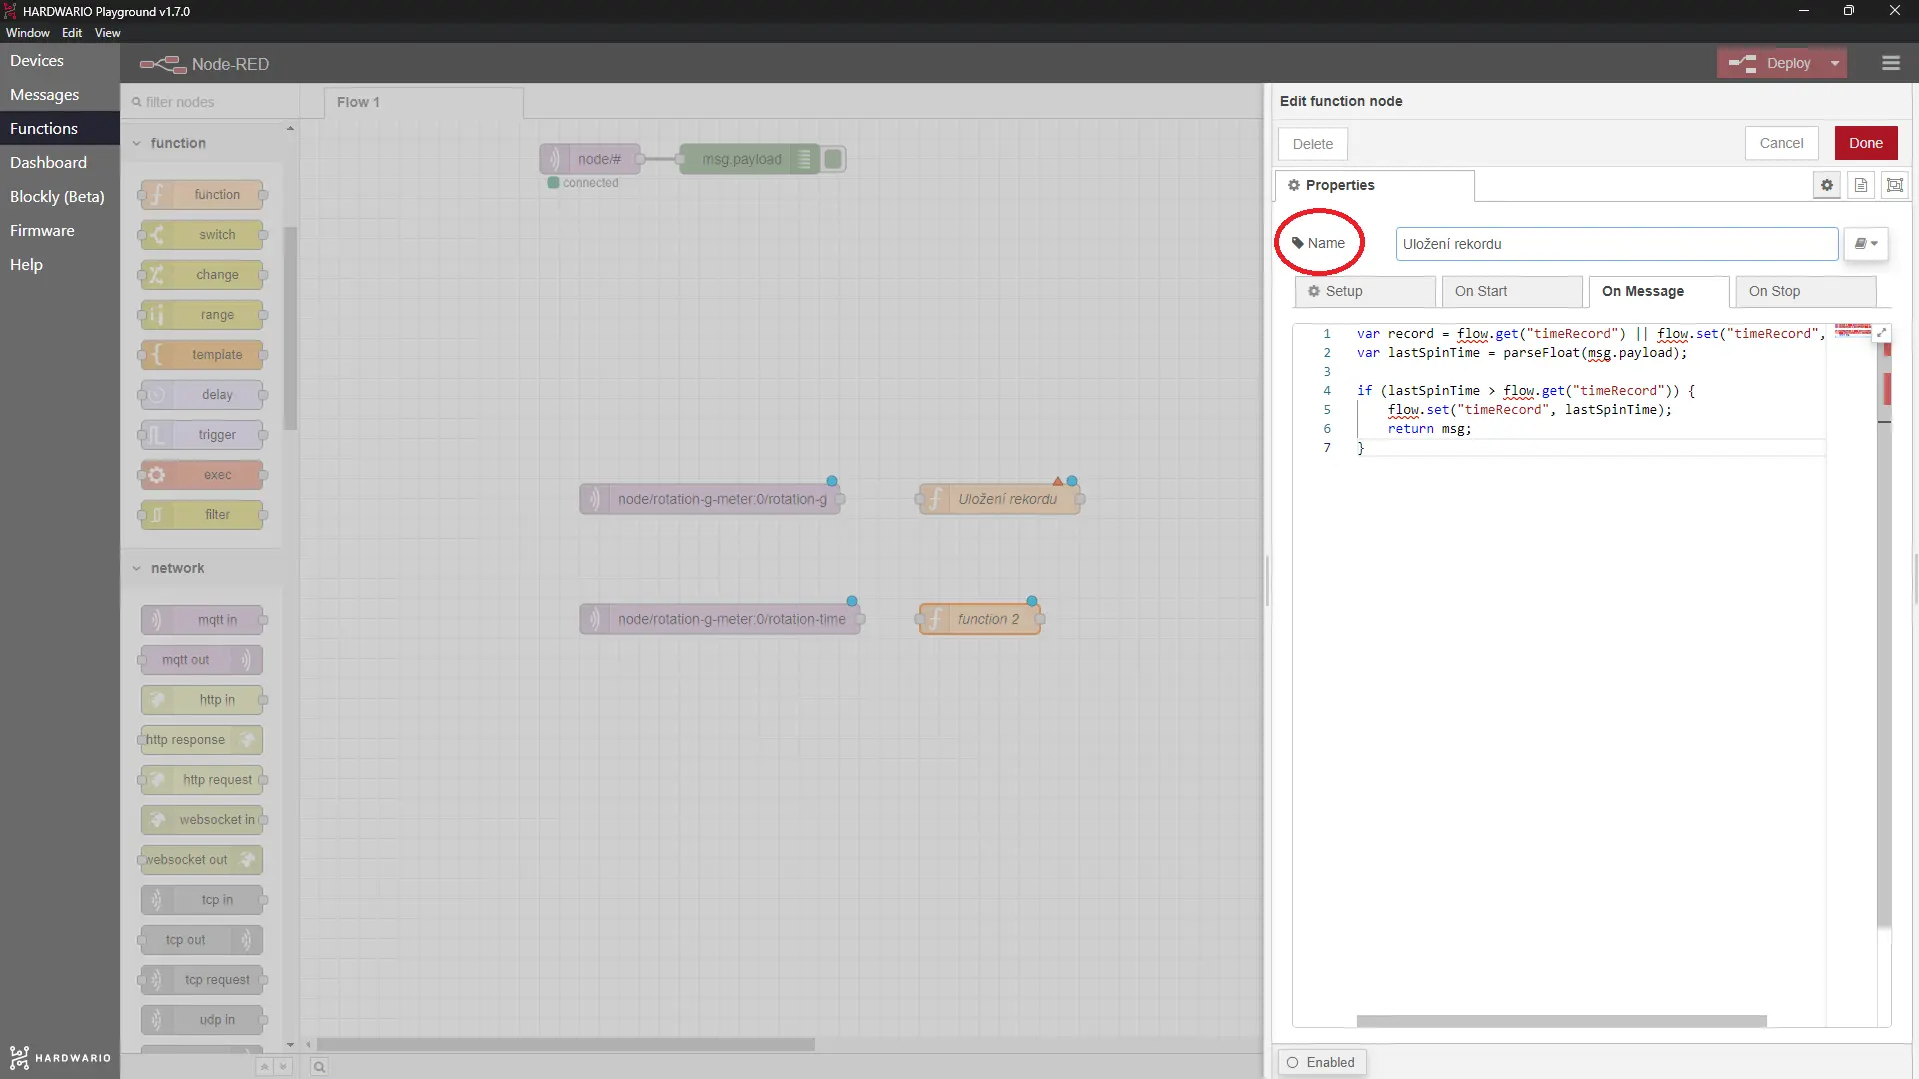
Confirm with Done.
- Below the upper function node, place a text node from the dashboard section. You can put it somewhere else, but it's clearer when the nodes sit one under another.
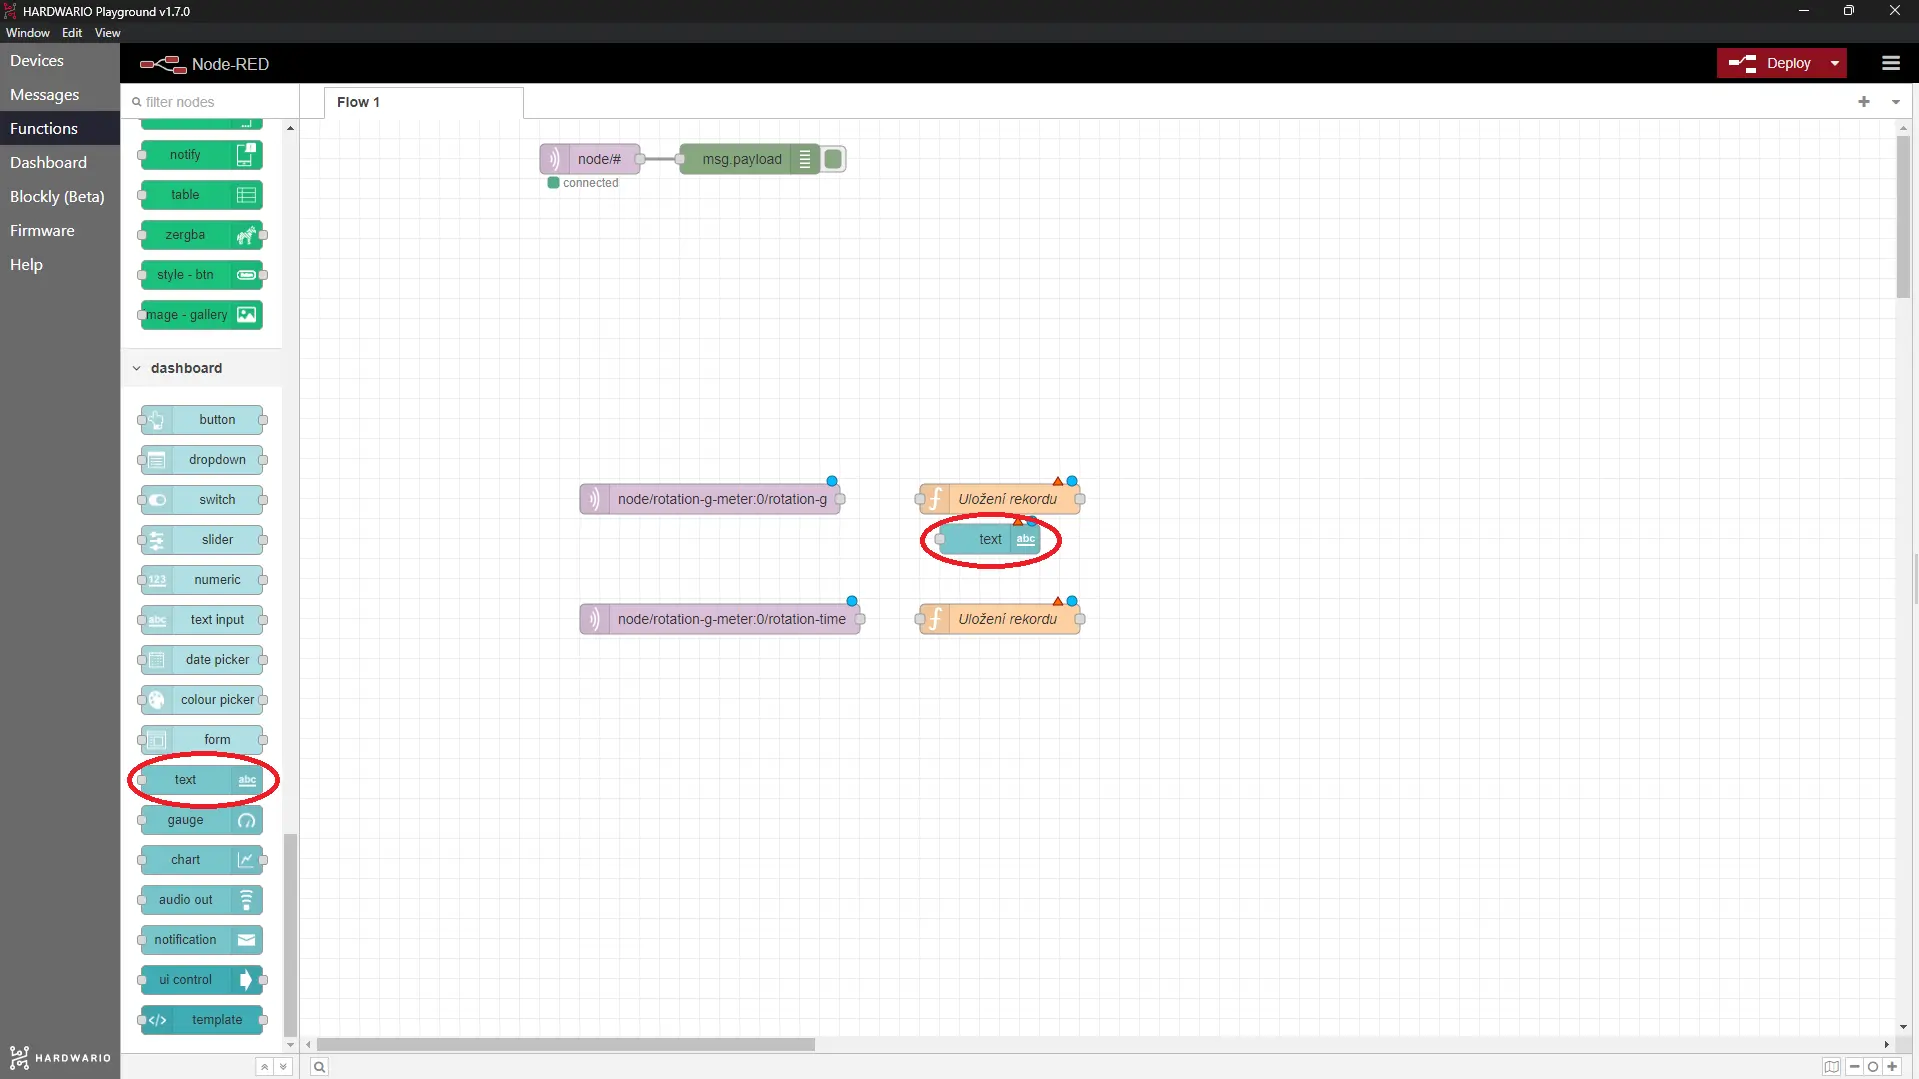
In its settings, name it Last spin. It will show the value the box has just measured.
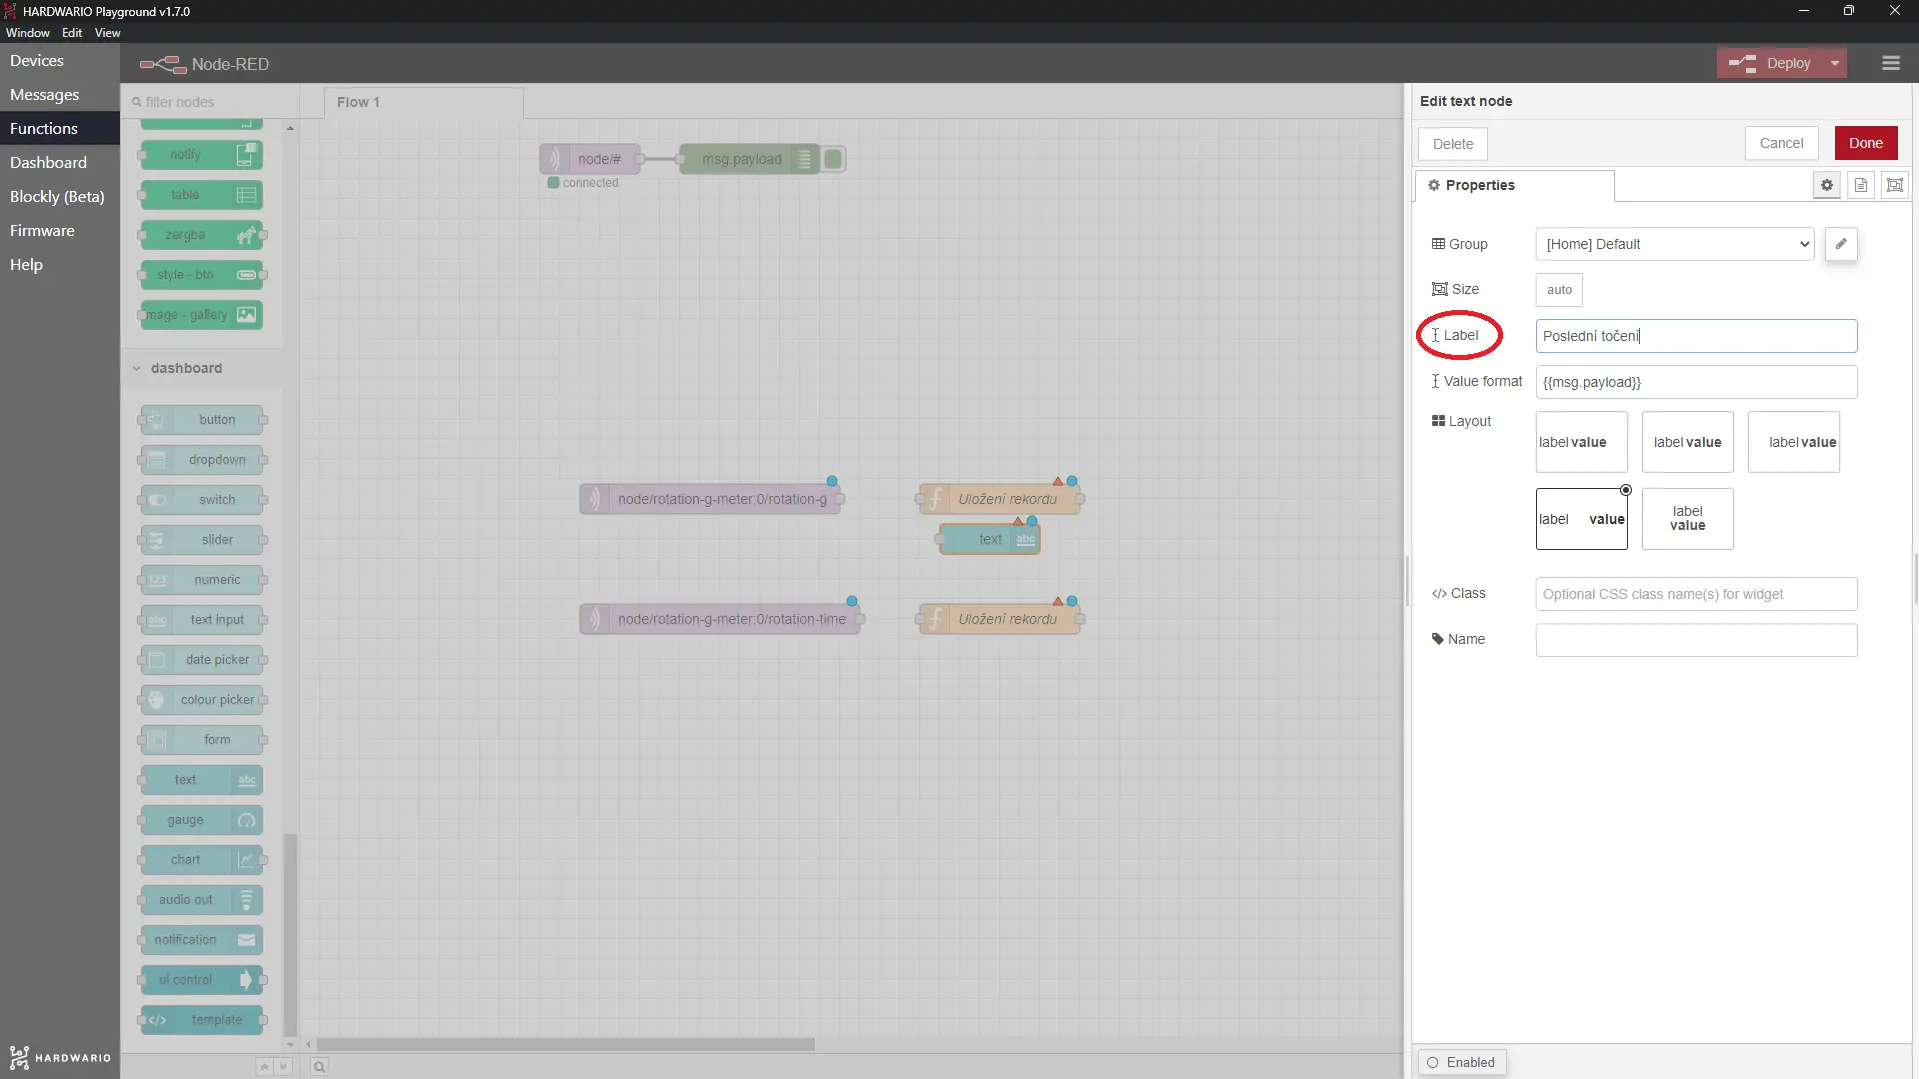
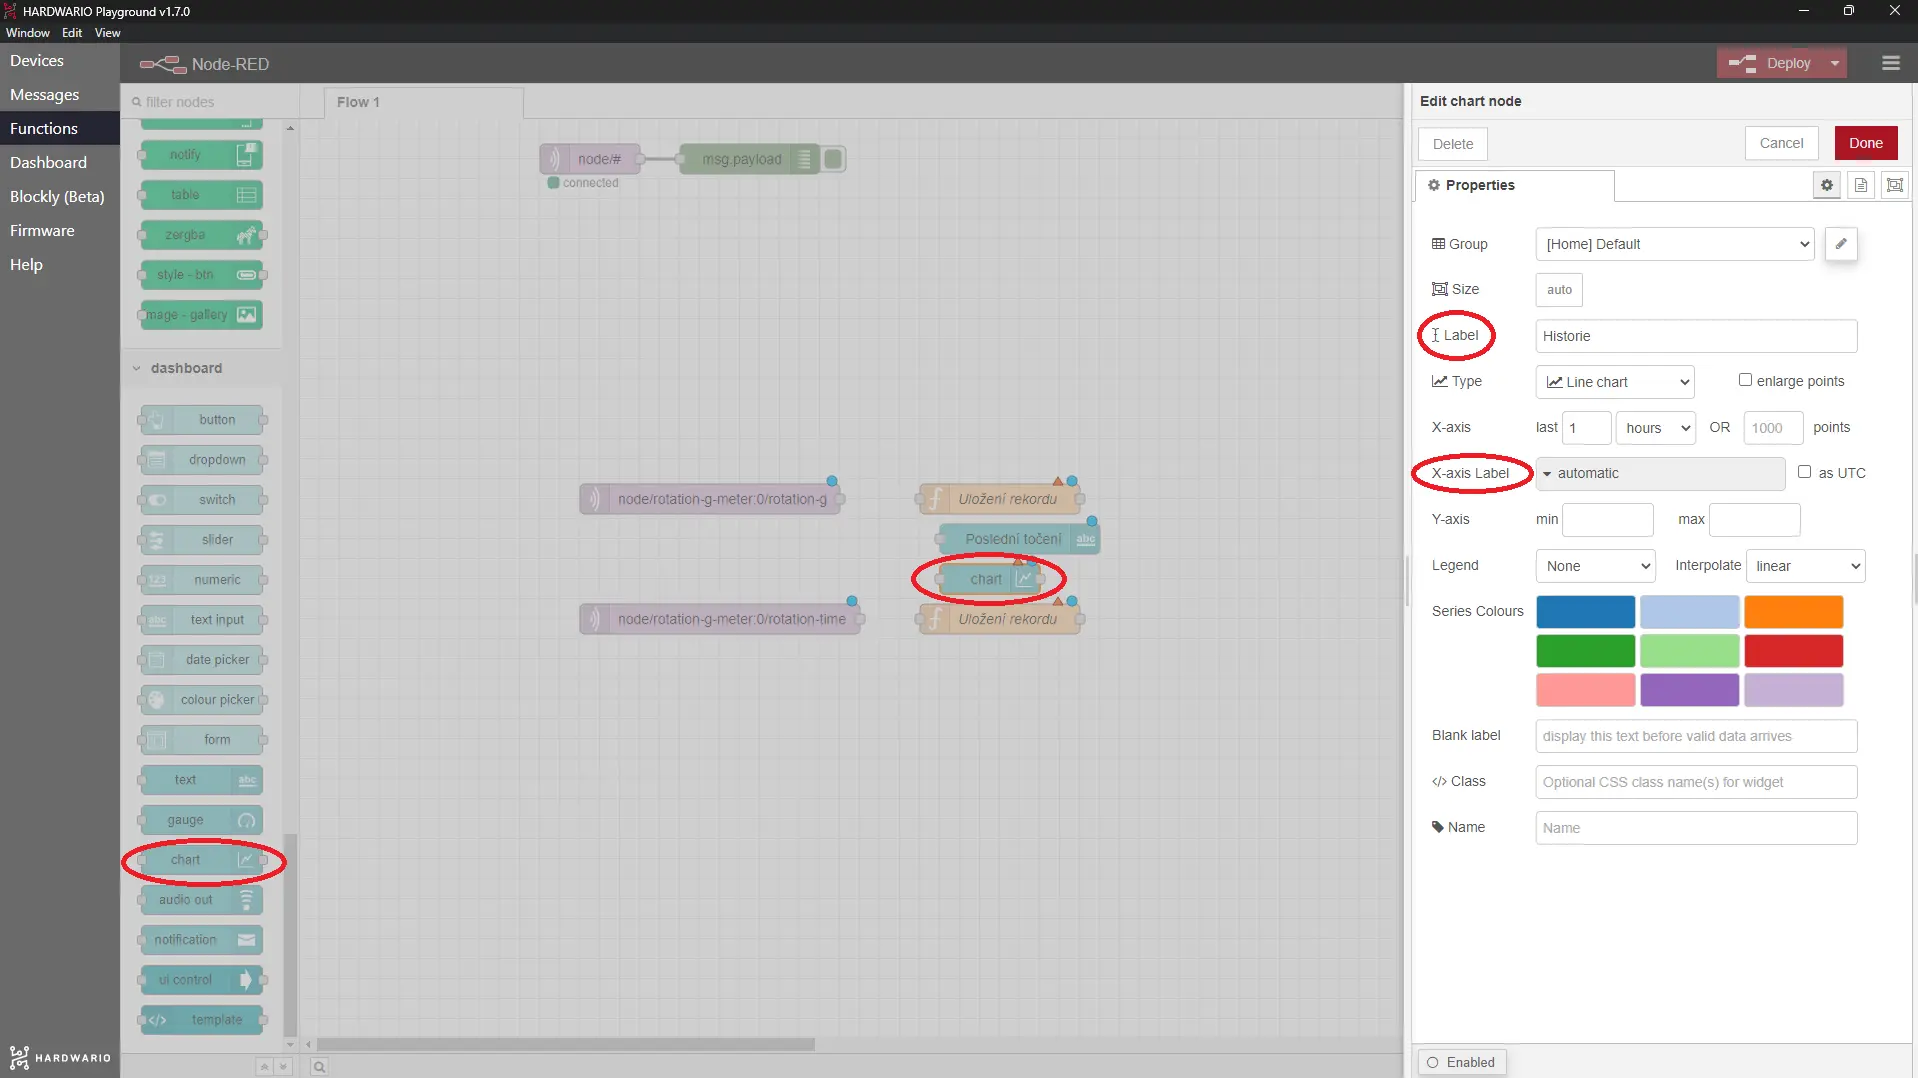
- Below this node, place one more, which plots the values in a chart. 📈 You'll find it as the chart node in the dashboard section. In the Label field, name it History. In the X-axis Label field, choose automatic, so the unit is added automatically.
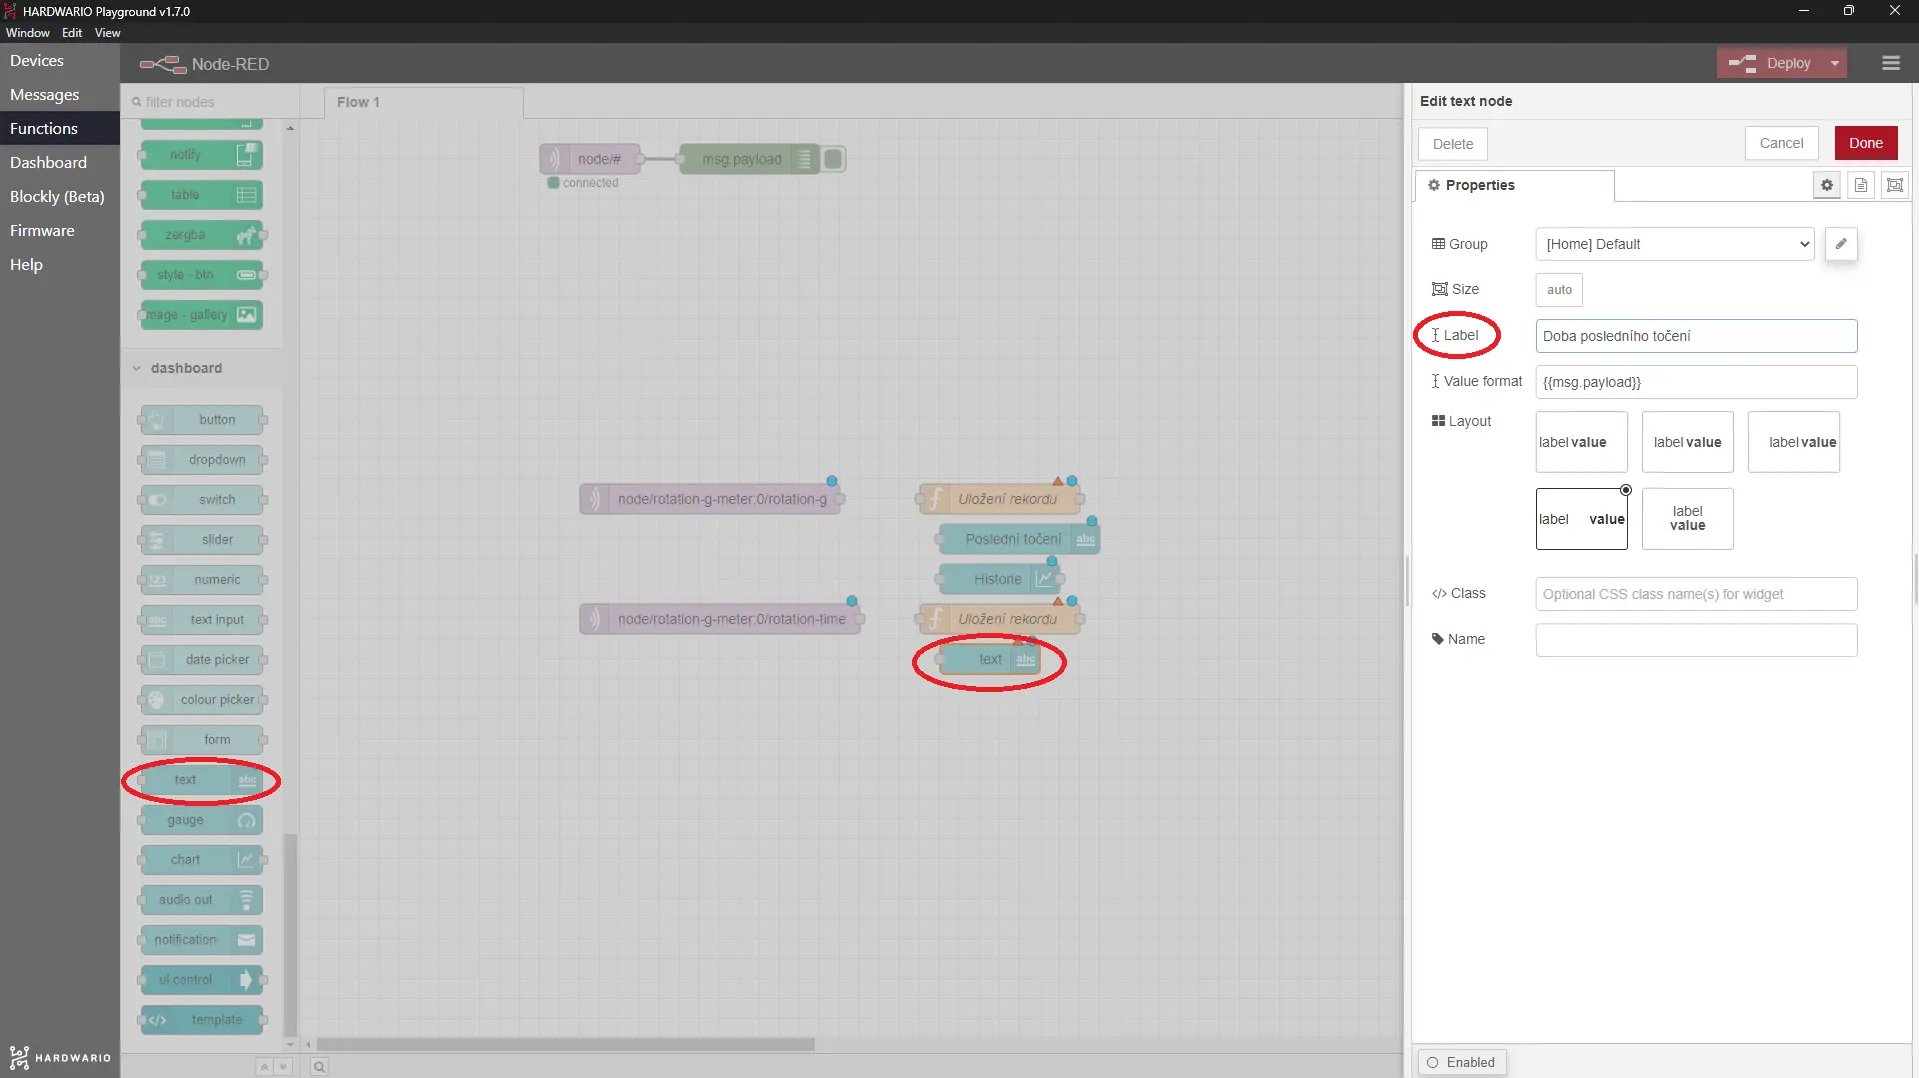
- Below the second JavaScript node, place a text node from the dashboard section. In it, set the label for the time of the last spin: Time of last spin.
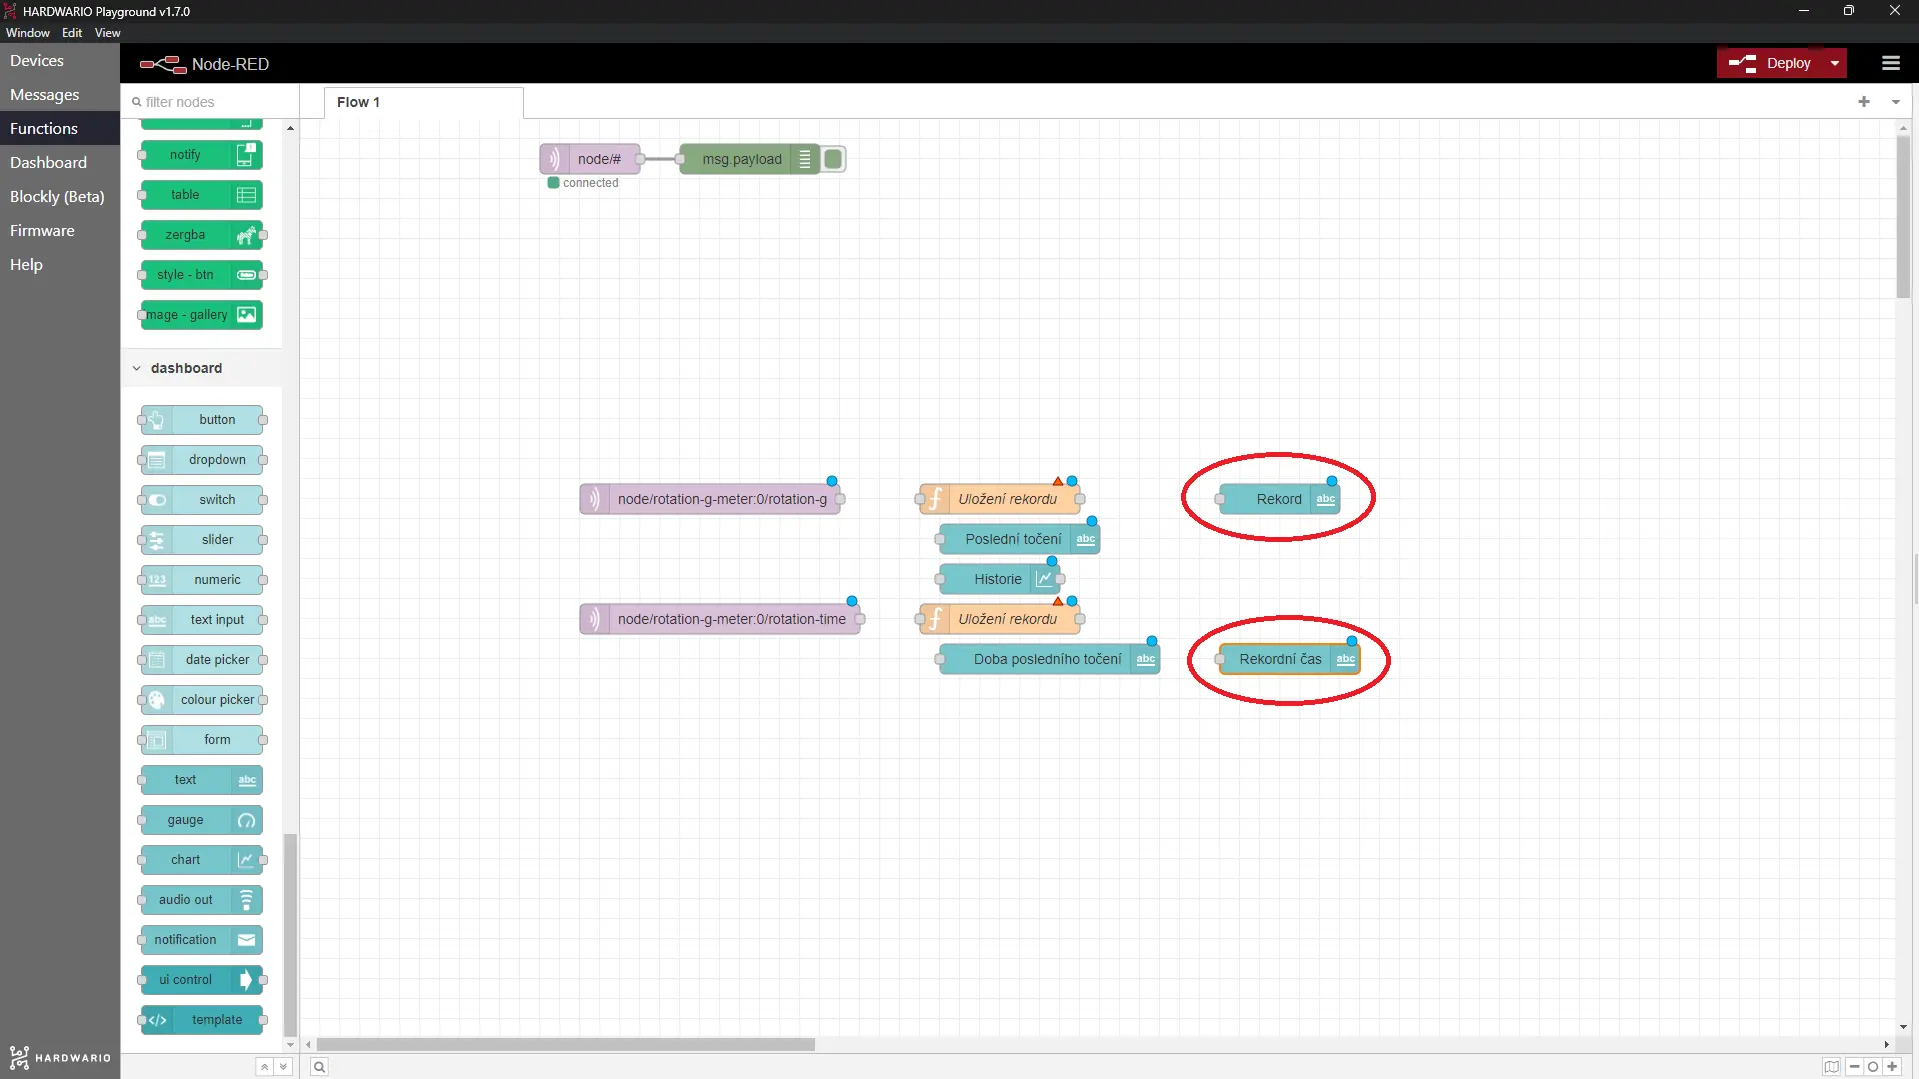
- After each branch, place one text node from the dashboard section. They decide how you'll see the records. Set their Labels to Record and Record time.
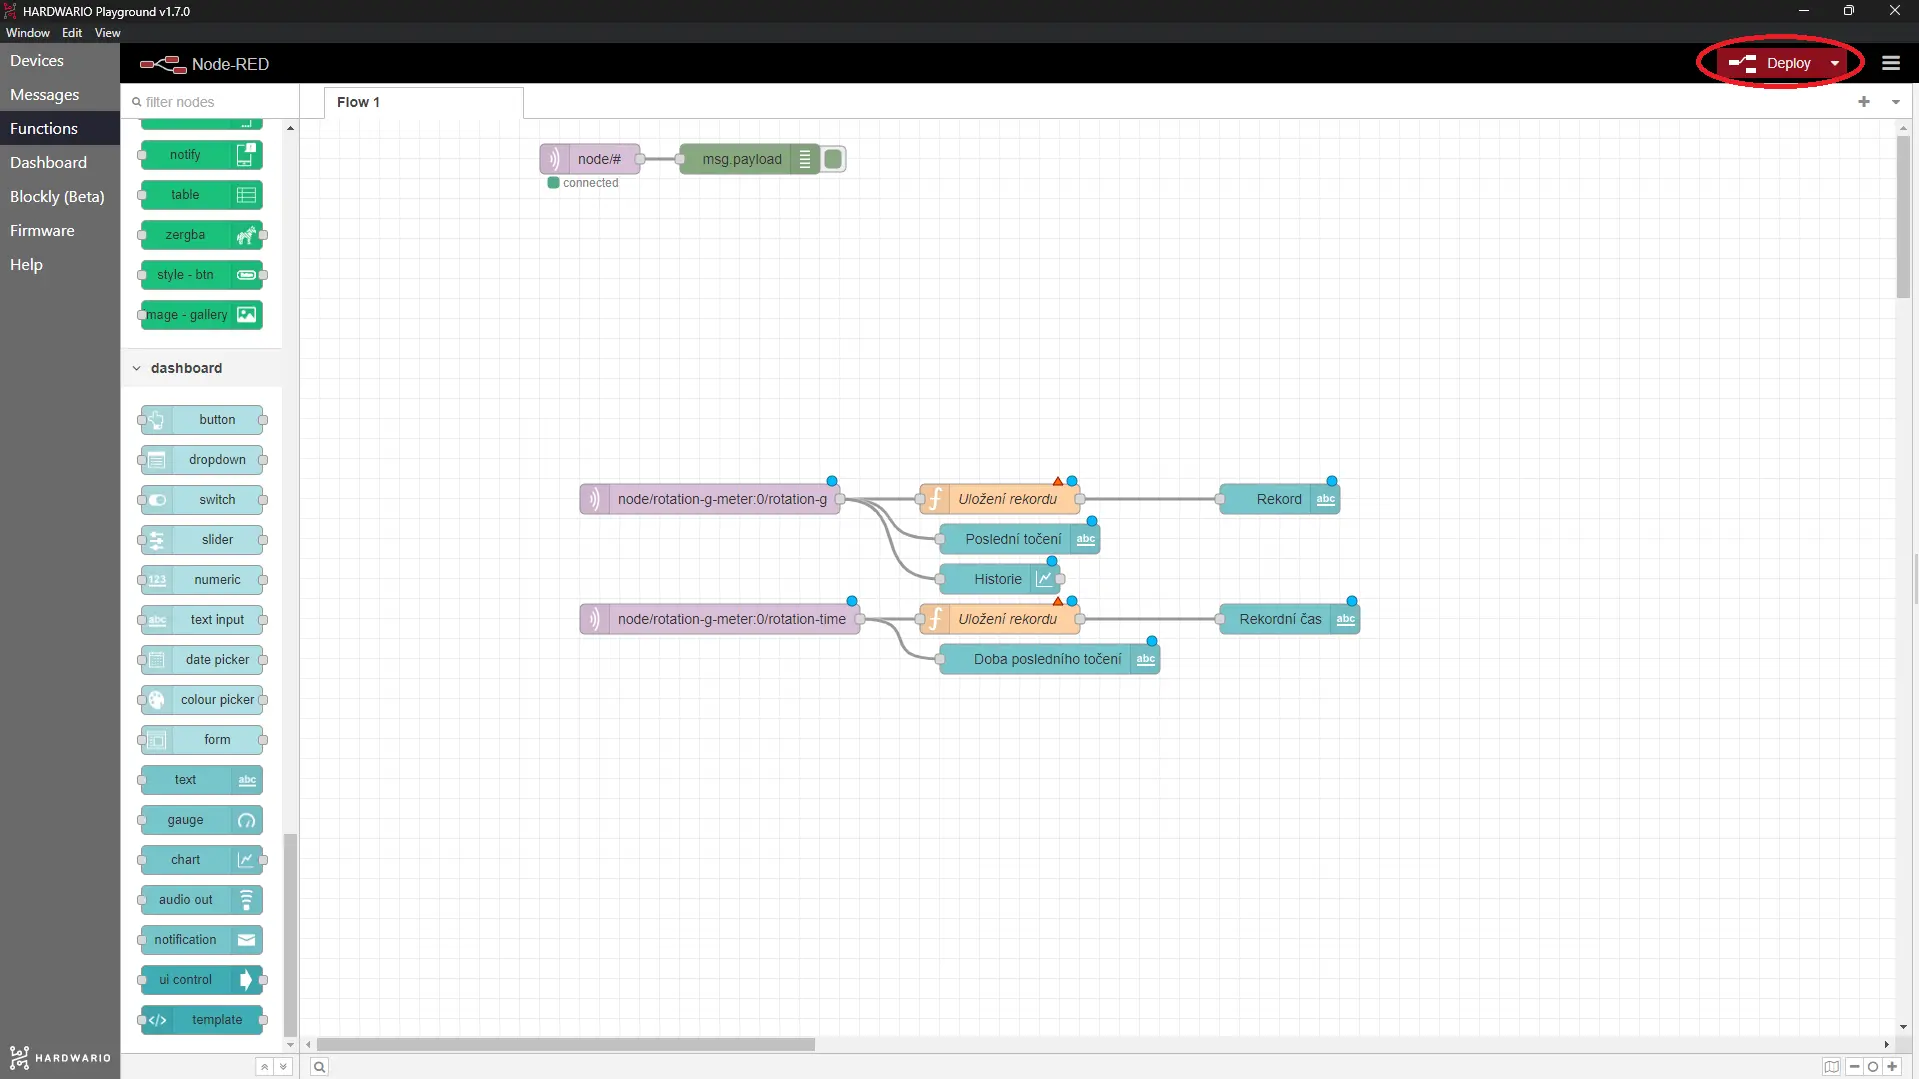
- Then connect everything as shown in the picture. You'll end up with two separate flows on the workspace. Finally, don't forget to press the Deploy button to start it all up. 🚨
Give it a spin!
- Invite all your friends and get them fired up. Maybe have a cola. 😄
- Measure your centrifugal force! Take turns spinning the box. Our tip: The box spins best when you stand it on its button.
- Follow the results on the Dashboard tab. Good luck and… spin it for all you're worth!
