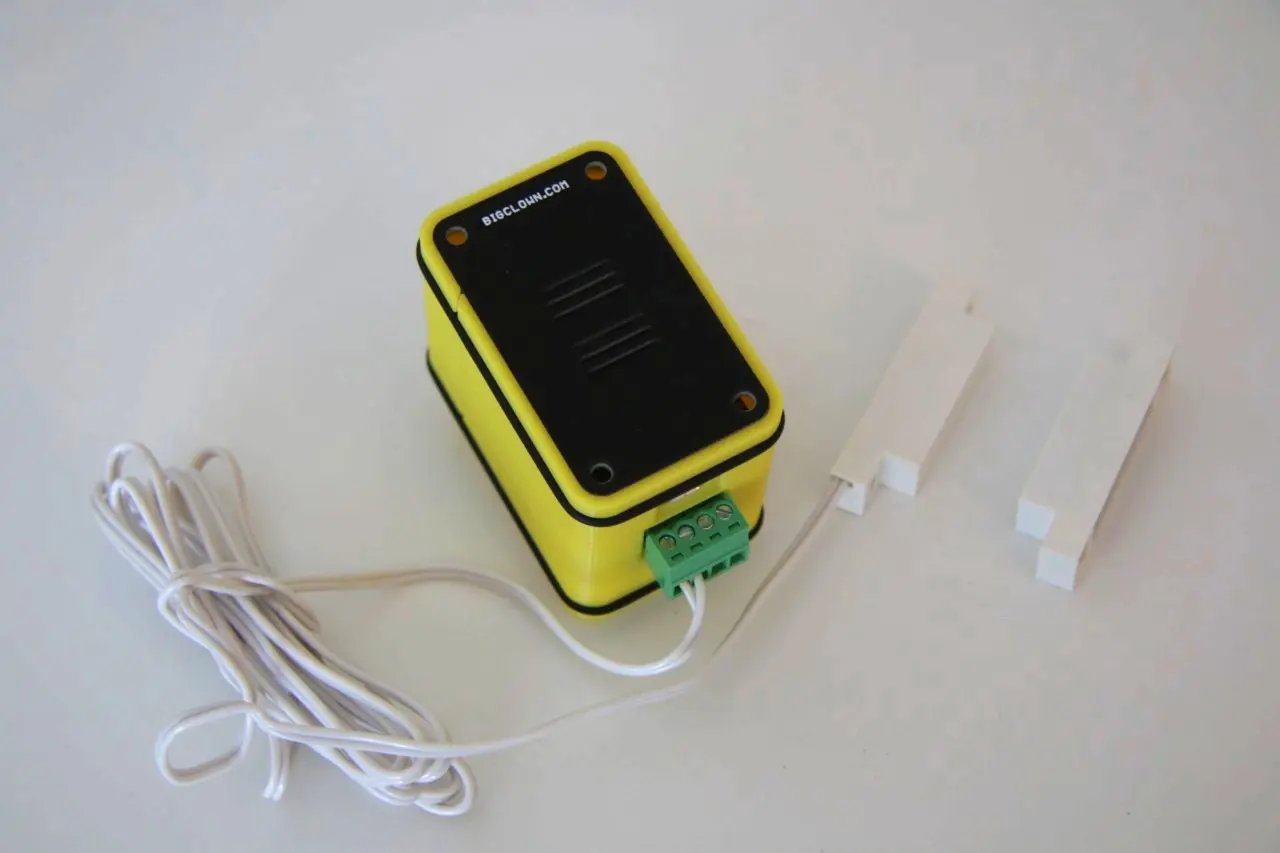
Radio Door Sensor
The Radio Door Sensor sends a notification to your phone whenever someone opens a door, a window or even the cookie jar! It also works as a reminder when you forget to close the garage or the gate in the evening.
The enclosure can take a magnet, so it is easy to mount, and the sensor runs on batteries for many years. Installation is really simple.

Project Intro Video
Playing the video loads it from YouTube (Google).
Requirements
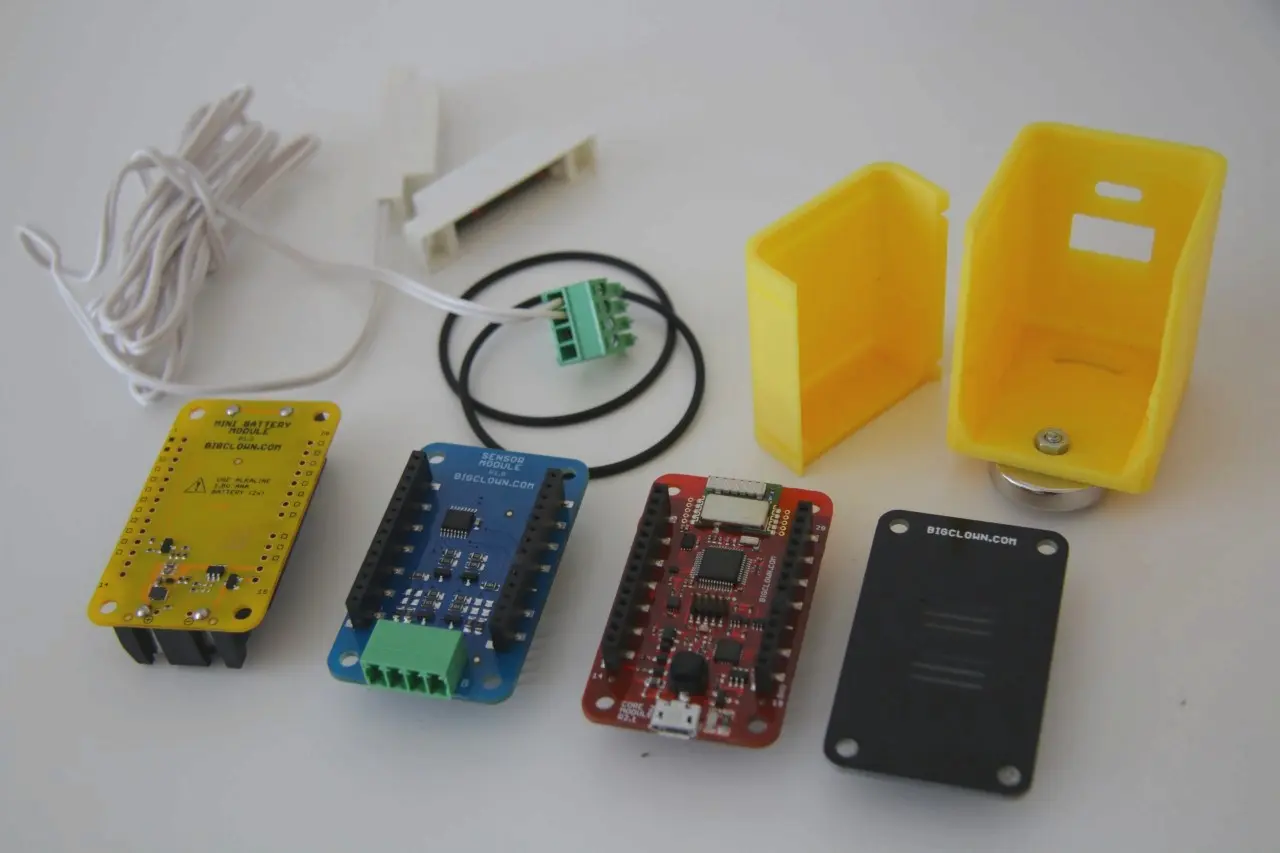
- Radio Dongle
- Core Module
- Battery Module
- Sensor Module
- Magnetic Switch (SA-201-A for screw mounting, self-adhesive SA-203)
- A computer running Windows, Linux or macOS
You can also connect the Radio Dongle to a Raspberry Pi or another single-board computer. See Raspberry Pi Installation for details.
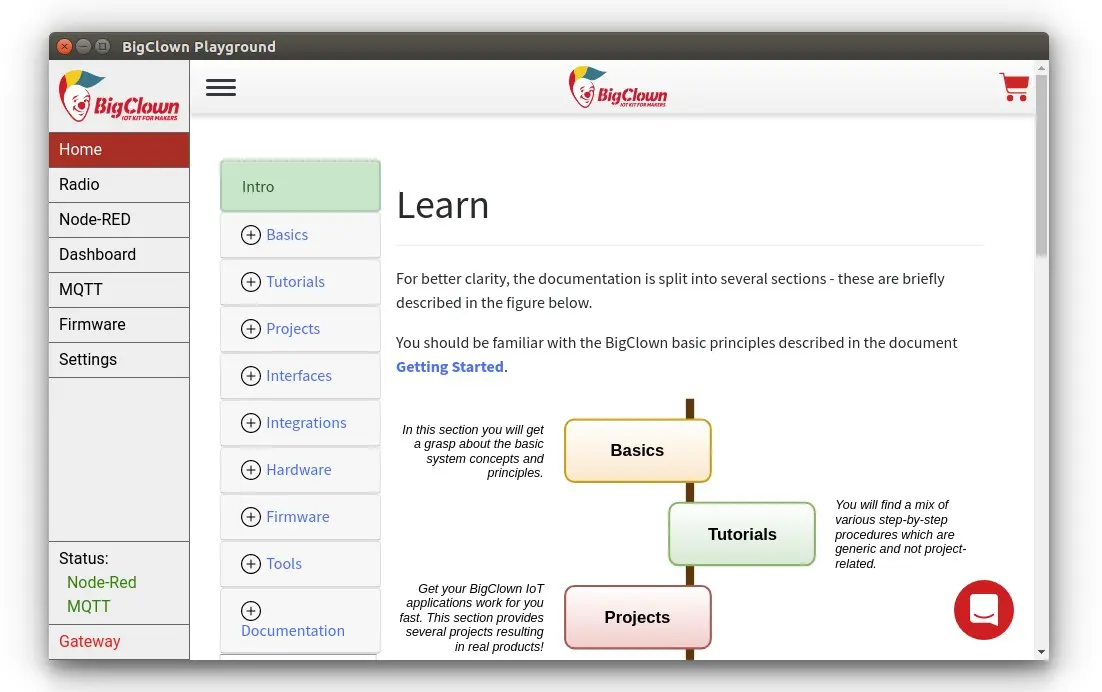
Download HARDWARIO Playground
Download the latest HARDWARIO Playground for your operating system and run it.
Now make sure the modules run the latest firmware: flash both the Radio Dongle and the Core Module of the remote node.
Flash the Door Sensor Firmware
Step 1: Connect the sensor
Connect only the Door Sensor to a USB port on your computer.
Step 2: Flash the firmware
In Playground, open the Firmware tab, select the hardwario/twr-radio-door-sensor firmware (it is listed after you tick Show all), choose the device's serial port under Device and click FLASH FIRMWARE.
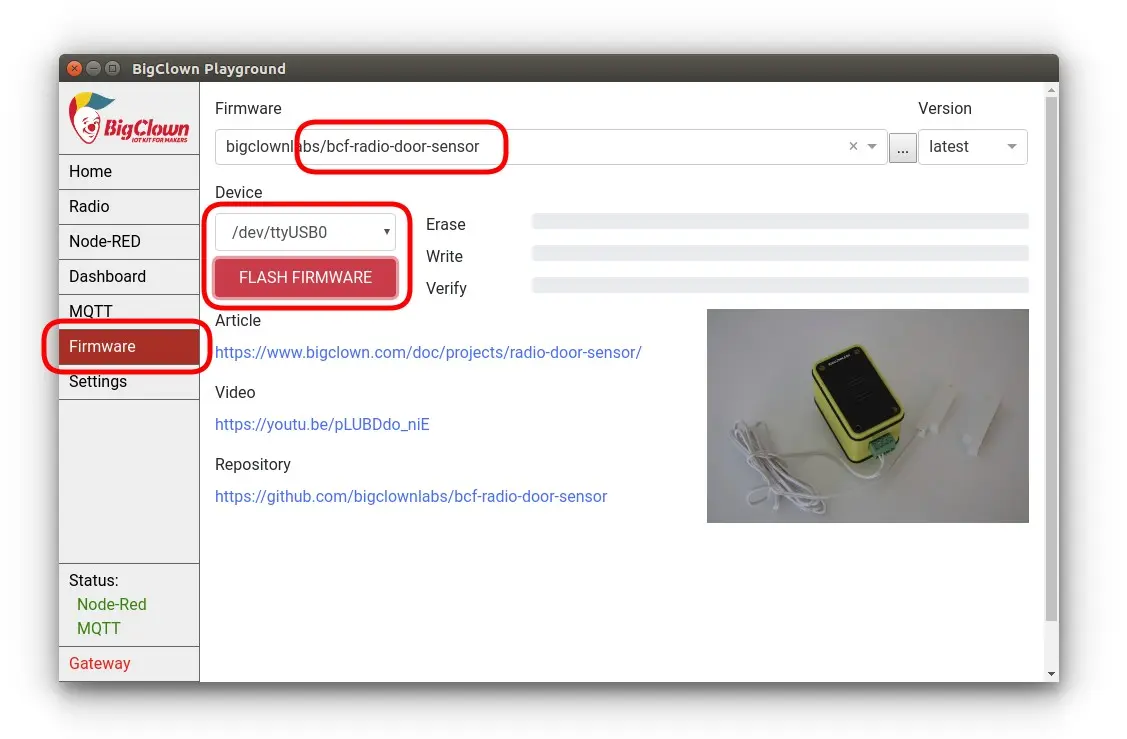
Step 3: Disconnect the sensor
Disconnect the Door Sensor from your computer. Remove the batteries and leave the sensor unpowered until you pair it.
Flash the Radio Dongle Firmware
Step 1: Connect the dongle
Connect only the Radio Dongle to a USB port on your computer.
Step 2: Flash the firmware
In Playground, open the Firmware tab, select the hardwario/twr-gateway-radio-dongle firmware, choose the device's serial port under Device and click FLASH FIRMWARE.
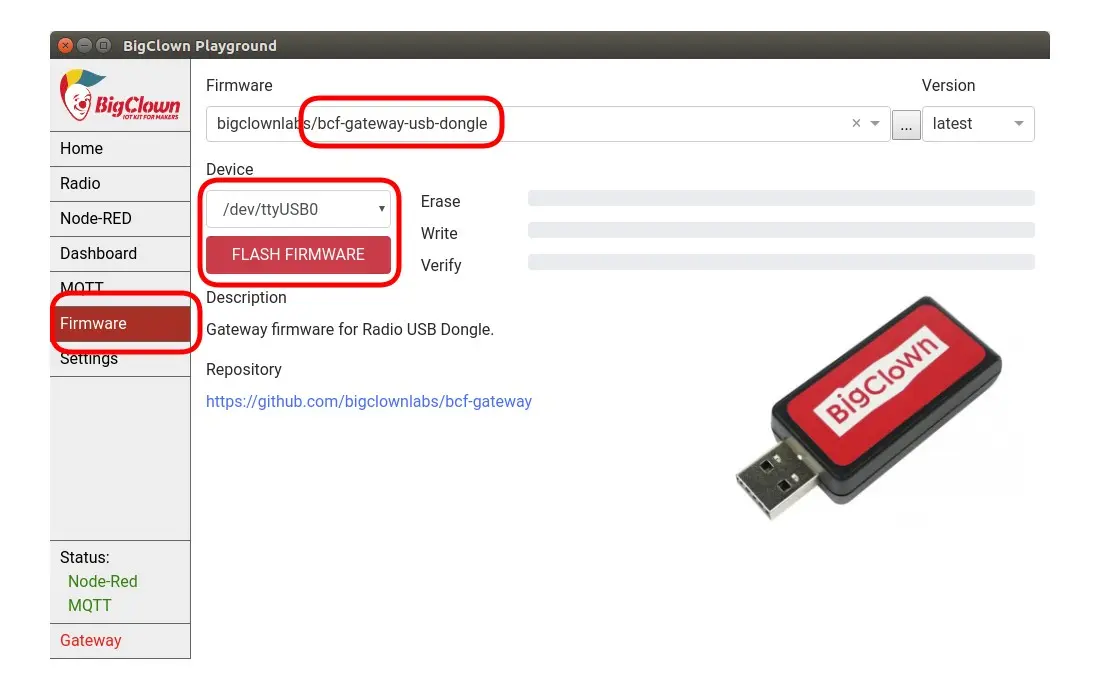
Step 3: Keep the dongle connected
Leave the Radio Dongle connected to your computer.
Start the Gateway
In the bottom-left corner, click Gateway and select the device's serial port. The Gateway label should turn green.
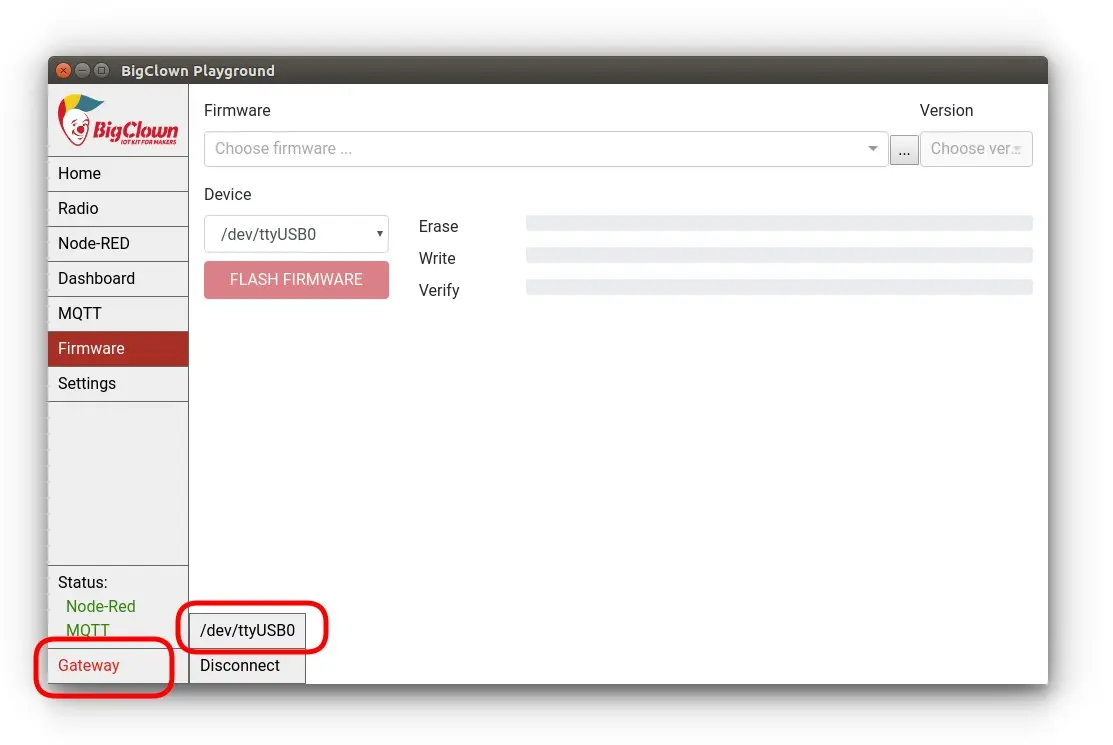
Pair the Radio Door Sensor
Step 1: Start pairing
On the Radio tab, click the Pairing start button.
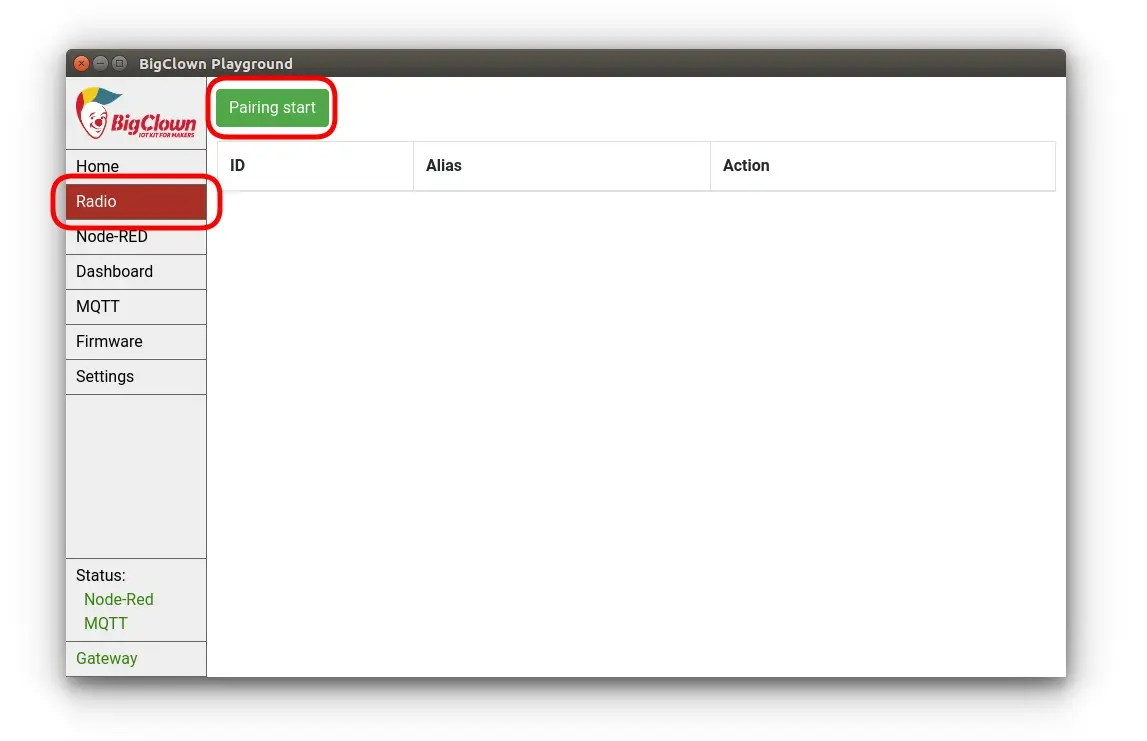
Step 2: Put the Door Sensor into pairing mode
Now insert the batteries into the Door Sensor. The remote module sends the pairing command every time you insert batteries.
Step 3: Stop pairing
Click Pairing stop to end pairing.
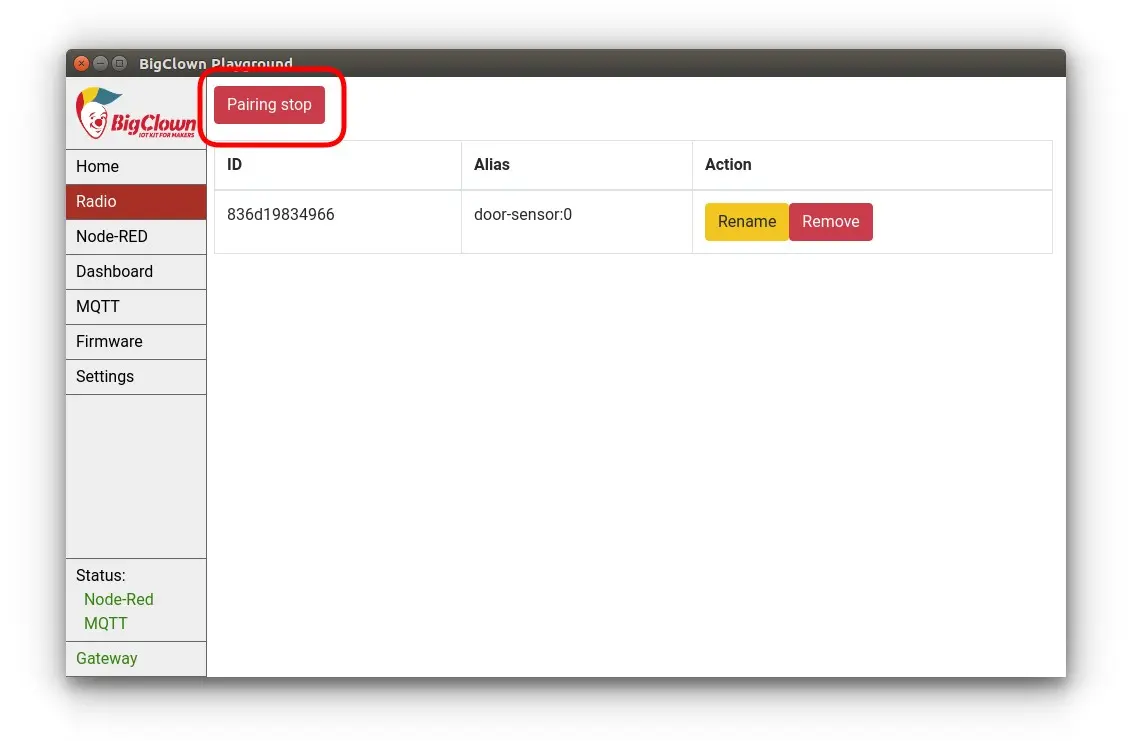
Test the Door Sensor
Step 1: Switch to the MQTT tab and subscribe to the # topic
Step 2: Move the magnet to the sensor and away again. MQTT messages should appear in the top window
Step 3: A button press and a temperature change send messages too. Try it!
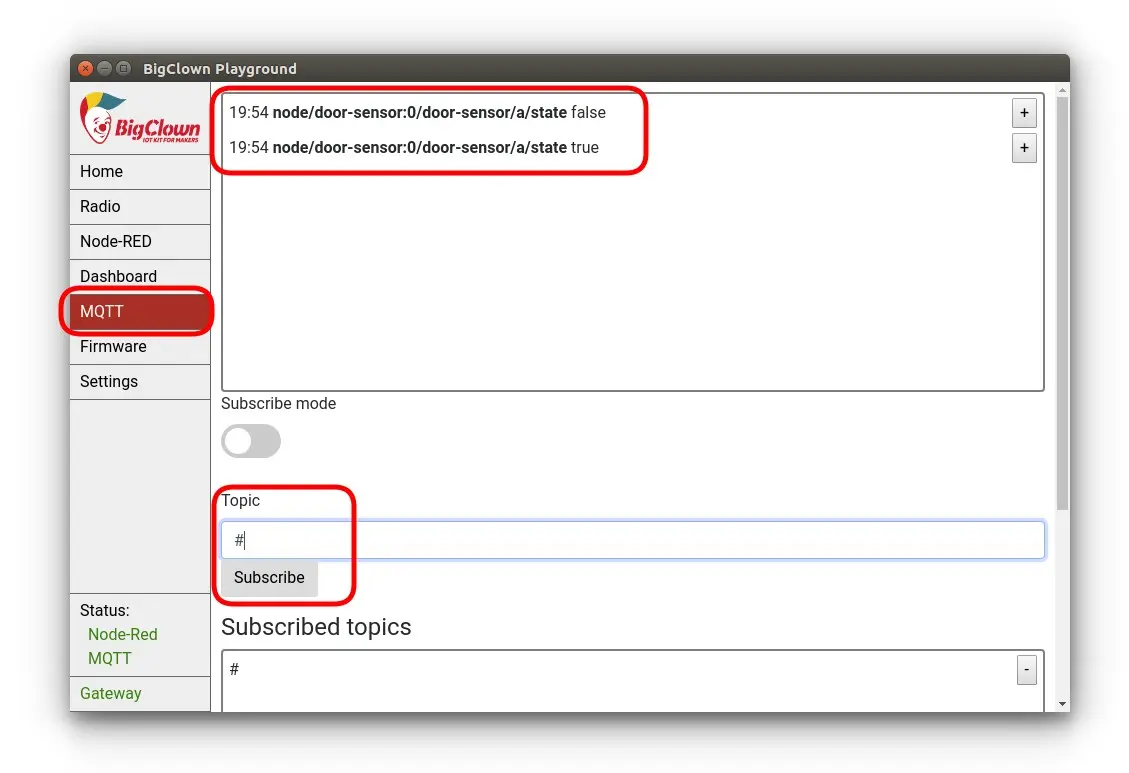
Great! You have built a radio network that receives events and temperature readings.
IFTTT Integration
In this section, we'll create an Applet in the IFTTT service. An Applet is a rule that responds to an event with an action.
Step 1: Open a web browser and go to IFTTT
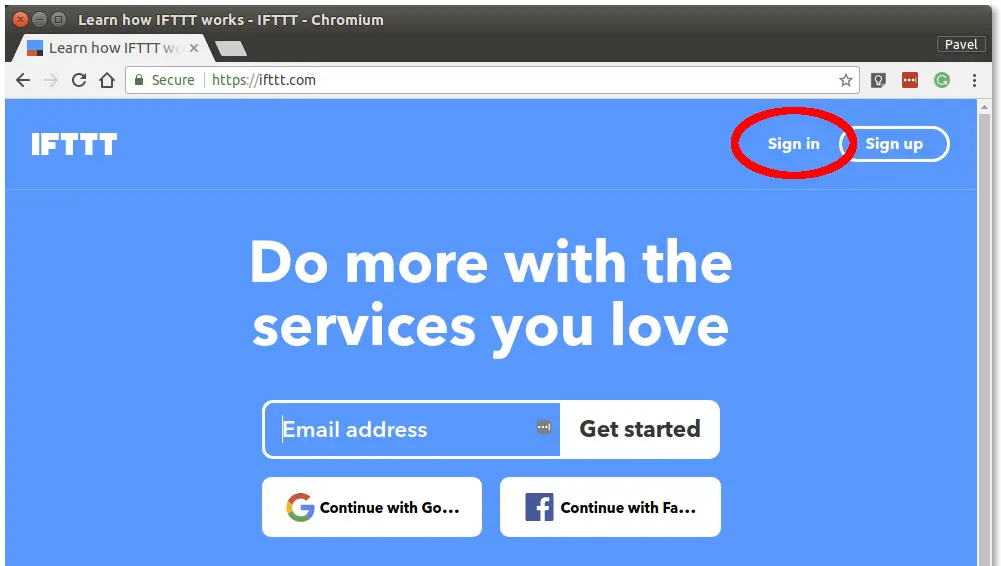
Step 2: Sign in to IFTTT. You can also sign up with your Google or Facebook account
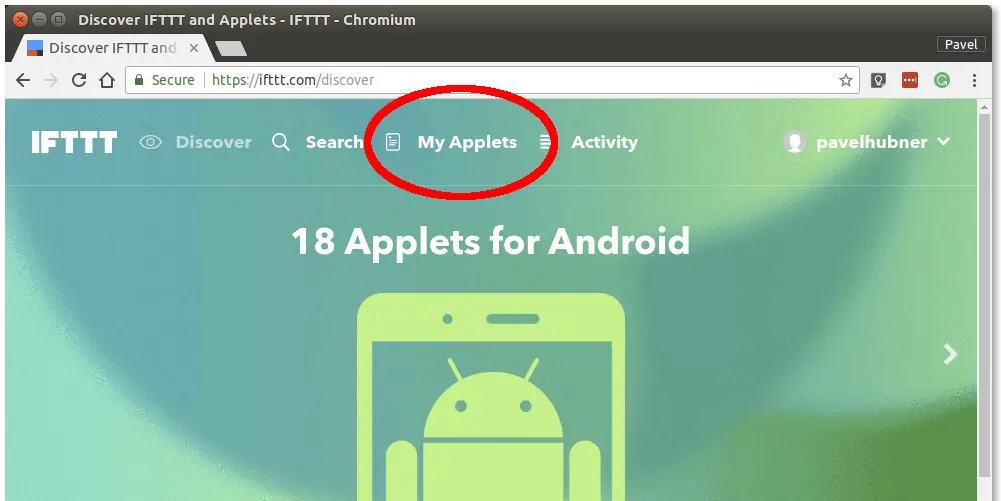
Step 3: Go to My Applets in the menu and click the New Applet button
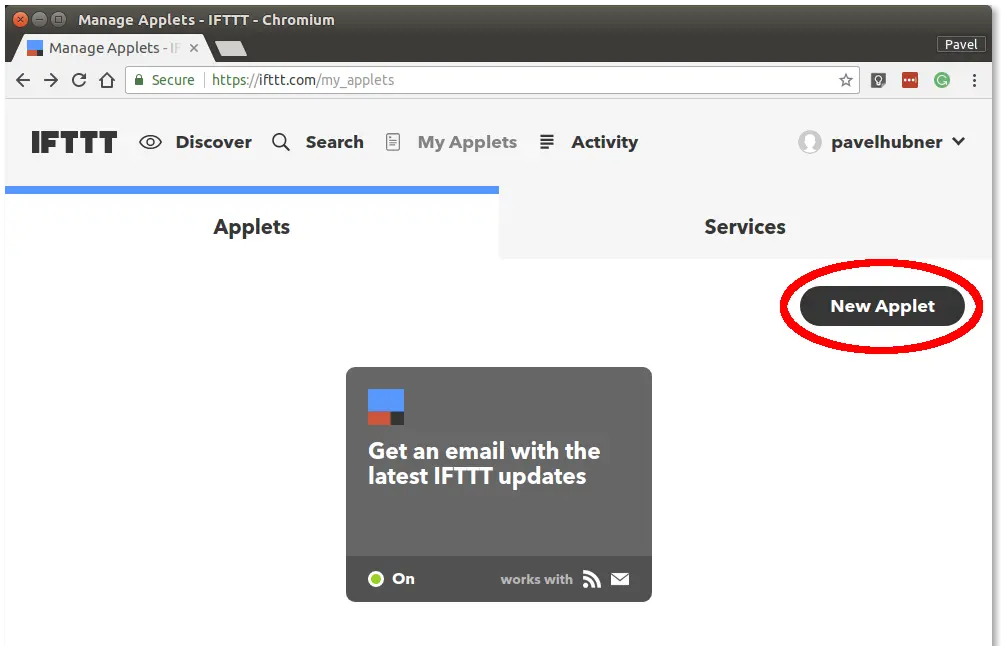
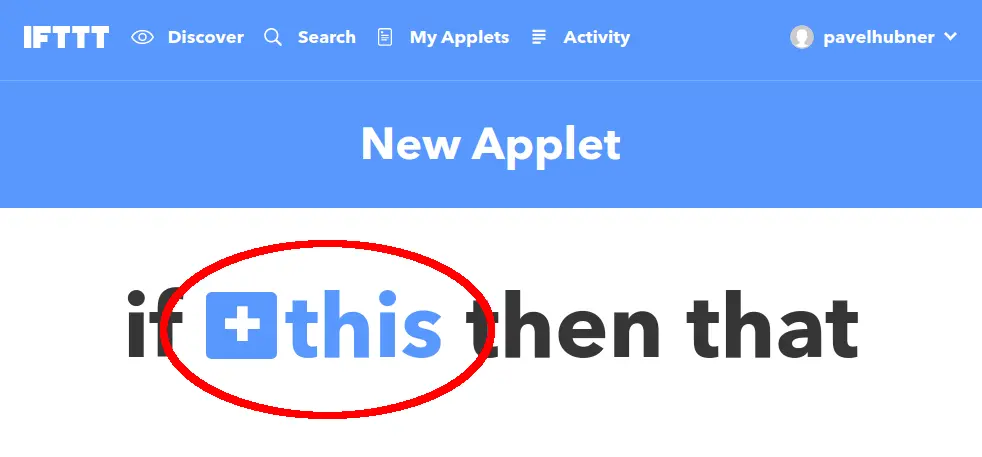
Step 4: Click +this in the if this then that sentence
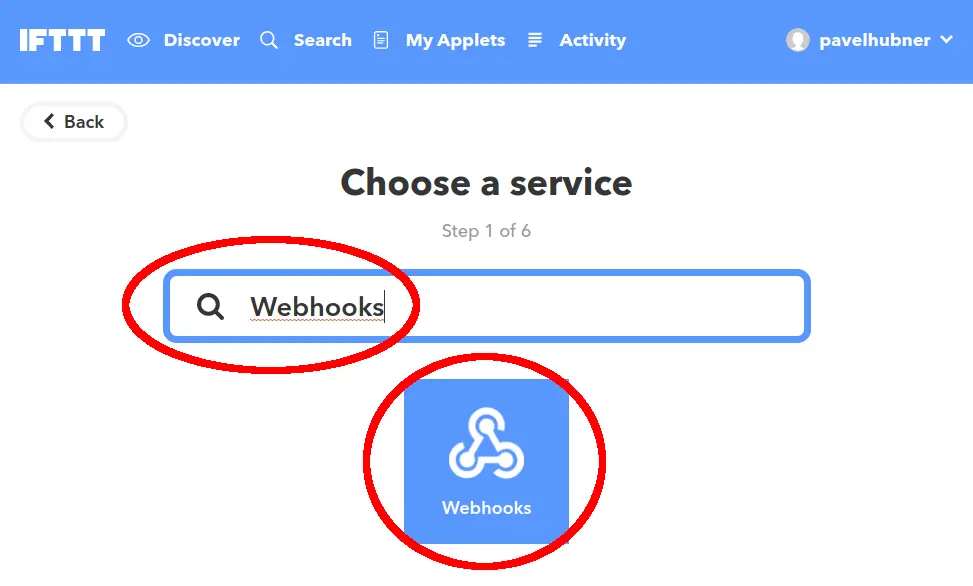
Step 5: Search for the Webhooks service and select it
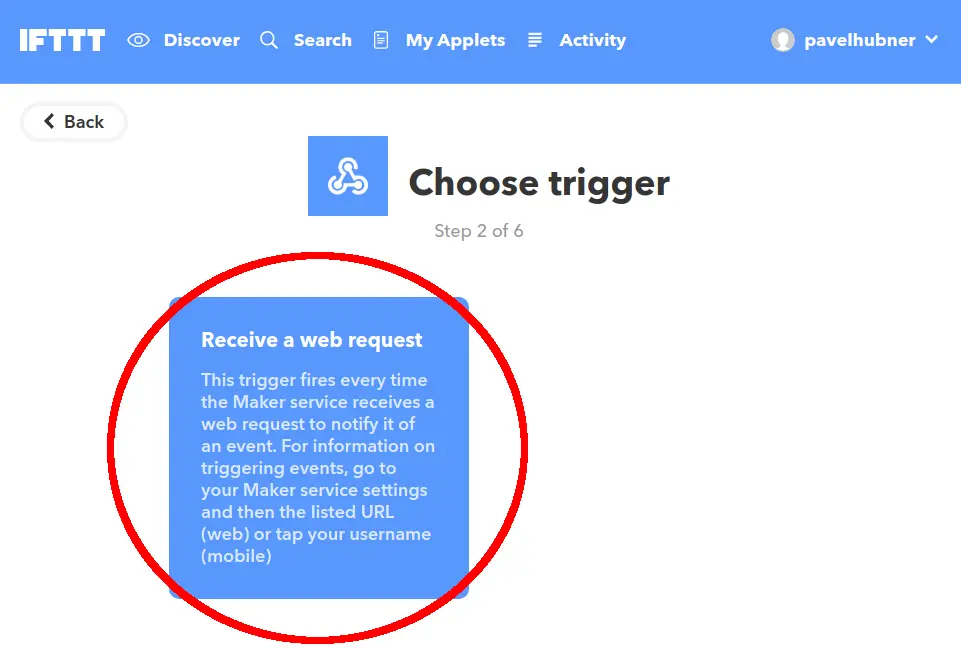
Step 6: Click Receive a web request
Step 7: Type door in the Event Name field and click Create Trigger
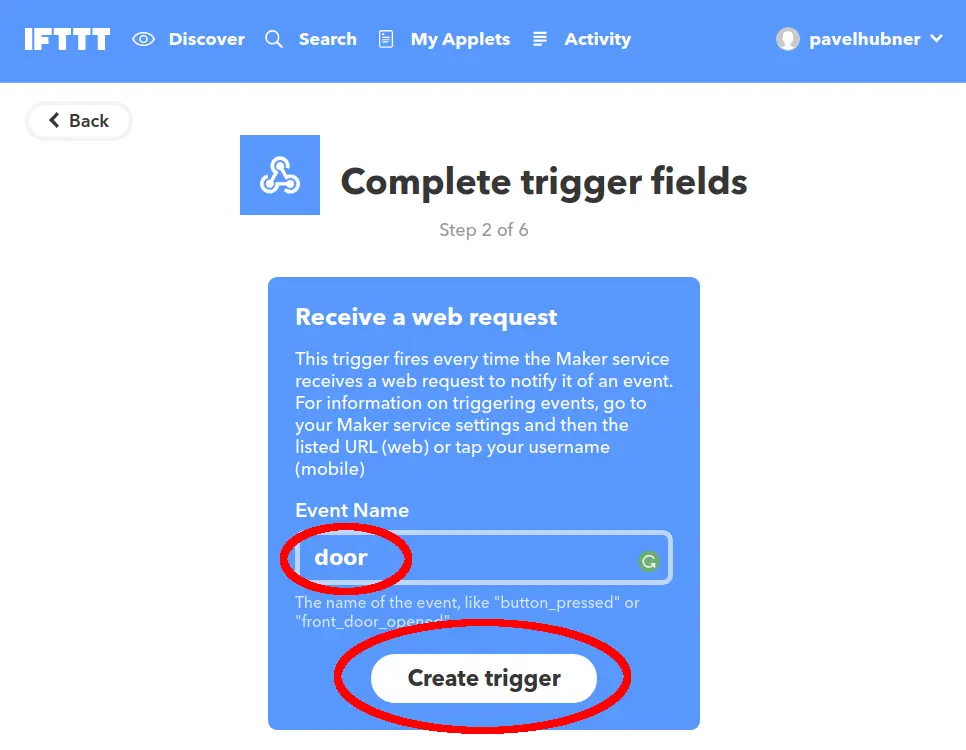
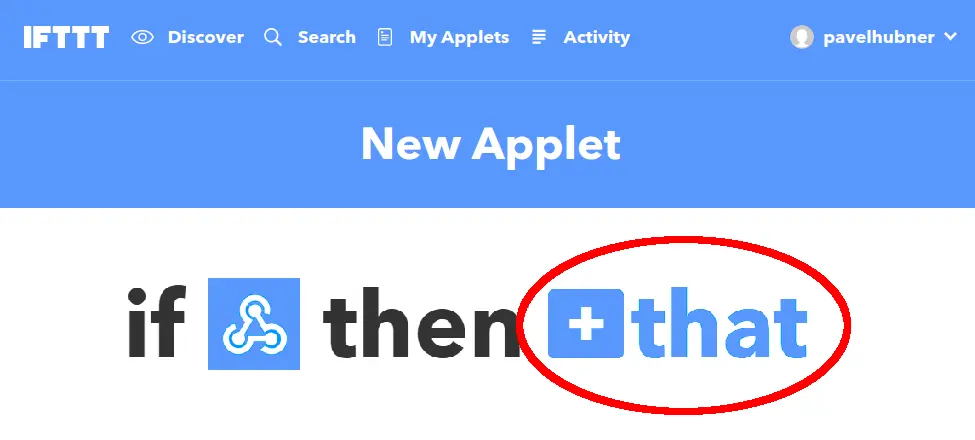
Step 8: Click +that in the if this then that sentence
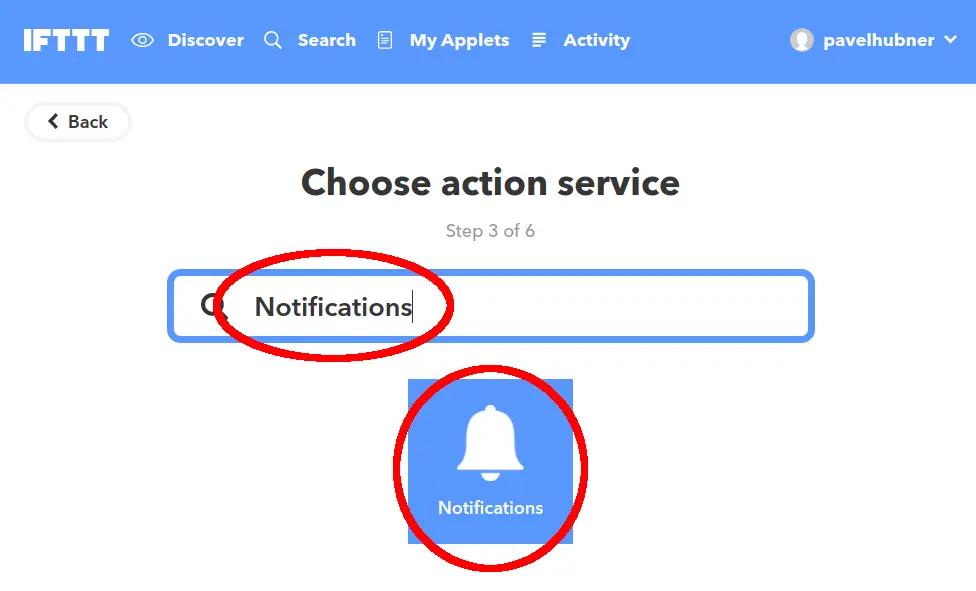
Step 9: Search for the Notifications action service and select it
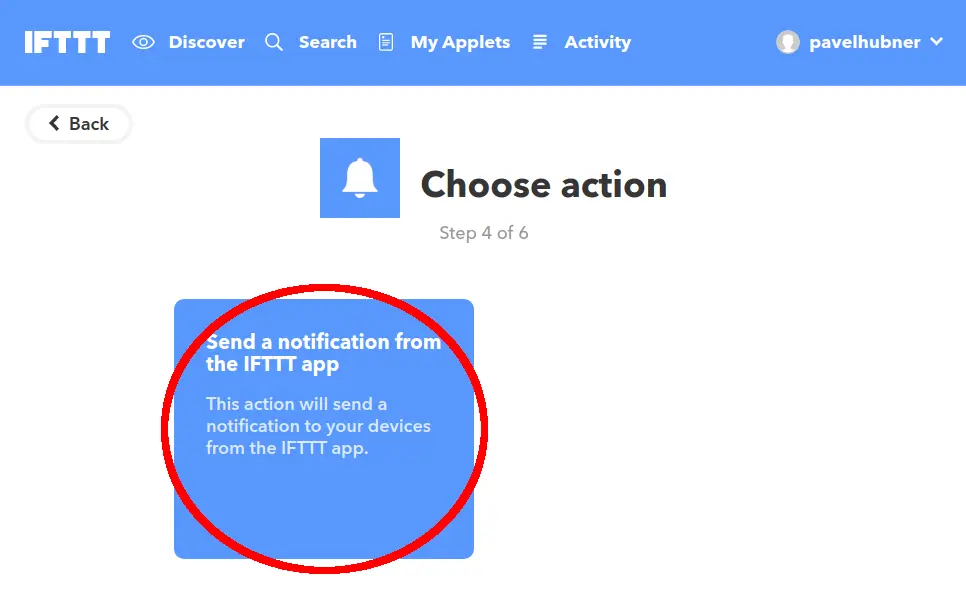
Step 10: Click Send a notification from the IFTTT app
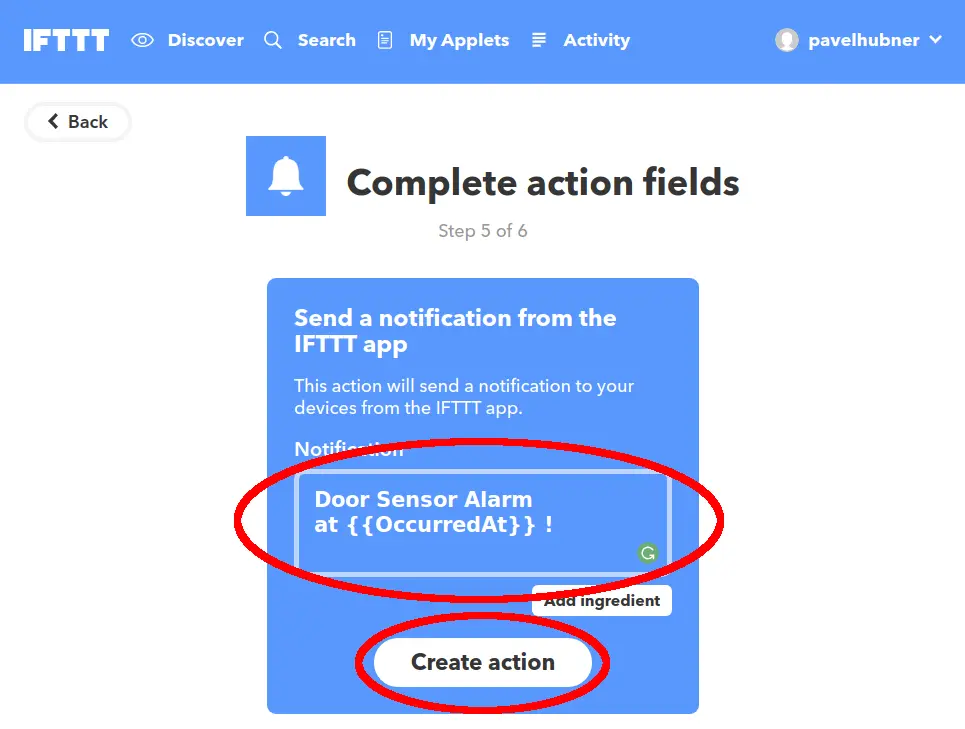
Step 11: Enter the text Door Sensor Alarm at {{OccurredAt}} ! in the Notification field and click the Create action button
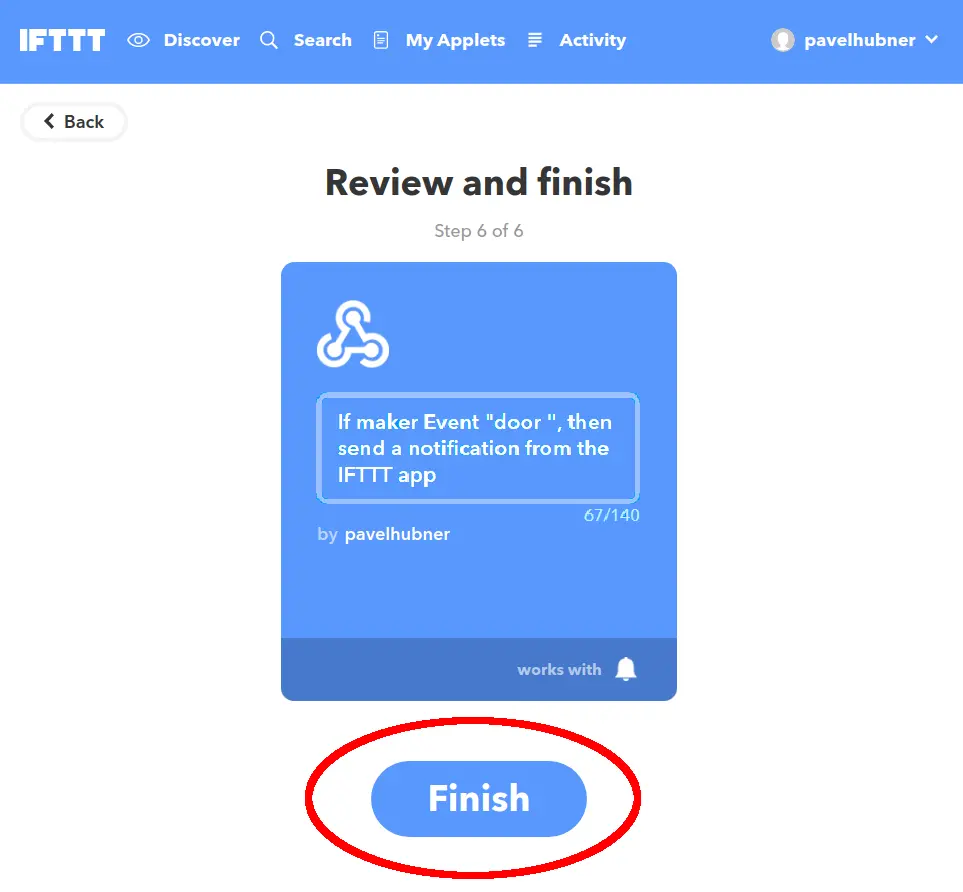
Step 12: Click the Finish button
Step 13: Click the Webhooks button
Step 14: Click the Documentation button
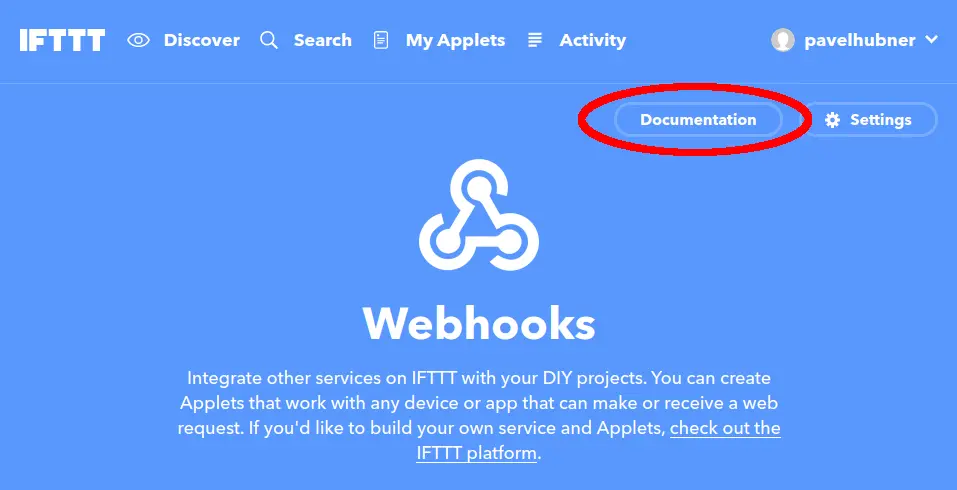
Step 15: This is your notification key. Keep this page open; you'll copy the key into Node-RED later:
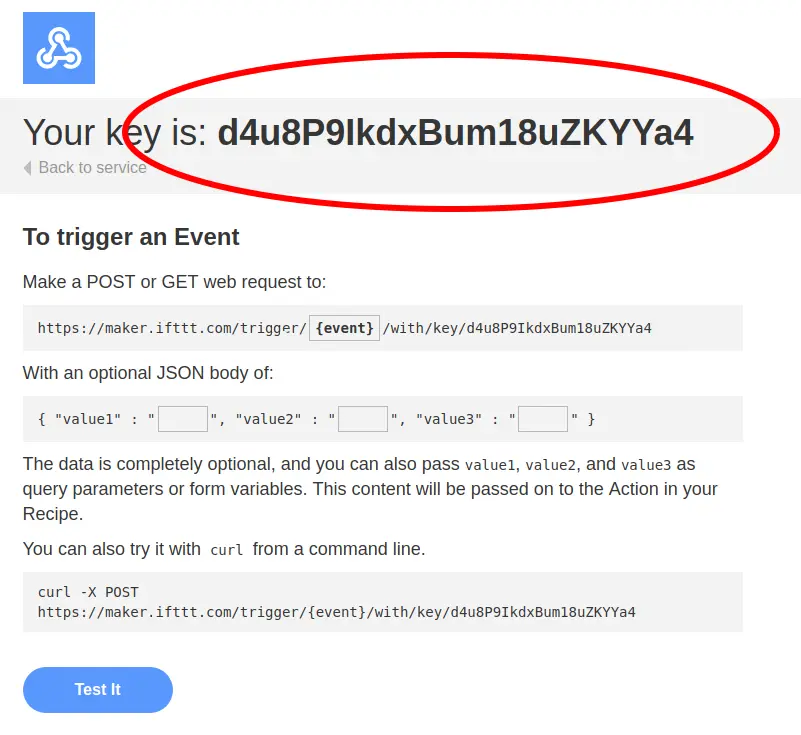
Step 16: Install the IFTTT app on your smartphone and sign in with the account you used to create the applet. When the app asks, allow push notifications
You now have a working notification Applet in the IFTTT service.
IFTTT Plugin for Node-RED
To use IFTTT in Node-RED, install a simple plugin that sends notifications.
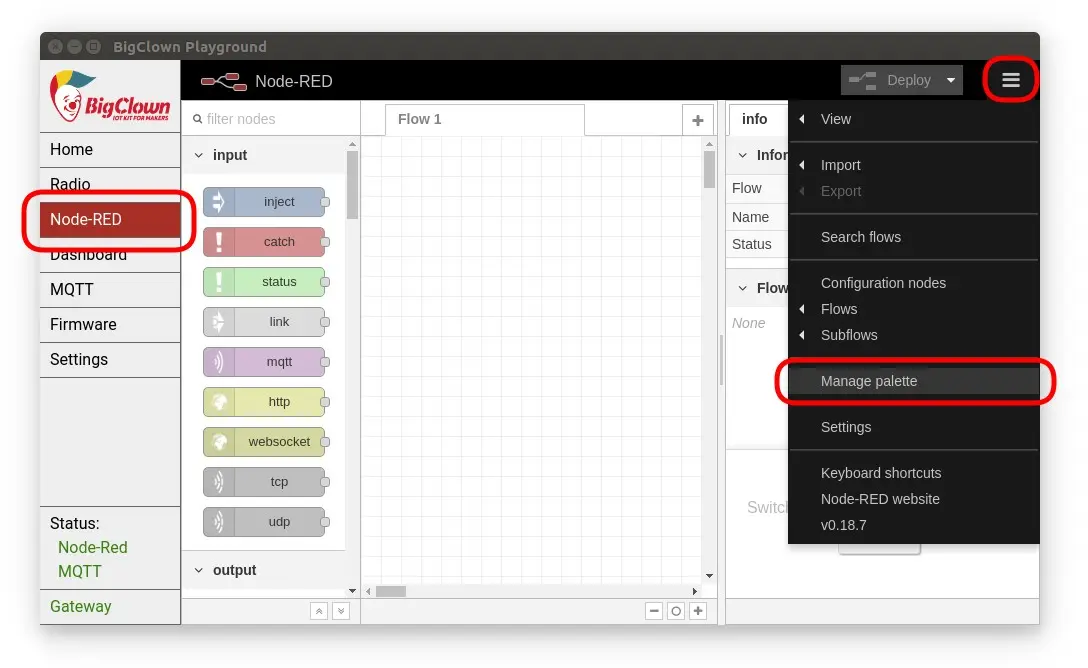
Step 1: Open the Node-RED tab (Functions in newer Playground versions), then click the menu in the top-right corner and select Manage palette
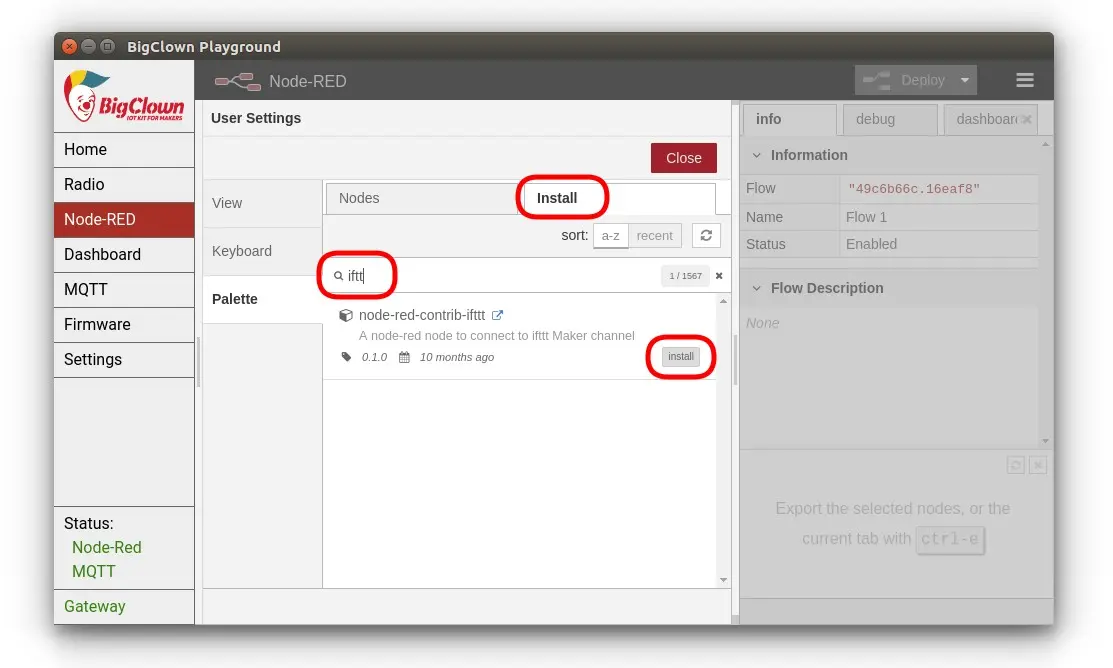
Step 2: Switch to the Install tab, search for ifttt and click install. In the pop-up window, click Install again
Step 3: After installation, a confirmation shows that new nodes have been added to Node-RED

Great! With the IFTTT plugin, Node-RED can send notifications straight to your phone.
Import the Notification Flow into Node-RED
Step 1: Copy the text below to the clipboard
[{"id":"5ca15197.aef91","type":"mqtt in","z":"49c6b66c.16eaf8","name":"","topic":"node/door-sensor:0/door-sensor/a/state","qos":"2","broker":"67b8de4a.029d3","x":210,"y":100,"wires":[["ccd36bb4.eccae8"]]},{"id":"ccd36bb4.eccae8","type":"switch","z":"49c6b66c.16eaf8","name":"","property":"payload","propertyType":"msg","rules":[{"t":"eq","v":"false","vt":"str"}],"checkall":"true","repair":false,"outputs":1,"x":210,"y":220,"wires":[["6cb9da01.6abab4"]]},{"id":"6cb9da01.6abab4","type":"ifttt out","z":"49c6b66c.16eaf8","eventName":"door","key":"","x":210,"y":320,"wires":[]},{"id":"67b8de4a.029d3","type":"mqtt-broker","z":"","broker":"127.0.0.1","port":"1883","clientid":"","usetls":false,"compatmode":true,"keepalive":"60","cleansession":true,"birthTopic":"","birthQos":"0","birthPayload":"","willTopic":"","willQos":"0","willPayload":""}]
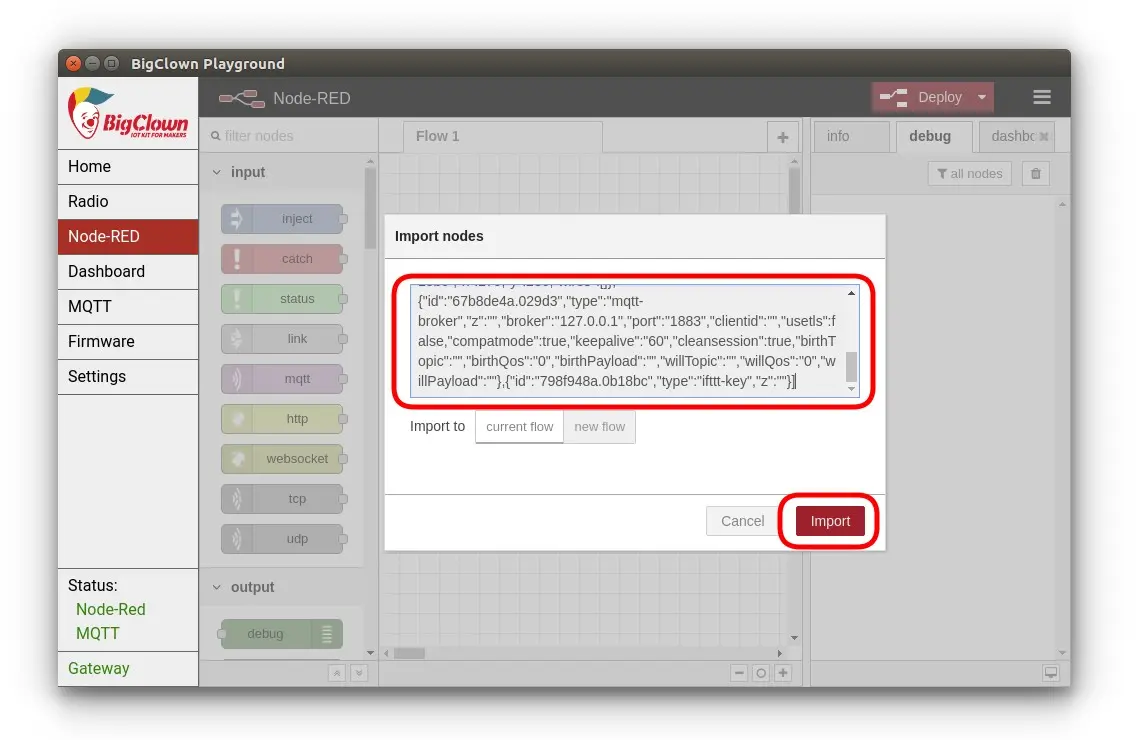
Step 2: Click the menu in the top right, then select Import and Clipboard
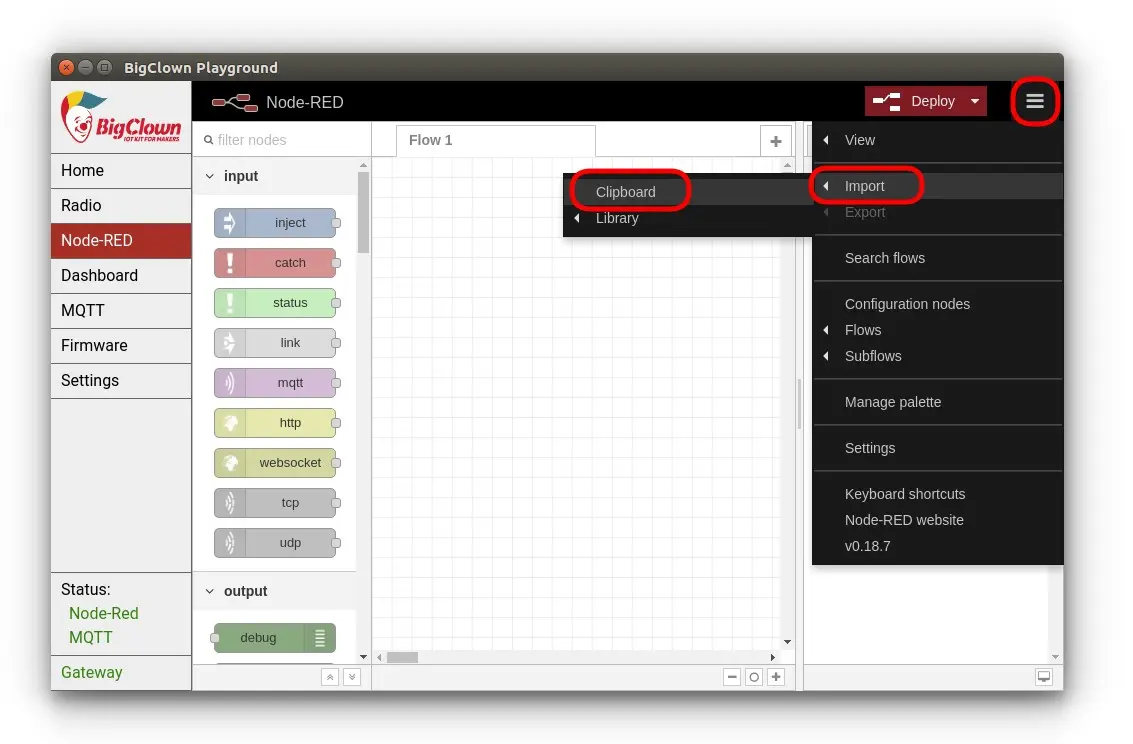
Step 3: Paste the text from the clipboard into the text box and click Import
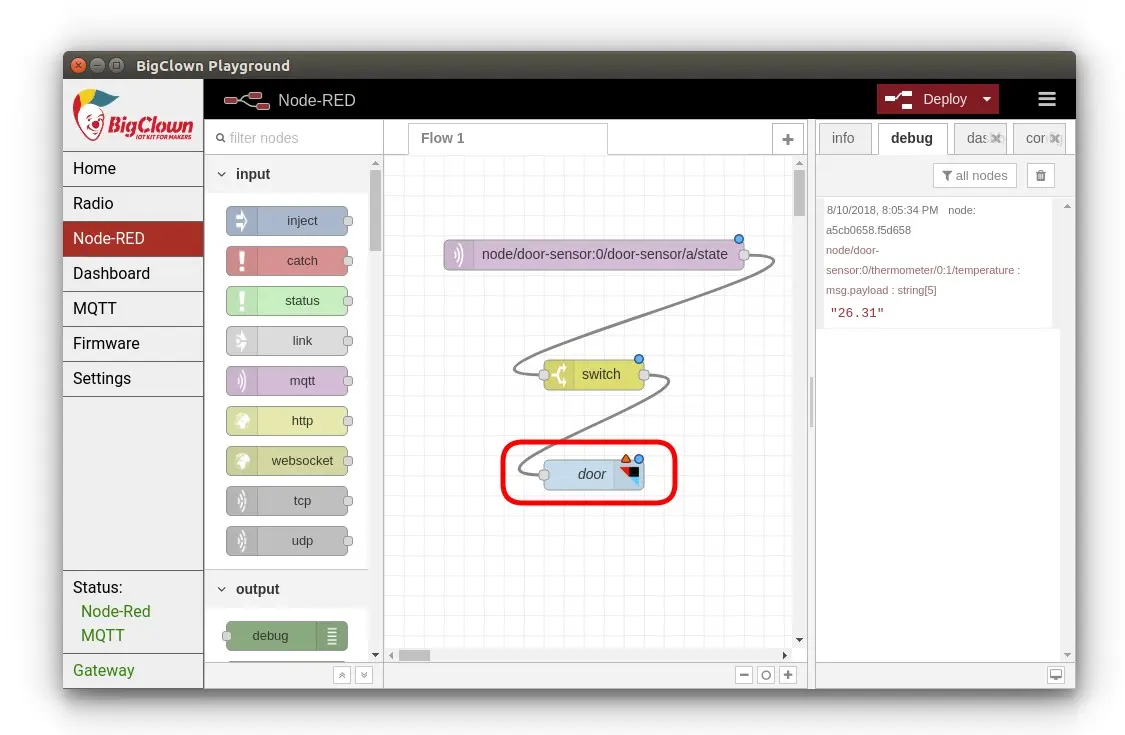
Set the IFTTT Key
Step 1: The flow is imported; now fill in your own IFTTT key. Double-click the IFTTT node
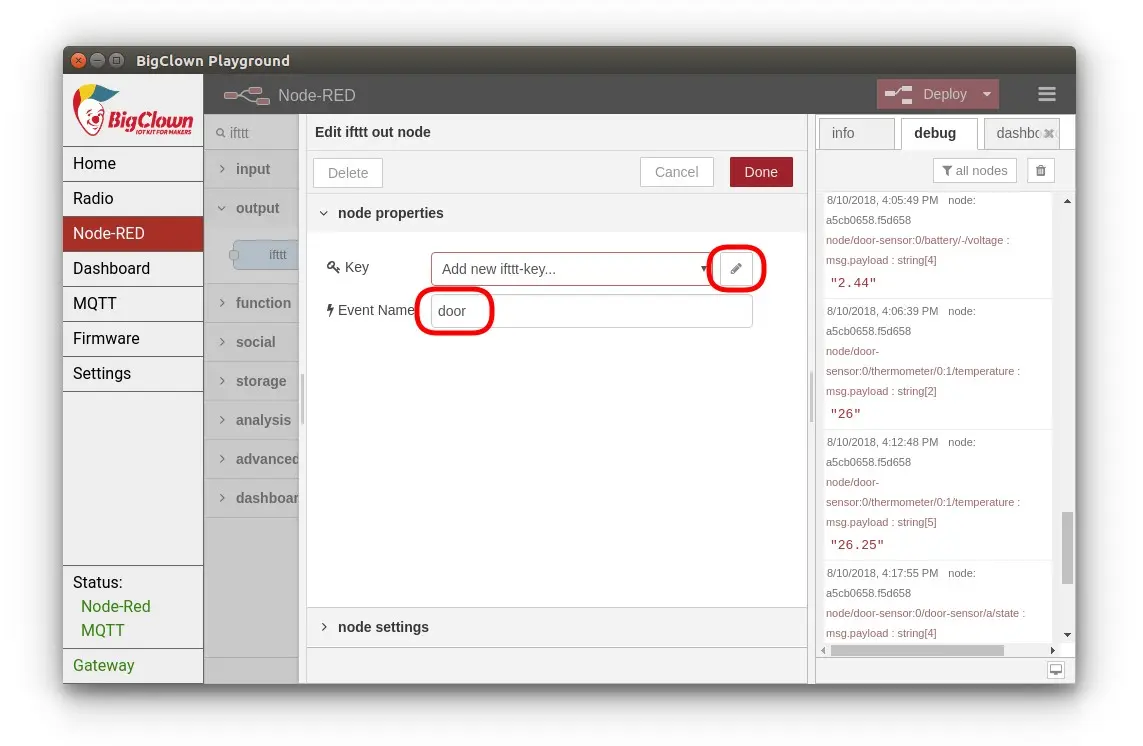
Step 2: Click the pencil icon and paste the key from the last step of the IFTTT Integration section. Check that Event name is set to door, then click Done
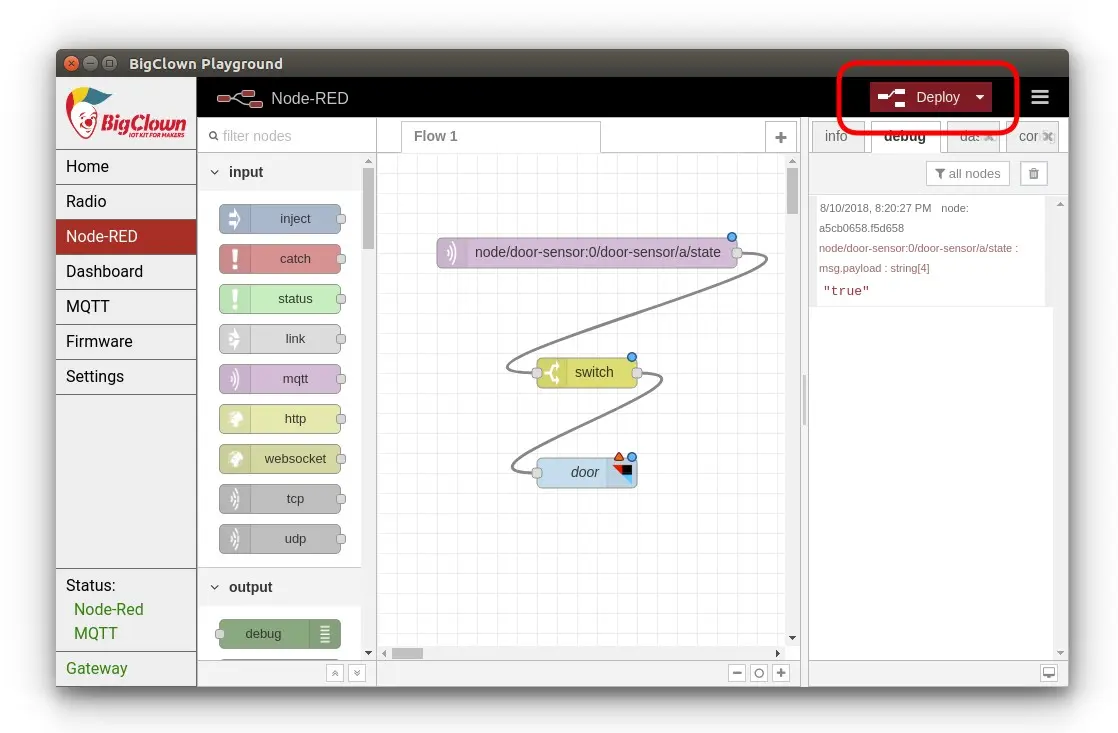
Run and Test the Flow
Step 1: Every time you change the flow, you have to click Deploy in the top-right corner. Do that now:
Step 2: Move the magnet to the magnetic switch of your Radio Door Sensor and away again. An IFTTT notification should arrive within a few seconds!
The debug tab on the right shows "true" and "false" messages, and on false a green Sent! flag briefly appears next to the IFTTT node.
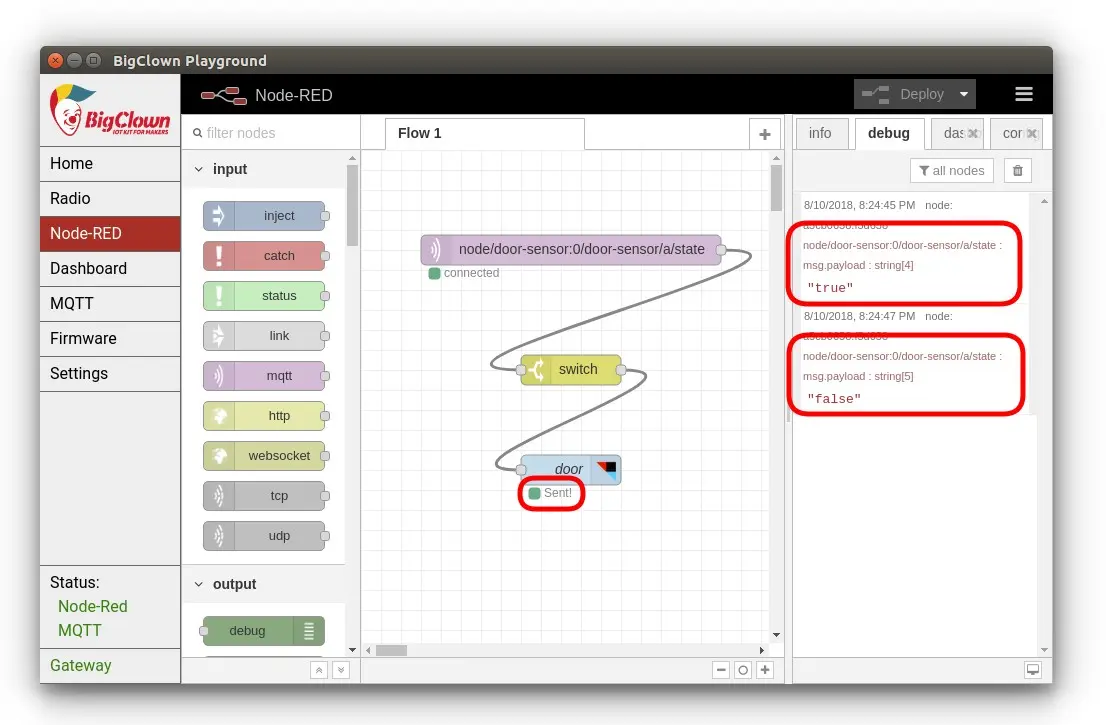
To be notified on "true" messages instead of false, open the switch node and change false to true in its rules.
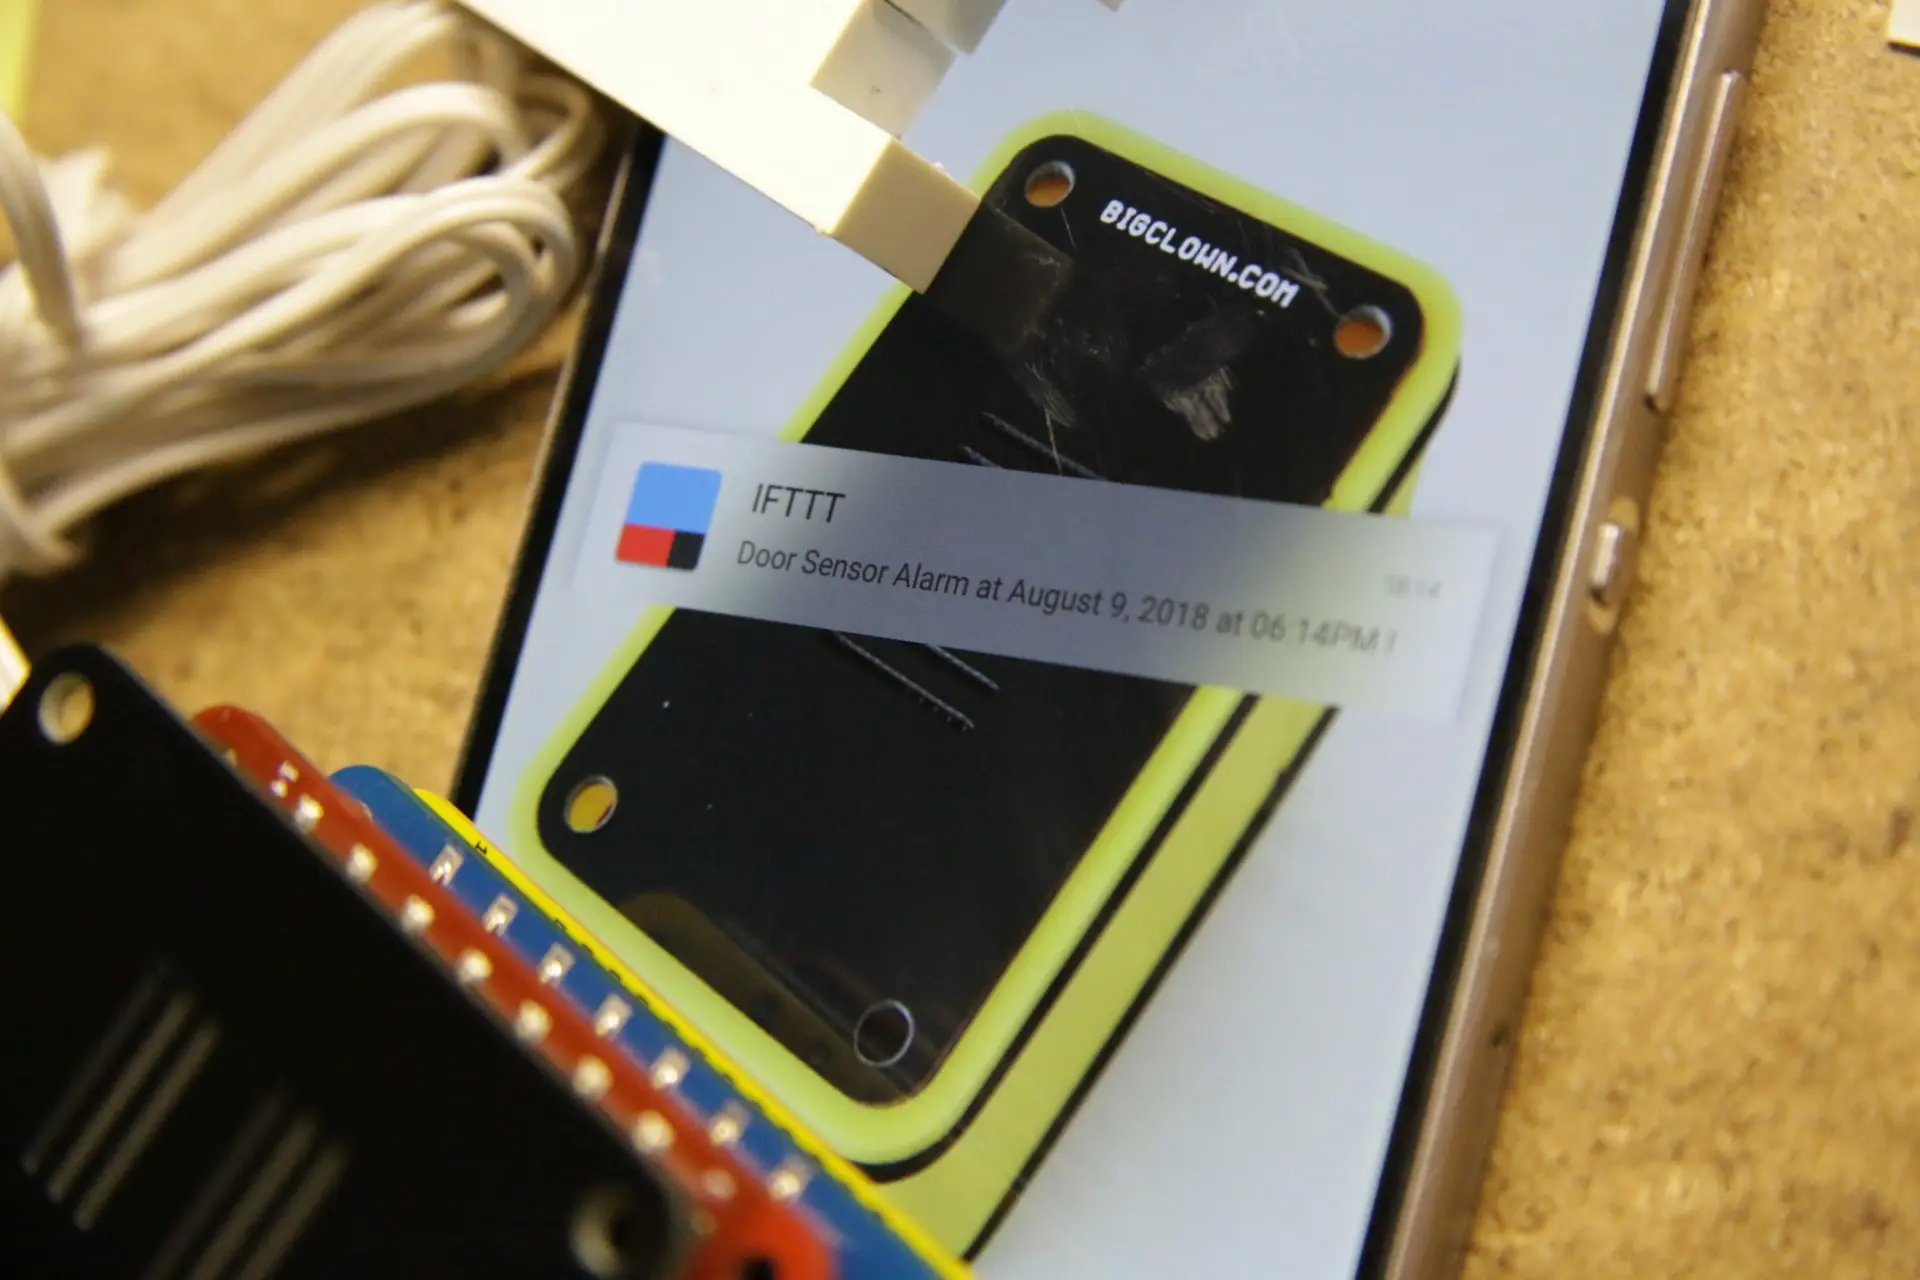
Now find the right spot for your Radio Door Sensor and enjoy the notifications!
More Features
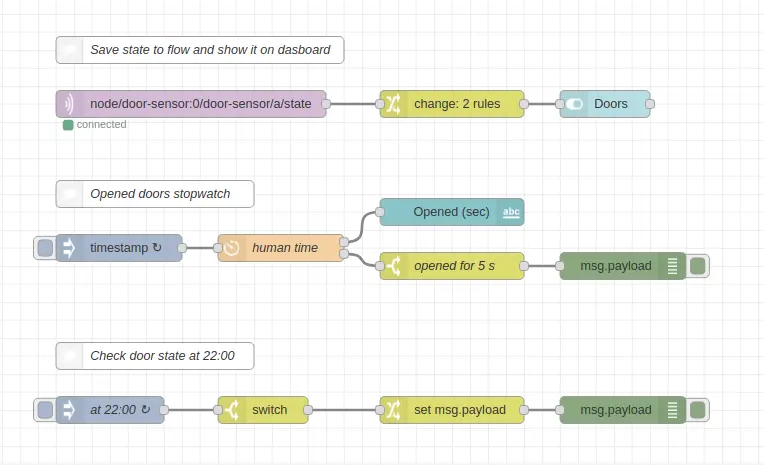
You can also import this flow into Node-RED. It can:
- Show the current door state as a graphical padlock
- Show a stopwatch while the door is open and raise an event once it has been open for a set number of seconds
- Check the door state at a set time and raise an event
[{"id":"6f038501.0d3aec","type":"mqtt in","z":"84faeffa.c3a93","name":"","topic":"node/door-sensor:0/door-sensor/a/state","qos":"2","broker":"29fba84a.b2af58","x":290,"y":260,"wires":[["27a2954e.e0ee9a"]]},{"id":"968704d7.760558","type":"ui_switch","z":"84faeffa.c3a93","name":"","label":"Doors","group":"57ff470b.93fdf8","order":0,"width":"0","height":"0","passthru":false,"decouple":"true","topic":"","style":"","onvalue":"true","onvalueType":"str","onicon":"fa-lock","oncolor":"green","offvalue":"false","offvalueType":"str","officon":"fa-unlock","offcolor":"red","x":750,"y":260,"wires":[[]]},{"id":"cd19b231.5a539","type":"inject","z":"84faeffa.c3a93","name":"","topic":"","payload":"","payloadType":"date","repeat":"1","crontab":"","once":false,"onceDelay":0.1,"x":210,"y":420,"wires":[["90766ef0.cb081"]]},{"id":"ec67f171.3a0db","type":"ui_text","z":"84faeffa.c3a93","group":"57ff470b.93fdf8","order":0,"width":0,"height":0,"name":"","label":"Opened (sec)","format":"{{msg.payload}}","layout":"row-spread","x":580,"y":380,"wires":[]},{"id":"90766ef0.cb081","type":"function","z":"84faeffa.c3a93","name":"human time","func":"var human = {payload : \"\"};\nvar seconds = {payload : 0};\n\nif(flow.get(\"state\") == \"true\")\n{\n human.payload = \"CLOSED\";\n} else\n{\n diff = parseInt((Date.now() - flow.get(\"timestamp\")));\n human.payload = new Date(diff).toString().slice(16,24);\n seconds.payload = parseInt(diff/1000);\n}\n\n\nreturn [human, seconds];","outputs":2,"noerr":0,"x":390,"y":420,"wires":[["ec67f171.3a0db"],["fa64f9a0.2e58e8"]],"outputLabels":["human time","seconds"],"icon":"node-red/timer.png"},{"id":"27a2954e.e0ee9a","type":"change","z":"84faeffa.c3a93","name":"","rules":[{"t":"set","p":"state","pt":"flow","to":"payload","tot":"msg"},{"t":"set","p":"timestamp","pt":"flow","to":"","tot":"date"}],"action":"","property":"","from":"","to":"","reg":false,"x":580,"y":260,"wires":[["968704d7.760558"]]},{"id":"3ed1d655.049fda","type":"inject","z":"84faeffa.c3a93","name":"at 22:00","topic":"","payload":"","payloadType":"date","repeat":"","crontab":"00 22 * * *","once":false,"onceDelay":0.1,"x":200,"y":600,"wires":[["66b56029.25196"]]},{"id":"66b56029.25196","type":"switch","z":"84faeffa.c3a93","name":"","property":"state","propertyType":"flow","rules":[{"t":"eq","v":"false","vt":"str"}],"checkall":"true","repair":false,"outputs":1,"x":370,"y":600,"wires":[["bf5ca77b.366198"]]},{"id":"94e19310.ac12e","type":"debug","z":"84faeffa.c3a93","name":"","active":true,"tosidebar":true,"console":false,"tostatus":false,"complete":"false","x":770,"y":600,"wires":[]},{"id":"bf5ca77b.366198","type":"change","z":"84faeffa.c3a93","name":"","rules":[{"t":"set","p":"payload","pt":"msg","to":"Door opened at night","tot":"str"}],"action":"","property":"","from":"","to":"","reg":false,"x":580,"y":600,"wires":[["94e19310.ac12e"]]},{"id":"fa64f9a0.2e58e8","type":"switch","z":"84faeffa.c3a93","name":"opened for 5 s","property":"payload","propertyType":"msg","rules":[{"t":"eq","v":"5","vt":"num"}],"checkall":"true","repair":false,"outputs":1,"x":580,"y":440,"wires":[["e3ba7f50.53703"]]},{"id":"e3ba7f50.53703","type":"debug","z":"84faeffa.c3a93","name":"","active":true,"tosidebar":true,"console":false,"tostatus":false,"complete":"false","x":770,"y":440,"wires":[]},{"id":"cd9712a1.91c45","type":"comment","z":"84faeffa.c3a93","name":"Save state to flow and show it on dasboard","info":"","x":300,"y":200,"wires":[]},{"id":"21a591a0.10411e","type":"comment","z":"84faeffa.c3a93","name":"Opened doors stopwatch","info":"","x":250,"y":360,"wires":[]},{"id":"6752875e.0092b8","type":"comment","z":"84faeffa.c3a93","name":"Check door state at 22:00","info":"","x":250,"y":540,"wires":[]},{"id":"29fba84a.b2af58","type":"mqtt-broker","z":"","broker":"127.0.0.1","port":"1883","clientid":"","usetls":false,"compatmode":true,"keepalive":"60","cleansession":true,"birthTopic":"","birthQos":"0","birthPayload":"","willTopic":"","willQos":"0","willPayload":""},{"id":"57ff470b.93fdf8","type":"ui_group","z":"","name":"Default","tab":"11207769.c31889","disp":true,"width":"6","collapse":false},{"id":"11207769.c31889","type":"ui_tab","z":"","name":"Home","icon":"dashboard"}]