Kennel temperature monitor - upgrade
Introduction
Do you already have a basic version of the kennel temperature detector? Build an even better one. It will send notifications to your mobile and you will see the temperature in the kennel from anywhere. 🐶
Under this project, you will learn how to set the box to send you a message when the temperature exceeds a preset value. 👌 The box won’t start barking, but it´s still a great project. 🐩
The basic version of this project can be found here: Temperature monitor for your hairy watchman: check the temperature in your dog's kennel.
All you need is the basic HARDWARIO Start Set.
Prepare Node-RED
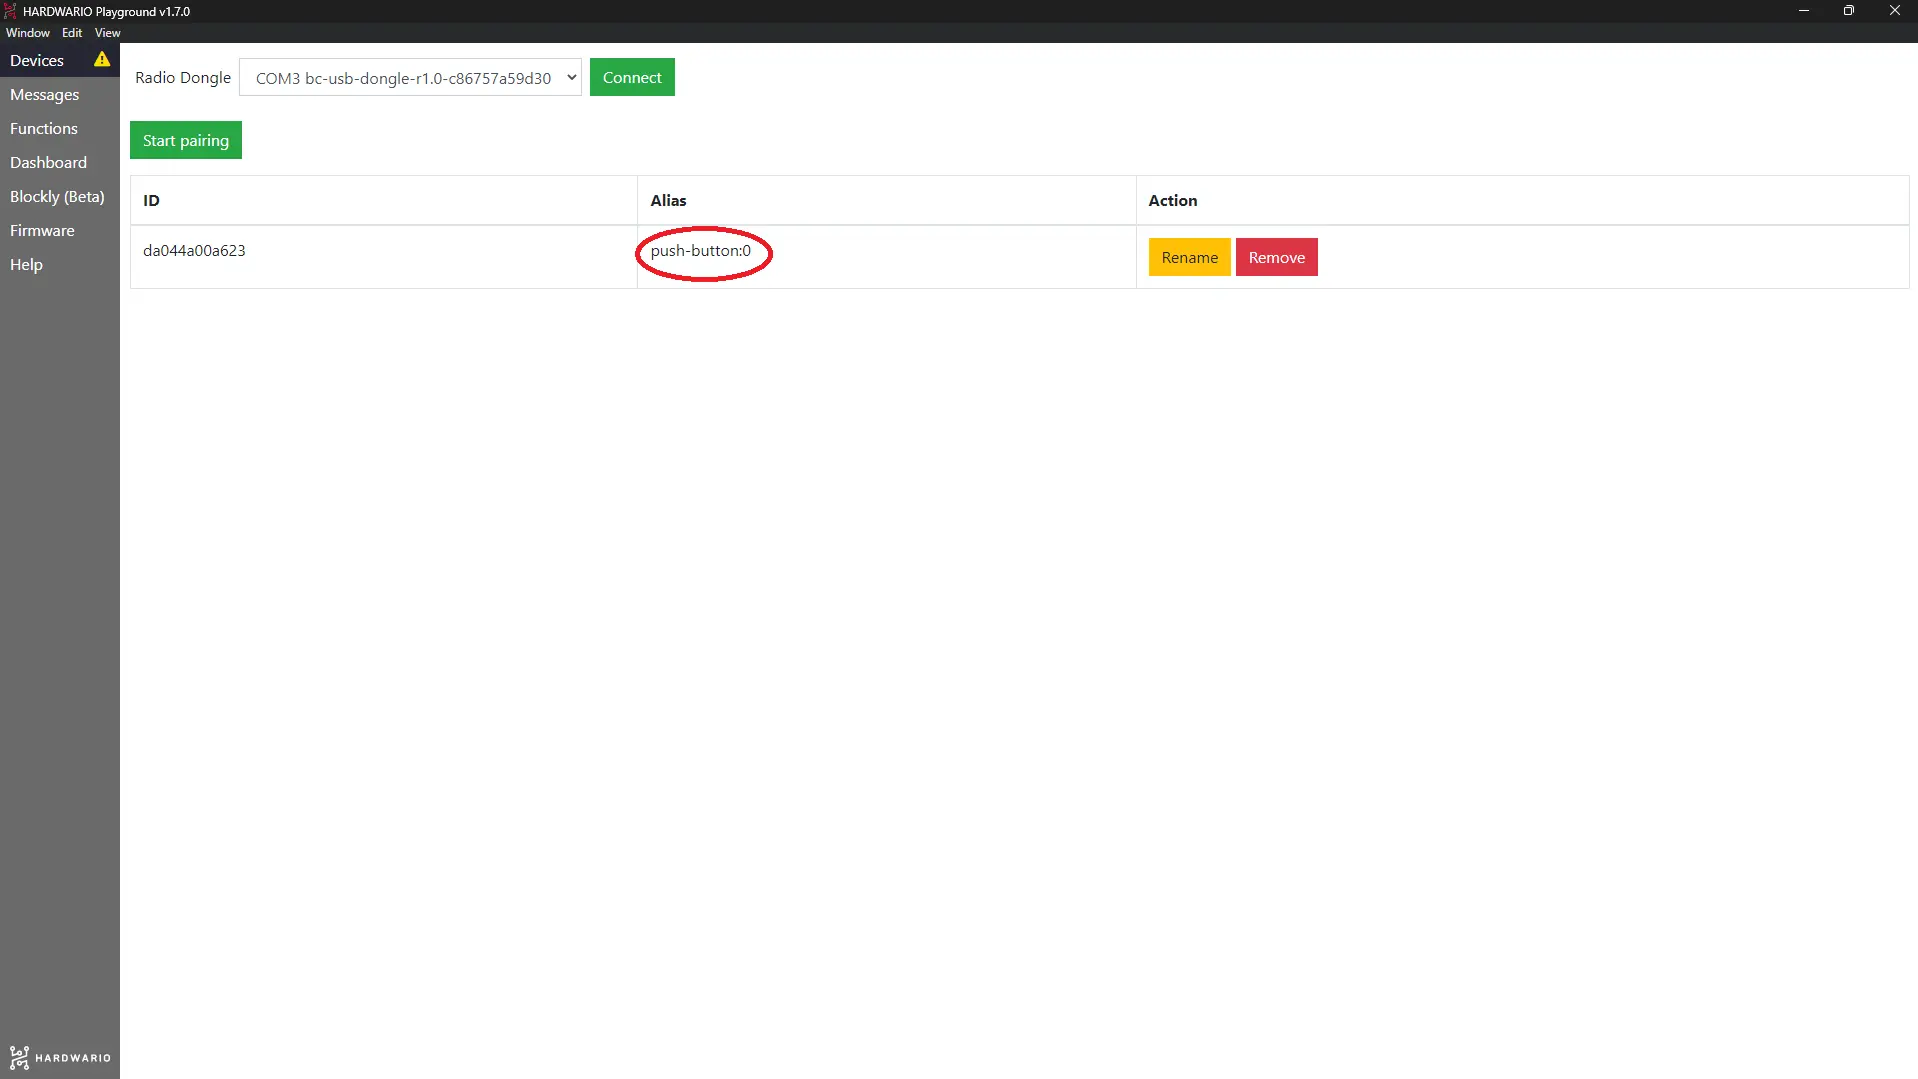
- The firmware you need for this project is the familiar bcf-radio-push-button. Have you got it already? What are you waiting for? Pair the box with a Dongle.
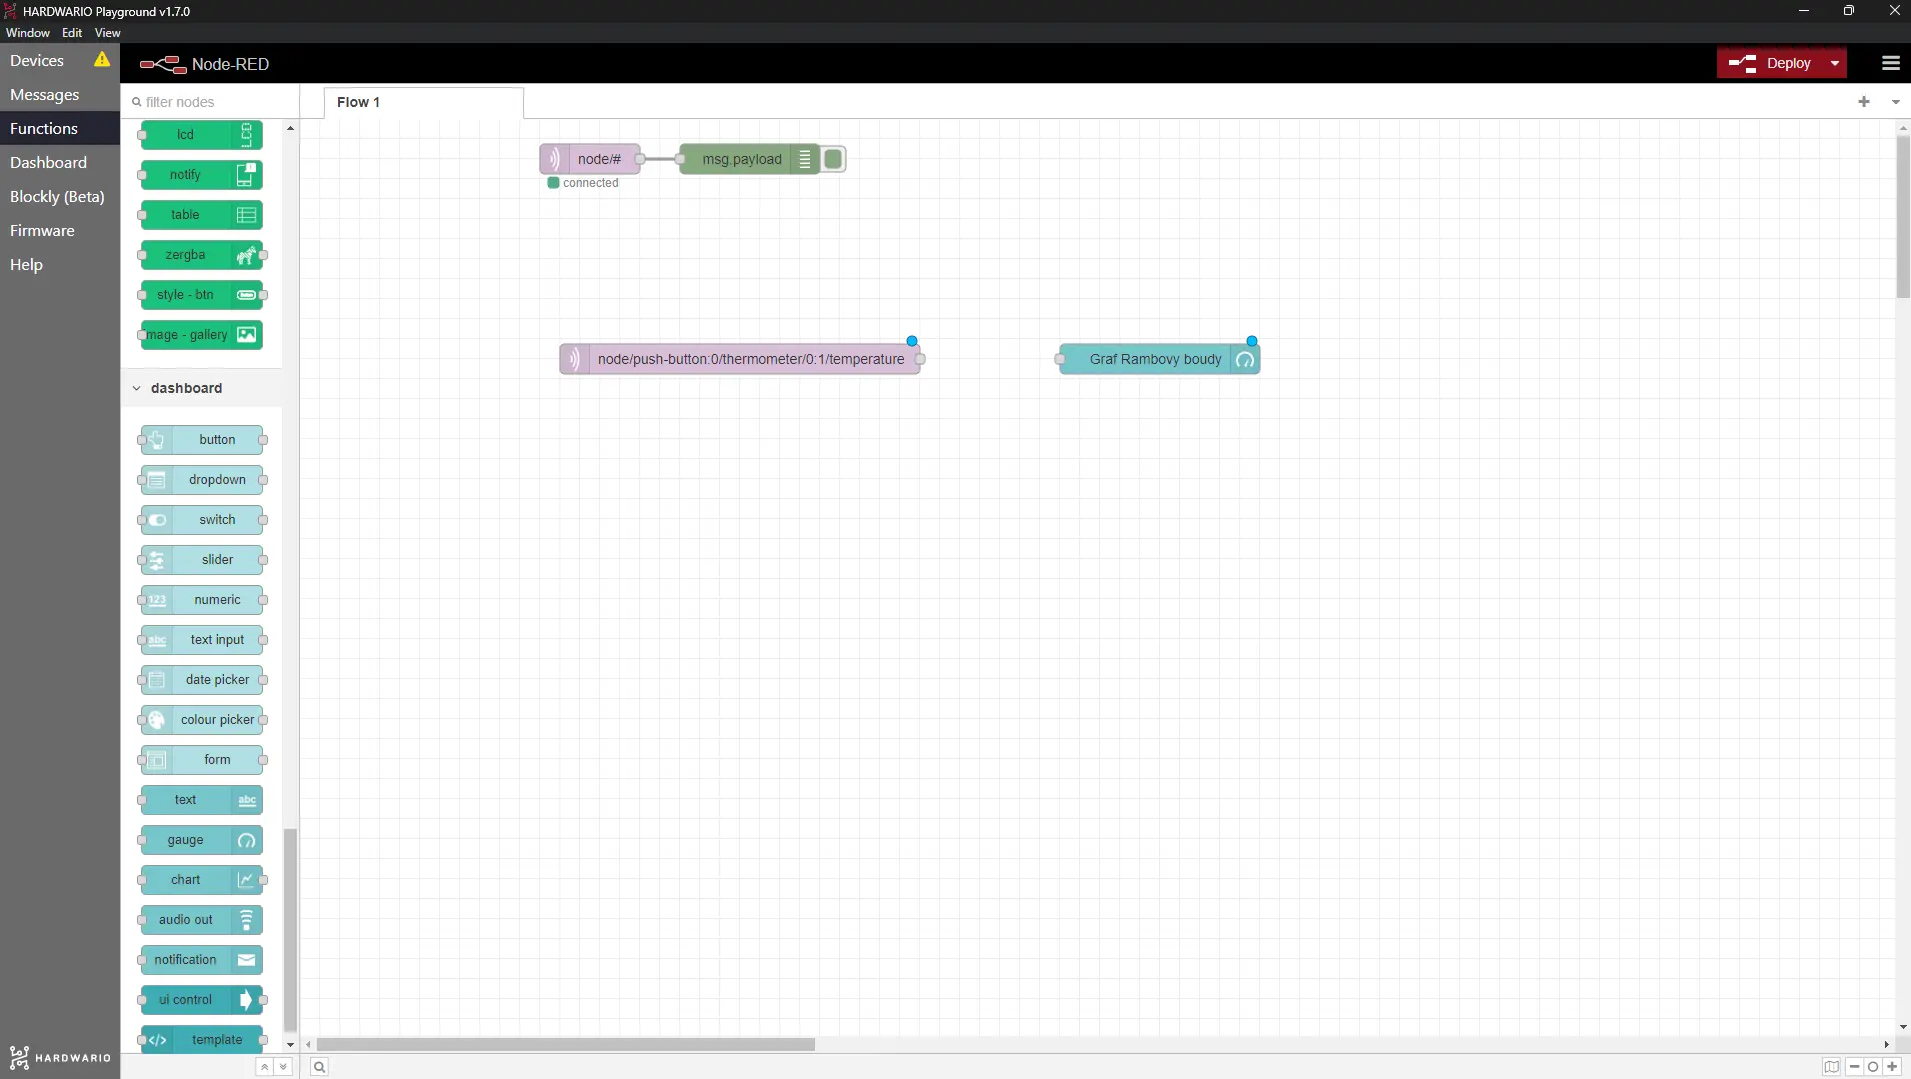
- In Playground, click on the Function tab and place the same thing on the desktop as in the basic version of the project:
- one MQTT node from under the Input section uploading Topic
node/push-button:0/thermometer/0:1/temperature
- and a pointer, that is a Gauge node from under the Dashboard section. It should read from -15 to 40 °C. Name it for better orientation. ✍️
Hold onto your hat and let's move on. 🎩
Prepare Blynk IoT for the alert
The temperature alert is delivered to your phone through the Blynk IoT app as a push notification. And that's exactly what makes the box smart. 😎
-
If you don't have one yet, create an account in Blynk IoT. See this guide for how to set up your account, a device template, and a device — you'll need all three. You can also reuse a template from a previous project.
-
In Blynk IoT, the alert isn't placed on the phone screen like a widget — it's sent as an Event defined on your template. On the template detail, open the Events tab and add a new event (for example, name it
kennel_tempand give it the message you want to receive, such as It is too cold in the kennel). Then turn on Notifications for that event so Blynk delivers it to your phone. The guide walks through the template settings. -
Download the Blynk IoT app on your phone from the App Store or Google Play and sign in with the same account. Make sure notifications are allowed for the app so the alert can pop up. 📱 You first have to upgrade your Node-RED before it does anything, though.
Upgrade in Node-RED
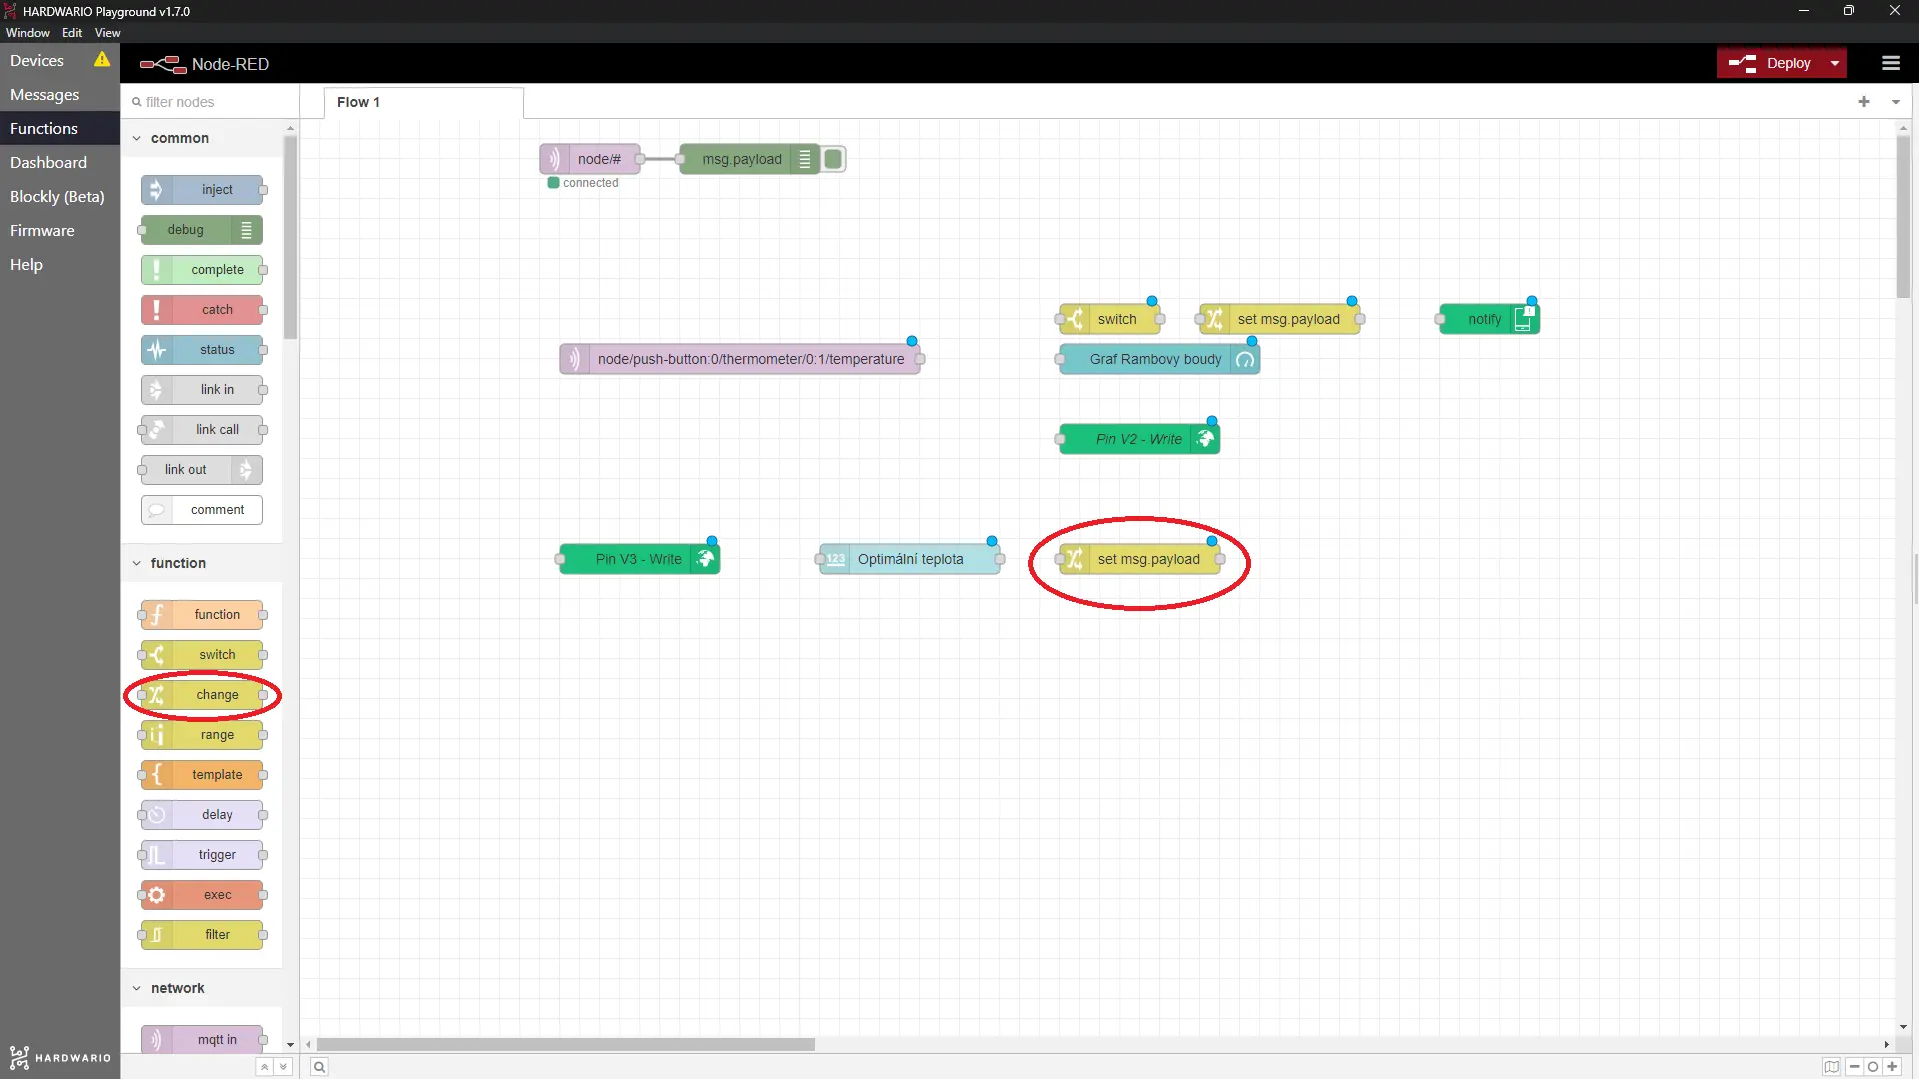
- Return to your computer and set up more features in Playground. The first is the mobile notification. You make this work with three nodes.
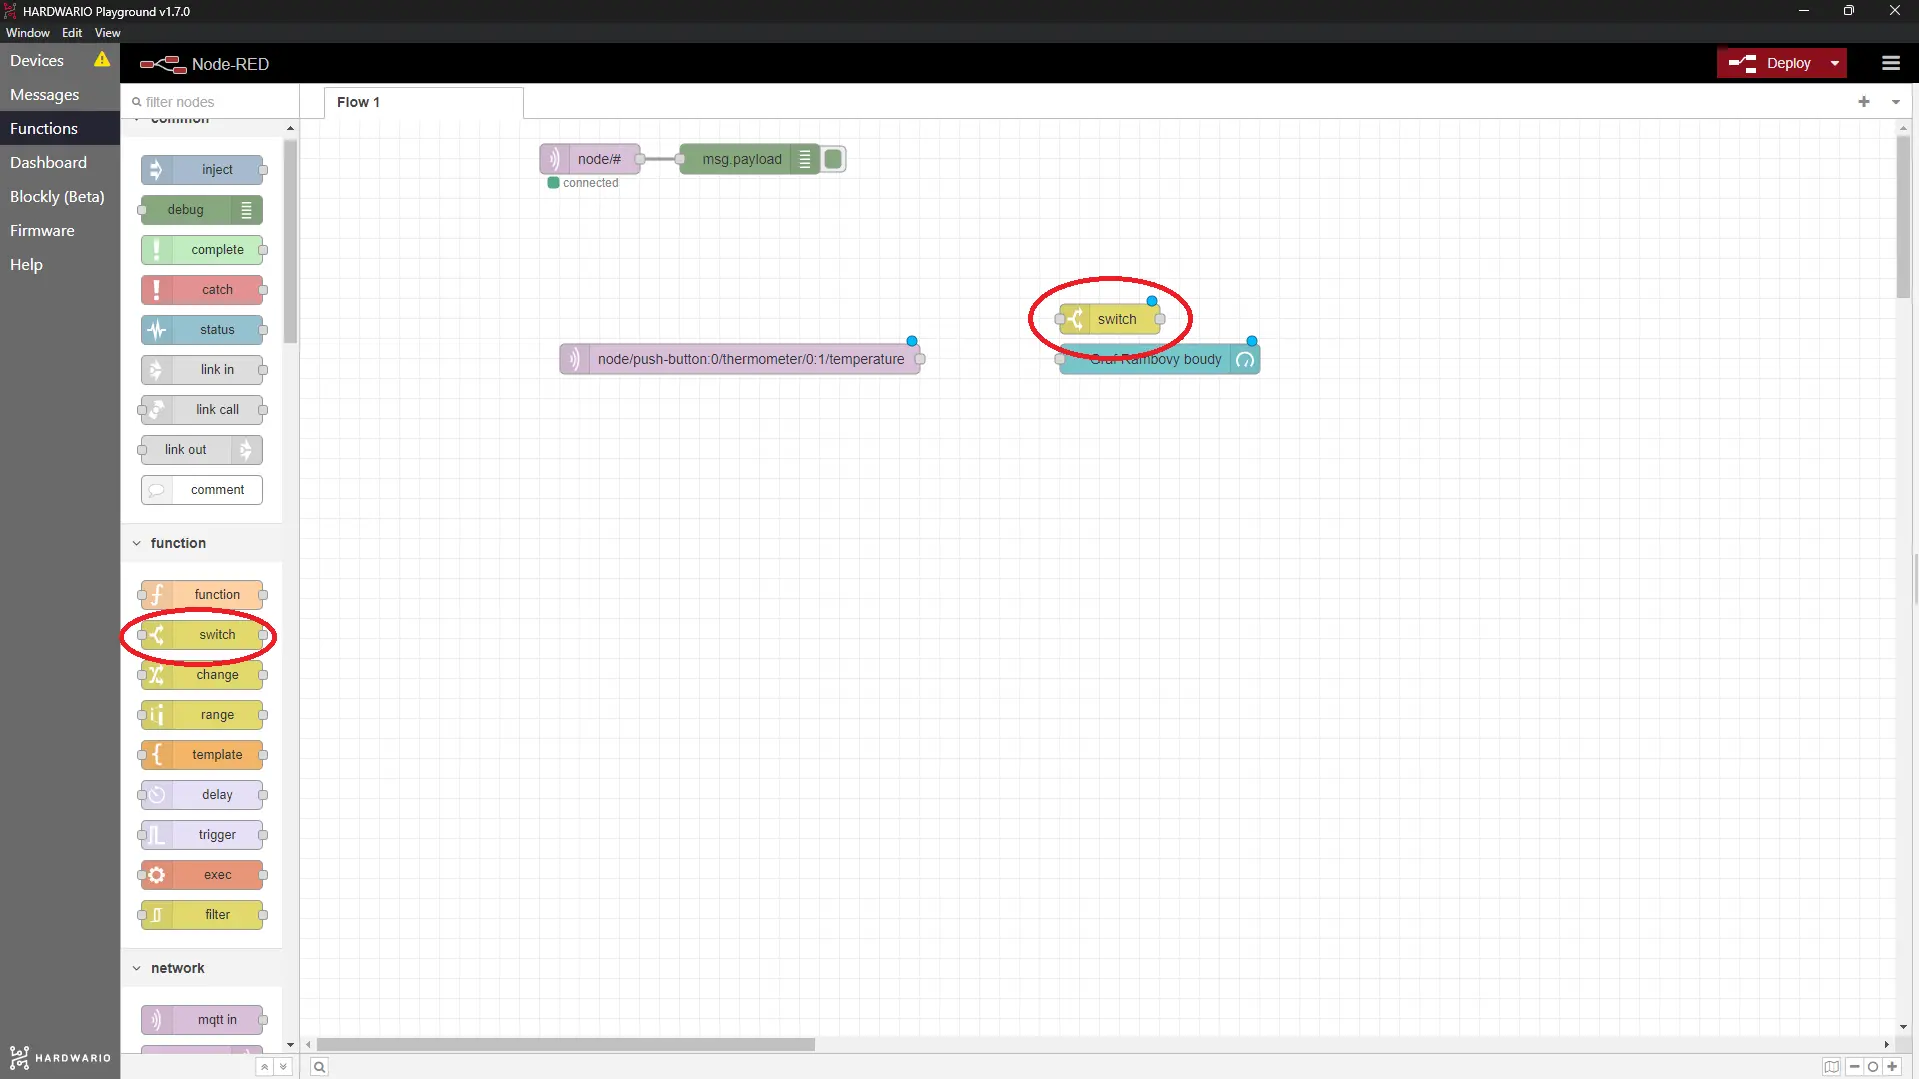
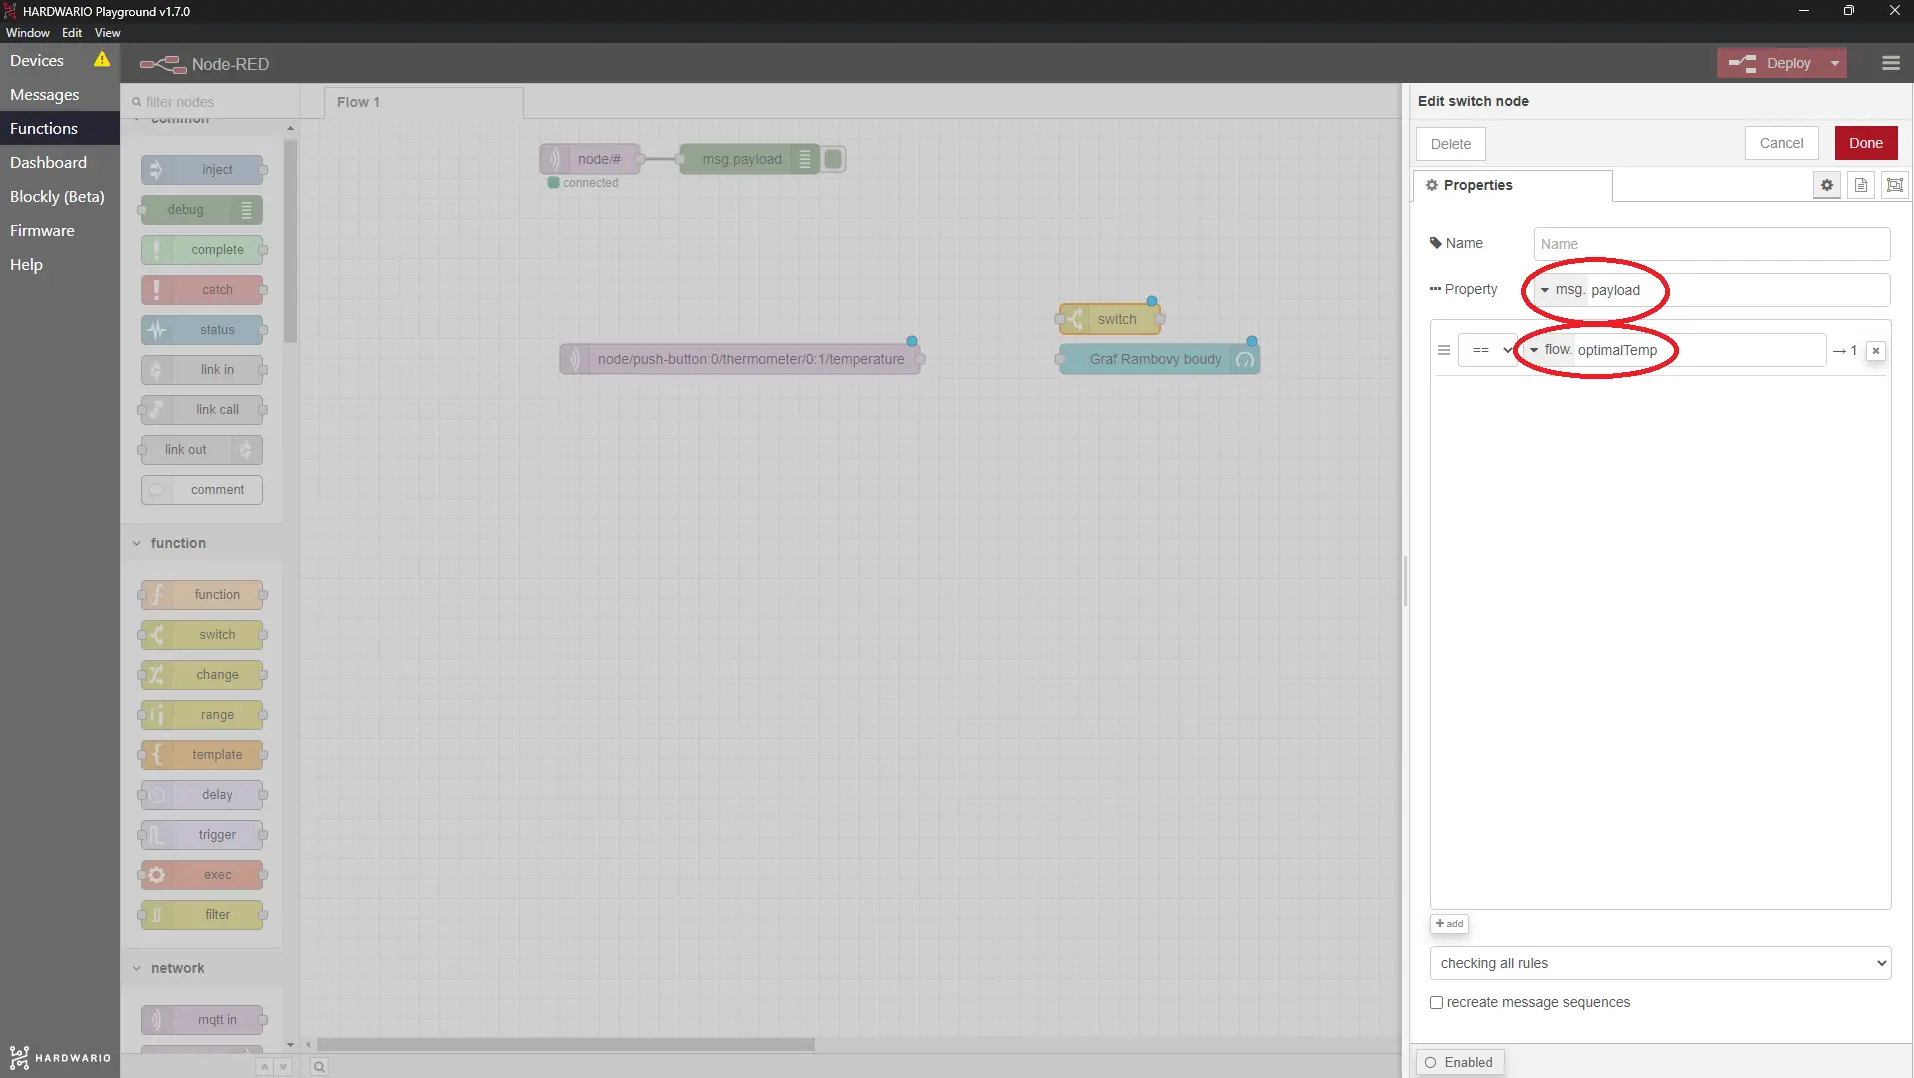
- First node: Switch node from under the Function section.
In the node, set what you see below:
a. Use msg. payload as the selected property;
b. Select the notification to be sent when the temperature is less than or equal to −15 °C. Work with the flow. optimalTemp variable and with the symbol less than/equal to: **<=**
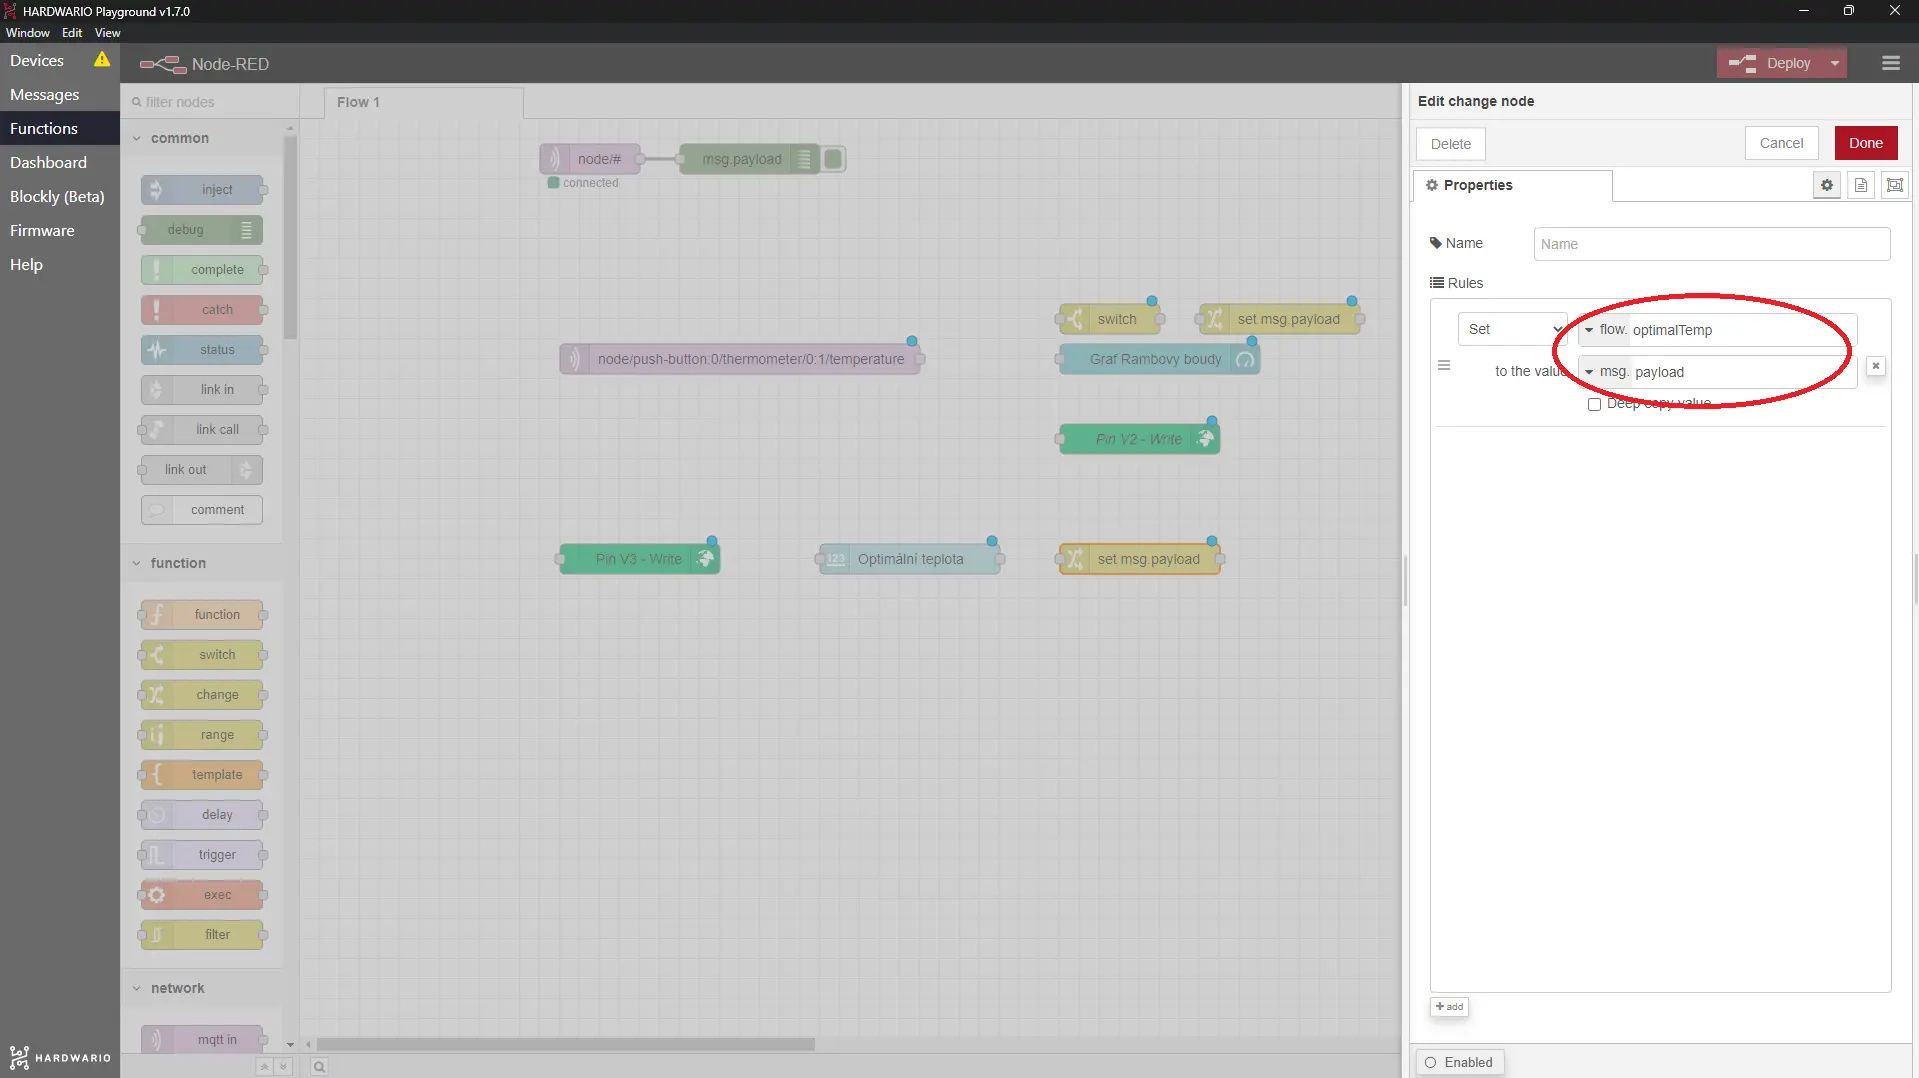
- Second node: Change node from the same section. This affects what message you get on your mobile.
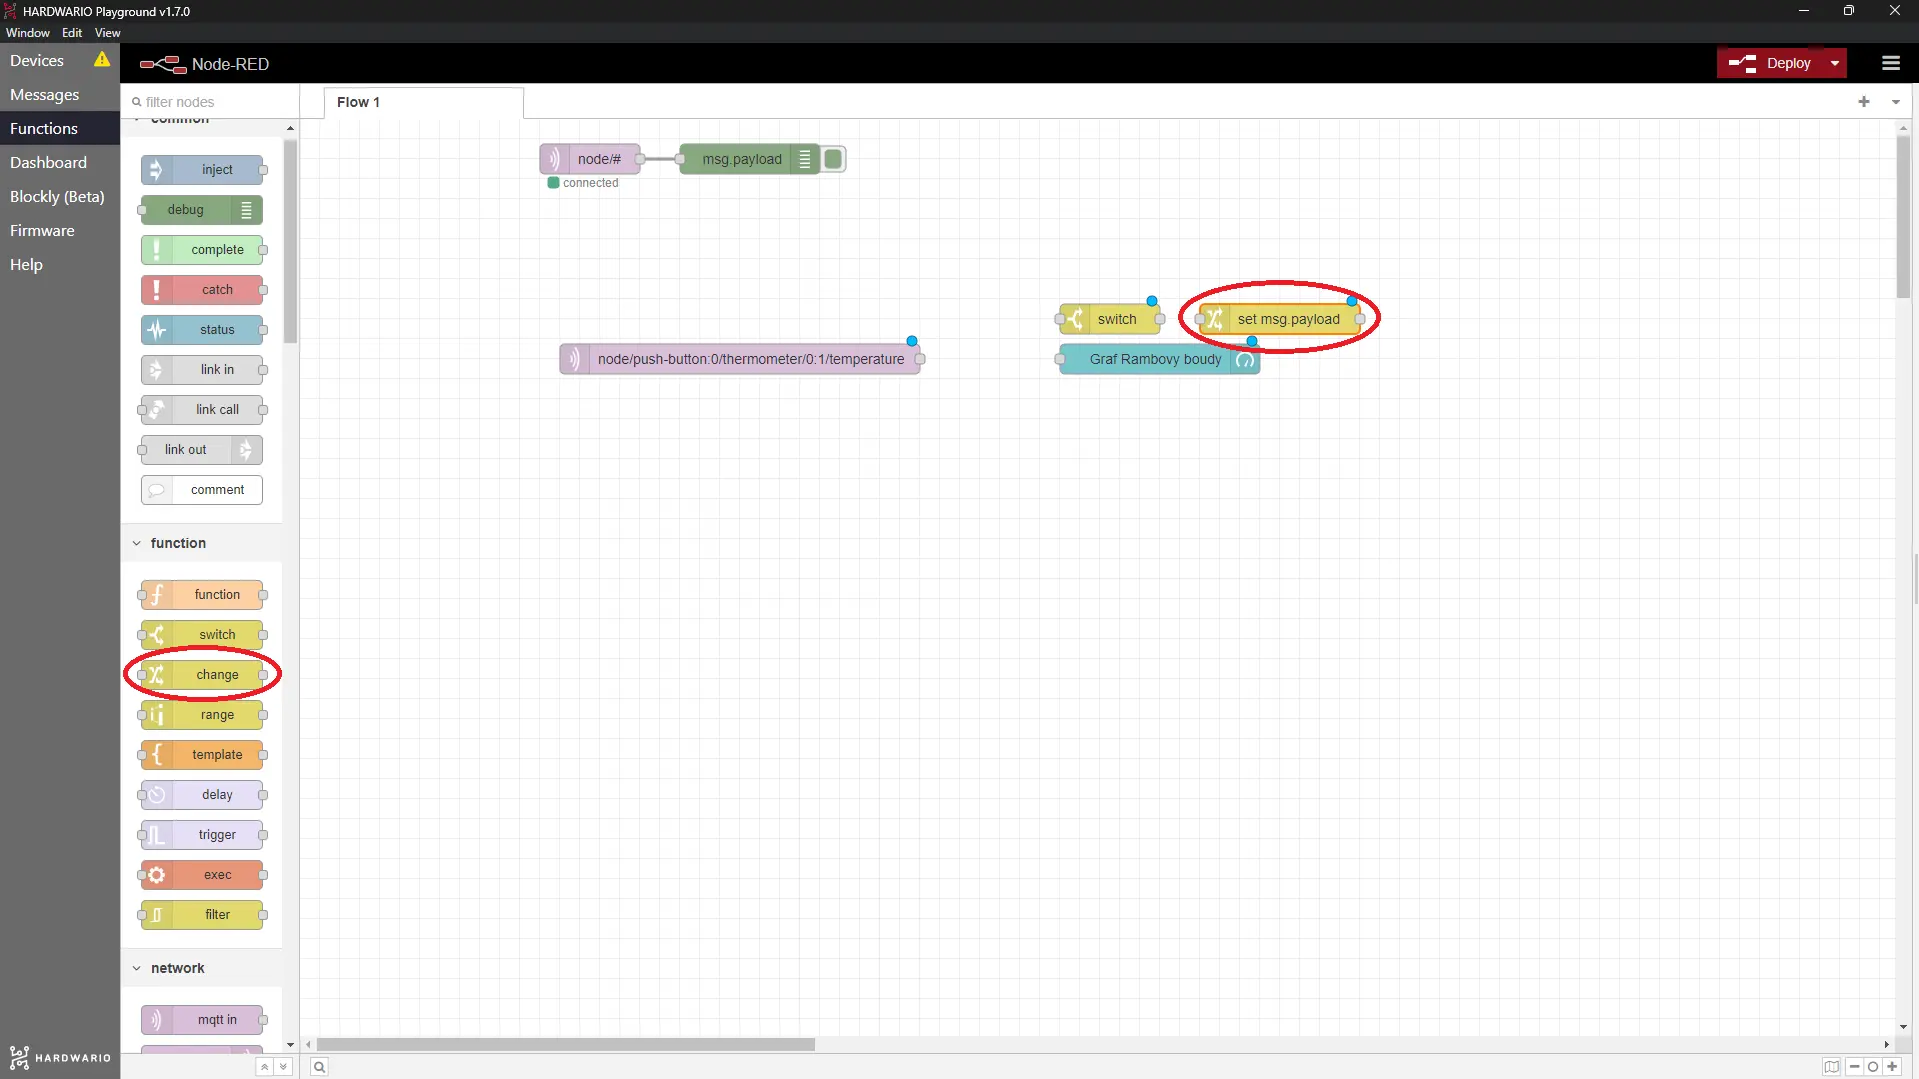
In the node, set what the mobile will tell you when the temperature in the kennel falls below the lowest temperature you set. For example It's too cold in the kennel.
Our tip: Write the message without hooks (háčky) and accent marks (čárky). Unfortunately, Blynk does not understand them.
- Third node: the Blynk IoT node that can trigger your event (the log event node), from under the Blynk IoT section. This provides the connection to the mobile.
Double-click the node to open it. On the right you'll see a small pencil. Click it and a new window opens. In the Url field enter
blynk.cloud, and into the Auth Token and Template ID fields copy the values from the device detail in the Blynk IoT web app on your computer. Confirm with the Add button.
Then set the node to fire the Event you created (the event code, e.g. kennel_temp). This is what turns the too-cold reading into the push notification. Confirm with the Done button.
Our tip: Name the connection in the name line so that you can recognize it later.
Add the flow that monitors the optimum temperature
- The icing on the cake is to follow. This flow consists of two nodes.
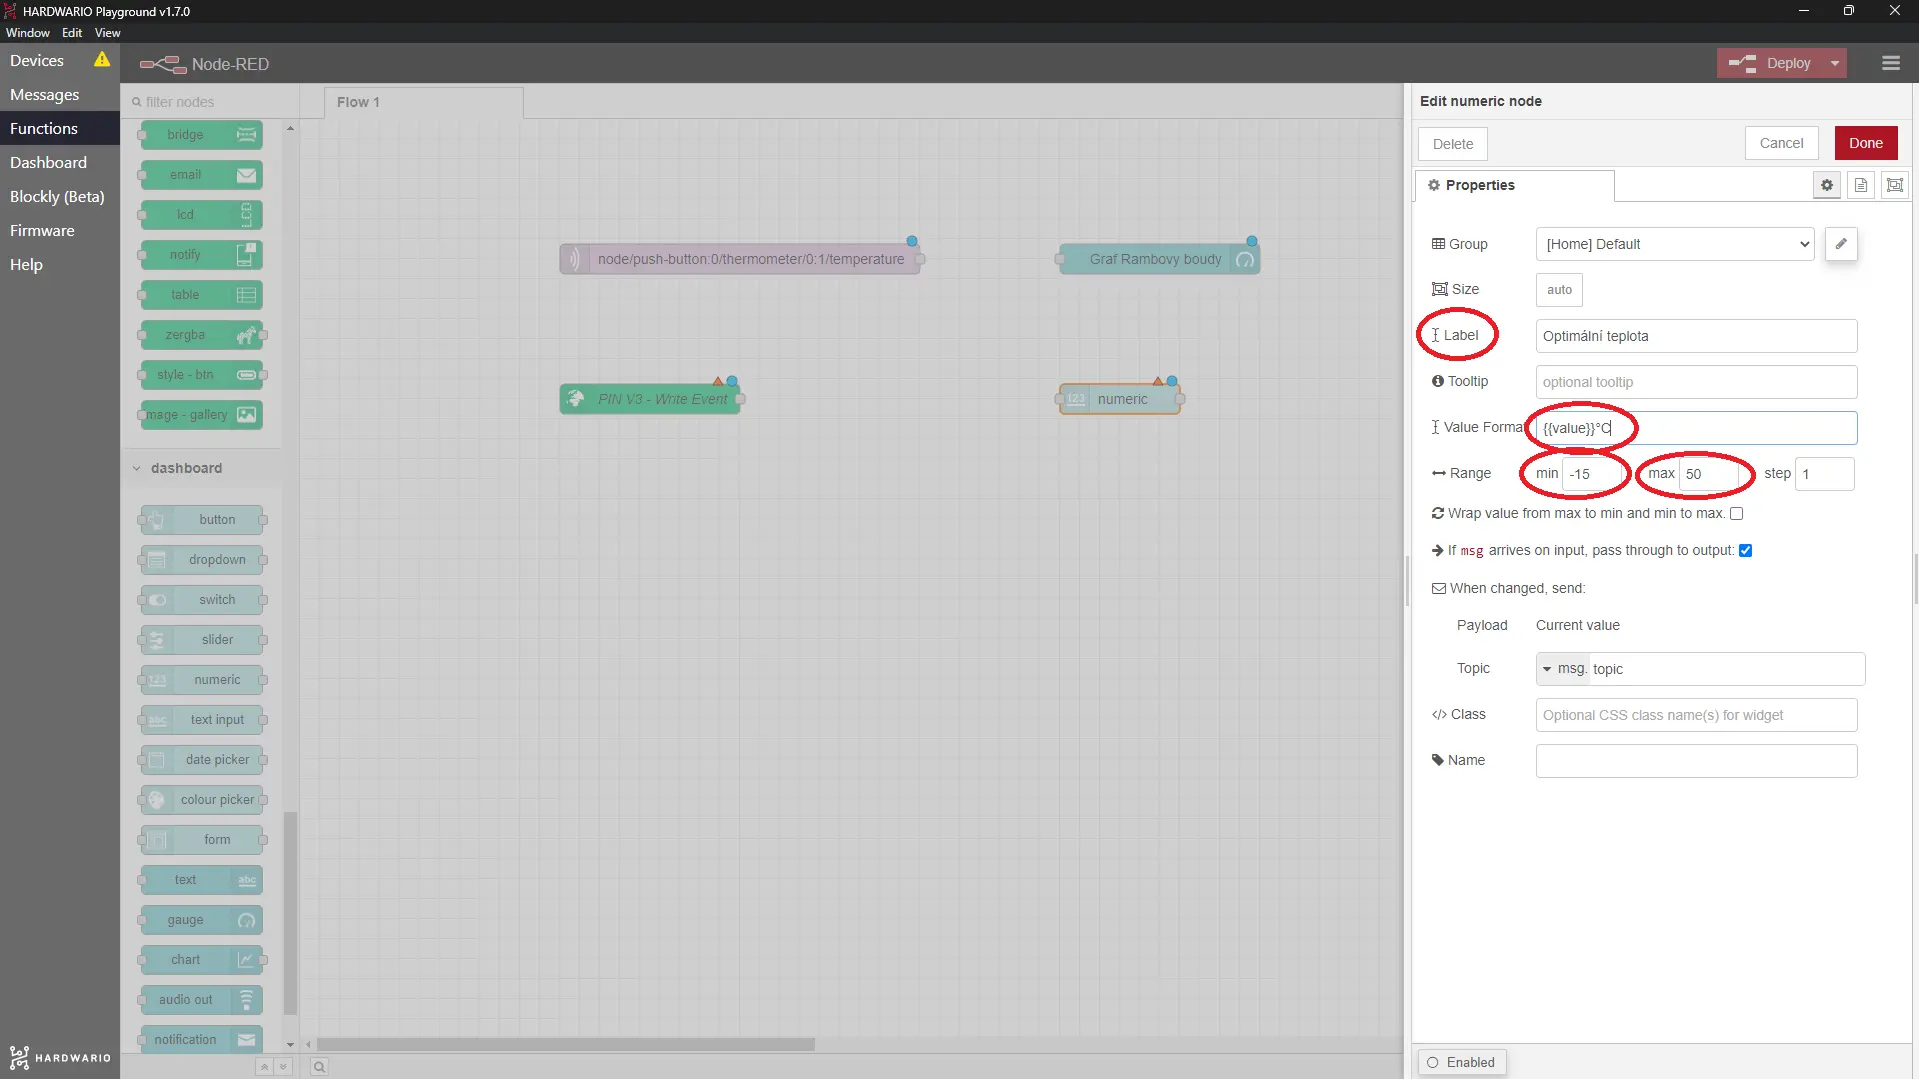
The first is the Numeric node from under the Dashboard section. Sounds like some comic book villain, doesn't it? But he's your buddy now.
The Numeric node lets you set the lowest acceptable temperature right from the Playground Dashboard. It ensures the threshold is easy to adjust.
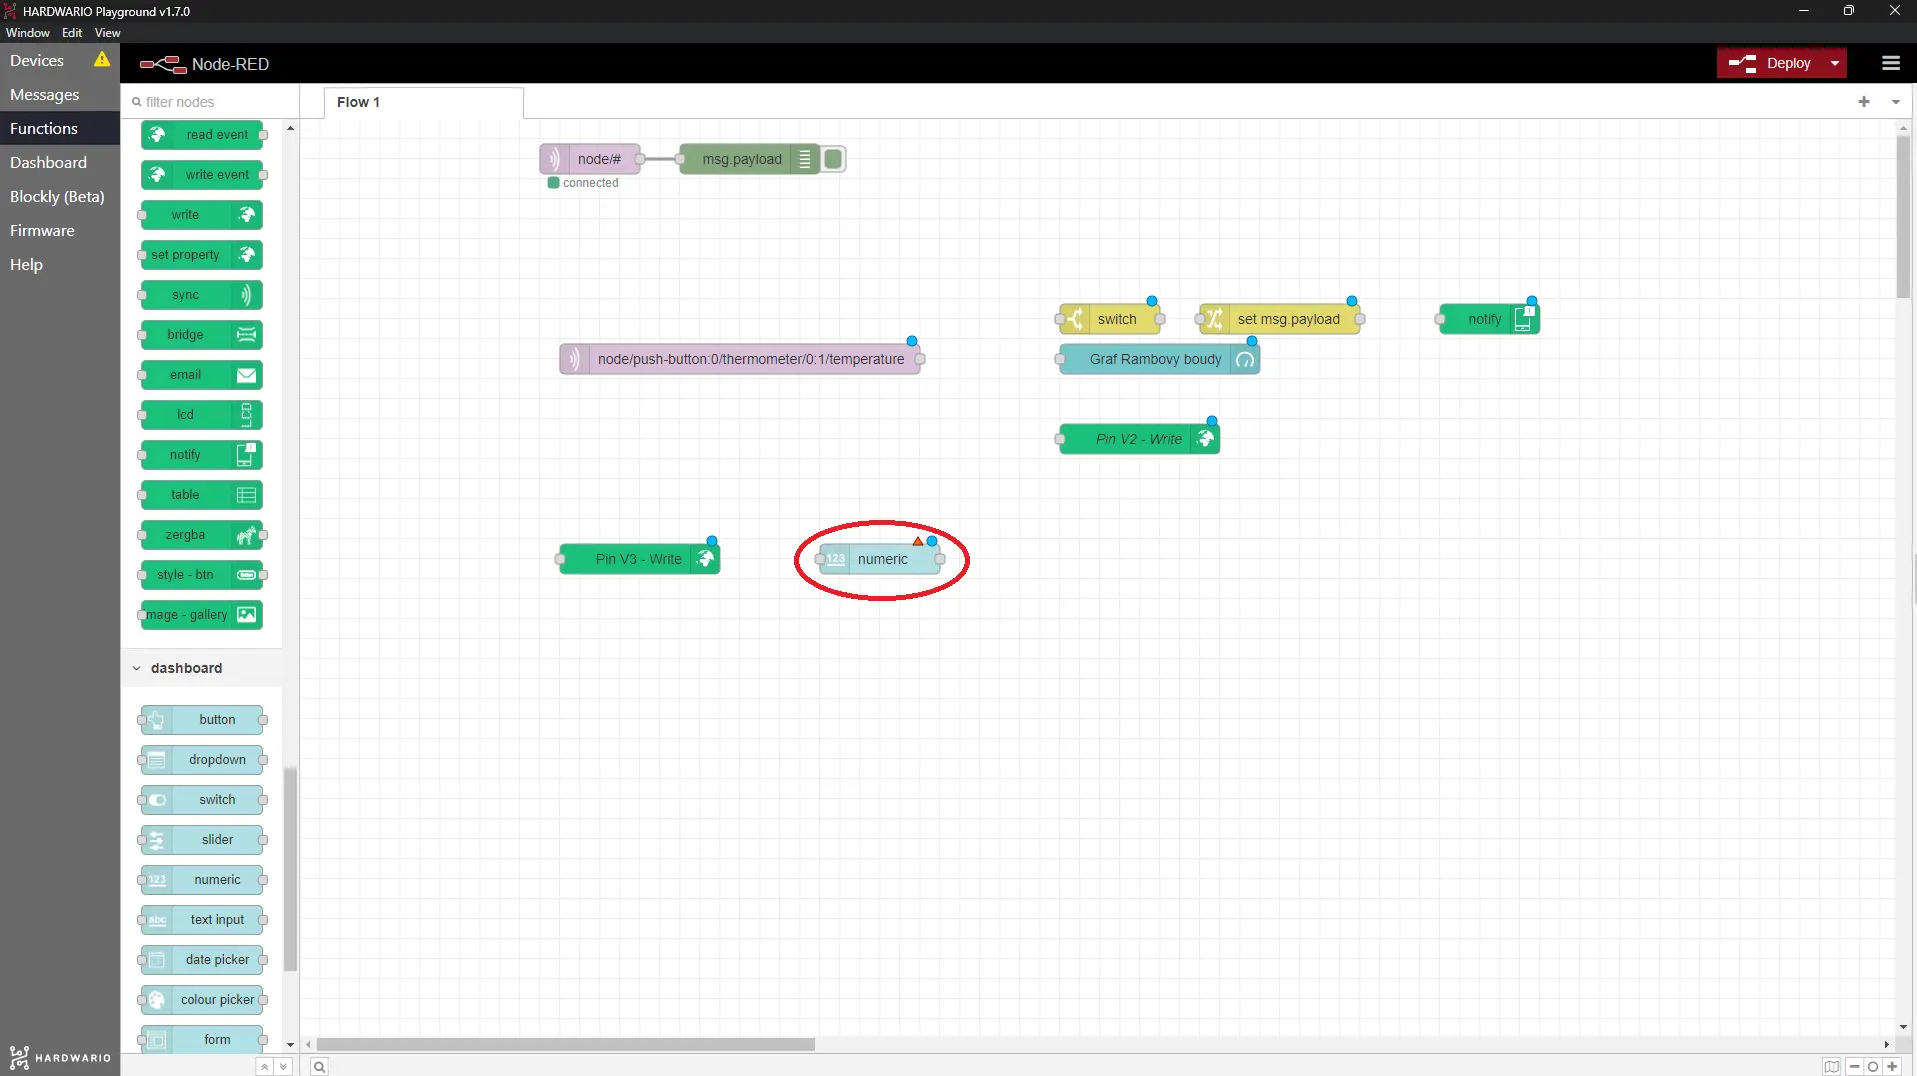
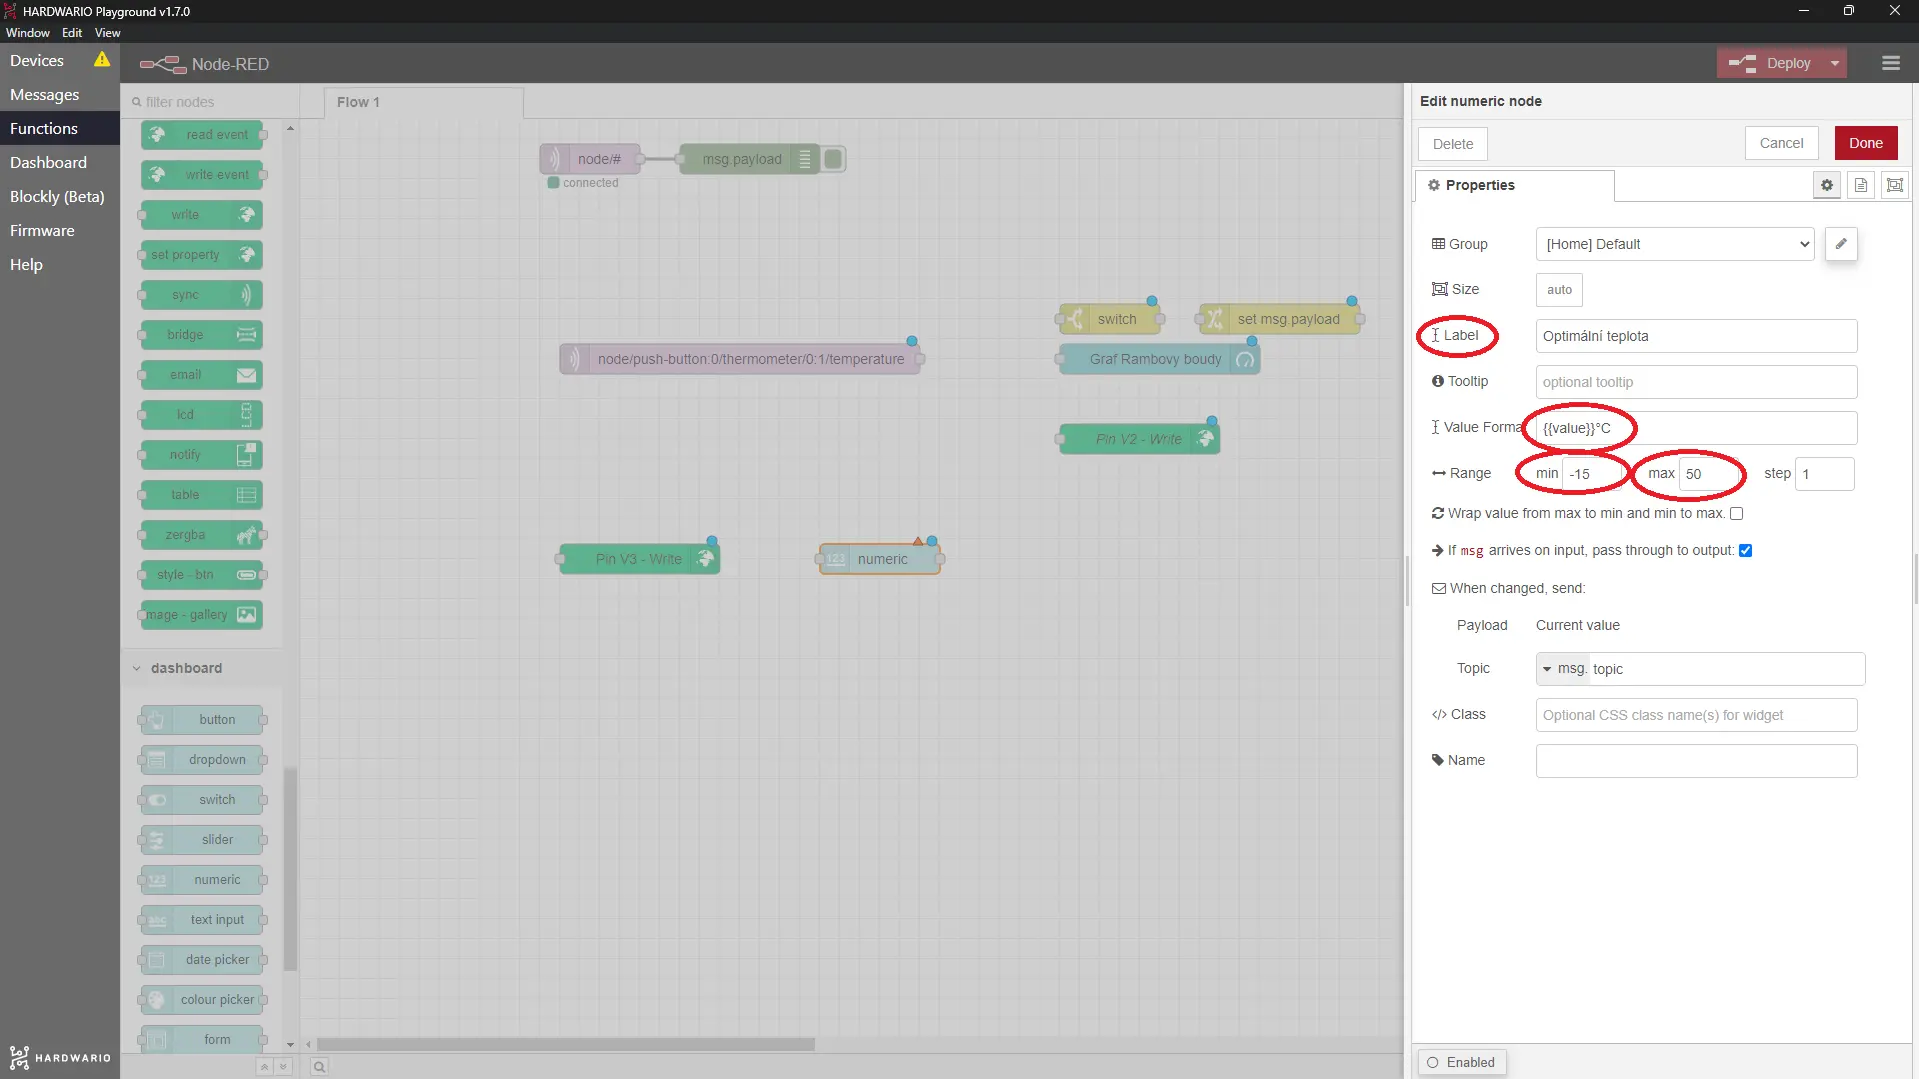
In the node, set the unit of measure (°C), the temperature range (−15 and 40) and the node name.
- Place another Change node next to it.
- In the node, set the minimum temperature value (optimalTemp) to be updated immediately with changes to the Numeric node. Take a look at the screenshot.
- Now you only have to connect it as shown in the screenshot and confirm with the Deploy button. 🙌

Ready, steady… go!
- Stick the box back to the inner wall of the kennel.
- The temperature measured in the kennel is not only shown in Playground in the Dashboard tab…

- Above all, you get a notification on your mobile if your dog is too hot or cold — so you can check on the kennel anywhere, anytime. 🕵️ Happy dog = good dog! 🐕