Apology to teachers
Introduction
Even a mobile phone isn´t infallible! It may sometimes let you down and not wake you up. If it happens to you, don't despair. Press 👇 the smart button to apologize to your teacher before they inform your parents.
Under this project, you will learn how to send a notification using a smart button. 📩
All you need for this is the basic HARDWARIO Start Set.
Make it happen in Node-RED
- Put the Start set together and pair it: If you are doing this for the first time, we've prepared a simple guide for you. You need the radio push button firmware for the Core Module. If you don't know how to download the firmware or what it is, you can find out here.
- In Playground, click the Functions tab where the Node-RED programming area is.🤖
- Place the MQTT node from the Input section on the Node-RED area.
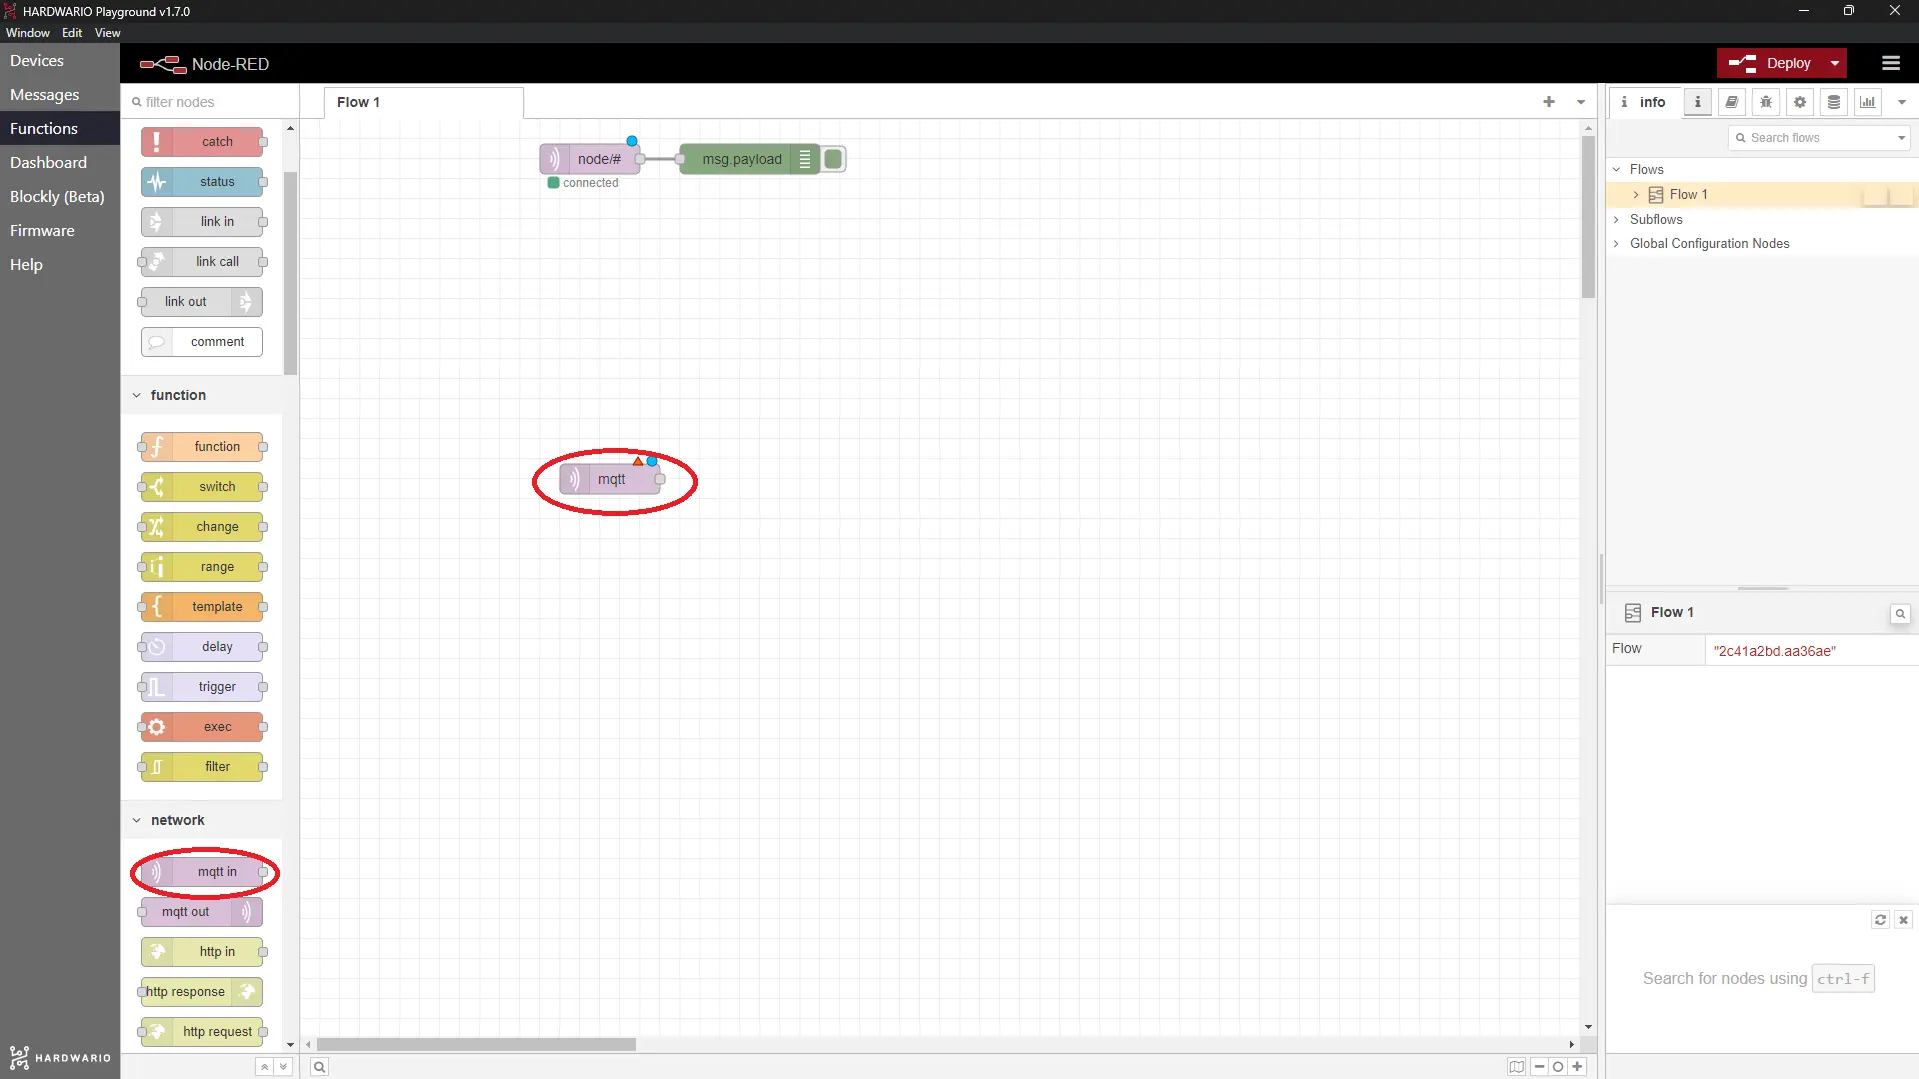
- In the node, set the key function, i.e. push button. Double-click on the node and copy the following line into the Topic field:
node/push-button:0/push-button/-/event-count
Confirm with the Done button.
Set content of the apology
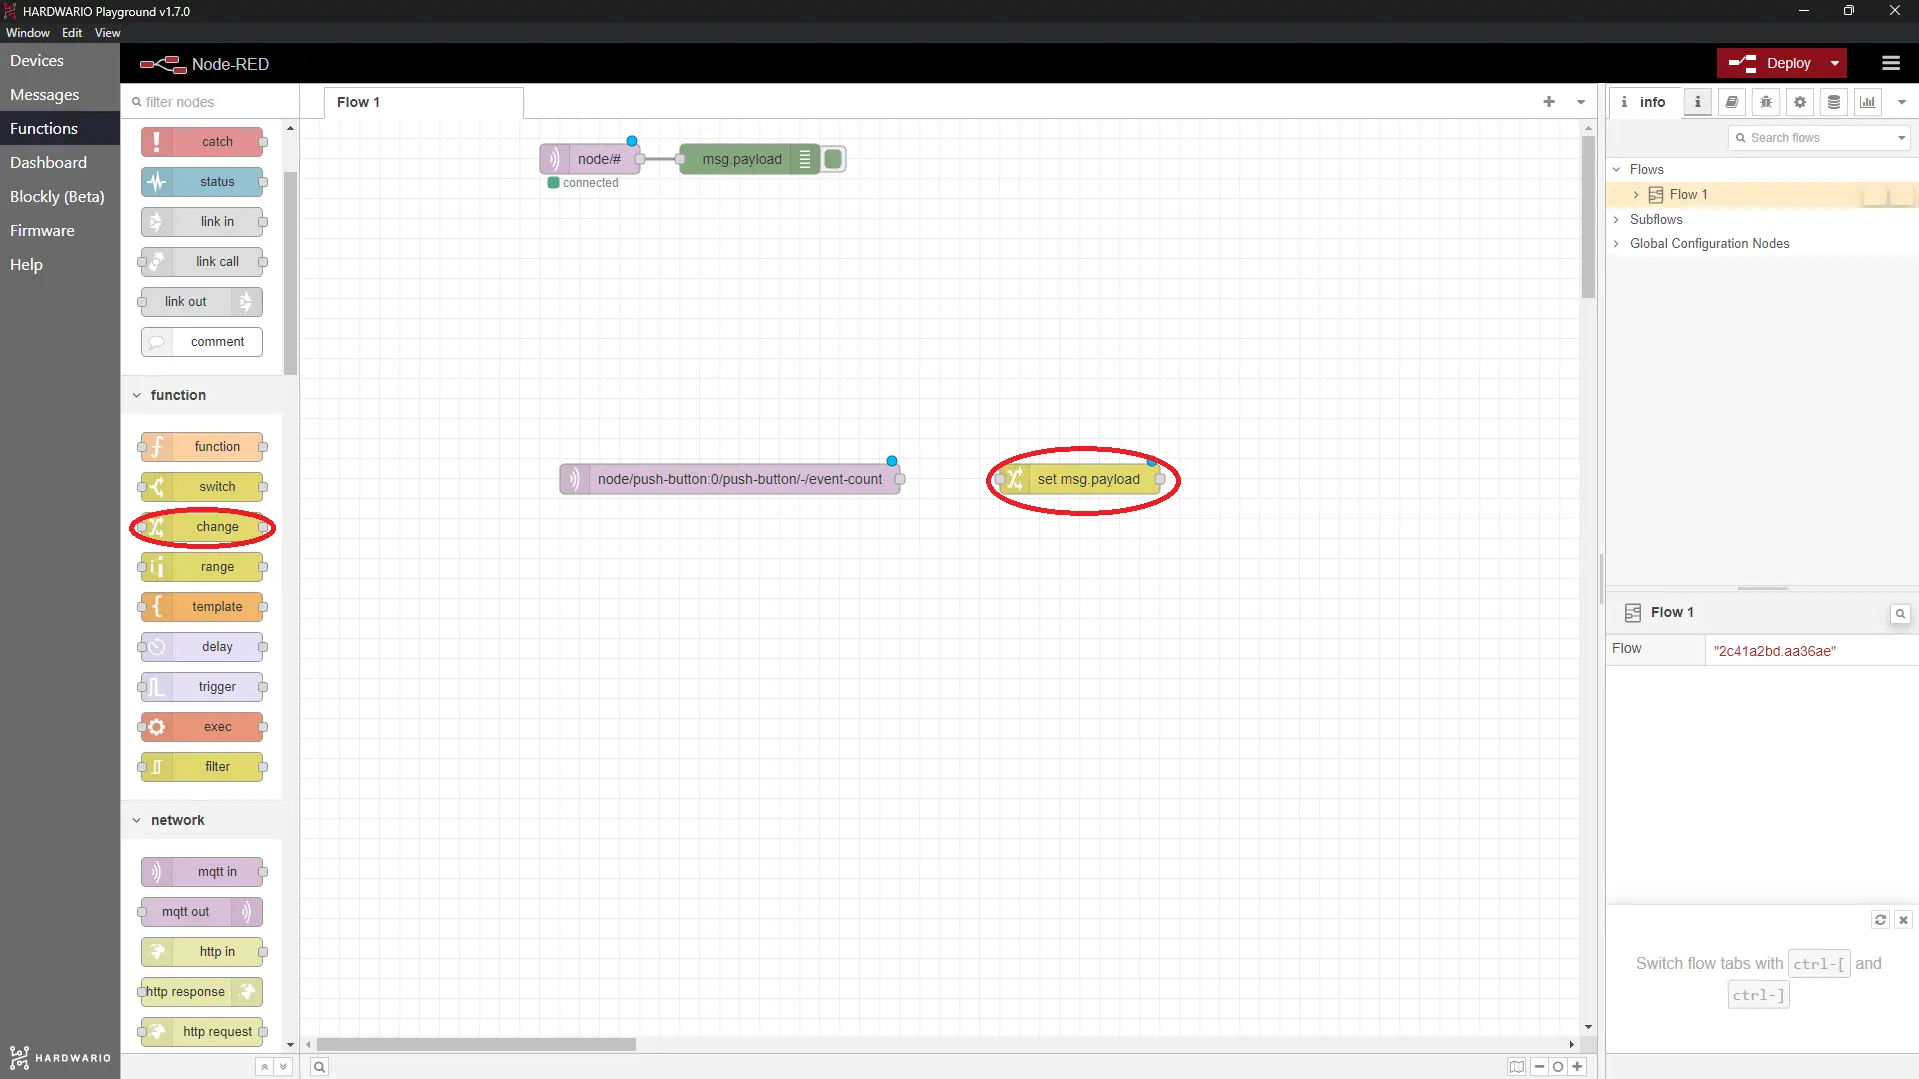
- You also determine the content of the apology in Node-RED. Place Change node from the Functions section next to the MQTT node. This determines what message is sent.
- Double-click on the node and set the msg. payload rule in the Rules field (see screenshot below). This sets the message content. Keep in mind that the notification does not display Czech accent marks (čárky) and hooks (háčky), and don't forget to sign it. The message may read like this:
Dear Mr. Woodpecker, I'm sorry, but unfortunately my dog ate my alarm clock. I'll come a.s.a.p. Evzen (your favorite pupil, who does not deserve to have a note sent home to his parents).
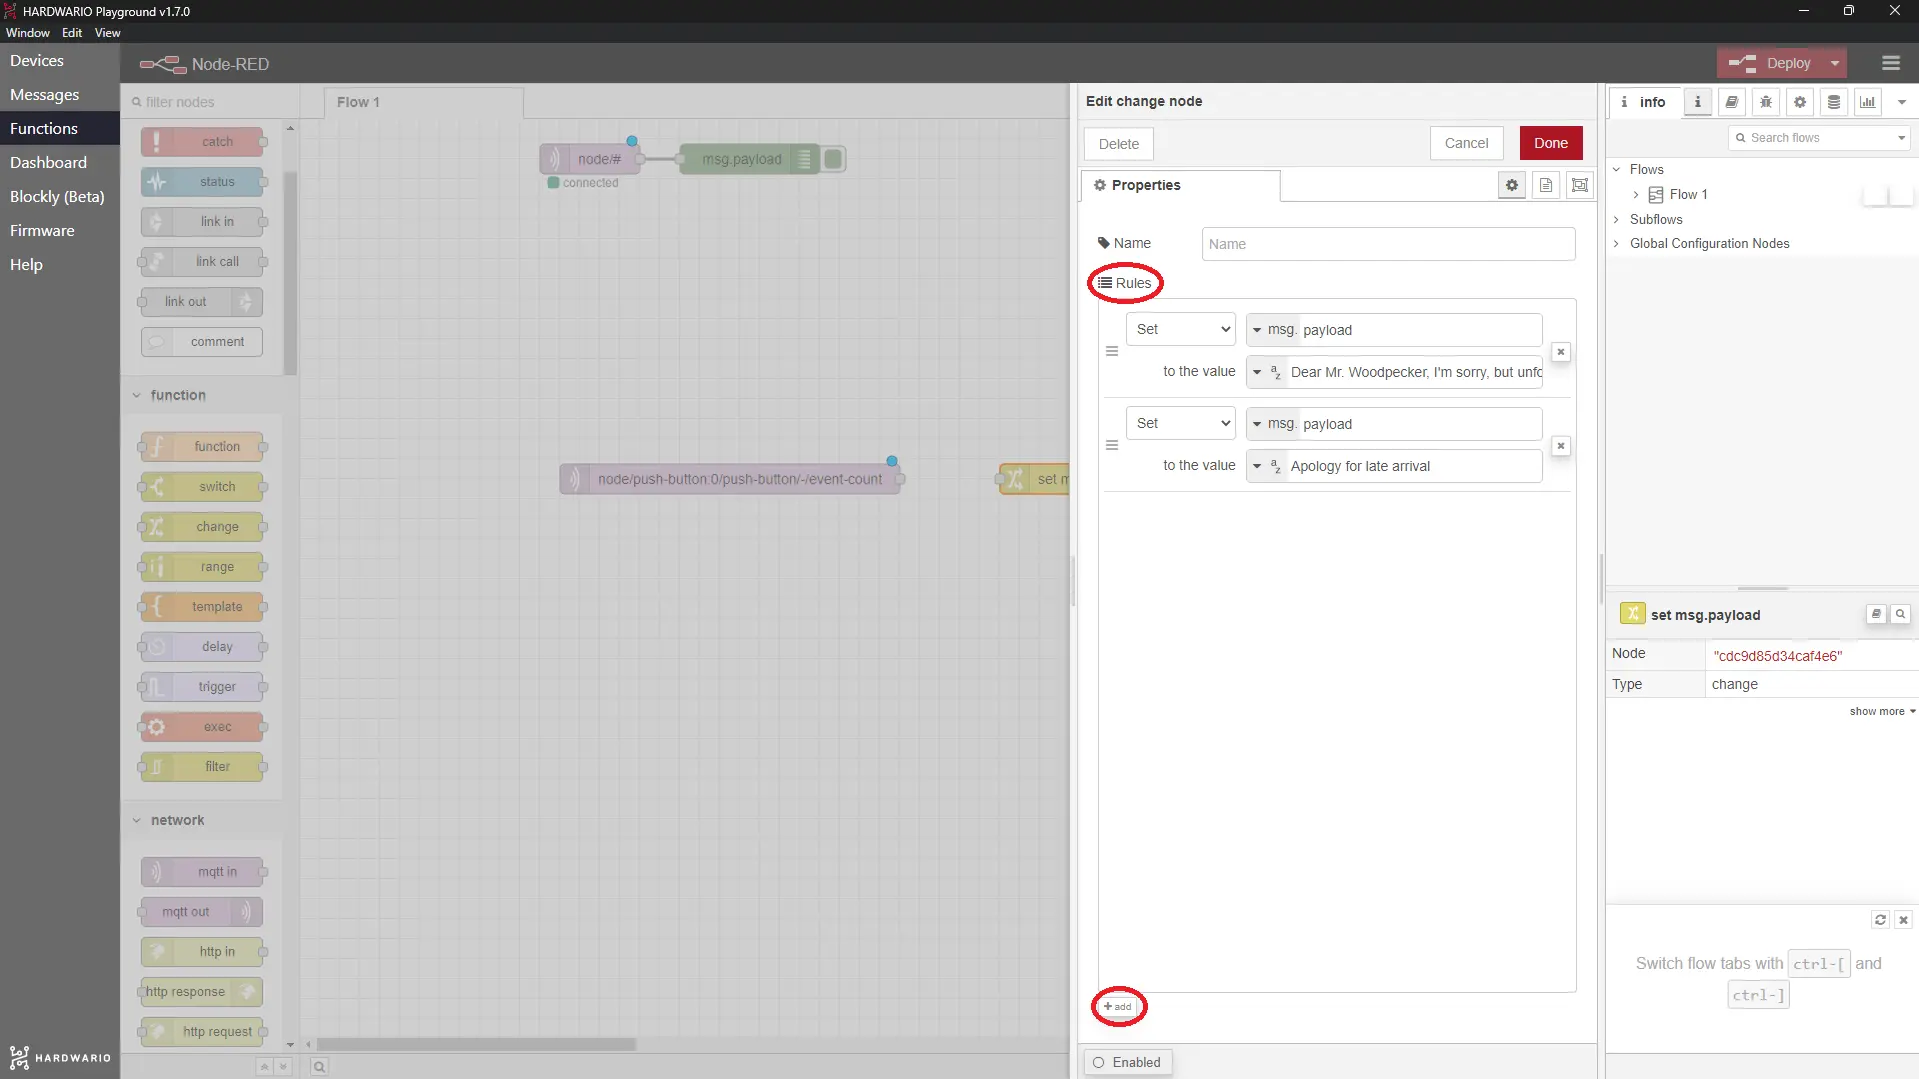
Confirm with the Done button.👏
Prepare Blynk IoT for notifications
The apology reaches the teacher's phone as a push notification through the Blynk IoT app. 📱
-
If you don't have one yet, create an account in Blynk IoT. See this guide for how to set up your account, a device template, and a device — you'll need all three. You can also reuse a template from a previous project.
-
In Blynk IoT, a notification isn't placed on the phone screen like a widget — it's sent as an Event defined on your template. On the template detail, open the Events tab and add a new event (for example, name it
apologyand give it a message). Then turn on Notifications for that event so Blynk delivers it to your phone. The guide walks through the template settings. -
Download the Blynk IoT app on your phone from the App Store or Google Play and sign in with the same account. Make sure notifications are allowed for the app so the apology can pop up. ✉️
Set up sending the apology
-
Now return to Playground. On the Node-RED canvas, add a node from the Blynk IoT section that can trigger your event (the log event node) after the Change node with your apology. 📮
-
Double-click the node to open it. On the right you'll see a small pencil. Click it and a new window opens. In the Url field enter
blynk.cloud, and into the Auth Token and Template ID fields copy the values from the device detail in the Blynk IoT web app on your computer. Confirm with the Add button. -
Set the node to fire the Event you created (the event code, e.g.
apology). This is what turns the button press into the push notification. Confirm with the Done button. -
Connect the nodes so the click on the box ➡️ becomes your apology ➡️ that fires the Blynk IoT event ➡️ which arrives on the teacher's mobile. Then press the Deploy button and relax: the apology that will save your life if you are late is ready! 🙏
Ready, steady… go!
- Do you want to try it? Use your own account for testing purposes so the notification lands on your phone.
- Confirm with Deploy again, then just press the button and ... hey presto, someone gets your message! 💌