Experiment
Time allocation: 10 min.
Controlling an LED strip with the IoT button
Experiment Description
In this experiment, we will control an LED strip with a button and by the measured temperature. We will also learn to work with the RGB color model.
Experiment Steps
- Assembling the button
- Assembling the LED strip controller
- Connecting the button to Playground
- Setting up the LED strip control
Assembling the Button
Modules in the setup:
- Core Module
- Mini Battery Module
- Push Button Module
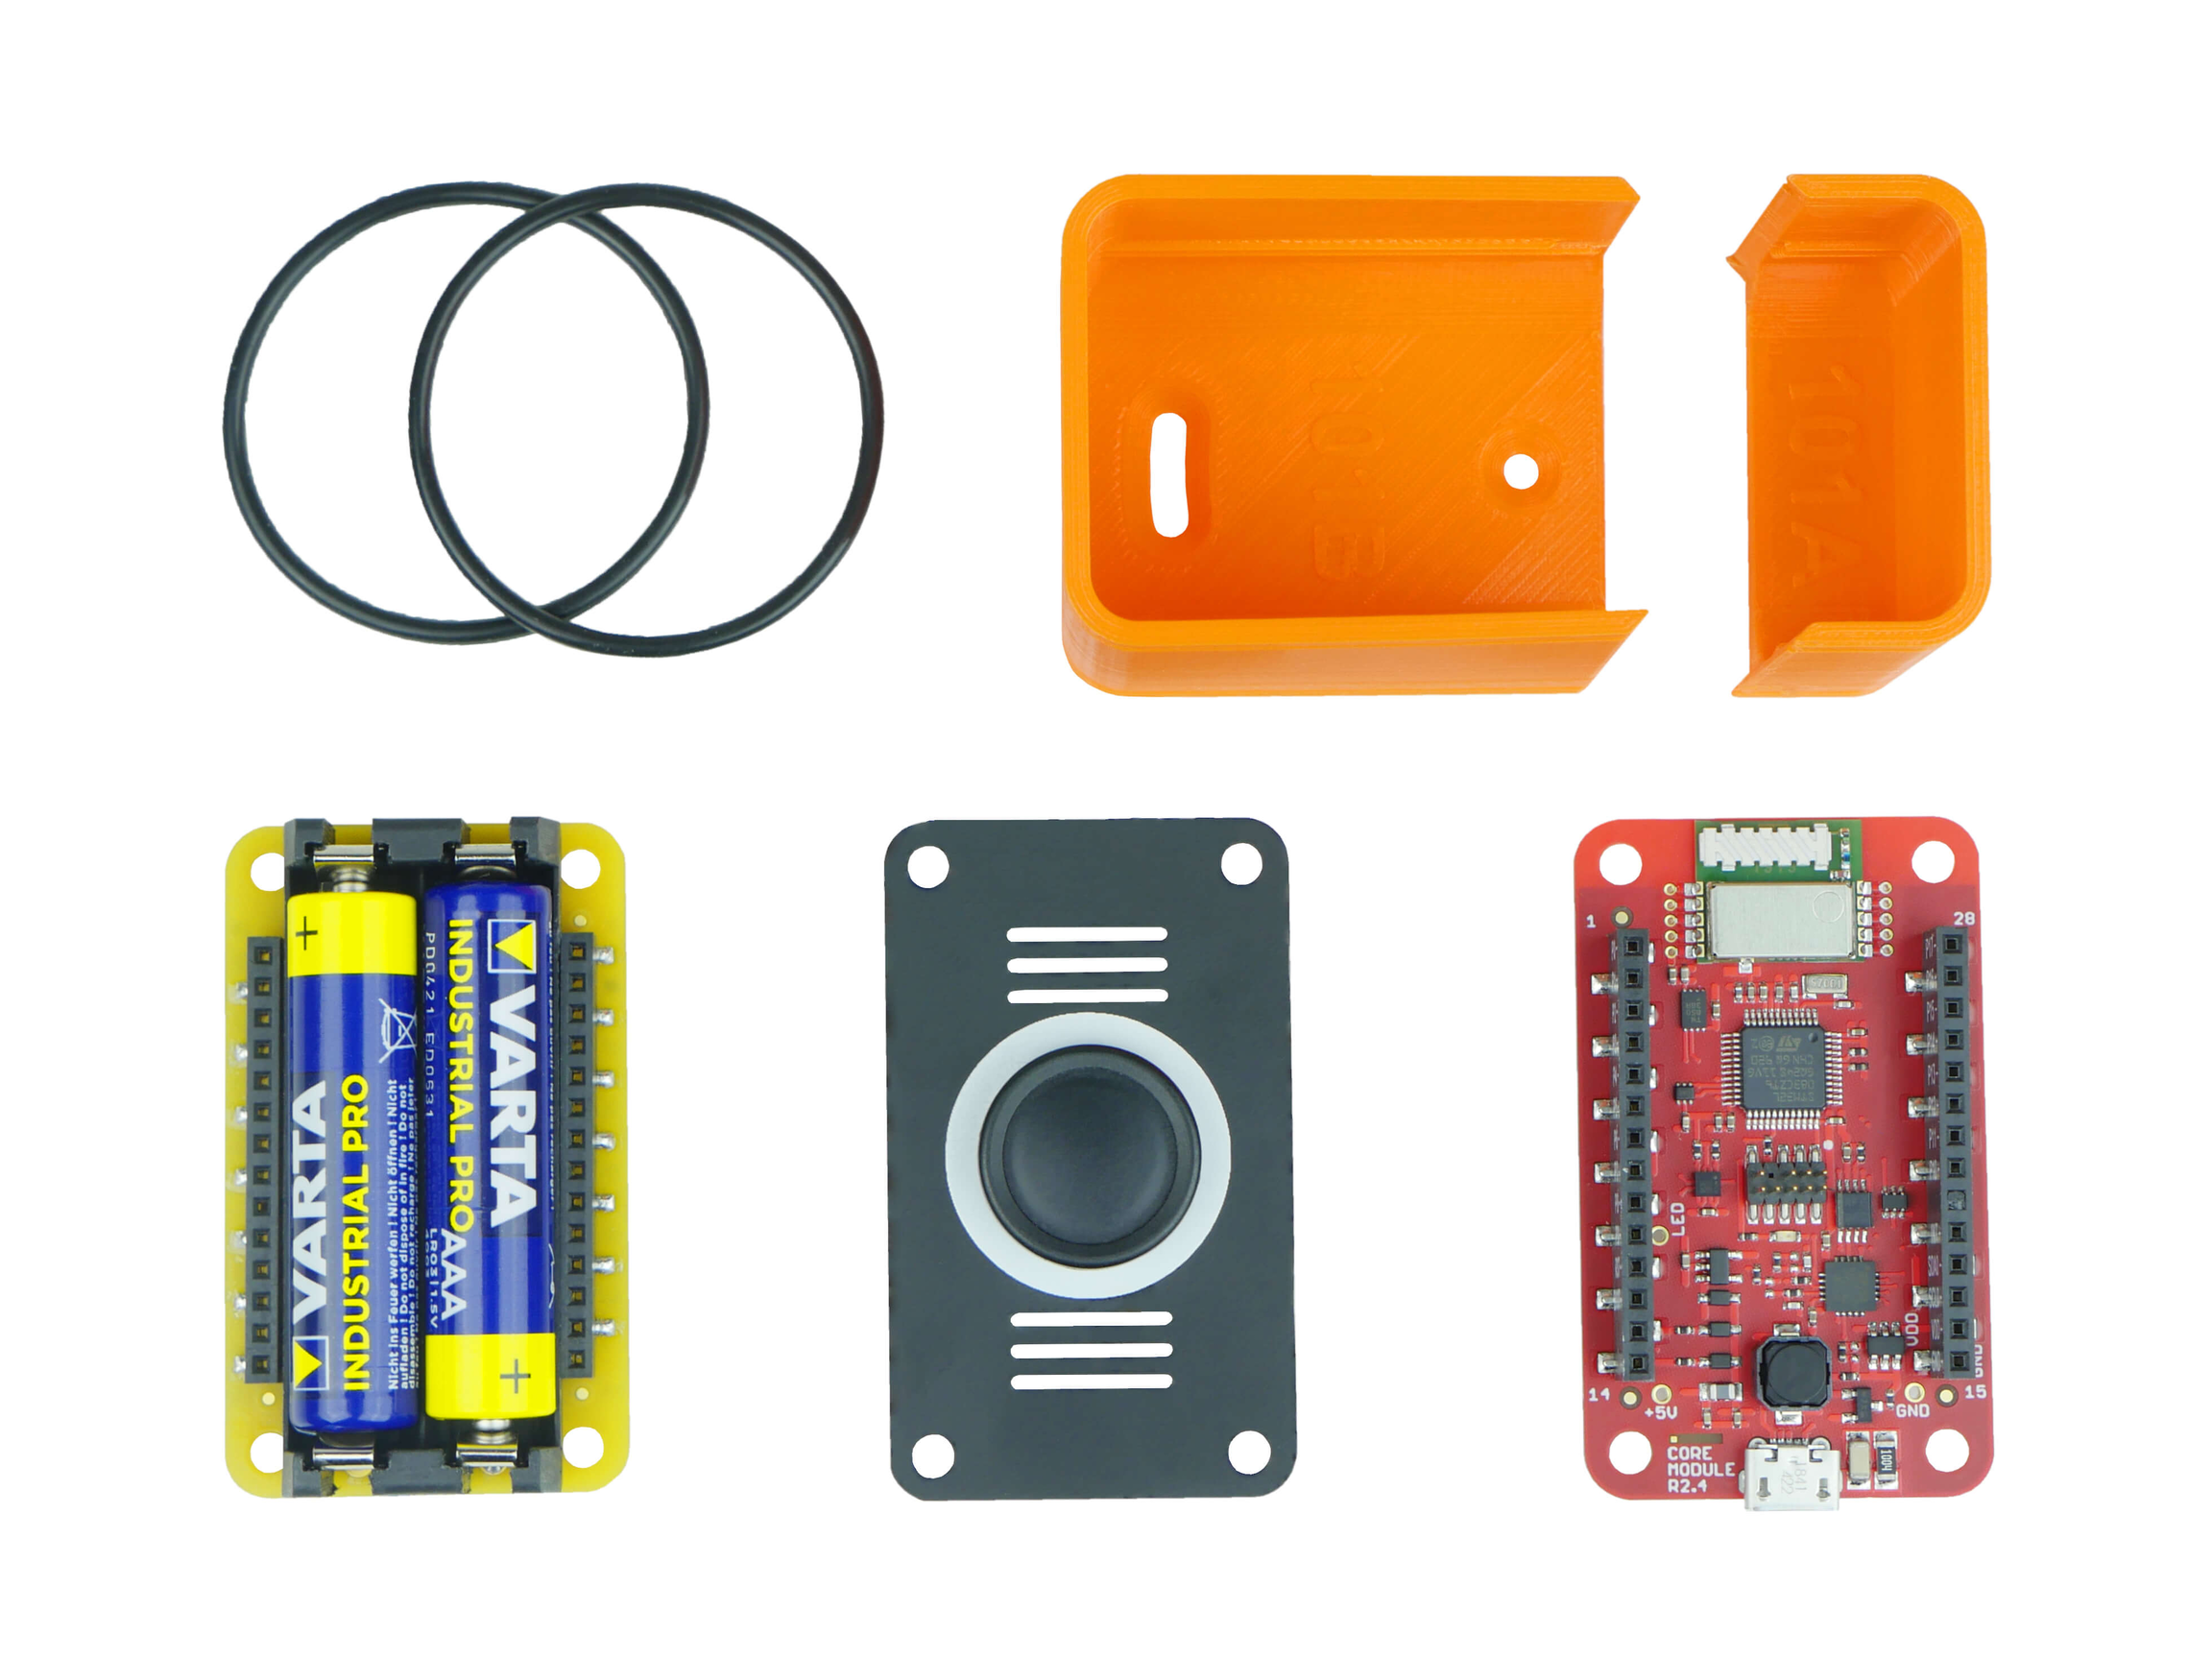
Assemble the unit following the video tutorial:
Playing the video loads it from YouTube (Google).
Assembling the LED Strip Controller
Modules in the setup:
- Core Module
- Power Module
- LED strip
Assemble the unit following the video tutorial:
Playing the video loads it from YouTube (Google).
Connecting the Units to the Playground
(If you don’t have the application yet, download and install it.)
- Plug the Radio Dongle into a USB port on your computer
- Open the Playground application and go to the Devices tab
- Select your Radio Dongle from the list of USB devices and click Connect
- Click Start pairing
- Insert the batteries into the button. A new device labeled
push-button:0appears in the device list - Click Start pairing again
- Plug the LED strip controller's adapter into a power socket. A new device labeled
power-controller:0appears in the device list
info
If a new device appears in the list with a different label, upload the correct firmware to it.
This guide explains how to upload firmware.
The button needs the twr-radio-push-button firmware and the LED strip controller needs twr-radio-power-controller.
Showing the button's press count and temperature
- Switch to the Functions tab
- Import this flow:
[{"id":"e1c78aec22a2b30f","type":"tab","label":"IoT button","disabled":false,"info":""},{"id":"df77fa76ec57b83c","type":"mqtt in","z":"e1c78aec22a2b30f","name":"","topic":"node/push-button:0/push-button/-/event-count","qos":"2","datatype":"auto","broker":"a382db22.fb11e8","inputs":0,"x":200,"y":180,"wires":[["f459f618531641e5"]]},{"id":"db42bc1c50d5c6bf","type":"mqtt in","z":"e1c78aec22a2b30f","name":"","topic":"node/push-button:0/thermometer/0:1/temperature","qos":"2","datatype":"auto","broker":"29fba84a.b2af58","inputs":0,"x":210,"y":360,"wires":[["f285b637e508b347"]]},{"id":"f285b637e508b347","type":"ui_text","z":"e1c78aec22a2b30f","group":"57ff470b.93fdf8","order":3,"width":0,"height":0,"name":"","label":"Temperature","format":"{{msg.payload}}°C","layout":"row-spread","className":"","x":550,"y":360,"wires":[]},{"id":"f459f618531641e5","type":"ui_text","z":"e1c78aec22a2b30f","group":"57ff470b.93fdf8","order":4,"width":0,"height":0,"name":"","label":"Counter","format":"{{msg.payload}}","layout":"row-spread","className":"","x":540,"y":180,"wires":[]},{"id":"a382db22.fb11e8","type":"mqtt-broker","name":"","broker":"127.0.0.1","port":"1883","clientid":"","autoConnect":true,"usetls":false,"protocolVersion":"4","keepalive":"60","cleansession":true,"birthTopic":"","birthQos":"0","birthPayload":"","birthMsg":{},"closeTopic":"","closeQos":"0","closePayload":"","closeMsg":{},"willTopic":"","willQos":"0","willPayload":"","willMsg":{},"sessionExpiry":""},{"id":"29fba84a.b2af58","type":"mqtt-broker","name":"","broker":"127.0.0.1","port":"1883","clientid":"","autoConnect":true,"usetls":false,"protocolVersion":"4","keepalive":"60","cleansession":true,"birthTopic":"","birthQos":"0","birthPayload":"","birthMsg":{},"closeTopic":"","closePayload":"","closeMsg":{},"willTopic":"","willQos":"0","willPayload":"","willMsg":{},"sessionExpiry":""},{"id":"57ff470b.93fdf8","type":"ui_group","name":"Default","tab":"11207769.c31889","order":1,"disp":true,"width":"6","collapse":false},{"id":"11207769.c31889","type":"ui_tab","name":"Home","icon":"dashboard"}]
- Click the Deploy button in the top right corner.
- Switch to the Messages tab. If everything went well, you will see incoming messages from the unit (push-button)
- Switch to the Dashboard tab. If everything went well, you will see how many times the button was pressed and its temperature
info
Note:
- To send data sooner, breathe on the button.
- The unit measures the temperature and sends it every 15 minutes; button presses are reported immediately.
- If the temperature changes by 0.2 °C or more since the last report, the unit sends the data right away.
Setting up the LED strip control
- Switch to the Functions tab
- Import this flow:
[{"id":"b0e6a61052f6464e","type":"tab","label":"LED controler","disabled":false,"info":""},{"id":"c150a9bf93daec3d","type":"mqtt out","z":"b0e6a61052f6464e","name":"","topic":"node/power-controller:0/led-strip/-/color/set","qos":"","retain":"","respTopic":"","contentType":"","userProps":"","correl":"","expiry":"","broker":"54516ae2.8f3d14","x":910,"y":120,"wires":[]},{"id":"c1d16ecd5e7996a6","type":"mqtt in","z":"b0e6a61052f6464e","name":"","topic":"node/push-button:0/push-button/-/event-count","qos":"2","datatype":"auto","broker":"54516ae2.8f3d14","nl":false,"rap":false,"inputs":0,"x":200,"y":120,"wires":[["dc7bbeb8ef8e5bea"]]},{"id":"0e2d5607022ff3d2","type":"mqtt in","z":"b0e6a61052f6464e","name":"","topic":"node/push-button:0/thermometer/0:1/temperature","qos":"2","datatype":"auto","broker":"54516ae2.8f3d14","nl":false,"rap":false,"inputs":0,"x":210,"y":200,"wires":[["421ceca3a1e659e6"]]},{"id":"e3fdded3dab459dd","type":"change","z":"b0e6a61052f6464e","name":"Color change","rules":[{"t":"set","p":"payload","pt":"msg","to":"\"#FF0000\"","tot":"str"}],"action":"","property":"","from":"","to":"","reg":false,"x":640,"y":200,"wires":[["c150a9bf93daec3d"]]},{"id":"421ceca3a1e659e6","type":"switch","z":"b0e6a61052f6464e","name":"Condition","property":"payload","propertyType":"msg","rules":[{"t":"gt","v":"25","vt":"num"}],"checkall":"true","repair":false,"outputs":1,"x":480,"y":200,"wires":[["e3fdded3dab459dd"]]},{"id":"dc7bbeb8ef8e5bea","type":"change","z":"b0e6a61052f6464e","name":"Color change","rules":[{"t":"set","p":"payload","pt":"msg","to":"\"#0000FF\"","tot":"str"}],"action":"","property":"","from":"","to":"","reg":false,"x":640,"y":120,"wires":[["c150a9bf93daec3d"]]},{"id":"54516ae2.8f3d14","type":"mqtt-broker","name":"","broker":"localhost","port":"1883","clientid":"","autoConnect":true,"usetls":false,"protocolVersion":"4","keepalive":"60","cleansession":true,"birthTopic":"","birthQos":"0","birthPayload":"","birthMsg":{},"closeTopic":"","closePayload":"","closeMsg":{},"willTopic":"","willQos":"0","willPayload":"","willMsg":{},"sessionExpiry":""}]
- Click the Deploy button in the top right corner.
- Switch to the Messages tab. If everything went well, you will see incoming messages from the controller (power-controller)
- The flow is now set up so that the LED strip turns red when the temperature rises above 25 °C, and blue when you press the button.
- If everything works, the color of the LED strip changes according to the set conditions.