Experiment
Time allocation: 10 min.
Sending IoT button presses
Experiment description
From the HARDWARIO kit we will build an IoT button. The device will allow us to send information about its pressing and further work with this information.
The communication will be done wirelessly to the Radio Dongle plugged into the USB port of the computer. The number of presses will be displayed in the HARDWARIO Playground application, or in the dashboard of the embedded Node-RED application.
Steps of the experiment
- Assembling the button
- Connecting the button to Playground
- Setting up a function to display the number of presses and button temperature on the dashboard
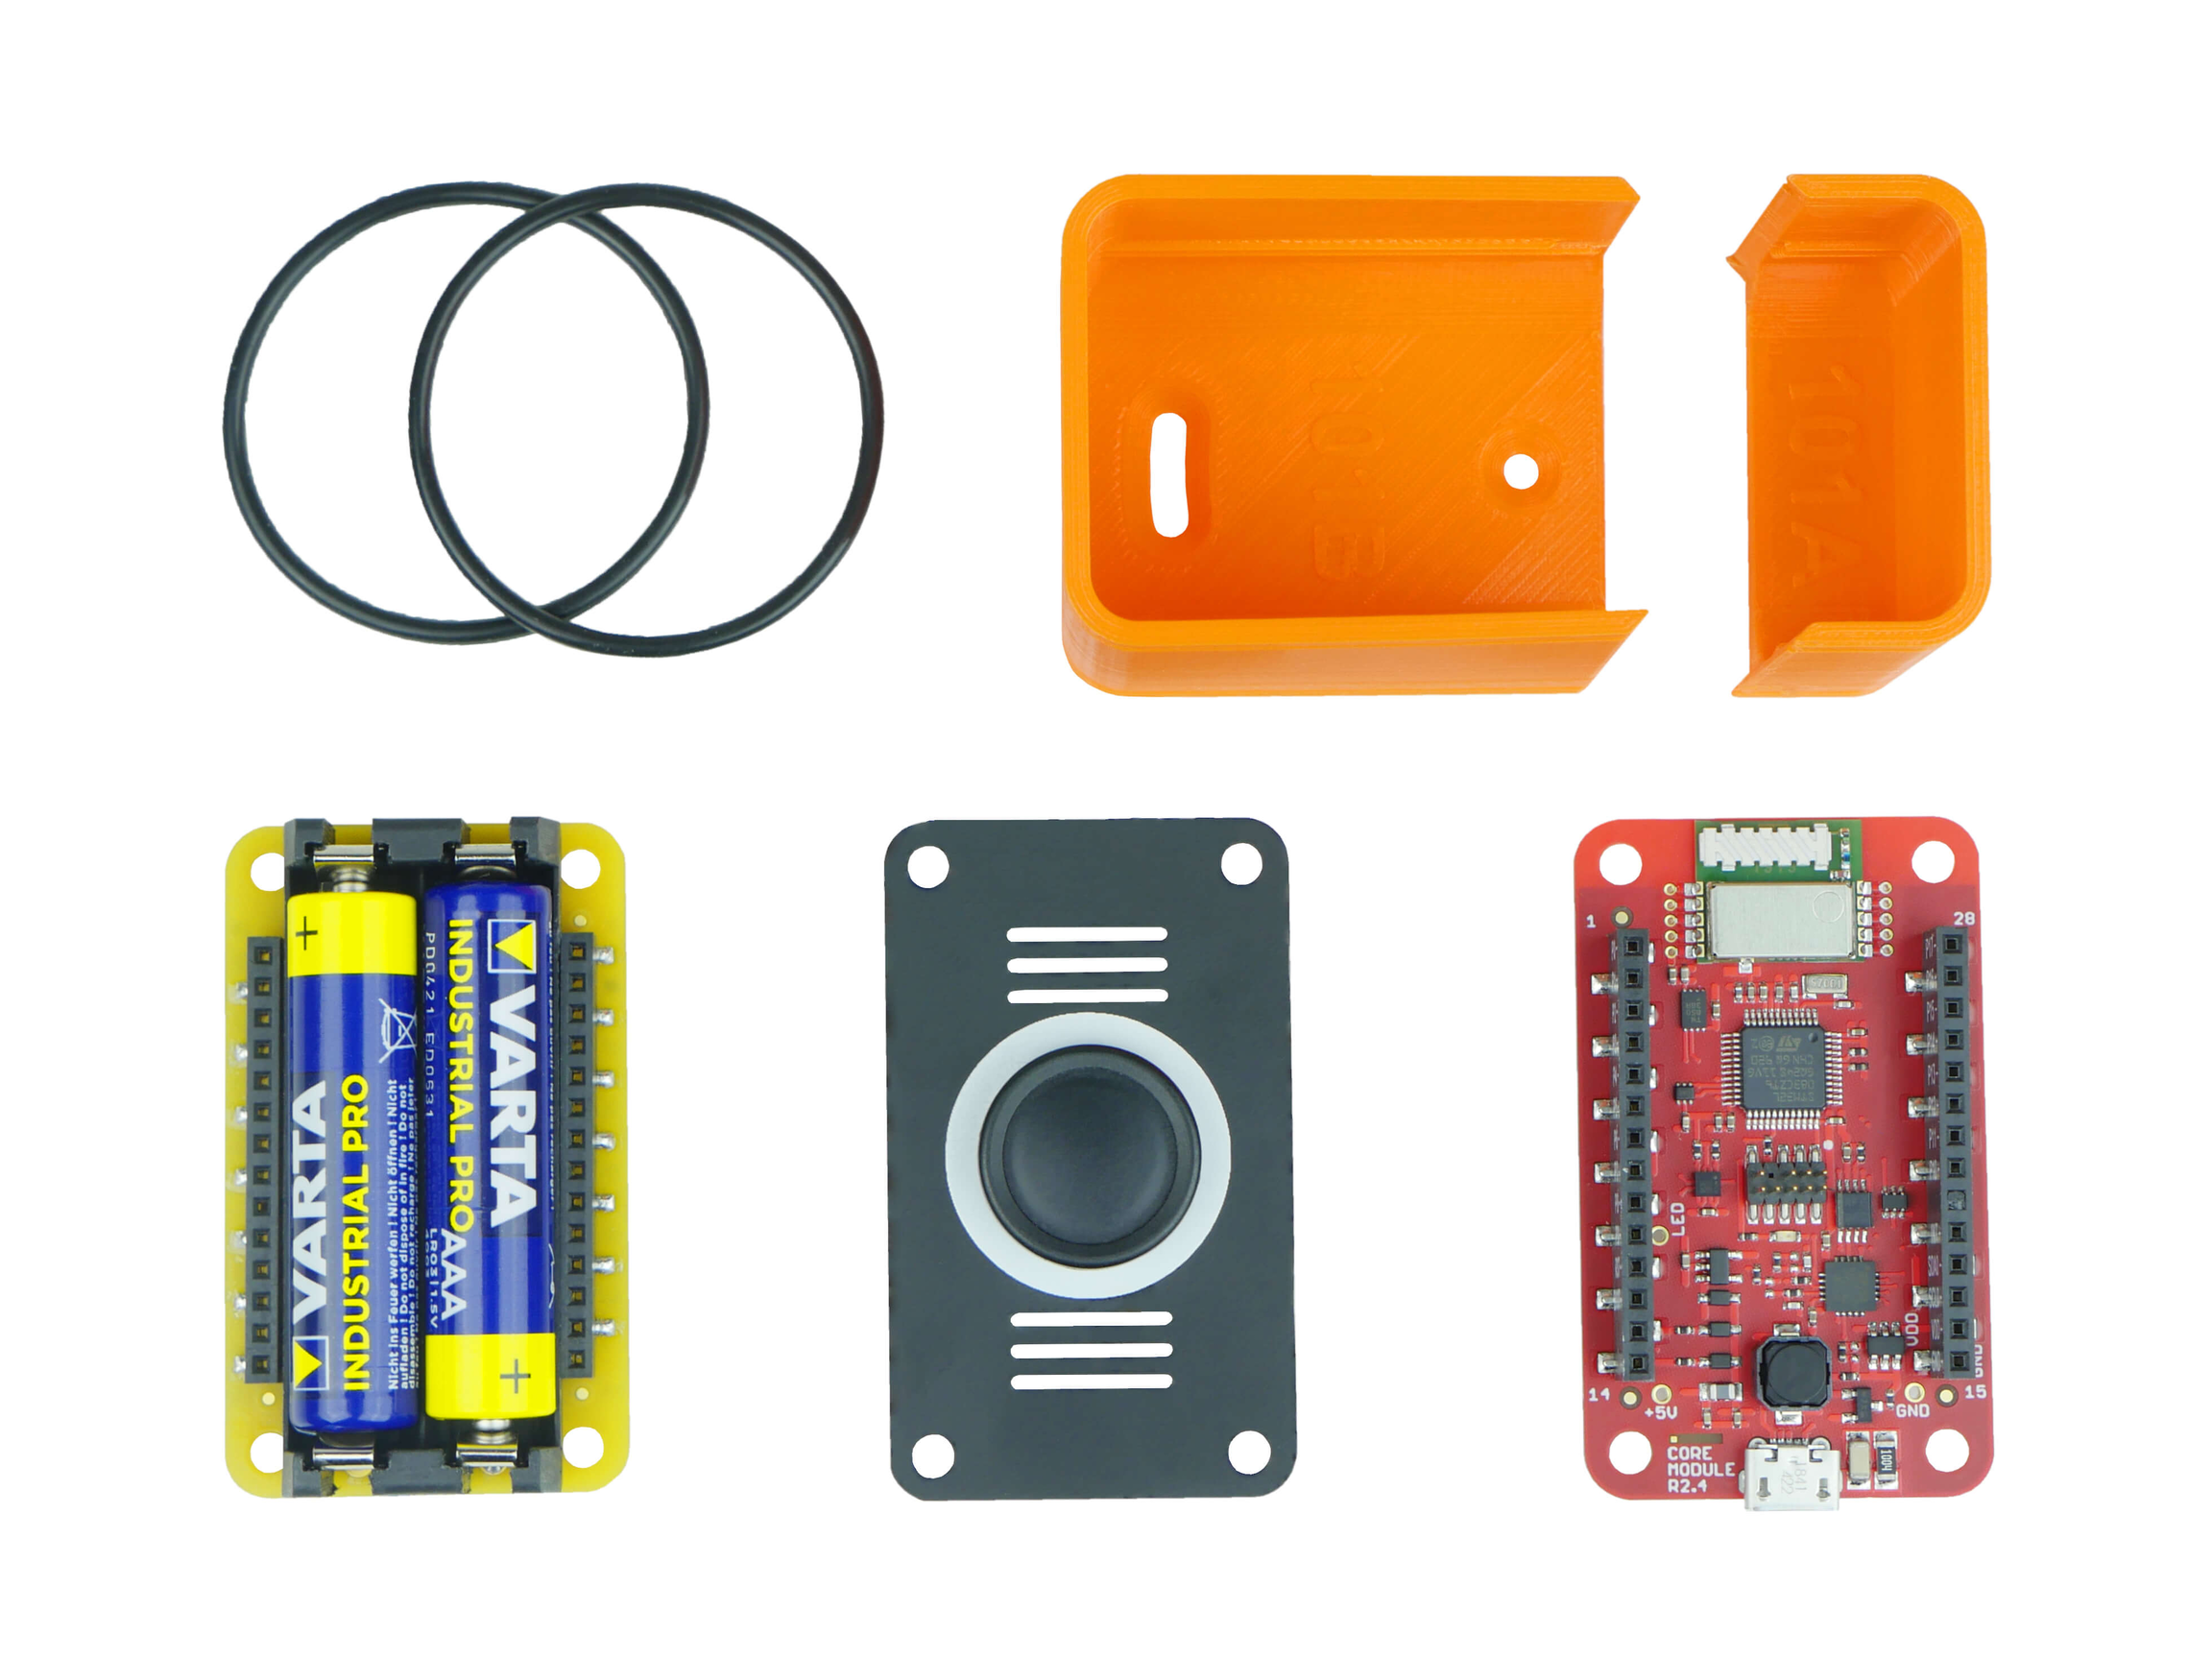
Assembling the Button
Modules in the setup
- Core Module
- Mini Battery Module
- Push Button Module
Assemble the unit according to the videotutorial
Connecting the units to the Playground
(If you don’t have the application on your computer yet, please download and install it.)
- Plug the Radio Dongle into a USB port on your computer
- Open the Playground application and go to the Devices tab
- Select your Radio Dongle from the list of USB devices and click Connect
- Click on Start pairing
- Insert the batteries into the button and connect the adapter to the LED strip controller
Setting up the function to display the number of presses and button temperature
- Switch to the Functions tab
- Import the following flow:
[{"id":"faaa4c4b.07c8a","type":"tab","label":"IoT tlačítko","disabled":false,"info":""},{"id":"a31fe112.0c3f9","type":"mqtt in","z":"faaa4c4b.07c8a","name":"","topic":"node/push-button:0/push-button/-/event-count","qos":"2","datatype":"auto","broker":"a382db22.fb11e8","x":200,"y":180,"wires":[["17cb0618.68ab3a"]]},{"id":"e3c3adba.98ee8","type":"mqtt in","z":"faaa4c4b.07c8a","name":"","topic":"node/push-button:0/thermometer/0:1/temperature","qos":"2","datatype":"auto","broker":"29fba84a.b2af58","x":210,"y":360,"wires":[["ffc89eb2.03b23"]]},{"id":"ffc89eb2.03b23","type":"ui_text","z":"faaa4c4b.07c8a","group":"57ff470b.93fdf8","order":3,"width":0,"height":0,"name":"","label":"Teplota","format":"{{msg.payload}}°C","layout":"row-spread","x":540,"y":360,"wires":[]},{"id":"17cb0618.68ab3a","type":"ui_text","z":"faaa4c4b.07c8a","group":"57ff470b.93fdf8","order":4,"width":0,"height":0,"name":"","label":"Počet stisků","format":"{{msg.payload}}","layout":"row-spread","x":550,"y":180,"wires":[]},{"id":"a382db22.fb11e8","type":"mqtt-broker","z":"","name":"","broker":"127.0.0.1","port":"1883","clientid":"","usetls":false,"compatmode":true,"keepalive":"60","cleansession":true,"birthTopic":"","birthQos":"0","birthPayload":"","closeTopic":"","closeQos":"0","closePayload":"","willTopic":"","willQos":"0","willPayload":""},{"id":"29fba84a.b2af58","type":"mqtt-broker","z":"","broker":"127.0.0.1","port":"1883","clientid":"","usetls":false,"compatmode":true,"keepalive":"60","cleansession":true,"birthTopic":"","birthQos":"0","birthPayload":"","willTopic":"","willQos":"0","willPayload":""},{"id":"57ff470b.93fdf8","type":"ui_group","z":"","name":"Default","tab":"11207769.c31889","order":1,"disp":true,"width":"6","collapse":false},{"id":"11207769.c31889","type":"ui_tab","z":"","name":"Home","icon":"dashboard"}]
- Switch to the Messages tab – if everything is working correctly, you should see incoming messages from the device (push-button)
- Switch to the Dashboard tab – you should see the number of button presses and its temperature
Note:
- To speed up data sending, blow on the button
- The unit measures temperature and sends temperature data every 15 minutes; button presses are sent immediately
- The unit will also send temperature data immediately if the temperature increases by more than 0.2 °C between two measurements